Now many people are replacing wooden windows with plastic ones. However, during operation their tightness may be compromised. People are faced with the question of how to insulate plastic windows so that the violation of integrity is corrected, and air from the street penetrates less into the room. It is important to understand what is the cause of the problem and solve it, and then isolate it.
Why does it blow from plastic windows?
Before you begin to correct the current situation, you should find out why the blowing occurs and whether there is fogging. There are many reasons, but there are several main ones:
- Defect in production.
- Low-quality plastic was used to make the windows.
- Poor fittings were installed.
- Errors were made during installation.
- Poor quality of seal material.
- The slopes were not properly insulated.
How to determine the cause
First, let's make sure that there is definitely a breeze coming from the window. To understand this, you can hold a lit candle or lighter to the junction of the window sash and frame. If the flame fluctuates, it means it is blowing from the window. Then the candle should be drawn around the entire perimeter. The problem often occurs at the junction of the window frame and the slope. This indicates poor installation, so you need to contact the company and demand that the work be corrected (if the warranty period has not expired).
The reason may lie in incorrect adjustment of the fittings or lack of installation on winter mode. To do this, try opening the window and looking at the lock. Not everyone can independently determine the problem and make adjustments, so it is better to call a specialist. Sometimes the reason is a violation of the window geometry. In this case, there is poor pressing of the sashes, and drafts arise due to this connection. A complete reinstallation of the glass unit will be required.
Another diagnostic method is to check the condition of the seal. It probably causes moisture to blow in or leak (condensation forms), if it is of poor quality or very dirty (remove all dust). When exposed to low temperatures, it loses its elasticity. You should touch it with your hands, checking for elasticity. If the reason is wear and tear of the insulation, then it needs to be replaced.
The next step is to pay attention to the quality of the plastic. Unfortunately, the average person will not be able to visually distinguish high-quality plastic from bad one; this requires a specialist. However, if all of the above diagnostic methods did not reveal the cause, then most likely you bought windows from bad material. We will have to dismantle and install a new metal-plastic structure.
When is the best time to isolate?
The problem of window blowing occurs during the cold season. IN summer period people either don’t notice it, but with the onset of cold weather the air from the street becomes noticeable. It is best to do thermal insulation in spring or summer in calm weather. The sealing compound requires a special temperature and cannot be used in winter weather. There is an advantage of insulation during the cold season: it is clear which place to insulate and whether the chosen method is effective.
How to insulate plastic windows
It is extremely important to understand how to insulate plastic windows. There are many methods of thermal insulation, so everyone can choose one that is convenient for themselves. Insulation for plastic windows is as follows:
- Polyurethane foam - fast and available method. However, foam is short-lived and is negatively affected by temperature changes, ultraviolet radiation, and air.
- Mineral wool is a safe and fire-resistant modern material.
- Window film can be used as insulation for the glass itself.
- Silicone sealant is reliable and inexpensive.
- Polystyrene foam is used to eliminate cracks in window slopes.
- Warm mixtures used outside.
- Gluing construction tape over the sealant will improve the effect.
- Facade paint has high weather resistance. It is easy to apply to a surface of any shape.
- The primer dries quickly and is easy to apply. It is frost-resistant and is not afraid of moisture.
When you can't do without a master
A professional is needed when there are obvious defects, and work to eliminate them requires compliance with safety regulations. To carry out repairs, it is worth calling a specialist because:
- insulation of slopes and ebbs from the outside can be dangerous, especially if the window is located above the second floor (you can fall and break);
- in order to properly insulate, it is important to know all process installations;
- The window is still under warranty.

Do-it-yourself insulation of plastic windows for the winter
A professional will advise you on how to seal plastic windows for the winter. However, there are simple and easy ways in which you can make repairs yourself. A simple example is the thermal insulation of a window using foam or sealant:
- Delete old foam from all the holes around the window. To do this, use a stiff brush, sticks and brushes.
- Thoroughly rinse and wipe the surface of the window sill and slopes with a cleaner to degrease and remove dust.
- Cover the resulting cracks with putty and plaster, then fill with polyurethane foam.
- If sealant is used instead of polyurethane foam, then after inserting it into the gap, it should be sealed with construction tape on top. To carry out the work, you must have a knife and scissors at hand.
- Install heat-saving film. The window frame is cleaned of dust and covered with double-sided tape. The film is measured to the size of the window, then carefully applied and smoothed. To avoid unevenness and bubbles, you need to blow it with a hairdryer.
Outside
Insulation from the street side can be done in different ways, suitable facade paint, primer, silicone sealant. It is best to use foam plastic for thermal insulation of slopes from the outside:
- Polystyrene foam of the required size must be glued to the slopes, and all visible cracks must be closed with glue.
- A special mesh should be placed on top of the foam and then plastered.
- Level the plaster with a water-repellent layer and apply a primer.
- Paint the resulting slopes, which will create an additional energy-saving protective layer from the wind.
Inside
The insulation of plastic windows inside should be done as carefully as possible, using different ways. Thermal insulation will contain the following stages:
- Insulate the slopes of plastic windows inside. To do this, use polyurethane foam.
- Place plastic on top of the foamed slopes.
- Adjust the fittings. This is done using an eccentric through rotation.
- Replace the seal. This element must be changed every 5 years. During this period, it loses elasticity and begins to let air through.

How to insulate the window sill of a plastic window
Under the windowsill you can often feel the movement of cold air. If a crack is visible, it needs to be foamed. It will be good if you attach a piece of plastic under it and fill the void inside with polyurethane foam or polystyrene foam. Stages for insulating a window sill:
- Remove the window sill.
- The wall on which it was located should be thoroughly cleaned of dirt and dust, after which all cracks and problem areas will be visible.
- Cracks can be closed with polyurethane foam.
- When the foam hardens, cut off the excess with a knife.
- Prime the entire surface.
- Apply sealant to all joints and corners.
- Plaster.
- Place the window sill in place.
Video
In January, in January there is a lot of snow in the yard.
And on our window, a few flowers bloomed.
So October has flown by. Winter is just around the corner. It got colder outside, and daylight hours noticeably decreased. How to properly prepare our beauties for winter, protect them from unpleasant winter “gifts” and create all the conditions for them to safely overcome this time of year?
Since the conditions for keeping plants are different for everyone, the methods will be slightly different.
So, first, let's figure out where our violets are kept.
Let's look at the 3 most common options.
1. On a windowsill in natural light.

If your violets live on windowsills and are not additionally illuminated, then winter is a dormant period for them. I would recommend replanting them. But, if the room temperature is below 18° C, it is better to postpone transplantation until spring. You should not make transplants if the apartment is very cold! As you know, after transplantation the plant needs time to take root well. Flowering usually stops at this time. Because daylight hours are getting shorter and shorter, then all the energy of the violet will go not to laying buds, but to growing good root system. And good measles is the key to future abundant flowering.
Be sure to insulate the window sill. It is very convenient to use for this purpose construction insulation(thin foam rubber on one side, foil on the other). The insulation must be bent at one edge towards the window glass, then there will be no water coming from the window onto the roots. cold air. If there is no insulation, you can use regular polyethylene. It is very good if you place flower pots on wooden slats or foam plates.
So, transplant the violet into a fresh earthen substrate, carefully shaking off the old soil (transplantation with a complete replacement of soil). If you use expanded clay, I advise you to replace it with foam chips; such a foam “cushion” will not allow moisture to linger in the pot and will protect the roots well from the cold window sill. Water just a little at the root warm water and place the plant under the bag. This will create a special microclimate and protect the violet from drafts. Make sure that condensation does not accumulate under the bag. After a couple of weeks, if the leaves have good turgor, remove the bag.
Make one feeding complex fertilizer in November, one in December and one in January. Starting in February, when daylight hours are already long enough, feed the violet once a week, alternating complex fertilizer with potassium monophosphate. All kinds of fertilizers for flowering plants There are a lot on sale now. Pay attention to the composition of the fertilizer and decide whether to include it in your .
IN winter period Water the violet little by little. It is advisable that the water is no colder than 20-22 degrees. Do not leave water in trays. It should be remembered that wet, cold soil will lead to rotting of the roots.
If you open a window or transom for ventilation, then the violets must be covered, or completely removed from the window for the duration of ventilation. Currents of cold air will leave unsightly spots on the leaves, and the tips of the leaves may turn brown. Also, do not allow the leaves to touch the cold glass.
Hot air from heating radiators is no less dangerous for violets. The soil quickly dries out in the pot, the edges of the leaves may dry out, and the leaf becomes deformed. If you do not have a special humidifier, cover the batteries with a damp towel. By the way, very dry air harms not only violets, but also people.
2. On a window with additional lighting

If your violets have additional lighting, then you can feed them in the same way as in the summer. It is necessary, of course, to take into account that if the violet has just bloomed, then it must be replanted and given a period for recovery. The rest of the content is no different from that described above. All my violets are on the windows. In summer we turn on the lights on cloudy days, and in winter the lamps shine from 7 a.m. to 8 a.m. evenings all the time. In order to reduce energy consumption and improve lighting, we switched to. In such conditions, flowering does not stop in winter. To prevent the plants from becoming depleted, it is necessary to remove the flower stalks and give the violets a forced rest.
3. On racks or shelves with additional lighting .

And finally, if your violets grow on a rack under lamps, then short daylight hours do not matter to them, and drafts from an open window do not reach. The temperature is more or less constant. If the rack is not located next to a heating radiator, then the humidity is usually sufficient. Therefore, fewer problems arise here than when kept on cold window sills.
In the fall, when the heating is not yet turned on, and it becomes cold outside (and in the apartment), diseases of violets, especially weakened plants, may become more active. At high humidity and low temperatures often appears powdery mildew. Powdery rashes appear on leaves, flowers and peduncles. The disease is not terrible and can be easily treated with Topaz. But if you neglect it too much, the disease will quickly spread to neighboring plants, and the violet may die.
Autumn for me is the period of mass replanting of adult plants. 2 weeks after transplantation, I begin to feed the violets. If I plan to get exhibition blooms for the spring holidays, then I feed them. This method has already been tested on more than one batch of violets and gives very good results. good results. I replant the babies, remove them from the leaves and plant leaf cuttings throughout the year. I feed the children less often than adult plants, once every 10-14 days with complex fertilizer. I water it moderately, always with warm water. If the room is cool, I don’t bathe the violets or feed them leaf by leaf! Violets can only be arranged if the house is warm enough. The temperature on the lower shelves of the racks is always lower, you need to remember this and not place immature young animals there.

I think this is a problem many of us face. For more than a year of being passionate about flowers, I was no exception. My soul could not stand it and I bought myself myrtle, euonymus, and acquired royal pelargonium.
And the apartment has double-glazed windows that heat the radiators in winter, and there is no insulated balcony.
Therefore, I had to use my imagination and open the “crazy hands” circle.
Instead of shelves, you can use the same polystyrene foam, but for stability and strength, because... On top of two perches she placed another piece of cardboard, onto which she populated the rooting and established pelargoniums.
If earlier, even on frosty nights (down to -3 so far), the temperature on the windowsill (the corner farthest from the radiator) did not drop below +17 and +16 near the glass itself, now back wall design temperature +15, taking into account the fact that at night it was 0, and during the day positive temperature. So, I think that the design justifies itself. Its disadvantage, in addition to the aesthetics that want a lot more, is that it is opaque, but I think that you won’t be able to forget about the residents in any case))
The frosts, almost forgotten by us, force lovers indoor plants take urgent measures to save your pets.
On cold days, the air temperature near the window itself, even during the day, remains around plus 5°C, and ice forms on the lower edge of the glass, closer to the window sill. Such spartan conditions are suitable only for cacti, and even then they are harmed by proximity to an icy window. What needs to be done?
First of all, ensure that the plants are insulated from the cold window sill and icy window glass, but so that there is enough light. During severe frosts, hang a curtain from the window frame. polyethylene film to make it warmer (the edges of the film can be easily secured with tape).
Under the frame itself, you can place rolled newspaper paper in several layers or a foam roller wrapped in plastic film.
For insulation, it is best to place insulating foam plates on the windowsill, and it would be nice to have profile ones - with a right angle, so that there would be protection from the cold from both the frame and the window sill. Now you can place flower pots in pallets. The foam itself is a very good insulator and protects potted plants from extreme cold and keeps them alive.
If possible, move flower pots away from the window glass, and remove heat-loving plants from the windowsill and move them to a warm and bright place (table, flower stands, shelves, etc.).
Begonias, balsams, uzambar violets, koleria, gloxinia, streptocarpus and all plants with thin herbaceous leaves are very afraid of the cold. It is better to place ferns with delicate fronds, aloe, euphorbia. Geranium and chrysanthemum tolerate a drop in temperature to 5°C. But if the frosts are severe and it is very cold on the windowsills, and there is nowhere to put the flowers (except on the floor for a short time), you can cover them with newspaper or thick paper, plastic film. During the day, the paper should be folded back so that light penetrates the leaves and the roots are protected.
To make the room warmer, from the battery central heating Everything is cleaned and the curtains are raised.
Another way to enhance heat transfer from batteries is to place reflective plates made of special foil behind them, which are sold in hardware stores, or simply place a mirror.
A window and flowers in winter, and even in frosty weather, are a problematic combination. Ventilation is necessary for everyone - both people and plants. You just need to try to distribute the plants on the window so that there are no plants directly under the window. On the side of the window indoor flowers They can winter quite successfully if they are covered with a curtain of paper or plastic film every time they are ventilated. You can secure such a device with a pair of small nails in the window frame. This simple shelter will reliably protect your pets.
If, nevertheless, some plant could not be saved and it is frozen, water it cold water from the shower entirely, with the crown. And those parts of the plant that are irreversibly damaged will have to be pruned. In these simple ways you will help your green pets survive the cold winter time.
![]()
Every year, like many others, I have the problem of arranging a window sill for seedlings. I have 5 window sills, but they all have the same problem - it’s very cold for small plants on them. I have private house, the window sills are wooden, old, despite the plastic windows in the corners they still “siphon”, especially if it’s windy.
I tried a lot of things: I placed books and magazines, laid warm rags... But all this did not bring the desired results. A hardware store came to my aid. I bought insulation with a silver coating.
To insulate with our own hands we will need:
- insulation;
- measuring tape;
- scissors.
Insulation process
The temperature on the windowsill is about +14ºC. My thermometer is old, shabby. I hope no one aesthetic side it won't hurt things.
We insulate the window sill for seedlings
Having measured the window sill, I added 10-20 cm on all sides, and trimmed the insulation at the corners so that I could wrap it up.
We insulate the window sill for seedlings
We plant seedlings. I took the heaviest boxes so that the insulation would settle down.
We insulate the window sill for seedlings
I bent the edge behind the heating pipe so that at least a little heat would reach the windowsill.
We insulate the window sill for seedlings
The temperature on the windowsill became +18. +19ºC.
We insulate the window sill for seedlings
I'm happy with the result. My peppers will be much more comfortable in an insulated “house”. I'll cover the rest of the window sills the same way. 1 meter of insulation 120 cm wide, approximately 1.5-2 cm thick cost me 64 rubles, enough for 2 window sills.
Any resident of an apartment or private residential building eventually asks the question: is it possible to make warm window sills yourself? As a rule, the window sill is not insulated, but protrudes on top of any insulating layer. If we look from inside the room, then cold air will blow from such a window, because insulation between the lid itself, window block and the stove is missing. Outside, the situation is similar, but here water can also flood in when it rains, and moisture can simply seep under the inner layers of external insulation.

The tides should stick out of the wall so that water can drain normally and not collect under window frame. Without him rainwater will flow down the walls, saturating the entire structure and foundation with moisture. This will eventually cause some problems.
Initially, the materials under the window frame look like this: concrete or brick slab– plastic or metal – frame of the window unit. As a rule, many people make the mistake of leaving everything in this order. As a result, home owners receive obvious design flaws with this installation:
- Wet insulation (inside and outside).
- Mold growth.
- Poor indoor air quality.
- Cold air infiltration.
- Cold floors.
- Low energy efficiency for the whole house.
- Additional cooling heating devices(radiators).
- Reduced efficiency of window openings.
- Premature rotting of the wooden frame.
Window sill insulation should begin at the stage of replacing old ones wooden windows , before installing new plastic profiles.
Initially, it is worth choosing an installation element with the correct length and a hollow base so that any insulation can be placed directly under it.
This perfect solution, since the thermal insulation of plastic windows is carried out precisely at the stage of their installation. In this case, the work will proceed in stages, as installation proceeds, starting from the base window opening before plastering internal and external slopes.

The main way is to use liquid foam for filling voids and formations in the hollow space under the window. Before using it you must cover all cracks inside and outside with waterproof solution. Additionally we post waterproofing film in one layer. We carry out blowing directly on a wetted surface(you can use a primer instead of water, this will increase the adhesion strength).

In our case, if you already have good windows that you do not plan to replace, you will need to organize insulation work in one of several ways. Absolutely all methods converge either to application of additional thermal insulation materials, or replacing the window sill itself and increasing the thresholds for outdoor use.
How to insulate the window sill of a modern plastic window?
The simplest and most commonly used method is to add a new layer of insulation on top of the existing one, with a wider width, and properly glue and insulate it under the window opening. For such purposes, a PVC plate made of modern polymer of varying densities is ideal. An additional lining will not look bulky and will stand out from the overall interior. Plastic thresholds are very cheap and easy to install.
Another option would be a solid piece of stone or concrete along the entire length of the window. In this case, monolithic slab will be installed on concrete base across its entire width. For such installation use waterproofing mixtures or cement with the addition liquid glass . Visible areas of cement masonry are treated with starting or finishing coat to give the window an aesthetic appearance.

If you don’t want to bother with plastic or stone, there is another option - a self-leveling base made from XPS liquid powder. This technology ultimately offers innovative and stylish finish, capable of imitating any surface (stone, wood, plastic and even sand).
What does this look like in practice? Waterproof, high-density extruded polystyrene (XPS) is essentially wrapped around the existing sill or replacement sill. A mesh and cement layer is then added for strengthening, support and waterproofing. Finally, final stage comes color rendering or silicon paint.
Conclusion
There are quite a few ways to insulate a window sill. It all depends on the type of window, its seating depth, wall material, initial surface treatment and intermediate insulation materials. We suggest you familiarize yourself in more detail with all the methods and materials used using the example of this video.
As winter approaches and the weather gets colder, you notice a draft moving through your apartment. Placing your hand near the window on a windy night, you find a source of painful coolness. Stop putting up with this and sleep under three blankets! There are many ways to insulate windows. They range from simple to complex, from practically free to quite expensive, from "old-fashioned" methods to modern technologies. In this longread we tried to collect the most effective methods.
Before taking drastic action, let's consider possible reasons draft coming from the windows. It would seem that wooden windows, due to their material, retain more heat, and plastic ones - a relatively new achievement of science and technology - are simply designed for heat and sound insulation. Then why can they allow a draft into our house?
- Unfortunately, poor-quality window installation is quite common. Sometimes installation company workers who call themselves professionals have a very superficial understanding of the installation of window units.
- The second reason may be partly related to the first - an attempt to save money on installing plastic windows. Companies often reduce the price by saving on insulation, foam, and the installation itself. Subsequently, low-quality windows are much more expensive due to the need to additionally insulate them.
- Even if cold air doesn't leak through the gaps, the windows themselves may be to blame, such as the old "single-pane" windows, which provide only a thin glass barrier between the house and the street, but not cozy warmth.
- The skew of the window and the loose fit of the window frame to the wall also threaten heat loss. Sometimes this happens due to deformation of the building, which especially often happens in old wooden houses.

It's wise to start by diagnosing the situation. Determine the most critical places from which the wind blows. Where does the cold come from: from the windowsill or window sashes? Maybe the problem is a worn-out seal or poor-quality slopes?
To determine the exact location from which cold air is blowing, you can simply run your hand over the surface of the window unit. If the problem cannot be identified in this way, light a candle or lighter and move it around the frame - the fire is more sensitive to drafts.
Look at the windows when it's raining. Moisture accumulated in a certain place will indicate gaps and cracks. When moisture accumulates in the corner of a window or along one of its edges, the problem is likely in the joints. Moisture that accumulates in the middle of the window panel may indicate some type of crack in the glass.
Perhaps the wind is blowing due to a poor-quality seal. Try placing a piece of paper in an open window and closing the window completely. If the paper pulls out easily as soon as you pull the corner of the sheet, it means that the seal is not pressed well against the frame.
Before you choose an insulation method from among those available, it is worth thinking about the goals of the insulation. It's clear that temperature control is a major concern, but what compromises are you willing to make? Will you be able to refuse in favor of cheapness? beautiful view, limit the flow of light or block access to a window?
You also need to consider cost. Some materials cost almost nothing: say, sealant can be bought for a couple of hundred rubles. More reliable and durable solutions will cost more and may require specialist help, but in the long term they may be a worthy investment.
Should I ask for help or insulate the windows myself?
To insulate your windows, you basically have only two options: do all the work yourself or turn to a professional. With your own hands, you can simply insulate a window sill, frame contour, window opening indoors, or replace the seal. If any defect appears within warranty period, the installer will have to fix any problems. In addition, it is worth resorting to the help of installers if external insulation work is required, and the window is located at a significant height - its replacement or renovation work may be associated with an increased risk, and experts know exactly how to properly insulate plastic windows from the outside.
It is worth remembering that it is better to insulate windows before the onset of winter - then the working conditions will be more comfortable. In addition, sealants and some others building materials can only be used in a certain temperature range, otherwise they lose their properties.
How to insulate plastic windows with your own hands
If you need to insulate a window opening, then polyurethane foam will do. As it expands, it fills the voids in the opening and prevents air movement. However, foam is a short-lived material that is susceptible to low temperatures, and will fit with a small gap. Also a popular insulation material is mineral wool, with heat and sound insulation. It is resistant to high temperatures and easy to install.
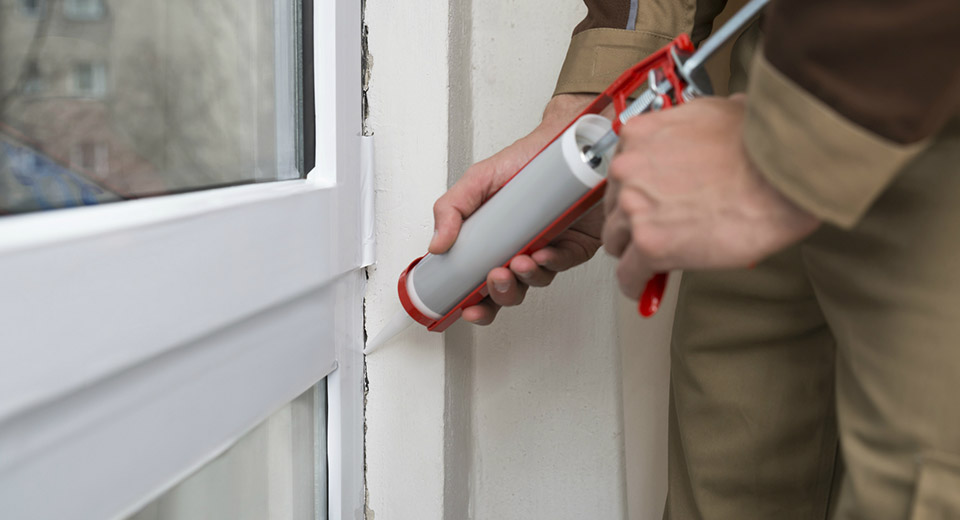
Carry out insulation window frames Silicone sealant will also help. When working with it, it is best to use an inexpensive tool - a lever syringe. The sealant also blocks moisture, making the windows resistant to mold and mildew. It is also worth choosing a transparent sealant - this way it will not be noticeable if it accidentally gets on the glass.
Before you apply caulk or expansion foam, it's worth checking exactly how much it expands - to determine this, apply a small drop to the corner of the window.
Another “cheap and cheerful” method is to plug the cracks in the windows with technical wool and then seal them masking tape. Previously, instead of tape, they used fabric or paper strips with a paste made of laundry soap. But when using this option, its fragility is obvious, and it will not completely get rid of blowing.
A good and inexpensive insulation for plastic windows is foam rubber: the financial costs will be minimal. Remove the film from the adhesive surface of the insulation and press the foam rubber insulation for windows into the required places. With the onset of warming it is very easy to remove. However, if moisture gets in, the insulation may lose its seal.
How to insulate the slopes of plastic windows
To insulate the slopes of plastic windows, you can use the most different materials– sandwich panels, plasterboard, polystyrene foam or polystyrene foam. However, polystyrene foam is the most fragile of the listed materials and tends to accumulate moisture. If it is necessary to insulate a window from the outside, dry mixtures for finishing slopes will help.
First, you need to carefully treat the cracks - eliminate possible contamination and remove old mounting foam. If you have chosen drywall to insulate the slopes, then the sequence of actions is as follows:
- cut blanks from plasterboard required sizes and treat with a moisture-resistant primer, wait until the workpieces dry;
- insert plasterboard sheets in the slot;
- fill the small gaps remaining between the drywall and the wall with polyurethane foam;
- after the foam has hardened, we finish cosmetic repairs primer and paint.
External insulation work is carried out at temperatures up to +5 ° C, otherwise building materials may lose some of their properties.

You can use a special heat-saving film to insulate windows. It transmits light into the room and at the same time does not “release” infrared radiation. This film not only protects the warmth of our home, but also helps get rid of the “ crying windows", that is, from . Also, windows on which heat-saving film is glued are characterized by greater strength. Before starting work, it is important to wash the glass, treat it with a degreasing agent and wipe it dry. Next, you need to stick the film so that its “metal” side faces the street. The film is glued not only to the glass itself, but also with an overlap to the frame. Some manufacturers make films on a self-adhesive basis, but some types of film require adhesive tape. To prevent bubbles and wrinkles on the film, use a household hair dryer.
A simple and inexpensive life hack that will help cope with drafts is to attach bubble film to the window. Choose film with larger bubbles as it tends to handle cold air better. Trim the bubble wrap so that it extends slightly over the window frame. Spray the window with water from a spray bottle, then “glue” a sheet of cut wrapping film onto the wet glass. You can reinforce it with double-sided tape. The “bumpy” side should face the glass. The film should adhere easily and remain in place for several months. If desired, you can apply a double layer of film for better thermal insulation. The only negative is that this method blocks the view from the window, but light will nevertheless enter the room.
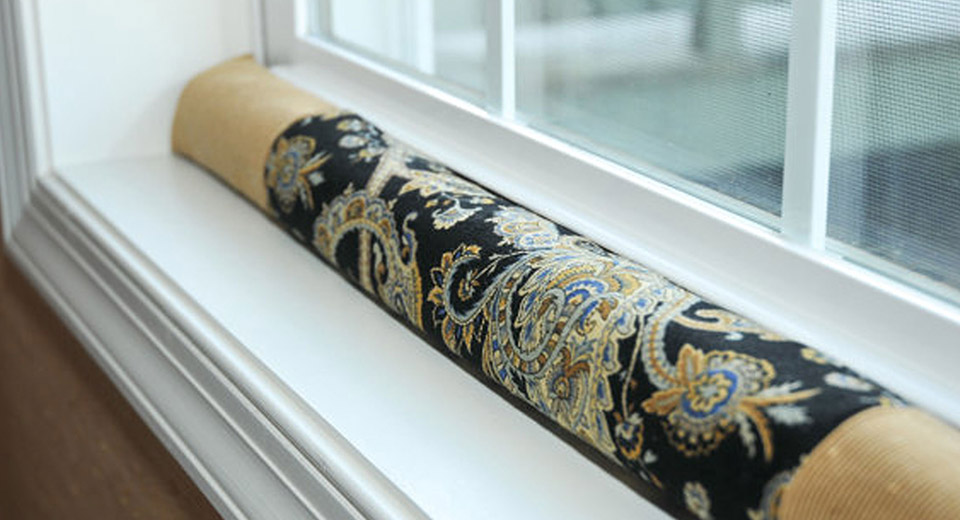
Sew a plain fabric to fit the width of the window. Fill it with some loose, dense substance such as sand, rice or polyester, then place it along the bottom of the window. In this case, heavy materials (denim, corduroy) will retain cold air more effectively than light materials (cotton, knitwear, etc.).
Replace the seal
If the problem is a worn seal, you can replace it yourself by picking up a suitable one at a hardware store. It is also better to choose a black sealant: black is the natural color of rubber, and impurities of other colors can spoil the quality of the product. After the old seal is removed, you need to clean the grooves from dust and dirt, treat the corners of the frame with glue and trim off the excess with scissors. The resulting joint also needs to be treated with glue.

People have been using wooden windows for a very long time, so the question “How to insulate old wooden windows?” there are many answers.
- Very old way, which our grandparents used, was covering wooden windows with newspapers. They were soaked in water and plugged into cracks. The space between the glass and the frame was sealed with paper strips. Of course, “paper will endure anything,” and you can survive the winter with it, but removing newspaper particles in the spring will be very problematic. In addition to the banal inconvenience, there is also a risk of damaging the window covering.
- If old windows need to be insulated quickly, and the aesthetic side of the issue is not very important to you, ordinary paper is also suitable. To make paper putty, you can shred old newspapers, soak them in water, add clay or crushed chalk and seal the cracks with the resulting composition. To secure the window putty, simply use tape. However, this method is short-lived and will most likely last only one season.
- Foam rubber - regular or tubular - can be used as insulation for wooden windows. It will be effective if the wooden doors have already dried out and do not fit tightly to the frame. Previously, foam rubber was nailed down with small nails, but now you can use regular masking tape. This material can serve faithfully for a couple of years, then it will begin to deform and will need to be replaced.
- When insulating wooden windows, you can also use sealant. It is necessary to remove the wooden beads holding the glass using a screwdriver, apply sealant and install the beads back - preferably new ones, since old ones often break during dismantling.
- Wood tends to crack. Therefore, the frame is often covered with a network of small cracks through which heat can escape. To seal them, you will need to clean the double-glazed windows from decorative covering, fill the cracks with melted paraffin, homemade putty, sealant or special putty, and then cover the frame again with paint or varnish.


