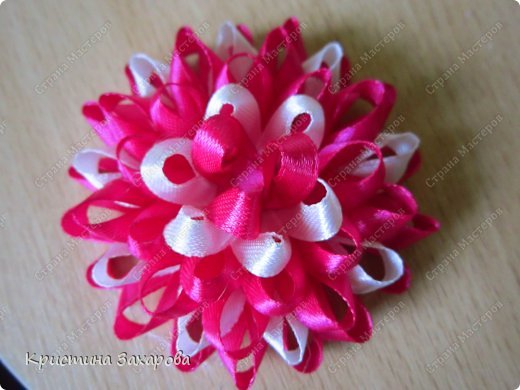
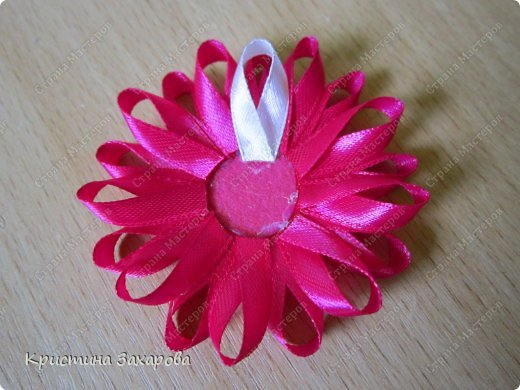
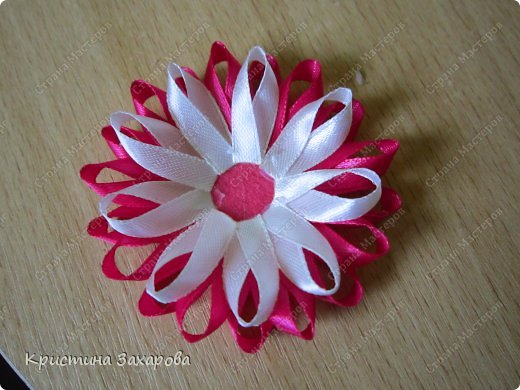
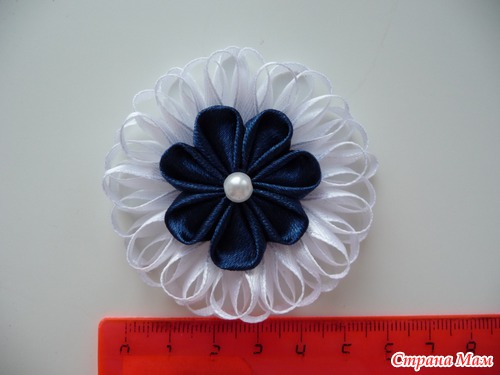
In a previous post I showed off my flowers. I have now created another one for September 1st and a blue school uniform, simultaneously filming the process. I in no way claim to be the author of the idea, I watched MK once on Odnoklassniki http://www.odnoklassniki.ru/group/51569977655546/album/52272169615610...I'm just telling you how I made these...
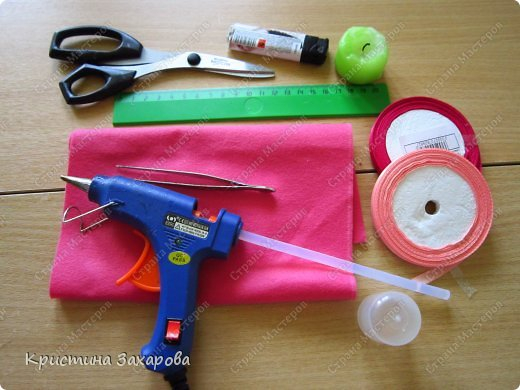
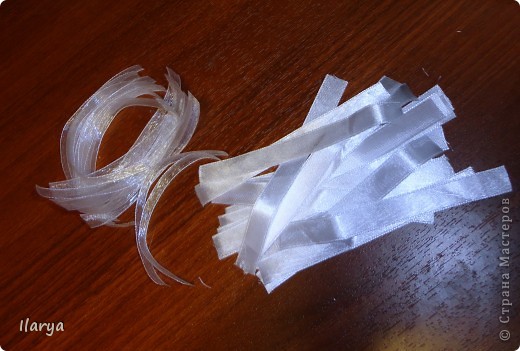
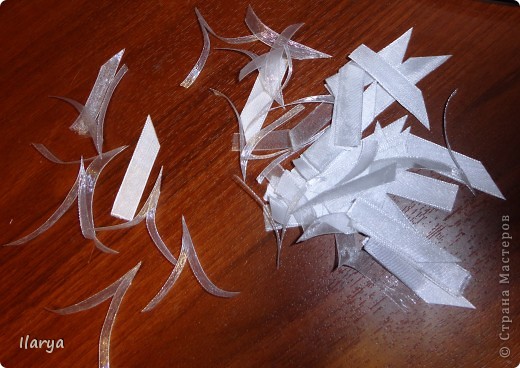
So, you need four meters narrow tape. I took satin 12 mm and nylon 9 mm - 2 m each (in the end, it took 1.6 m, but there should be a small reserve in case of defects). You can make it even narrower, then the petals will be thinner and there will be more of them. We cut the ribbon into 10 cm pieces (for this I have adapted to use a protractor just 10 cm long. I wrap the ribbon around it and whack-whack in bulk...)
![]()
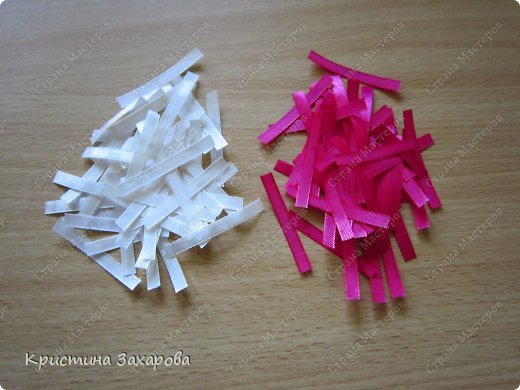
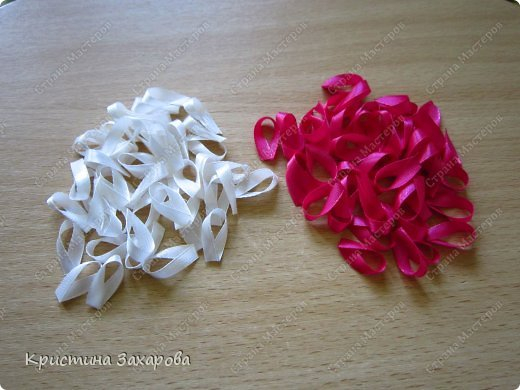
So we cut a bunch of ribbons...
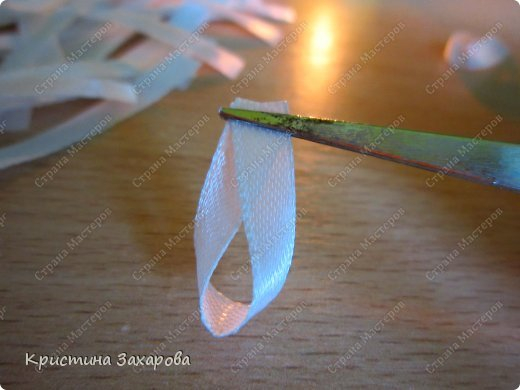
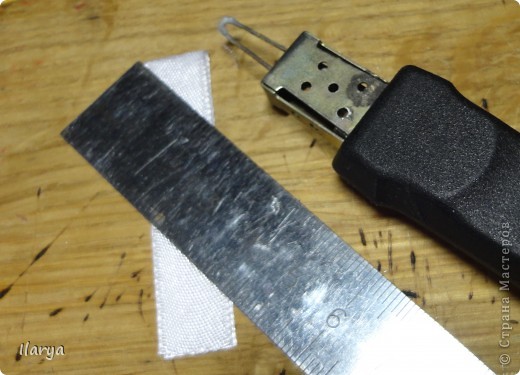
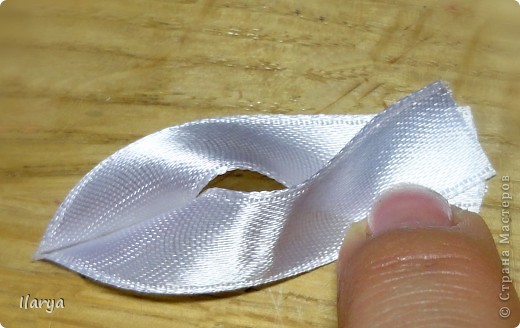
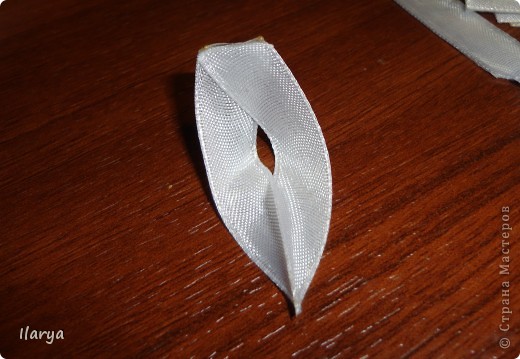
And we begin to make petals. Fold the piece of tape in half with the front side inward, press it with a metal ruler and cut off the excess triangle with a soldering iron or wood burner. We don’t have these miracle electrical devices, which means we just cut off a triangle, pinch the edges with tweezers and melt it with a lighter.
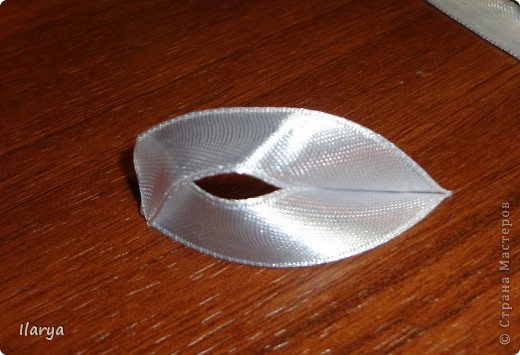
Done...
We clamp it with tweezers and melt the edge with a lighter.
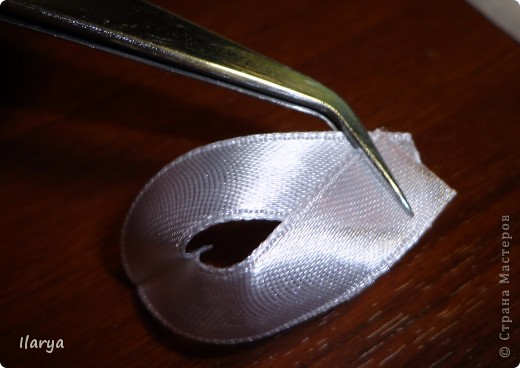
You can, of course, again do this with a miracle electrical device, but personally, I find it more convenient to do this operation with a lighter.

Face
Wrong side
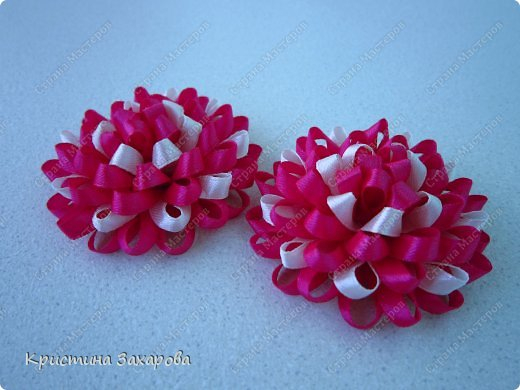
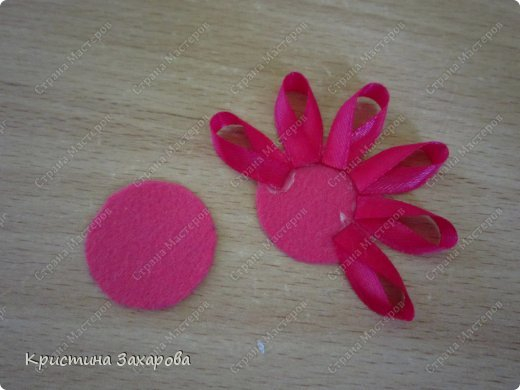
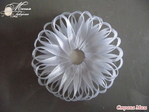
And finally, the most interesting thing: collecting the flower. We cut out the base - a circle with a diameter of 4 centimeters, cover it with fabric and begin gluing the first row of petals along the edge. I did this with hot glue, putting a drop on the base about 5 mm from the edge and immediately pressing the petal. I got 8 petals per circle. If the ribbon were narrower, more petals would be needed, 10-12.
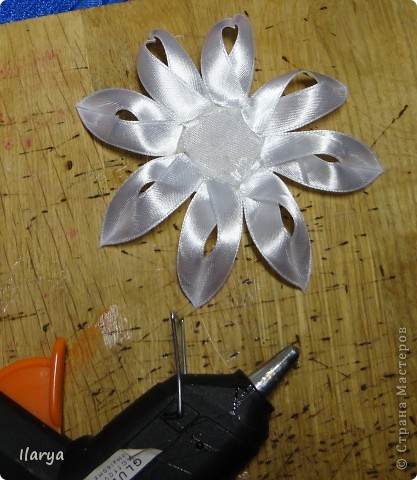
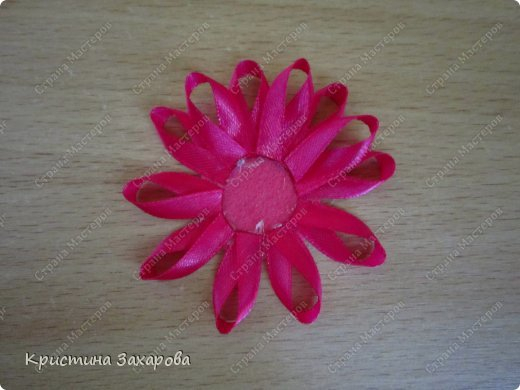
Then the second row of petals, in a checkerboard pattern. Then again and again, slightly moving the rows towards the center. Since the flower is voluminous, for convenience you can put it on something high so that the petals hang freely. I put the glass upside down.
Well, let's start with! I decided to make my own mk, since I was not satisfied with the Internet. I will make a small flower (about the flower, which I will describe more below how I did it), for this I took a narrow ribbon 0.5-0.6 (for some reason in stores write the width differently, although in fact the tape is 0.6 cm wide) divided with a Soviet-era wood burner (got from my beloved mother-in-law and father-in-law) into two ribbons, oh, I don’t know, maybe someone else is perverted in this way. Maybe ribbons? 2.5 mm wide and is on sale, but I had no time to run to the store. I will have 3 rows in total. So, all the pieces of ribbon will be the same length 5.5 cm and the number of finished petals will also be the same, namely 13 petals. The diameter of the base is 2.5. cm, this will be baby food cardboard (on the other side I just glue a satin ribbon). And so what are my changes to create this type of flower.
1. The petal should be shaped narrow
2. The petals must be glued next to each other
3. the first rows should practically lie on top of each other, i.e. the second row and third row do not need to be lowered lower
and now the photo!
first row:
second row, its beginning
![]()
third row, its beginning (I indicated where it begins)
ready three rows
and here is the actual flower
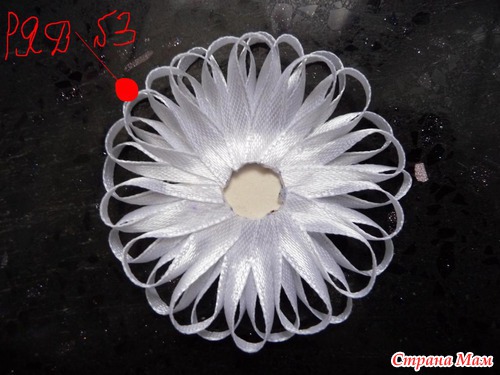
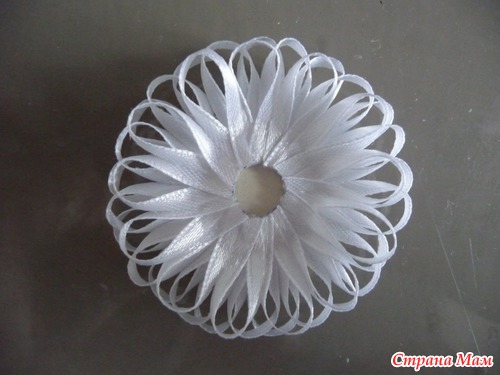
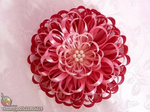
Let's move on to creating a flower like this, it is 12 cm in diameter
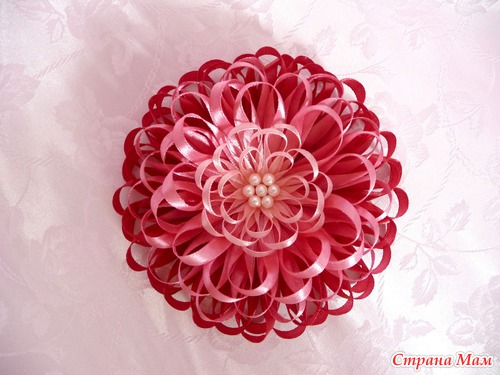
ribbon width 0.6 cm. Base diameter 5 cm. Total rows 10. Length of segments up to row 7 inclusive 10.5 cm
1st row - number of petals 15 pcs, 2nd row - 15, 3rd row - 13, 4th row - 11, 5th row - 10, 6th row - 9, 7th row - 8. But from the 8th row a ribbon 2.5 mm wide came : 8th and 9th row - segment length 7 cm, 7 pieces per row, and the last 10th row - segment length 5 cm and 6 petals. Well, that's all. and do not forget about the formation of narrow petals, and the first rows should be at the same level, and from the 4th row slowly go lower. It turned out to be a strange MK, a lot of words and few photos, sorry that it turned out this way. I hope at least someone understands. This is my first MK
here is a comparison of the flower from the Internet and mine
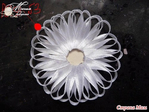
To work, we need a narrow ribbon 0.5-0.6 (for some reason in stores they write the width differently, although in fact the ribbon is 0.6 cm wide), divided with a Soviet-era wood burner (got from my beloved mother-in-law and father-in-law) into two ribbons, oh I don’t know, maybe someone else is perverted this way? Maybe 2.5 mm wide tapes are on sale, but I didn’t have time to run to the store. I will have 3 rows in total. So, all the pieces of ribbon will be the same length 5.5 cm and the number of finished petals will also be the same, namely 13 petals. The diameter of the base is 2.5 cm, it will be baby food cardboard (on the other side I just glue a satin ribbon). And so what are my changes to create this type of flower.
1. The petal should be shaped narrow
2. The petals must be glued next to each other
3. the first rows should practically lie on top of each other, i.e. the second row and third row do not need to be lowered lower
and now the photo!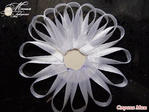
first row:
second row, its beginning
third row, its beginning (I indicated where it begins)
ready three rows
and here's the actual flower To

Per let's go to create something like thisth flower, it is 12 cm in diameter
ribbon width 0.6 cm. Base diameter 5 cm. Total rows 10. Length of segments up to row 7 inclusive 10.5 cm
1st row - number of petals 15 pcs, 2nd row - 15, 3rd row - 13, 4th row - 11, 5th row - 10, 6th row - 9, 7th row - 8. But from the 8th row a ribbon 2.5 mm wide came : 8th and 9th row - segment length 7 cm, 7 pieces per row, and the last 10th row - segment length 5 cm and 6 petals. Well, that's all. and do not forget about the formation of narrow petals, and the first rows should be at the same level, and from the 4th row slowly go lower.
Lush flower made of ribbons