Have you already decided on the color scheme for your kitchen? If yes, then it's time to think about lighting. Backlight working area for the kitchen is not an easy task and requires utmost attention.
What will it be? Ordinary chandelier, spotlights or LED strip? Where should I install them and how long will they last?
Immediately before purchasing lamps, you should make a small calculation - experts recommend 40-50 W per 1 m². This indicator somewhat overpriced compared to other rooms. Why? It’s simple - the housewife needs lighting for the kitchen work area for cleaning, for an excellent overview of products and ready-made dishes, and, finally, to make the kitchen cozy.
To have an idea of the future result, try to draw up a schematic project plan that will show where and what is planned to be illuminated in your kitchen, and how it will all look.
Work area lighting
In general, the work area in the kitchen is one of most important places, which contributes to the speed and quality of cooking. Do you need work surface lighting in the kitchen? The answer is simple and laconic - it is necessary!
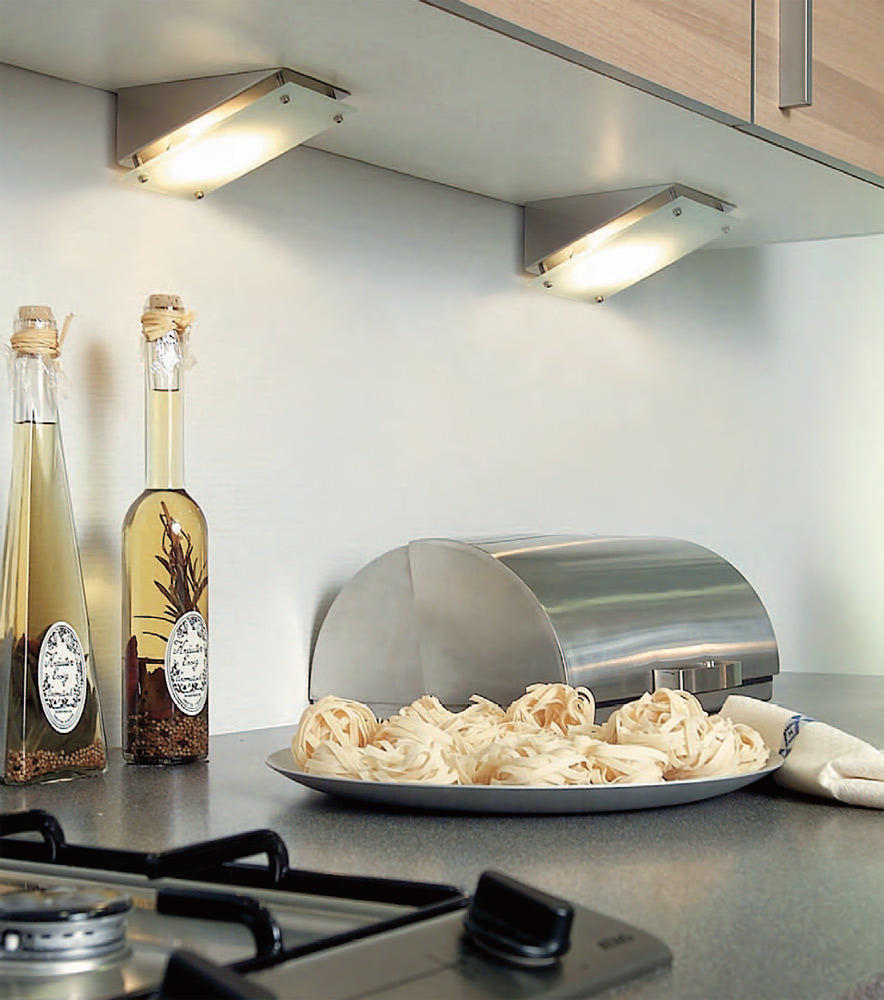
So, most likely the hood you bought will already be equipped with lighting, but keep in mind that its light is only enough for the hob, which does not fully satisfy the requirements of modern housewives.
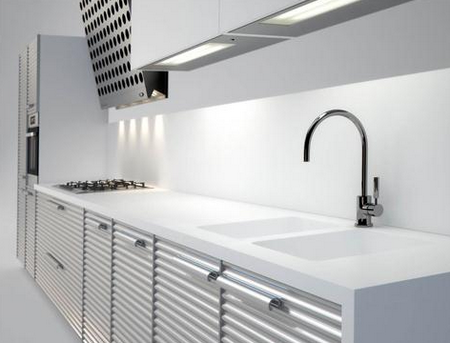
Fluorescent lamps can come to your aid - they are the brightest assistant in household matters. Experts recommend installing them in kitchen cabinets, where they will look great and simultaneously illuminate the entire work panel (countertop).
As an option, you can use already familiar spotlights, but for those who want to get a uniform glow, this option is unlikely to be suitable.
Possible problems and other nuances
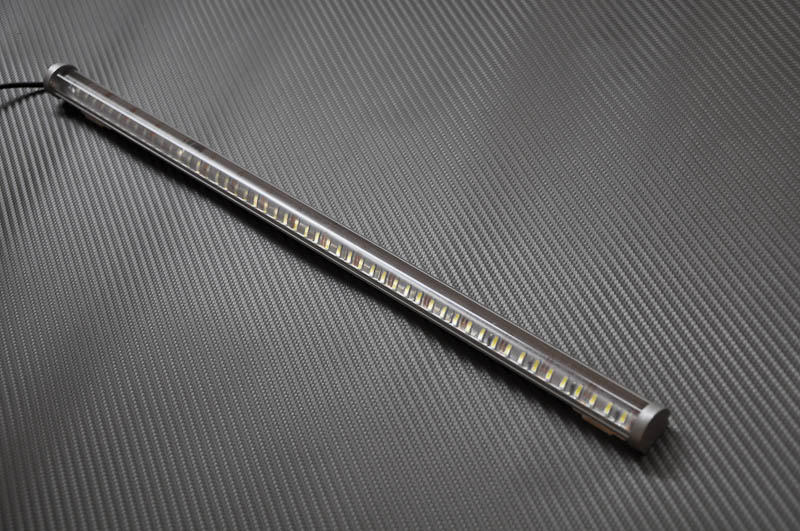
As an example, let’s take an ordinary LED strip, which has proven itself well in use in kitchen areas.
At first glance, everything is simple, but upon first inspection and approach to work, a lot of problems immediately arise.
- Fastening – double-sided tape can be used as an option for fastening the LED strip, but sooner or later it will wear out. sticks. You can also try M3 tape, but how long will it last?
- Brightness – cheap models barely glow, while expensive and bright ones get very hot. A dilemma immediately arises - if you take an expensive option, then you need some kind of cooling system.
- Protects against moisture, steam and splashes– It is not recommended to use a completely silicone tape. Why? Therefore, it does not have replaceable parts, and it quickly breaks down.
If you visit often enough specialty stores, then you have probably come across stands with aluminum profiles and plastic diffusers. When choosing this method lighting, several problems immediately disappear: protection from moisture and heat removal.
– quite a nice bonus. But what to put inside the profile?
After all, you want to illuminate the kitchen not just pointwise, but with uniform and pleasant light. As an option you can use powerful LEDs, but then stains will be visible on the working surface.
To solve this issue you can consider 2 options:
- Buy powerful LEDs and connect them to a lower current (an expensive option that not many people can handle);
- Buy a lot of low-power LEDs;
The second option also has its drawbacks: before installing the light bulbs, you will have to experiment a lot with their distance from each other to achieve the effect of integrity.
Pay attention!!! Upon purchase aluminum profile for luminous stripes, give preference to anodized models. Such aluminum is not afraid of fumes, moisture, grease and other troubles.
If you don’t want to spend hours fiddling with such light bulbs, then turn your attention to LED strips, created specifically for office lamps of the Armstrong type. But keep in mind that these tapes operate on 20 V!
Attention!!! If there are no 20 V power supplies, you will have to purchase a driver that will output the required voltage to the strip.
Kitchen work surface lighting has another important nuance - the type of light. There are three types in total:
- Warm - this type lighting is not very popular, due to the “yellow darkness” effect. The working surface of the table top is poorly lit, and the rest of the room is generally plunged into darkness (more like a romantic setting, but not a working one);
- Neutral is the most acceptable option, the most popular among specialists;
- Cold - too harsh lighting, designed for amateurs.
Assembling the system
Now all that remains is to assemble everything and attach it in place. The lighting for the kitchen work area is a high-quality aluminum (plastic) profile that is easily sawn and attached to the furniture. LED rulers are also easy to saw and drill.
Another small, but still a problem arises - what to power and where to hide the wires. In general, you can buy several special drivers like MGTF. As an economical option, you can use a computer multi-core twisted pair, and instead of drivers there is a regular and familiar transformer (toroidal transformer 27 V, 3A).
H» width=»640″ allowfullscreen=»» frameborder=»0″>
Do you have any questions? Presented to your attention detailed photo and a video instruction in which all the nuances of this not simple but interesting matter are described in detail. Create a new kitchen, make your life brighter and more comfortable, amaze everyone with your ingenuity and resourcefulness. Good luck to you in your work endeavors!


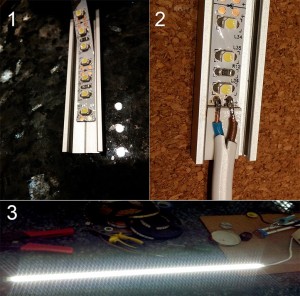 I inserted the diffuser until it snaps into place. I glued the mounting double-sided
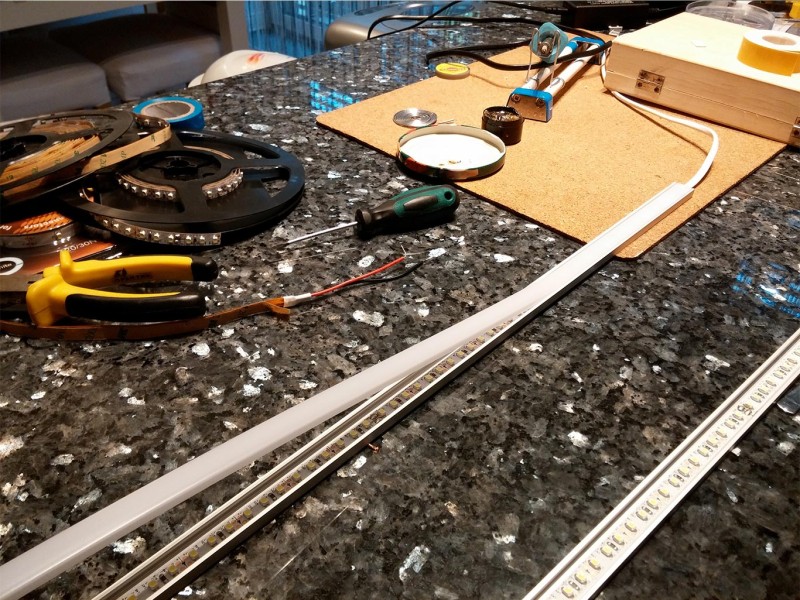
To create beautiful design any room is very important point is the organization of the correct one. This is especially true for the kitchen, since correctly distributed light fluxes can transform the cooking procedure from a chore into an enjoyable process. There are many lighting options, but the most interesting and modern is LED lighting for the kitchen work area.
Advantages of LED lighting for the kitchen
Everyone knows that LEDs are semiconductors that emit light, and depending on chemical composition the brightness of their radiation may vary.
LED backlight It is resistant to mechanical damage. It is durable, has excellent brightness and a variety of color scheme. Kitchen lighting can be made in red and white, blue and green, yellow and purple. It should be remembered that such lighting must correspond general style premises and look harmonious with kitchen furniture. For example, in a classic kitchen it is better to use warm-colored lighting, but cold lighting can be in tune exclusively with modern styles.
Since the LEDs are densely located on the strip, this lighting is considered more uniform compared to other options. These lighting sources can operate in both the ultraviolet spectrum and infrared. In addition, such lighting is very economical, since LEDs consume little electricity. However, the LED strip must be connected only through a transformer.
Adjustment of such lighting occurs using touch switches, which can even change the shades of lighting. The LED strip has a self-adhesive base, so it is quite possible to install such lighting for the kitchen work area yourself.
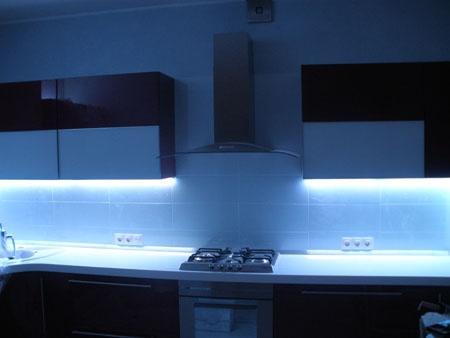
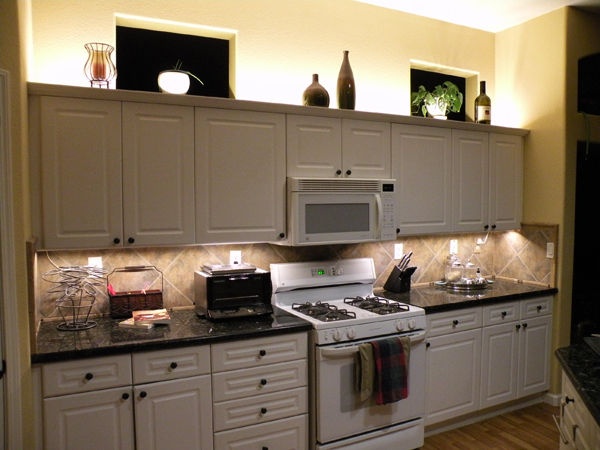
Most often you can find kitchen lighting in the form of an LED strip, which is mounted underneath wall cabinets. Moreover, you can place the tape in the corner between the cabinet and the apron, along the edges of the cabinets, or along their entire line. To ensure high-quality lighting, experts recommend using strips with 60 LEDs for each linear meter. The most commonly used lighting is under cabinets. white, which is most convenient when cooking.
In order to protect such a lighting element, especially if it is located above a sink or stove, it is better to choose an LED strip that is encased in silicone. Then it will not be afraid of moisture, dust, or grease: all this can be easily and safely removed with a sponge.
The LED strip can be attached not only to the bottom kitchen cabinets, but also along their top, creating the effect of furniture floating. This base lighting can be used as a night light. In addition, LED strip lighting can be mounted even inside kitchen cabinets. Such decorative lighting systems are very compact, and their configuration can be very different: triangular, round, etc.
An original and elegant solution would be to illuminate the apron in the kitchen with an LED strip with so-called skins. These double decorative glass panels with a pattern, between the layers of which an LED strip is laid. A kitchen with LED lighting will look stylish and especially unusual. However, the cost of the skin is quite high compared to other types of lighting.
Work area lighting is an integral part of modern kitchen lighting. It is necessary to ensure coziness and comfort in the room. In addition to ergonomics and functionality, it must also be practical.
Types of kitchen lighting
 When the color scheme for the new kitchen has already been selected, it’s time to start lighting it. Three main areas are illuminated in the kitchen:
- Work area;
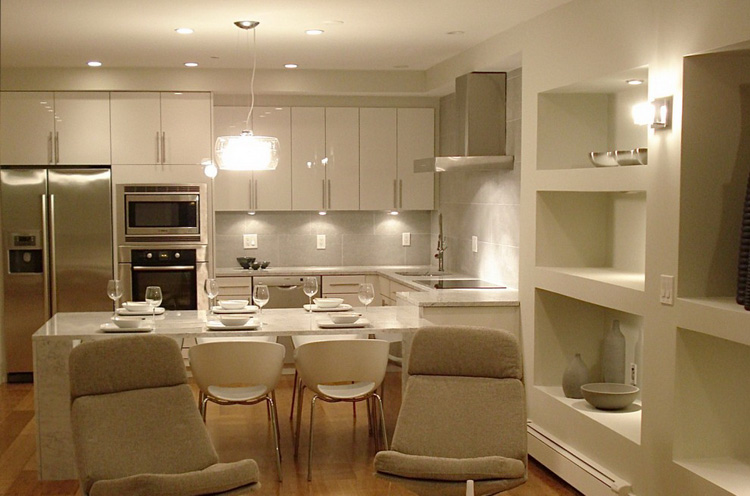
- Light above the dining table;
- General lighting.
In order to visually separate these zones, floor and furniture lighting can also be used. Modern kitchens require maximum comfort in cooking, which is due to the abundance kitchen appliances, so there should be no doubt about the need to illuminate the kitchen work area.


Illuminating the work area in a new kitchen requires utmost attention. Of course, the hood may have a built-in lamp, but it will only illuminate the hob. And since there should be enough light in the work area, you should seriously think about providing it with lighting. Lamps must be selected that are practical and easy to clean; it is also necessary to ensure the most convenient access to switches.
The placement of certain lamps with switches should be planned as early as initial stage when drawing up a project, so that later there is no need to occupy power outlets and think about how to hide unaesthetic electrical wires. The type of lamps should also be decided in advance.
Work area lighting
Illumination of the work area in the kitchen serves not only as lighting, but is also a decorative element, and at night it can be used as a night light.
Using the main light source to illuminate the work area is not very advisable, since it will create a shadow, and besides, the brightness of one chandelier may not be enough for such needs.
There are many options for lighting the kitchen work area. Using spotlights, fluorescent lamps or LED strip will help determine the design of the planned interior, the main thing is that there is enough light to meet the needs of the housewife, the lamps are practical and the switches are easy to access.
An installed motion sensor in the area of the work area will not only add exotic originality to the new kitchen, but will also provide convenient access to turn on the lighting. The light above the work area will light up at the moment when the sensor detects movement and also go out in its absence. This is convenient because during the cooking process, your hands may not always be clean and turning on the backlight if necessary is not always convenient.
Which lamp for the work area is better to choose?

To plan and arrange lighting for the kitchen work area, it is necessary, first of all, to decide on the type of lamps:
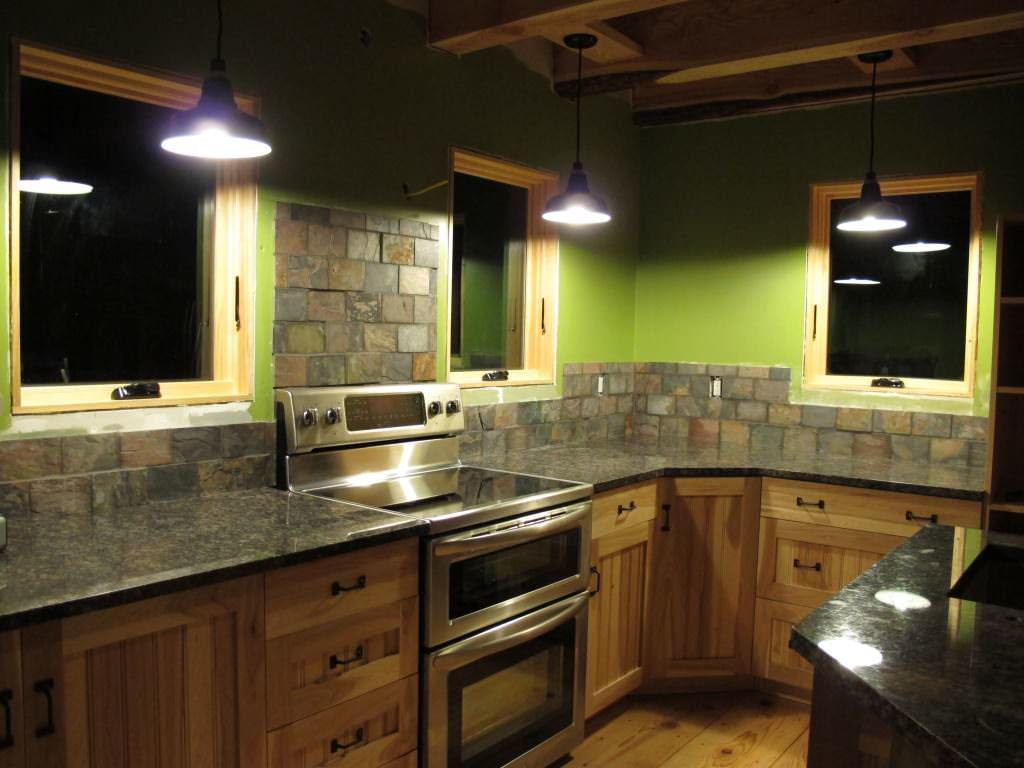
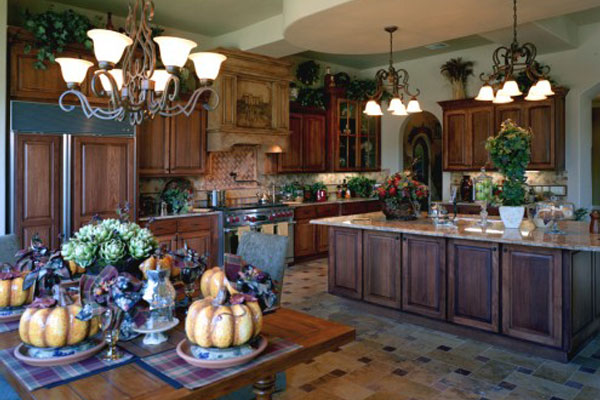
- Chandelier, as a rule, is used as the main light source. To ensure required quantity There may not be enough light in the work area, even if you move its location closer to the desktop. It will add solemnity to the overall atmosphere of the kitchen, being located above the dining area.
- Spot lamps with halogen bulbs will perfectly illuminate the working area of the room, creating a festive atmosphere, however, such lighting is not always convenient.
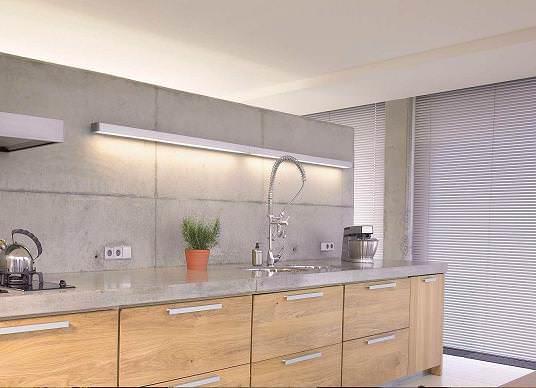
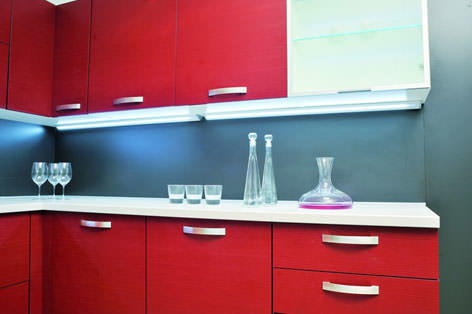
- Fluorescent lamps, built under the upper cabinets above the entire surface of the working area will provide uniform illumination and make the design of its apron brighter and more noticeable. Using only the light above the work area to illuminate the entire kitchen will create a romantic atmosphere in the room.
- LED strip, used for lighting, will become a bright, beautiful and practical kitchen assistant for any housewife. The color of the tape can be selected according to the design of the room; it can be variable or uniform. And the ability to change the brightness and saturation of the glow will allow you to get very unusual shades. The tape is attached to the upper cabinets of the set above the apron using staples, adhesives or double-sided tape. Using an LED strip, you can illuminate not only the kitchen work area, but also the countertop, cabinets and base of the kitchen unit. And if you run a ribbon around the perimeter of the ceiling, it can be used as an alternative to a traditional chandelier, because the brightness of the glow will be quite enough to illuminate the entire room. Using an LED strip will save on energy costs and also create a cozy atmosphere in the room.

- Spots or lamps with directional light, mounted under wall cabinets and directly on them, may well perform the function of not only local, but also the main lighting of the kitchen.
- Rotary lamps, illuminated kitchen work area can not only become a bright assistant to the housewife in cooking, but also the main source of light when visiting.
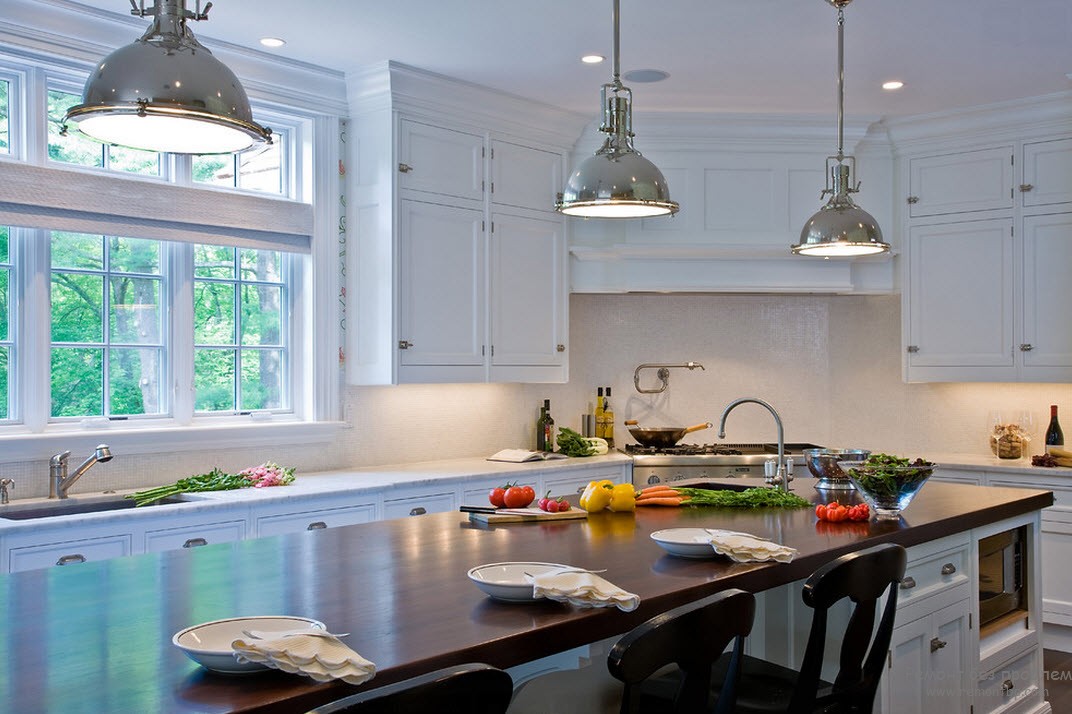
- Pendant lamps, mounted above a kitchen island or work table, will add originality to the room. They are mounted in such a way that they do not interfere at all when preparing food, while at the same time they brightly illuminate the required area.
- Skinali or glass apron with internal lighting will be a real work of art in the new kitchen. Kitchen apron is an integral part of any modern kitchen, and the question of the need for its installation is rarely raised. The skins are two layers tempered glass, between which there is an internal LED backlight. They can be plain or have a pattern, the panel thickness is no more than 2 cm. How alternative option can be used tempered glass for an apron with LED strip attached to the ends of the panels. The refraction of light will make the entire panels glow, adding uniqueness and sophistication to your kitchen.

Even at the initial stage of drawing up the project, a wiring diagram for the kitchen is planned. When compiling it, you must definitely take into account all the nuances of placing lamps to illuminate the kitchen work area:
- First of all, you should decide on the type of lamps. What will it be - LED strip, spotlights or spots?
Work area lighting should be arranged as functionally and harmoniously as possible.
- After the choice is made, it is necessary to calculate the number of lamps. In order to make the housewife comfortable in the kitchen work area, experts recommend placing lamps at a rate of 45 - 50 W per m2. The required figure for the kitchen work area is somewhat high compared to other areas of the room. This is necessary not only to make the kitchen more comfortable, but also to provide an overview of products and dishes. In addition, in the process of preparing food, the kitchen becomes clogged, especially the stove, sink, apron and work area table. For high-quality cleaning and cleaning of these elements, the light must be bright.
- In order to have an idea of the results of your calculations, you can draw up a diagram that will display the placement of furniture, appliances and lighting fixtures.
If it turns out that the renovation has already been done and the room is almost decorated, but the lighting device for the kitchen work area was not taken into account at the design stage, and there is a need to use an additional socket for lighting, as well as to hide electrical wires, the cables can be attached with staples or adhesive the inner perimeter of wall cabinets. An additional outlet can be installed in any place that is not visible to the eye by connecting it from an existing outlet located nearby. Lamps for these purposes are usually economical in terms of energy consumption and will not cause damage to kitchen electrical wiring.
We make illumination of the work area with our own hands (video)
Work area lighting functionally necessary in a modern kitchen, where the housewife spends most of her time. In order not to create difficulties in its operation, it must have the most convenient access to switches, be practical and ergonomic.
Attention, TODAY only!
One of the most favorite places in the house is the kitchen. Here you can have something delicious to eat, chat with guests or prepare a gourmet lunch for your family. Every housewife strives to create coziness and home warmth. Today there is a huge number of various devices that are designed not only to give comfort to the kitchen, but also to make it more convenient and practical to use. This is a modern multifunctional household appliances, which will help you quickly and tasty prepare any dish, and a multi-functional kitchen set, as well as everything possible options shelves and shelves where you can place everything you need at hand.
Illumination of the work area in the kitchen is functional and decorative element interior
To ensure that your kitchen and its work areas have an attractive appearance and are pleasing to the eye, do not forget about its renovation. The main thing is, of course, the color finish of the walls, ceiling and floor in the kitchen. You should not choose cold and pale colors for kitchen decoration, as they can make you feel depressed or simply create a feeling of pressure in the space. The kitchen should sparkle with bright or bed colors, creating warmth and comfort. In such a kitchen it is pleasant to sit with a cup of coffee on cold winter evenings and remember summer adventures or vacations with friends.
All this is of course good, but there is one detail that can give your kitchen and its work area a feeling of a fairy tale and a romantic mood. This small detail is the lighting in the kitchen. It is very often forgotten. It’s not as vitally necessary in the kitchen as it is, say, from a stove or refrigerator. But lighting or backlighting can give the seemingly most ordinary and unremarkable kitchen interior originality and uniqueness.
In this article we will look at possible lighting options in the kitchen.
Of course, every kitchen has at least one chandelier, which illuminates its entire room with a work area. But here it all depends on the size of the kitchen space.
Small kitchen lighting
Many people are faced with the question of how to organize normal work in a kitchen whose size does not even allow several people to turn around comfortably. Many homes have just such a small kitchenette, which is a reflection of the construction of apartments of the last century.

Lighting in a small kitchen can expand the space
Many people believe that for a small kitchen, an ordinary chandelier that sticks out of the ceiling is enough. But that's not true. When twilight, evening or night sets in, even in a small kitchen there are places where there is clearly a lack of lighting: on the countertop under wall cabinets, in the depths of shelves and wall cabinets, in the back floor cabinets and cabinets This is especially noticeable in the work area. A lack of lighting in small kitchens can be a consequence of dim light bulbs in a chandelier or darkened chandelier shades.
When planning lighting in a small kitchen, you shouldn’t go too overboard. Of course, all people love New Year, but you shouldn’t turn your kitchen into a small corner of this holiday with an excess of lighting.
You should also install lighting taking into account the kitchen wiring, because each lamp requires a separate electrical wiring. Wiring is also needed for sockets, of which there must be a sufficient number to connect all household equipment. You should not overload the kitchen with excessive lighting and extension cords, otherwise at one point your kitchen may really sparkle like a real Christmas tree.

Lighting in the kitchen should be neutral color, only slight light distortion is allowed
In a small kitchen, you need to pay close attention to the lighting of the work area and install additional lighting only in those places where it is really necessary. This is where small ones will come to the rescue. ceiling lights, which are attached to ceiling cornice. To do this, two parallel wires are pulled on the ceiling cornice, onto which several small lampshades are attached. The light from such a design can be directed to the work surface of the countertop under the wall cabinets, to the table or sink, and also to illuminate any other necessary surface.
Large kitchen
Lighting in such a kitchen requires a slightly different approach compared to small kitchens. Since the room in this case is quite large, the light from one single chandelier on the ceiling (even if it is large) will be sorely lacking. But there is room for implementation here. various options lighting of various work surfaces.
Option for lighting design in a large kitchen
In a large kitchen, you can use multi-level suspended ceilings with built-in individual lamps, separate lighting for kitchen units and shelves, lighting for floor and wall cabinets and much more. It all depends on your needs, desires and capabilities.
Kitchen lighting options
There are a huge number of lighting options for different areas of the kitchen.
Illumination of the work area in the kitchen.
The housewife spends most of her time in the kitchen work surface, which includes a sink, a stove and a worktop surface on which fruits or vegetables are cut, dough is prepared, and meat is cut. On modern kitchens Due to ergonomic considerations, practicality and comfort, a plate dryer, an extractor hood and wall cabinets are located above the work surface, in which housewives usually store various spices and other small things much needed in the kitchen. Because of the canopy kitchen set This area includes much less light, and in the evening or at night the working surface is generally darkened. Here you cannot do without additional lighting.

Illumination of the work area in the kitchen
Most often, local light sources are used to illuminate the working surface. The lighting of the work area in the kitchen can have several lighting variations:
- Work area lighting can be installed on the hood. This allows you to illuminate the surface of the slab or hob. In this case, the lighting can also cover adjacent areas: the sink and part of the working surface of the countertop or table. The presence of lighting on the hood allows you to control the cooking process and prevent it from burning, water evaporation, contamination of the surface of the stove or arched surface as a result of splashing water during boiling. There are hoods with built-in lighting. Therefore, when purchasing a hood, you should find out for yourself whether you need a hood with built-in lighting. Such units are, of course, a little more expensive than standard models, but they can make your life in the kitchen easier and will allow you to do without additional lamps. Hoods with built-in lighting have a more attractive and stylish look, unlike those on which additional lamps are hung.
- Lighting the surface of a table top or table. To do this, additional lighting is installed on the bottom of the wall cabinets, which are located above this work surface. Illumination of this area will help to avoid injuries and cuts to your fingers when cutting meat, vegetables and fruits. Also, lighting the work area will help keep it clean, and if contamination occurs, quickly eliminate it to prevent the formation of persistent contamination.
Lighting of the work area can be carried out at two levels:
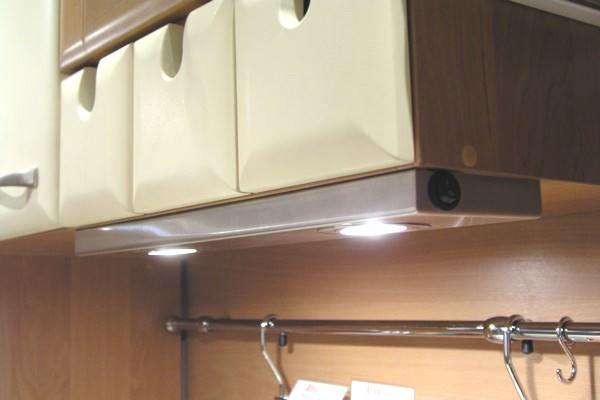
- The first level of illumination of the work area. At this level, it is assumed that lighting will be installed in the space under the cabinets. To do this, you can use one fluorescent lamp, which will be attached to the bottom of the cabinets. Such a lamp will help illuminate the entire surface of the work area of the countertop, even that which is not used as a work surface, but on which spices, kitchen utensils, etc. may be located. But for this the lamp must be quite long. When choosing such a lamp, you must choose one that will not distort appearance products that are yellow. Also, instead of an elongated lamp, you can use linear LED backlighting. But it is still better to illuminate the working surface of the tabletop with an elongated lamp.

First level of work area lighting
- Second level of illumination of the work area. The second level of illumination is formed when individual spotlights are installed above upper cabinets. In this case, the lamps can be mounted in a surface cornice. Small lamps are usually attached along the edge of the cornice, which are held on the cornice using clothespins. The light from these lamps is directed to those areas where work is currently taking place. An LED strip can also be installed on the eaves, but in terms of the quality of illumination of the working surface, it is significantly inferior to small light bulbs, the direction of light of which can be adjusted. This is very practical for kitchens where food preparation is carried out on various surfaces.
Second level of illumination of the work area.
Individual lighting would be best suited for illuminating the above-mentioned places. LED lamps, which have such qualities necessary for the kitchen as small size and sufficient brightness of lighting.
It is also possible to purchase wall cabinets with built-in lighting. Such cabinets may have shaped protrusions on which the built-in lamp will be located. On these cabinets it is possible to place lamps at different levels with the ability to regulate the direction of the light beam.
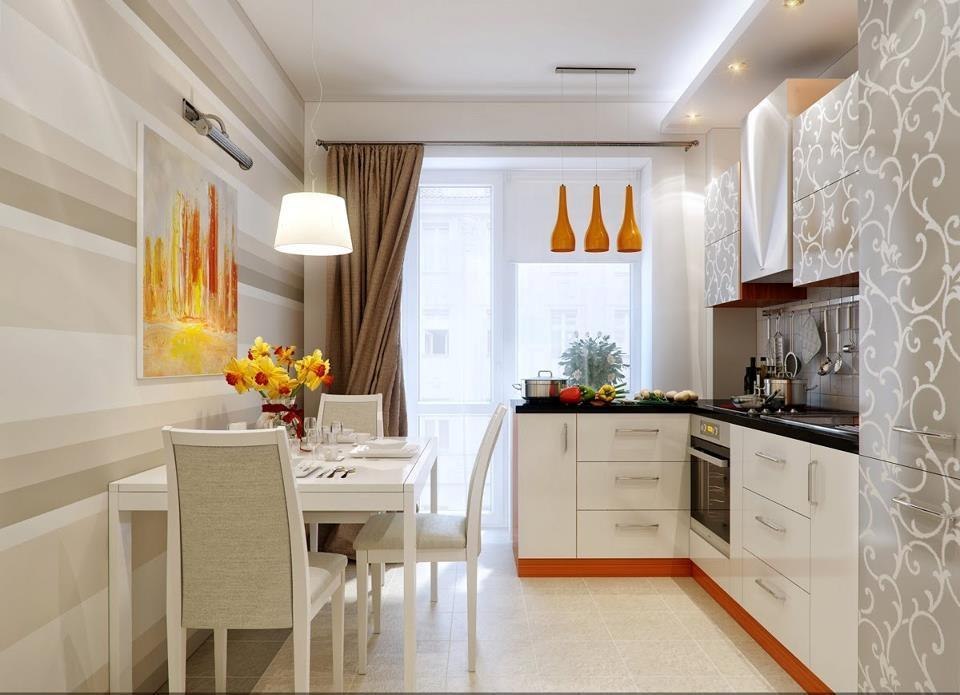
Area above the dining table.
The dining table is the most main element in the kitchen. Often, it is at the dinner table that there is an opportunity to see and communicate with all family members.
If the table is located in the middle of the kitchen, then a large chandelier is used to illuminate it, which will fully satisfy this area of the kitchen with the necessary lighting. Instead of a chandelier, you can use various pendant lamps, especially if the kitchen has suspended ceilings. With the help suspended ceilings You can highlight the dining area with built-in lamps, which will be located in a certain way. You can also select boundaries dining area using the suspended ceiling level.
But often the table is moved towards the wall or positioned so that the lighting from the central ceiling chandelier no longer reaches it. In this case, the table will be illuminated using a lamp with a lampshade. You can choose a chandelier that allows you to adjust the height of the lamp depending on the surface of the table. The shape of the lampshade should match the interior of the kitchen and not stand out from the overall kitchen design.
Illuminated area above the dining table in the kitchen
In another case, you can attach a group of small lamps to the ceiling above the dining table, which will be located on elongated pendants. The order in which such lamps are placed depends only on your preferences.
It is possible to place the lamp on the ceiling using a rod. This device will be appreciated by fans of constant rearrangements. If the dining table has been moved, the lamp will follow it along the rod and its lighting will not be affected.
If the dining table is adjacent to one of the kitchen walls, then you can use it to illuminate it. wall lamps. Lamps that are installed on the wall can have a wide variety of designs. This can be a sconce on a flexible leg, lamps on brackets, LED strips and single lamps. Such lamps must be installed at a level not less than a meter above the table level, and the light they emit, accordingly, should completely illuminate the dining table.
Do not forget that all lamps, chandeliers and sconces should be in harmony with the rest of the kitchen and beautifully complement its interior.
Kitchen lighting.
In addition to the chandeliers, which are located in the center of the kitchen, additional hood lighting and dining table, it is possible to equip with lighting and hanging shelves. We already said above that there are wall cabinets with built-in lighting. But they are mainly located above the working surface of the countertop.
However, in addition to the work triangle (stove, washing refrigerator), the kitchen may also contain kitchen furniture: soft corners and sofas. There may also be a lack of lighting in this area in the evening and at night.
Kitchen lighting
The easiest way to illuminate this part of the kitchen is to use wall sconces or single lamps. But open shelves with lighting will look most stylish and original. Such shelves give free rein to the imagination of the owners. They can have all kinds of structures, be made from various materials(wood, plastic, glass), and their lighting can be very diverse. To illuminate shelves above a sofa or soft corner You can use multi-colored LEDs. You can also make the lighting yourself and set several functional modes, which will create a truly festive mood in your kitchen.
If desired, you can install standard lighting yellow, but switch lighting modes from bright to dim. With such lighting you can arrange it in the kitchen romantic dinner for two, creating the atmosphere of a cozy French restaurant.
Decorative lighting in the kitchen.
Lighting in the kitchen is not only possible work area tabletop or dining table, but also various elements decor to focus attention on them. You can equip various elements with lighting: paintings, shelves, etc.
Open shelves with illumination of its internal contents will look very beautiful. Such shelves do not carry a functional load in the kitchen, but act as a decorative design. On these shelves you can place souvenirs brought from different countries, decorative saucers or family photographs.
Decorative lighting in the kitchen
Decorative shelves can be made of various materials: plastic, glass, wood and iron. The choice of material for shelves depends entirely on the general kitchen interior. But they will look especially beautiful in the kitchen forged elements decor and, in particular, forged shelves. They will look great and organically in almost any kitchen design, and their lighting will add an atmosphere of mystery and mystery to your kitchen.
To enhance the lighting effect, you can do back wall the shelves are mirrored, and the light from the backlight will complement the atmosphere of the kitchen and enhance the effect of comfort and warmth in it. At the same time, you can make such a shelf with your own hands.
When decorating your kitchen with additional lighting, you should not overdo it. Before installing additional lighting, it is worth calculating everything accurately. Everything should be harmoniously arranged, and most importantly, functional. The backlight should be where it is needed, and at the same time not dazzle the eyes.


