Decorative painting of walls has recently gained great popularity among all types of decoration. The fact is that thanks to this type of decor, you can make the walls in your house exclusive and attractive, since you do not need to copy standard types of painting. Today, decorative wall decoration has become a big competitor to conventional painting and wallpaper, as it makes walls unique.
Advantages of decorative wall painting
Wall decoration has only one coating requirement work surface- it should be smooth. In addition, there are a large number of advantages of this type of wall decoration.
Dyes for wall decoration have the following advantages:

Types of decorative paints
First you need to realize that decorating paint is significantly different from ordinary paint. By using this paint, you can achieve unique visual effects. But the craftsmen know how to decorate with ordinary cheap materials and can achieve an exclusive look.
Today we can distinguish the following main options: decorative paints:

In addition to the above options, there are a huge number of decorative paints with different textured inclusions, for example, glaze, enamels, etc. If your budget is very limited, then any of the proposed options will be suitable for decorating walls.
Required Tools
Decorating a living space with your own hands does not require special skills to carry out such work. But in any case, you first need to read the instructions and tips for decorative painting of walls in order to find out how to work and what tools you need to prepare.
For such work, in addition to the decorative paints themselves, you will need the following tools:
- roller;
- several types of spatulas (metal, rubber, serrated);
- sponges;
- hard brushes;
- sandpaper;
- stencil.
Before starting work, you need to decide on the expected effect. Various decorative ideas are made special tools, therefore, in order not to buy unnecessary equipment, you need to know what kind of drawing you should get in the end. On the other hand, the price of rollers and brushes is low, especially since they can be used many times.
Preparing walls for decoration
In the case of finishing walls using decorative paints, for the first time it is necessary to properly treat the working area before painting. With this treatment, your work will be justified, as it will last reliably for many years.
Such preparation should take place in stages:
- First you need to clean the old coating.
- Prime the walls.
- If necessary, repair any damage to the work surface.
- Large uneven areas must be filled with putty.
- Then you need to reapply the primer ball.
After completing all the above steps, the surface is ready for the main work. It should be noted: in order for it to stay on the wall for a long time and reliably, you need to let the plaster and primer dry completely, and then start decorating the working surface.
Types of surface decoration
Due to the fact that natural, environmentally friendly paint costs a lot of money in the store, professional craftsmen and designers have learned to use several types of wall treatments using regular paint, which also give a good effect. Today there are several ways to make a universal drawing using ordinary cheap means.
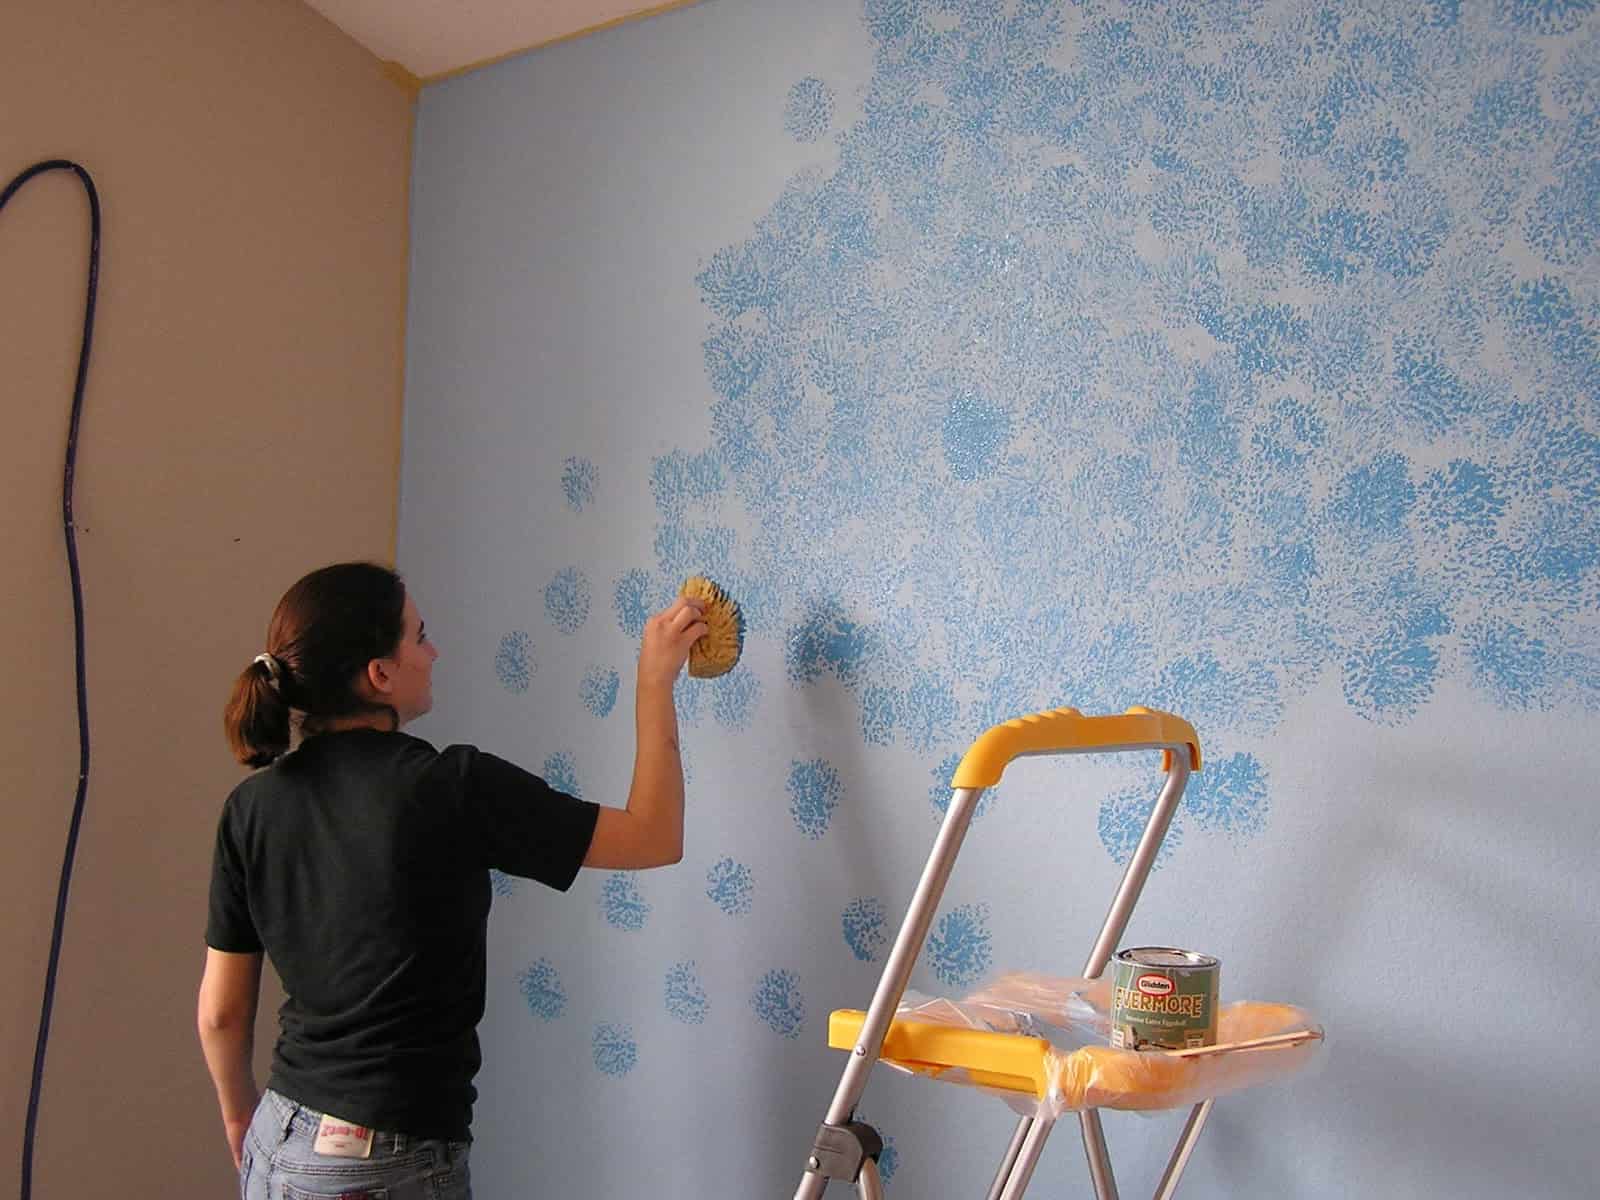
Using stippling
This type of wall painting is characterized by the appearance of an old and shabby surface. This kind of decor is very often used in themed catering establishments.
To create this effect you need:

This method has one big disadvantage - all irregularities are very clearly visible in a lit room.
Skin effect
This effect is often used in private offices. But it can also be used in residential areas. Before decorating, the surface must also be treated according to the above scheme.
To create the illusion of skin:

Venetian plaster effect
This type of decor is rightfully considered one of the most beautiful today. This color can be used both in offices and residential buildings and corridors. She will look appropriate everywhere.
To recreate the effect Venetian plaster using regular paint you need:

At the finish you need to wipe the dry working area sandpaper, and then cover the paint with a special wax mixture.
Wrinkled skin illusion
This effect can also be used in many types of premises, but it is more suitable for cafes, restaurants, etc. Creating such a coating does not require special skills or effort. The only difficulty is that the process itself is very long and requires a lot of patience.
For a wrinkled skin effect:
- Take a small piece of paper; you need to smear a piece of the wall according to its size.
- A sheet of paper needs to be crumpled and applied to the work surface.
- Smooth the sheet over the wall, thereby creating a wrinkled effect.
This way you need to treat the entire wall.
Using a cloth roller
In order to create decorative surface, you can use not only tools that you can buy in the store, but also improvised equipment. Even a homemade rag roller will do, with which you can make very beautiful effect. This type of decor is very popular, especially in children's rooms. The advantage of this type of finishing is that you don’t have to spend too long on the initial treatment of the walls, since this style of painting hides all the imperfections and damage.
To do this you need:
- First apply the first coat of paint, then wait for it to dry completely.
- Then we add another shade of the main color already used, but a little darker.
- The rag needs to be smeared with the resulting paint, twisted and wound onto a roller.
- You need to paint over the entire plane of the working surface in different directions to obtain a characteristic pattern.
Wall decor can be made in a variety of ways using special dyes. There are many color tones and shades. But different decorative paints have their own properties. Depending on the properties of each paint, they are mainly distinguished:

Many people are interested in the question of how to renovate a room with their own hands without the help of professionals, but not everyone knows how to work correctly.
- It is necessary to prime the surface well before work.
- It is imperative to cover the floors with a protective film.
- First smear the working area horizontally, and then vertically.
These tips will help you avoid repair failures and eliminate the need to redo the job. Using advanced techniques for painting walls, you can truly achieve unique design premises, as well as realize all creative fantasies.
When choosing a method of finishing walls, preference is increasingly given to painting. We wrote about the pros and cons of this method in the article. Walls painted in the traditional way will be a suitable backdrop for both modern minimalism and vintage decor. However, when working with paint, you can get really creative by combining colors and shades. Some ways of combining paint will bring crazy pop art energy into the interior, while others will help create a harmonious background for a luxurious classic interior.
It is generally accepted that painted walls, unlike those covered with wallpaper, look dull and uninteresting. It's a delusion! Firstly, the paint can be tinted in absolutely any color. There is no such freedom with wallpaper: what the designers created is what you have to use. Secondly, the paint can be combined to achieve amazing effects. With wallpaper it is not always possible to achieve such interesting results.
Combining paint colors is not so easy. You will have to work very carefully. It is necessary to purchase a good masking tape that will not only protect the surface from paint, but will also be easily removed from it without pulling the finish layer with it. In addition, painting in two colors will require precision calculations, measurements and markings. You will also need patience, because some dyeing methods may take several days (step-by-step dyeing).
How to paint walls in two, three or four colors? There are several popular combination paint designs. When choosing, you need to take into account the style of the future interior, the features of the room layout, and, of course, personal preferences. So, let's look at the basic techniques for painting walls in several colors. But first, about some important nuances.
There are three possible combinations:
- close or related colors: for example, two neutrals (black and white, gray and beige) or two pastel cold ones (blue and)
- “gradient”: tones of the same color of different saturation
- different colors: for example blue and red, green and orange
Having chosen the last color plan, try to choose shades that are similar in saturation, temperature and “sound”. If, for example, you take not orange, but, then instead of grass green it is better to use olive.
2. Designing a border between different colors
The border between two colors is not always perfectly neat and even. But this is not a problem: the joint can be formed polyurethane molding, paper border, wooden slats, a plastic strip or, for example, a border made of stone, mosaic and pebbles - they just need to be glued to the joint line using liquid nails or other reliable glue.
3. Tinting with reserve
If you select shades not from a catalog, but guided by your own imagination, order paint tinting with a large margin. If the paint runs out and you have to tint a new portion, a complete match may not be achieved. It is especially important to create a reserve of paint if you are tinting it yourself.
Combined painting of walls in two colors: 10 design options
1. Dividing walls horizontally
The part of the wall from the floor is painted with paint of one color, and above - another. The boundary is usually drawn at about a third of the height from the floor. However, division can be done in another way. For example, exactly in half or with a predominance of the lower part. Sometimes the border runs almost under the ceiling.


Painting walls in two colors: traditional design
Dividing the wall below the midline is the traditional approach. This painting of walls in two colors is suitable for interiors in the most different styles: classic, art deco, retro, country. When creating elegant modern interiors This wall design is also justified. Painting with horizontal division creates an imitation of panels - the same ones that are mounted along the bottom of the wall. The border between two colors should be decorated with molding or decorative border.

Other options for dividing walls horizontally with offset color boundaries are usually used in children's rooms and in creative modern interiors.

How to paint? Here's one way. First you need to paint the entire wall a lighter shade. After the paint has dried, measure and draw a border line. Above or below the border, stick masking tape exactly along the drawn line. The tape is glued to the part that will no longer be painted. Next, paint the wall below or above the tape in a second color. In the first hour after painting, carefully remove the tape.
2. Color inserts
This is another way of coloring with. First, the wall is painted with paint of one color. After drying, future “panels” are marked. Masking tape is glued along these lines. Inside, the resulting squares or rectangles are painted with a second color - usually darker, but the most possible different solutions. The tape is removed before the paint dries. Painted “panels”, as a rule, are framed with moldings, strips, and borders.

This wall decoration is ideal for classic, baroque and glamorous interiors. Wall decor is usually placed inside the “panels”: for example, clocks and.
3. Accent wall
This is a fashionable solution that allows you to make a bold statement in the interior without the risk of oversaturating it. Three walls in the room are painted in one color, usually neutral or quite light. The fourth is painted with a different color - it can be very discreet or very bright, depending on the desired effect.


Only part of the wall can be painted - for example, in the form of a wide vertical stripe. More about creation accent wall read in.
4. "Gradient"
This is a method of combined painting similar to the previous one, in which the entire surface of the wall has one color, different from the color of the other walls. But in this case, paint is used not of different colors, but of tones of the same color of different saturation. A sort of gradient is created. You can use 4 tones - a separate shade for each of the walls of the room.

5. Continuous horizontal stripe
It's simple but very effective way add variety to wall design. First you need to paint them in one of the colors. After drying, mark two lines - the upper and lower boundaries of the future wide strip. Apply masking tape along these lines (outside the future strip). Now you need to apply the second color of paint inside the markings. Without waiting for it to dry, remove the tape.

This combination of painting walls in two colors is good for - a horizontal stripe visually reduces its height, making the room seem a little wider and more spacious. Wall decor is placed inside the strip - for example, small paintings or photo frames. In a children's room, the stripe can be decorated with stenciled designs.

6. Stripes on the walls
Using paint of two or three tones, you can turn a plain wall into a striped one. It is worth saying that this work is very painstaking, but the result is worth it.

Using two methods at once: dividing horizontally and painting with stripes
It’s easier to apply wide stripes: less fuss with tape, and not so many blots. In addition, wide stripes look softer and more unobtrusive.

Read more about the nuances associated with incorporating stripes into room design in our article “”. We wrote about how to make a wall striped in our other article: “”.
Combined striped paint can be used not for all walls, but to create accent pieces. The strip can be either vertical or horizontal.

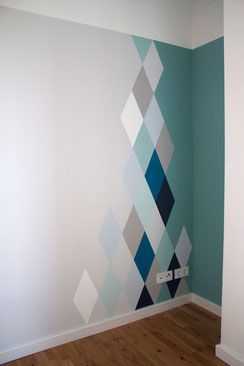
7. Diamonds on the wall
This is a vintage solution, ideal for decorating a nursery, bedroom or.

No less fuss, and probably even more, than with stripes. But the result is no less interesting, and most importantly - unusual: a wall painted in this way resembles an “old school” knitted vest. Thanks to this, the interior acquires a special warmth and naive charm.


Painting walls with diamonds will force some tinkering. First you need to paint the wall in the lighter of the selected colors. Then, when the paint has dried, mark out future diamonds. Decide what their alternation will be. Note which diamonds will be darker and which will remain light. Along the border of the diamonds that need to be painted in more dark color, stick masking tape (outside of the marking line). Paint the surfaces inside the markings and remove the tape. After the paint has completely dried, you can draw solid or dotted lines intersecting the sides of the diamonds. This will increase the similarity with the famous knitting pattern.
8. Niches, ledges, openings
Combined painting is designed to emphasize the geometry of such structures and place emphasis on them. Any recesses, openings, as well as parts of the walls behind racks and shelves can be painted in a color different from the main color of the walls.


9. Complex shapes
Combined painting of walls allows you to introduce any, even the most bizarre, shapes into the interior. For example, the border of two colors can be arched, wavy, zigzag, etc. The second color can be superimposed on top of the first in large circles, ovals, triangles, etc.


Color lines can follow the shapes of furniture, decor and other interior details. This is an excellent solution for modern interiors and for rooms in a bright pop art style.

They usually paint without using tape. They simply mark the joint line, paint it a little with a roller, then carefully work with a brush, creating a clear, even border between the two colors.
10. Polka Dot Walls
This idea is usually embodied in. Although polka dots are also appropriate in living rooms, bedrooms, and kitchens, if we are talking about styles such as country and retro. Painting walls with polka dots is easy: first you need to paint the walls with a lighter paint, then using a stencil, using a brush or sponge, apply another color or several other colors in the form of randomly or systematically located circles.


Wall decoration is one of the most important stages renovations in the apartment, because they are the ones that immediately catch your eye. I want the home to have an atmosphere of comfort and beauty, and at the same time, so that the repair costs do not exceed the budget. One of the most simple solutions finishing - painting the walls. Anyone can do the work themselves, but still, it’s worth knowing a few rules of technology. We will look at how to paint walls correctly in this article.
The paint can be used for decorative finishing and for surface protection. They differ in their composition:
- Emulsion
- Alkyd
- Adhesive
- Silicate
- Polyurethane
Emulsion paints some of the best. They are distinguished by high characteristics: their consumption is minimized, they are harmless and odorless, and dry quickly. But they can only be used in heated rooms. There are several types:
Acrylic. They are pricey, but they are worth every penny spent. Acrylic paints durable, not afraid of light. However, they are not used in rooms with high humidity, despite the fact that they repel water, they are still afraid of it. 
Latex. The most expensive. Due to the latex content, the paint dries very quickly. It can be applied to wallpaper or bare walls. Masks minor surface imperfections. But this type is less resistant to light.
Water-based. Dries almost instantly. Very durable, mask small cracks and have a huge variety of choices. They are not afraid of water, but if washed too often, the coating may lose its appearance.
Water-dispersed. The main advantage is moisture resistance. Can be used for coating in damp areas. Most often they are produced in white, which means they will have to be diluted with color. They are afraid of cold rooms. 
Silicone. Due to the silicone content, this type of paint is the most elastic. They can be applied to cracks, to any coating, even with old finishes. The downside is that it takes a long time to dry.
Alkyd paints There are two types: oil and enamel. The paint will emit an odor for some time after application. They cannot be washed and they support combustion. They are rarely used indoors living rooms because of harmfulness.
Oily alkyd paints
They emit a toxic substance during operation, but are very cheap. They take a very long time to dry. Enamel ones dry much faster and will not fade during use. 
Adhesive paints afraid of water. They are more suitable for ceilings than for walls, because they are not recommended to be washed frequently and can fade in the sun. But they are much cheaper than many other types.
Silicate paints They will last for many years, but they contain alkali, which increases the risk of damage during operation. Not suitable for all types of surfaces and do not come into contact with other types of paints.
Polyurethane paints rarely used due to their cost. But they are worth the money. Not afraid of light, temperature changes and chemicals. They will last a very long time. They are most often used to paint a bathtub or kitchen, as this coating can withstand all conditions. 
In addition to composition, paints are also distinguished by texture. There are relief ones - the surface will not be smooth, but with roughness. Decorative ones create imitation natural materials. Matte paints are difficult to clean, so they are used in living rooms or bedrooms. The glossy surface is suitable for finishing the bathroom and kitchen, as it is easy to clean.
What paint to paint the walls
The paint must have the following characteristics:
- Safety
- Durability
- Easy to care for
- Wear resistance
What paint is best to paint walls? Safety is the first criterion when choosing paint. A wide selection of compositions allows you not to fix your gaze on only one specific type. Don't be afraid to ask for quality certificates. Always check the composition, it should not contain toxic substances above permissible norm. Some substances can be harmful not only during operation, but even after drying. Don't skimp on yourself and buy quality products. 
According to its characteristics, the paint must have high characteristics so that its service life is not short. One of the most important conditions— resistance to mechanical damage. Of course, no species can withstand a strong blow, but it should not endure much damage. Otherwise it will start to crumble. Paint should not be afraid of light. Then it will not fade or fade and will serve you for many years.
Choose waterproof paints. At first glance, this condition seems decisive only when painting walls in damp rooms. But if the paint does not like water, then it is not recommended to wash it. And to do only dry cleaning is just to drive away dust. You will have to clean such a surface carefully, and if stains appear, you are unlikely to remove them. In addition, moisture-resistant types have higher characteristics, so it is better to buy them.
If you are wondering how to paint the walls in a room with your own hands, then another selection criterion is drying time. The paint is applied in several layers; if it dries for a long time, the repair may take longer. Therefore, purchase paints that dry quickly enough.
 woman paint on wall
 The more expensive the paint, the better it is. But not everyone is ready to spend money. In fact, by purchasing cheap paints, you may not save money, the point here is in expense. Manufacturers indicate how much paint is required. Poor quality and cheap quickly absorbs into the walls, and sometimes you even need to apply it in three or four layers before it acquires the right type. Therefore, pay attention to the manufacturers' instructions on material consumption.
Required Tools
Painting does not require a huge range of tools. All you need is a paint tray, a brush and a roller. The brush is used to penetrate hard to reach places, so take one wide and one narrow.  A short-nap roller is used when painting smooth walls. Medium-length pile is suitable for textured and rough, matte coatings. If you have textured walls- it’s a long pile.
Preparing the wall surface
How to paint the walls in an apartment correctly? Before you start working directly, you should carefully prepare the walls. The accuracy and beauty of the paint application will depend on how carefully you treat the walls. The preparation process consists of several stages:
- Preparing the room
- Surface cleaning
- Removing cracks and irregularities
- Primer
Working with paint is dirty; if you accidentally swing a brush or roller, the stains can spread throughout the room. Therefore, block off the entire space with film. Turn off the electricity, just in case you accidentally touch an outlet, you will be safe. The joints between the floor and walls can be sealed with masking tape. Do the same with the sockets. 
The surface of the walls must be thoroughly washed. Remove any existing stains, mildew or mold. You can use vinegar or ammonia. Also get rid of the old coating, if any. If you bought paint that can be applied to other types of finishes, make sure that old layer It holds well, does not fall off anywhere, does not peel. Otherwise, you need to get rid of these shortcomings. old paint can be removed from the walls special composition, which is sold at a hardware store. If you previously had wallpaper, remove it with a spatula and warm soapy water.

Primer required type work, you can’t skip it. It will protect your walls from the formation of fungus and mold. It will make the surface smoother, so your paint will not be absorbed into the base coating, and this will significantly save consumption. It is best to apply two layers. If your base coat is made of concrete, you can apply all three layers. Concrete is very absorbent, so let it absorb the primer rather than the paint. After priming, get rid of large cracks and holes. 
DIY wall painting
If you have White paint and color, then first you need to dilute them. Try diluting in a small container to the desired color. Remember the proportions and transfer them to the bucket.
How to paint walls yourself:
One surface should be painted at once. Under no circumstances leave a wall painted only halfway for a long time; this will lead to the border at the junction being visible to the naked eye. 
Using a roller, paint the entire surface from top to bottom. You cannot work from below, as smudges will subsequently form, which you will not be able to get rid of later.
After covering the surface, use a brush to paint hard-to-reach places and corners. After applying the first layer, you need to wait until it dries completely. The drying time is indicated on the packaging, but it’s better to check with your hand somewhere in the corner to see if the surface is sticky. Then proceed to the next layer. During the drying process, make sure that temperature regime, which is indicated in the instructions. It is better to avoid direct exposure to light during the drying period.
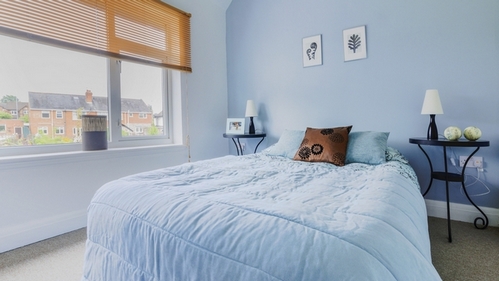
The desire to decorate every corner of your home with comfort is natural, and therefore the stylistic direction should be chosen carefully and consistently. in the living room - a laconic solution for a variety of interior solutions, the main thing is to decide on color, texture and bright accents. Further in the article we will look at the features of painting walls in the living room.
Painting the walls in the living room: the color of the mood
From choice color composition In the living room, both the direction of the interior and the comfort of the guests depend. Therefore, before deciding on the stylistic and color scheme, it is worth paying attention to the types of paints, texture, functional features and performance qualities.
Types of paints
Painting compositions for treating indoor surfaces are divided into two types:
- emulsion.
 Alkyd paints have chemical composition based on artificial alkyd resins. Previously, they were used for internal and external work. However, today the usual oil or enamel paints with a persistent chemical odor are being replaced by practical and safe emulsion compositions.
In turn, emulsions are distinguished by composition into:
- latex;
- water-based;
- acrylic;
- silicone;
- silicate.
The best solution for the hallway, due to its abrasion resistance, is acrylic and latex compositions. Surfaces treated with such paints last 7-10 years.
What color to paint the living room
Regardless of the chosen stylistic solution, color decides a lot: with blue tint creates comfort and freshness, green has a calming effect, yellow gives warmth home comfort, and white awakens creativity.
New designs 2018
 Fashionable designs for the hallway 2018 are a combination home comfort and light playfulness, coquetry and flirtation. So, designers suggest saturating the room with flirty shades of rose quartz and pearl color. Light shades will visually play with the space, and a calm pearl shine will give the room a touch of pathos.
You can also surprise your guests with a “Hazelnut” style combination. This is a deep café au lait shade, with a rich but not loud brownish color. Pairs with dark wood, white ottomans or ultra-black chests of drawers. If you want to dilute the pretentiousness with playful notes, you can use bright contrasting interior elements, decorated in milky blue shades or orange tones.
For extraordinary individuals with creative views, a color combination in the living room in the “Flame” style is suitable. This is a colorful, but not flashy combination of orange, sand and fiery shades. It is also worth paying attention to the peach shades of “Peach Echo”.
Ideas for small living rooms: how to visually make the room larger
 Most hallways and living rooms in apartments are narrow and compact rooms, which when choosing stylistic direction require professionalism. So, the rule for small rooms is the minimum amount functional furniture and a correctly selected color scheme, which visually expands the space of the room.
You can visually make a small room larger by applying the following rules:
- choose shades of beige, soft blue or light green, sand or pearlescent;
- when painting, it is worth dividing the wall into separate zones, highlighting them decorative baguettes or stucco without patterns, which will be several shades lighter than the main color;
- do not use large chandeliers, lamps, The best decision– multiple spotlights with uniform light distribution;
- from furniture, choose wardrobes with mirrors without patterns;
- separate the ceiling area from the walls with medium-width baguettes;
- do not choose floor-length furniture, it is better to find a pouf, couch or a wardrobe with high legs;
- do not use more than three color combinations;
- natural, natural shades look better than heavy and bright tones.
What color to paint the living room: a selection of the best designs
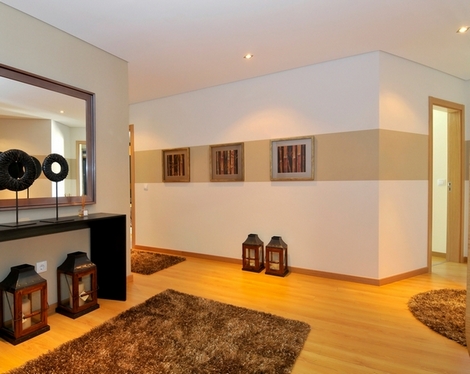
 Following the hallway, as a rule, comes the hall, which is important to maintain in one stylistic solution and a suitable color scheme. If the rooms are different in color, strongly contrasting with each other, this will cause some dissonance. Therefore, the main rule for choosing colors in the hall is the combination and continuation of the interior specified in the hallway and living room.
- pearl shades;
- delicate pearls;
- pink or peach sunset;
- cold coffee;
- blue-lilac shade;
- cool shades of green.
Depending on the color, you can complement the selected shade with gold and silver accents, delimiting the space into functional zones.
Crossing the threshold of home, every person wants to feel the protection and comfort of home. Therefore, to choose color range The room should be approached responsibly, taking into account the characteristics of each family member.
Useful video
Paint the walls - great idea when you want to refresh your interior, but not everyone wants to live among plain walls. We offer original solutions decorate walls that are akin to designer interiors. In order for the walls to be painted on top level, it is not at all necessary to turn to professionals and pay a lot of money for their work. Here are a few ideas that you can follow to radically change the design of your room.
Original ideas for painting walls
1. Different colors of geometric pattern
With help masking tape and different shades of paint you can play with the geometry of the room.
2. Incredible wall texture with a simple sponge
With this trick, even an inexperienced painter can achieve excellent results.

3. Imitation of brickwork using a rectangular sponge
Agree, it’s not difficult, but it looks great

4. Almost real wood in your room
This tree can be drawn using stencils

5. Light airy composition
Feathers on the wall make the interior of the room look lighter and no additional wall decorations are required. Such feathers are also applied to the wall using stencils.

6. Mountain peaks using Ombre technique
Ombre is a smooth transition from a rich shade to a lighter one. This technique can be successfully used in painting walls. This look is worth working for, but with great desire and patience you can get a great result.

Another example of mountain slopes using the ombre technique. A sheet of newspaper is used as a stencil.

7. Ombre technique
If you want to achieve an ombre effect without an additional pattern. Each shade of paint is applied separately, then the transition between colors is shaded.
8. A color transition on one wall using a geometric pattern will allow you to zone the space in an original and beautiful way
An excellent option for designing a color transition border between two different walls.
9. Decorative honeycombs of different shades will make the interior modern and original.

10. It is better to place a complex geometric motif on only one wall. This pattern is easy to make with masking tape and a roller.
11. Two in one: ombre technique and geometry. This method of painting imitates a wall panel and will become a bright accent in the interior.

12. Just let the paint dry
In this case, you will not need any brushes, stencils, or rollers. For smooth flowing lines, use a syringe, adjusting the width of the stripes only by the size of the syringe opening.
We recommend reading
 What is "desu"? And how to understand an anime fan? See what “desu” is in other dictionaries How desu is translated
 How many glasses of water should you drink a day - useful and dangerous doses
 Interpretation of dreams according to the best online dream books
 Meeting of the Coordination Council in the Education Department of the Kolomna Urban District