Removing old paintwork- the process is long and tedious, but necessary. Thick layers of paint on frames and jambs eventually cause windows and doors to stop closing properly. If you paint walls, floors, ceilings directly on top of old paint, you can never be sure that decorative coating will last long enough. Old paint tends to peel off, which means it ruins the entire repair. Therefore delete old paint need to!
There are two main ways to do this:
- chemical- using special compounds;
- thermal- using heated air.
Regardless of which paint removal method you choose, remember to follow safety precautions. When working with toxic materials and paints, you need to wear gloves and a respirator.
Removing paint using removers and destroyers
To remove fresh paint, a solvent corresponding to the type of paint is most often used - acetone, white spirit, solvent, etc. But in order to cope with old and completely dried paint, they are not enough, in this case complex solvents - paint removers and paint destroyers are useful .
Removers- these are special chemical compositions, designed for removing old paint and varnish coatings, hardened putties, sealants and other materials. The remover is absorbed into the paint and destroys it - the paint swells and softens, after which it can be quite easily removed using a spatula, a stiff brush, a chisel or a wooden scraper.
You need to choose a remover for old paint according to the type of paint you want to remove and the base material on which the paint was applied. Recommendations for use are indicated on the packaging - read them carefully! Removers contain aggressive chemicals - acids and organic solvents, which interact with paint, but do not destroy wood, metal or other materials. The washes are toxic, so try not to lean over the surface being treated; the room must be regularly ventilated during work. Most destroyers do not wash off with water. When opening a jar, remember the main rule of a chemist - keep it with the neck away from you, so as not to accidentally inhale the accumulated vapors.
You can apply the remover or destroyer with a regular brush with natural bristles. It is advisable that the brush does not have plastic parts. When working with destroying compounds, you should not use plastic spatulas or other tools at all. Many washes have a thick gel-like consistency, which allows them to be applied in a fairly thick layer even on vertical surfaces. Once the remover is applied, allow enough time for it to react, but do not allow it to dry completely or you will have to start the whole job over again. If it is not possible to remove the coating completely at one time, the procedure should be repeated. Minor paint residues can be sanded off.
Remember that you need to work with the remover very carefully. If the composition gets on other items, it may damage them. Plastic or painted surfaces must be protected from accidental contact with remover and paint residues. Don't forget to cover the floor too.
If you have some wash left over, it can be useful for cleaning and preserving your brushes.
Removing paint using a hair dryer
The second way to get rid of old paint is to treat the surfaces with a stream of hot air using construction hair dryer (heat gun). A construction hair dryer is designed in the same way as a regular hair dryer. Inside its body there is an incandescent coil and a fan. A construction hair dryer is inexpensive, and in addition to dealing with old paint, it can be used for drying, for local heating, and even for welding plastic (the kit often includes a set of special attachments). Temperature and air supply speed are adjustable. So, in many cases, buying a hair dryer can be a much more profitable purchase than using removers. Especially if you are renovating an old house or an apartment.
Direct a stream of hot air onto the paint. When it begins to swell, peel and soften to the consistency of plasticine, remove it with a spatula or chisel. You will have to work directly in a stream of hot air, otherwise the paint quickly cools down and loses its plastic properties.
Hot air treatment works well For wooden surfaces . The main thing is not to overdo it, so as not to char the wood. You should work with plastic surfaces with extreme caution, as the plastic can be overheated and irreparably damaged. The tool should also not have plastic parts (use metal spatulas with wooden handle). A hair dryer is also not suitable for removing paint from metal, since metal has high thermal conductivity and removes heat from the paint, preventing it from heating to the required temperature.
You should use a hair dryer with extreme caution near wires, furniture, glass, wallpaper and other flammable materials. You can protect surrounding objects from heat using a sheet of plywood or thick cardboard. It is recommended to remove the glass from the windows, as they are very sensitive to temperature changes and can easily crack. Also take into account that hot air rises up, do not lean over the work area, keep your head at the level of the hair dryer or lower. If the hair dryer nozzle gets very hot, use a stand and do not leave the hair dryer on unattended.
When heated, toxic fumes evaporate from the paint, so ventilate the room from time to time. If you are removing paint from furniture or, for example, from doors that can be removed from their hinges, then it is better to do it outside.
After the old paint has been cleaned off, the surface can be puttied, dried, and treated.
Despite the fact that a hair dryer has only one function (air heating), it can safely be called universal. This device allows you to perform wide range tasks: drying surfaces, removing old paint and varnish, tinning, cutting linoleum or roofing felt, bending plastic pipes, gluing parts, soldering with soft solder, etc. Each type of work requires the fulfillment of certain conditions, such as temperature regime, use of an appropriate nozzle, etc. We will tell you about the features of working with a hair dryer in this article.
Types of nozzles
As a rule, a hairdryer comes with various attachments, each of which is used for a specific type of work. The most common ones are:
— welded, used for working with welding cables;
— welded mirror, intended for welding plastic parts;

- flat nozzle for removing old putty, paint, film, veneer and wallpaper;

— a reflex nozzle for heating plastic pipes before they are deformed;

— glass protective nozzle, for removing varnish and paint from glass, windows and other similar surfaces;

— wide-spray nozzle for drying and removing old paint from large surfaces;

— round, for welding plastic sheets, spot heating

— slotted (crevice) nozzle, for sleeve welding PVC materials

- focusing, for concentrating the air flow in a specific place. Using this attachment you can, for example, defrost frozen pipes.

Features of operation
Like all power tools, they can cause injury if used incorrectly. Therefore, during work it is very important to follow safety precautions: use a hair dryer only in a well-ventilated area; must be removed from work area flammable items; While working, you cannot keep your head at the level of the hair dryer. You should also pay attention to some nuances:
If you purchased new hair dryer, it is advisable that before starting work it should run “idle” at low speeds for 10-15 minutes.
Make sure that the air intake grilles are always open. Failure to comply with this rule may result in premature failure of the tool.
While working with a hairdryer, you need to take breaks. Household models you need to let it “rest” after every 15 minutes of use; for professional hair dryers, the time of continuous operation may be longer.
Select the temperature and blowing speed depending on the work being performed.
When turning the hair dryer on/off, it is advisable to let it run “idle” at minimum speed for 2-3 minutes. This way the spiral will heat up/cool down gradually, thereby extending the working life of the tool.
Removing paint
The easiest way is to remove old paint from wood; the situation is somewhat more difficult with metal products, but remove with a hairdryer upper layer plastic part and it won’t work out at all (under the influence high temperature it is simply deformed).
It is advisable to set the air flow speed to maximum
Heat the surface in small areas (the distance between them should be approximately 2-5 cm)
When exposed to high temperatures, the paint gradually deforms: first it swells a little, then becomes covered with bubbles and then peels off. When the coating begins to separate, you need to carefully remove it with a scraper, while continuing to heat the surface of the adjacent area. In this way you can easily and quickly remove old paint from walls, windows, floors and other flat, smooth surfaces. If you have to work with profiled areas or narrow edges, use a wire brush instead of a scraper.

Singing wood
By means of singeing, you can give light wood a beautiful dark color. To get this effect you can use blowtorch, But best result you will achieve it with a hairdryer.
Best suited for scorching conifers trees - pine, spruce, fir, etc.
Before exposure to heat, the wood must be carefully processed: first cleaned with a brass brush (in the direction of the grain), then sanded with fine-grained sandpaper. Before starting work, all dust should be removed.
A wide nozzle is suitable for scorching; it will provide more uniform heating.
Work is carried out at a maximum temperature of 500-600 degrees, at high speed air flow.
The distance between the hair dryer nozzle and the surface of the product should be at least 1 cm - the larger it is, the more evenly the surface is scorched. If approached too closely, burns may occur.
A beautiful effect can also be achieved by drying surfaces painted with stain with a hairdryer. The fact is that hot air enhances the color. This technique is called thermal dyeing.

Seam welding
A hair dryer can also be used to connect various elements, including floor coverings. To do this, you will need to install a welding attachment on the hair dryer. The work is carried out as follows: using a special cutter, a groove is formed; The filler rod, melted at a temperature of 300 degrees (which, by the way, must be suitable in terms of the material of manufacture for the coating being joined) is placed in the groove. Next, using a special knife (in the shape of a crescent), you should remove the excess rod.
Plastic pipe bending
Bending is performed at a temperature of 250-400 degrees (depending on the material from which the pipe is made), using a reflex nozzle. The air flow speed should be reduced. To prevent the pipe from bursting when exposed to temperature, you can insert a bending spring into it, or simply pour sand. Avoid heating the pipe too much - the plastic can be severely deformed beyond repair. The pipe should be kept in a bent position until it has cooled completely.
Soldering plastic pipes
If you have a construction hair dryer, soldering plastic with your own hands will not be difficult. To do this you will need a reflector attachment. Solder plastic pipes should be at a temperature of 250-350 degrees, with minimal air flow. This is done as follows: the switched-on hair dryer is placed on the table and, as soon as the reflector heats up to the desired temperature, the ends of the pipes to be welded are lightly pressed against it. Once the plastic becomes noticeably softer, the pipes are quickly connected and held for 30 seconds.

Connecting films
Using a hairdryer, you can very quickly and efficiently join films (provided that they are made of the same material). This is done as follows: the films are folded together, with an overlap of approximately 2.5 cm. Next, installing a crevice nozzle on the hair dryer and turning on the temperature mode from 250 to 400 degrees (depending on the film material), the overlap area is treated with hot air for several seconds . As soon as the material becomes soft, the joint is rolled with a roller.
Tinning with a hairdryer
Tinning is the process of covering the surface of a product with a layer of molten solder (usually an alloy of tin and lead). It allows you to eliminate minor surface damage (small scratches, dents, etc.). The procedure is as follows: first, the surface is cleaned of dirt and paintwork, and sanded; then etched hydrochloric acid; then the surface is heated and solder is evenly applied to it (here it is important to prevent the solder from melting too much, otherwise it will take on a liquid-like form and begin to flow down). This results in a rather rough surface; in order to level it, you need to reheat the solder and level it with a special spatula.
Old paint does not make it possible to qualitatively update the interior. It cannot be re-coated except for drywall and paneling. Most often, repairs involve wallpapering, applying new paint or decorative plaster. In this case, removal of the coating is mandatory. How to remove old paint from walls? There are three main methods of removal: chemical, thermal and mechanical.
Materials and tools: solvents, rubber gloves, respirator, safety glasses, spatula.
To use this method, you need special substances - removers, which can be purchased at a hardware store. Typically, such substances have a name containing the words “removal”, “anti” and “removal”. Available in cans or aerosols. The composition contains organic or alkaline solvents. Manufacturers advertise the products as low-toxic, but it is better to carry out work using protective equipment and with open windows.
Before using the alkaline composition, the surface is treated with white spirit. In the absence of special substances, the wall just needs to be washed with water.
The remover is applied to the wall with a brush or roller and left for the time specified in the instructions. Usually the time does not exceed two hours. It is important to prevent the remover from drying out on the surface. After this, the softened paint can be easily removed with a spatula.
Instead of buying a ready-made product, you can prepare it yourself. To remove oil paint you need to take potassium carbonate and lime. Recipe: a kilogram of quicklime and 300 grams of potassium carbonate must be dissolved in five liters of water. The mixture is applied with a roller for 12 hours, then removed with a spatula.
Some craftsmen use liquid glass, which is applied with a roller to the old paint. Leave to set for two hours. Glass attracts paint and falls off along with it.
The removal speed depends on the number of layers of paint. It is possible to re-apply the remover. When removing enamel or oil paint, the operation will have to be repeated several times. And it’s not a fact that it will be possible to remove it completely. Then you'll have to use by mechanical means.
Advantages:
- ease of use;
- does not require physical effort;
- absence of noise and dust.
Flaws:
- toxicity;
- impossibility of use for allergies;
- wall after application chemicals need to be washed several times;
- high cost when using special means.
Thermal method
Materials and tools: blowtorch or hair dryer, safety glasses, gloves, spatula.
The easiest way to thermally remove paint is to use a blowtorch. Limitations of the method: risk of paint ignition, toxicity.
There is also an “old-fashioned” method - using an iron. The wall is ironed with a hot iron through a layer of foil.
A construction hair dryer is much more effective and allows you to carry out the operation much more quickly. The heating temperature of about 700 degrees allows you to remove old layers of paint quite quickly.
When exposed to high temperatures, the coating swells and peels off the walls. Then remove it with a regular or figured spatula. It is important to remove the paint immediately after heating, otherwise it will cool down and will not peel off.
Before using the method, you need to test on a small area. Some types of paint, on the contrary, adhere tightly to the wall surface when heated.
Advantages:
- using an iron does not require special knowledge or money;
- speed when using a hair dryer.
Flaws:
- temperature-induced toxicity;
- accidental melting of sockets and switches;
- damage to electrical wiring;
- risk of fire.
Mechanical method
Materials and tools: safety glasses, gloves, mechanical cleaning tools.
There are several ways:
- use of an ax and water;
- grinder with grinding wheel;
- drill with attachment;
- metal brush and spatula.
The use of an ax and water is one of the most simple ways. An ax is used to make frequent cuts into the old paint. Roughness is applied with the edge of a metal sheet under small angle to the surface.
Warm water is sprayed from a spray bottle, which penetrates into the created cracks and softens the paint. After some time, the surface is cleaned with a spatula. If the paint is not all removed, the procedure will have to be repeated.
You don’t have to use an axe, but simply soften the paint with a special solution and remove it with a spatula. It is recommended to prepare a solution of iodine and warm water(a bottle of iodine in a bucket), apply to the walls and wait for softening.
Using a hammer and chisel to clean the old coating takes a long time, but is environmentally safe. A chisel is used to pry up or specially peel off a piece of paint, then the paint is removed from the walls by tapping with a hammer. Small pieces are cleaned off with a spatula. Cleaning the wall this way is physically difficult and takes quite a long time.

Using a grinder with a special circle significantly speeds up the work. Instead of a grinder, you can use a drill with an attachment in the form of a metal brush. There are three types of nozzles:
- Chain paint remover. This is an attachment in the form of three chains, each of which has 13 links. Paint removal occurs quickly and in small areas. There is practically no dust. The plaster is not damaged. The downside is the rapid wear of the chain attachment.
- Crown nozzle. Cleaning is quick but very dusty.
- Brush. It also generates a lot of dust at high paint removal speeds.
Using a tool, the paint can be removed quickly, but the method is very noisy and a lot of dust is formed.
If the paint is already peeling off, then it is better to simply remove it with a spatula and scrape it off in difficult places with a metal brush. The method is labor-intensive and time-consuming. But it’s absolutely not dusty.
Advantages:
- application speed special tool;
- ease of operation using conventional mechanical means;
- cheapness.
Flaws:
- loud noise from the grinder and drill;
- dustiness of the room.
Criteria for choosing a method for removing old paint from walls
- Availability of special tools (grinder, drill, hair dryer, blowtorch).
- Conditions of work.
- Time to carry out work.
- Type of old paint.
- The type of surface on which the paint is applied.
- "Old age" of the coating.
- Availability of protective equipment.
If you need to carry out work in a residential area, the time required to carry it out is sharply reduced and safety requirements are increased. In this case, it is better to use a mechanical method (without special tools) or chemical method with wash.
If no one lives in the room, you can use any methods, since the level of noise, dust and toxicity is not so critical.
The absence of a tool automatically eliminates the problem of selection and the paint will have to be removed with a spatula, chisel or ax.
If you do not have a respirator and safety glasses, you should not attempt thermal, chemical or mechanical methods using a drill and grinder.

If the old paint on the walls is waterproof, then it can only be removed thermally, mechanically without the use of water, and chemically.
If the paint was applied more than two years ago, the chemical method may not work.
Acrylic paint cannot be removed chemically or thermally; only mechanical methods are suitable for it.
On wooden walls Never use a blowtorch due to the risk of fire. Application is also limited mechanical methods– the tree can be damaged. It is better to use a hair dryer or remover.
Safety regulations
- The room must be ventilated during the work and after it for 24 hours. It is better to keep the windows open.
- It is prohibited to work without protective equipment.
- Smoking is not allowed indoors.
- Chemicals should not be used if you have allergies.
- Mechanical methods using tools are not suitable for asthmatics.
- When using thermal method There must be a fire extinguisher in the room.
- You need to prepare a first aid kit, as using any tools increases the risk of injury. You should have iodine, hydrogen peroxide, a patch and a bandage on hand.
- There should be no children or animals in the room.
- It is better to wear special clothing that covers the entire body.
The choice of method for removing old paint from walls depends on the tools, willingness to invest time and money, and safety requirements. In any case, it is better to prefer the least toxic and dust-free methods.
Different paints are removed in different ways: some are easier, others sometimes baffle even experienced builders. It all depends on the type of paint and the surface on which it is applied. To avoid wasting time searching for information and various experiments, carefully study this article. In it we will look at everything possible ways, how to remove paint, we will describe their advantages and disadvantages, we will not forget about safety measures, and we will also mention the ways in which smart person should not be used at all.
Take it off or leave it on?
Painting the walls of kitchens and bathrooms was a very common interior design practice during the Soviet period. Therefore, many of us are still faced with the need to remove paint from walls, floors and ceilings, for example, before leveling them or before laying ceramic tiles. Is it worth removing it or can the floor and walls be restored over the painted surface?
It all depends on what you plan to do next. If you decide to cover the wall with plasterboard, you can leave the paint on the wall. But in most cases, you will still have to remove old paint from walls and ceilings, since the painted surface has adhesion (adhesion) to tile adhesives, cement plasters and any construction mixtures practically zero. So if you decide to apply plaster over the paintwork, the joy of the repair you have made will not last long.
How to choose a paint removal method?
Different paints are removed in different ways: some are easier, others sometimes baffle even experienced builders. It all depends on the type of paint and the surface on which it is applied. To avoid wasting time searching for information and various experiments, carefully study this article. In it we will look at all possible ways to remove paint, describe their advantages and disadvantages, do not forget about safety measures, and also mention methods that a smart person should not use at all.
How to choose the best method for removing paint?

Four factors influence the choice of one method or another:
- surface on which it is applied paintwork, and what you plan to do next with it;
- type of paint, number of layers and strength of its adhesion to the surface;
- tool available;
- the budget you have.
The paint itself comes in several types: water-based, acrylic and oil-based. Oil paint is the most difficult to remove from concrete surfaces. Therefore, we will take a closer look below at how to remove old oil paint.
Of course, you may not know what kind of paint is on the walls of your home. In this case, you will still have to experiment a little with removal methods on small area walls. Try the least labor-intensive gentle methods first.
The paint can be applied to metal, wood, drywall or concrete. Oil paint is the most difficult to remove from bare, unplastered concrete ceilings.
What might you need?
Depending on the chosen removal method, you may need the following tools and materials:
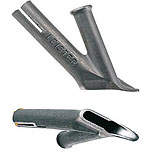
- spatula, iron scraper or wide chisel;
- chemical paint remover, brush or roller;
- ax for notching;
- construction hair dryer;
- electric drill with a special attachment;
- grinder with a wide nozzle;
- water;
- respirator, goggles, gloves, other personal protective equipment.
Description of removal methods. How to remove oil paint?
It is especially difficult to remove oil paint from walls and ceilings if they have not been previously plastered. In general, there are not many ways to remove oil paint. Unfortunately, science has not yet been able to come up with something new, completely harmless, fast and not requiring much effort. Therefore, let's consider everything possible options with their pros and cons.
In general, everything existing methods Paint removal can be divided into three groups:
- chemical;
- thermal;
- mechanical.
Chemical method
The essence of the method: prepare chemical solution to remove paint according to the instructions, apply it to the surface with a brush (movements are best done in one direction) or paint roller, give time for the paint to soften and remove with a spatula, metal scraper or use a wire brush to apply the paint along with the remover. This method is the fastest, but the smell can linger for a long time. Also note: if the paint was applied in several layers, using a remover does not guarantee perfect removal immediately. It may require application in two or three stages.
Removing paint using chemicals is a method that has many disadvantages. Firstly, it is highly toxic and has a sharp specific persistent odor, secondly, it can cause a burn if it comes into contact with the skin, thirdly, it requires special disposal (in no case into the sewer), and fourthly, it is not cheap.
If you do decide to use chemicals, be sure to follow safety rules. Work with reagents only in well-ventilated areas using personal protective equipment (respirator, goggles, gloves); pregnant women and children should not be in the room. It is necessary to completely protect all parts of the body from chemicals, because... This mixture of acids and solvents is very aggressive and contact with it will lead to disastrous consequences.
You can also try the following methods. To remove paint from plank floors, thoroughly wet the boards with water and cover them with a thick layer of soda ash. Cover the whole thing with damp burlap and leave it for a day without letting the burlap dry out. After a day, you can easily clean the paint swollen from dampness with a spatula.
You can also remove old paint with a mixture of potassium carbonate and lime. Mix 1.2 kg of quicklime and 400 g of potassium carbonate (or soda ash) in water until thick. Apply the mixture to the surface and let it sit for 12 hours. After this, the old paint will come off easily.
Another option is to remove oil paint liquid glass. Lubricate and let dry thoroughly. The silicate film should begin to peel off along with the paint. Repeat the procedure several times.
Thermal method

Removing paint with a hair dryer is a method that has been known for a long time. Heat the painted surface with a construction hairdryer until the paint softens and scrape it off with a spatula (another scraper) soft paint from the wall, doors or floor. If you don’t have a hairdryer, take a wide sheet of foil and heat the paint through the foil with an iron.
The method is not applicable in places where there is electrical wiring or there is a decorative coating that can be damaged by high temperature (for example, plastic).
But this method is ideal for removing paint in areas where vibration and shock are unacceptable (for example, glass doors, window frames etc.) But a very significant drawback heat treatment- the acrid smell of paint and the release of toxic substances when it is heated. Therefore, you need to reliably protect your respiratory system and use this method only in well-ventilated areas.
Mechanical method

Pay attention to physical properties paint, which releases strong toxic substances when chemically and thermally removed, the most optimal method would be to use a mechanical removal method.
Famous old old-fashioned method- labor-intensive, slow, but cheap, non-traumatic and least harmful - notching walls with an ax. To remove the paint you will need, in fact, an axe, water and muscles. First, make notches with an axe, then spray the wall well with water, wait a few minutes until it is absorbed, and remove the paint with an axe. To make work go faster and more efficiently, you need to choose the right angle of inclination of the ax.
Most often, this method is used if further wall cladding is planned. ceramic tiles, since the adhesion of tiles to a non-smooth surface is the most ideal. Although the method is labor-intensive and slow, it is quite acceptable when you need to process small area, and is almost ideal in poorly ventilated areas.
Mechanized mechanical methods
To speed up the mechanical removal of paint from concrete wall To make your work easier and increase productivity, we recommend using mechanized methods.
You can use a grinder with a wide circle. With such cleaning there will be a lot, a lot of dust: after a minute of work you will have to wait twenty minutes for the dust to settle. But today there is excellent new equipment with a built-in vacuum cleaner that allows you to remove paint from the wall as cleanly as possible. Watch the video:
There are two more methods with hammer drill attachments.
The first method is to use a chain as an attachment on a drill. This is a fairly effective and cheap method of removing paint and rust from concrete, wood and metal surfaces.
It is possible to use circuits of two configurations. The nozzle of the first configuration, the so-called paint remover, is presented in the photo and video below.

The attachment of the second configuration is a chain of 13 links with a link thickness of 5 mm. The central link rotates 6 links on each side. A 6 mm bolt is used as the base. Put the chain on and press it well with the nut. The drill is turned on by turning to the left.
If the extreme link flies off on one side, it is necessary to remove it from the other for balance. You can remove the paint as long as there are at least three links on each side. Unlike a brush, which produces a lot of fine dust, the chain knocks off the paint in pieces. You must be protected from mechanical damage.
The second method of removing paint from a concrete wall is to use a brick crown as an attachment for a hammer drill.

How to remove acrylic paint?
You can try removing acrylic paint with a good wire brush or even coarse sandpaper. This handmade, so don't forget about gloves. If the paint is good, it will not come off well. In this case, you can use the removal methods described above for oil paint. Keep in mind that if you plan to cover the surface again with acrylic, it will adhere well to any acrylic paint without cleaning.
Worst ways to remove paint
Ways not to remove old paint:
- Thermal method using open fire. It is very fire hazardous;
- Chemical wash in unventilated areas.
And remember. Whatever method you choose to remove paint, be sure to use personal protective equipment. This is especially true for the respiratory organs and eyes. After all, when cleaning surfaces from old paint, you are simultaneously exposed to several dangerous factors: dust, toxic chemicals and small particles of paint flying off the wall.
Many people, at some point in their lives, have removed old paint from various surfaces and they can say that this procedure is not so simple in its essence. First of all, this requires a lot of patience and work from a person.
But, fortunately, this problem has now been practically solved. This one appeared construction tool, like a construction hair dryer, which you can purchase by visiting the Master Tool online store. It does an excellent job of removing old paint and other grading tasks.
Let's talk about the advantages of this device and how to use it. The article will also reveal the little secrets of working with a hair dryer.

Construction hair dryers are used in numerous ways in production construction work. For example, you can simply use it to dry wallpaper or even use a hair dryer to solder non-refractory types of metals.
Let us dwell on the procedure for removing paint from a surface using a hair dryer. This tool is ideal for such work.
The paint begins to be easily removed after a stream of hot air from a hair dryer passes over its surface. The use of the latter not only speeds up the process, but also guarantees the quality of the result.

As for the process of using a construction hair dryer itself, it is not that difficult and any novice builder can do it.
If you have ever held and used a regular household hair dryer to dry your hair, then you will not feel any difference in using a construction hair dryer. These two types differ only in the temperature of the air that comes from them.
Accordingly, for a construction hairdryer this indicator is very high, so before starting work you need to carefully protect your hands so as not to get burned. Regular cotton construction gloves are suitable for this.

When removing old paint, you need to use a hair dryer together with a spatula or some kind of scraper. To make the paint come off the surface faster, adjust the temperature of the hair dryer.
It should be high if the paint layer is thick and vice versa. Warm up the surface with paint immediately before the scraper, moving a little further and faster all the time.
If you are removing paint from a surface inside a building or room, try to take breaks every half hour and ventilate the room. You can simply get chemical poisoning from the fumes that form from heated paint.

But there are some secrets even when removing old paint with a hairdryer. If you use a spatula with it, use only its sides to remove paint. Since it is the side of the spatula that is the most blunt, which means it will remove the paint efficiently and better.
Also, don’t try too hard to heat the surface. This will greatly soften the paint and make it difficult to remove. It will begin to stick to the surface. It is necessary to evenly peel off the already soft layers of paint, while making progressive and consistent movements with a spatula.


