One of the frequently cited arguments in favor of elastic ceilings is the hiding of all defects and unevenness of the ceiling without the cost of eliminating them. Professionals working with this material know that this is only partly true, and it will still be necessary to prepare the ceiling for a suspended ceiling.
What can you save on, and what work should definitely be done?
Freeing up your workspace
If any accessories are required, the holes will be made in the membrane and are height adjustable. If necessary, the membrane will be cleaned. All tools and protective coatings will be removed from working area, and the room will remain clean and tidy. The completed ceiling will be handed over to you, now the proud owner of the system ceiling ceiling along with care instructions.
Suspended ceilings are widely used in many public and commercial buildings to create an attractive ceiling beneath a structural floor. Suspended ceilings are usually installed to create decorative ceiling under the soffit or roof ceiling. However, its installation will almost inevitably create a void between the ceiling and the soffit of the floor or roof above. Unconfined voids must be avoided as they create a route through which fire and sound can travel.
The canvas not only perfectly hides all the imperfections of the ceiling, but also makes it impossible to easily eliminate them after installation is completed. Defects that violate appearance, and sometimes integrity stretch ceiling, just a few:
- In the unventilated space formed by the canvas, in the presence of dampness, intensive growth of mold fungi that is dangerous to health is possible.
- Falling layers of plaster or whitewash cause surface deformation.
- The presence of gaps between the floor slabs leads to the formation of drafts, causing significant vibrations of the canvas.
The preparation of the ceiling before installing the stretch ceiling is aimed at eliminating the causes of the listed defects.
Installation of additional sound insulation
Due to the inherent characteristics of the product, a mattress made from rock stone is an ideal product for separating these voids as it will limit the passage of sound and fire. In certain circumstances, a suspended ceiling system is used in combination with sound-absorbing materials such as glass wool or stone slab to control the acoustic characteristics of a room or area. In areas where it is required high performance, for example, in broadcast studios or auditoriums, a perforated suspended ceiling tiles, which is then provided with a blanket of woolen fabric enclosed in clothing fabric.
Removing the old layer of whitewash is necessary in case of peeling and to prevent the formation of mold. A high-quality lime-whitened ceiling does not need to be washed away - lime itself is an excellent antiseptic used in the fight against fungus. But the chalk coating does not prevent the growth of “vegetation”. It is also better to remove wallpaper glued to the ceiling - they provide a good breeding ground for the development of mold. There are 3 ways to clean whitewash from the ceiling.
Detailed Design Considerations
The table below shows cavity barrier systems that offer both fire resistance and sound insulation. Hidden spaces or cavities, especially above suspended ceiling, provide a ready route for the spread of smoke and flame. Barrier cavities above suspended ceilings are used to prevent smoke and flame penetration from fire-rated walls and partitions.
Diagram below. . The requirements in the Building Regulations are to protect life, not property. To limit the extent of property damage, a building owner may want to install cavity barriers at more frequent intervals. Cavity barriers are primarily designed to delay the passage of fire. Demonstration tests have shown that a stone slab reinforced with 25mm wire mesh acts as a highly effective filter to prevent the passage of smoke particles.
Blurring the ceiling is done with a wet rag or sponge and is used to remove a thin layer of whitewash. The process is labor-intensive and requires time and patience. Pre-wetting the ceiling with a spray bottle will help speed up the process somewhat. Regularly changing the water and rinsing the cloth frequently will also improve productivity. The blurring is completed when the concrete structure clearly appears on the ceiling.
Treatment and strengthening of the floor surface
For applications where particularly high level resistance to smoke or fumes, a cavity strip barrier should be used. Likewise, barrier film covered with foil may also be considered necessary in air chambers. The void above the suspended ceiling is a potential route for flanking sound above the partitions. This is especially true when a lightweight, modular ceiling is installed.
Sound Absorbing Cavity Barriers
The sound absorption properties of glass wool can be used to minimize the "acoustic weakness" of suspended ceilings. There are many situations, such as hospital consultation rooms, where it is important that the audio performance of a section is not compromised by the void above the suspended ceiling. Illustrations below. High levels of sound absorption can be achieved using perforated or slotted panels with glass wool or a flue grate backing.
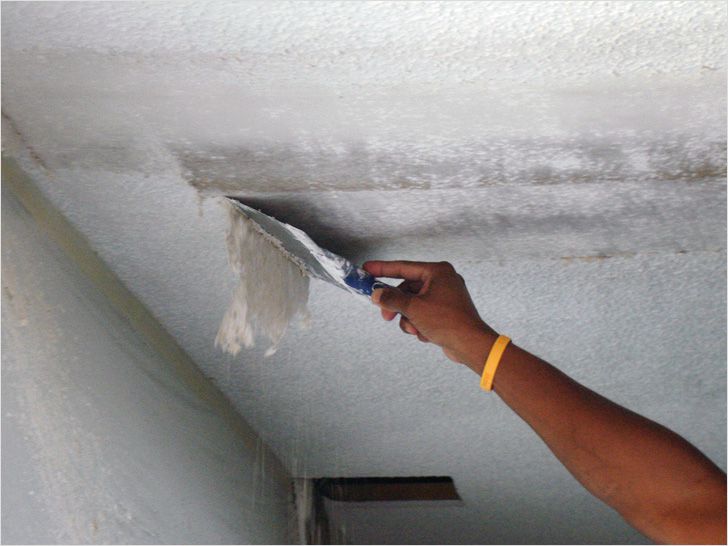
Removing whitewash with a spatula also begins with moistening the surface using a spray or paint roller. The water should wet the whitewash all the way to the ceiling without causing the chalk to become soggy. Therefore, the thick whitewash layer is wetted in several passes, and then allowed to shake lightly.
The presence of air space above a suspended ceiling or behind a wall underlay significantly increases the absorption value of the insulating underlay. Although insulation installed directly above the perforated metal ceiling, will help reduce the ambient sound, this form of design is mainly used to reduce the reverberation noise in a room or area.
Sound absorption refers to the attenuation of reverberant noises in the same room or area as the noise source. This usually refers to covering all or part of the surfaces of the room with a material that absorbs sound. When a sound wave hits a surface, some of its energy will be reflected and some will be absorbed. A material's ability to effectively absorb sound can be measured by its sound absorption coefficient, which is defined as the ratio of the sound energy absorbed to the sound energy dropped.
Ideally, the chalk should easily come off the ceiling, but not stick to the spatula. It is more convenient to scrape off whitewash with a narrow spatula with a blade width of 5-8 cm - and the surface is cleaned more evenly, and the hand will be less tired. By holding a bowl in the work area with your free hand, you can minimize the time spent on subsequent cleaning of the room.
A material that absorbs 65% of the sound energy hitting it has a sound absorption coefficient. Glass wool and stone wool have the same good characteristics absorption of sound due to their fibrous nature, which makes mineral wool ideal as a sound absorption layer.
All joints are either tightly fitted, overlapped or edged back, and stitched in a continuous spiral loop with 1mm diameter galvanized wire. Due to moisture, no plaster can be used in damp areas. If the basement, garage or bathroom needs to get new stucco, it can't just be used for every stucco job. Finally, rooms in the basement and a bathroom with showers where it can get very wet.
Application chemical compositions allows you to prepare the ceiling as efficiently as possible. This section includes simple soap solution: in a bucket hot water dissolve 3-4 tablespoons of crushed laundry soap, and then add 5 tablespoons of baking soda. As an option: replace soap with several caps of shampoo, and soda with table vinegar.
Lime plasters can be used, for example, in damp rooms. If the area to be plastered is relatively large, clay plaster can be used. Due to its clay content, it also has the advantage that it can absorb very large amounts of moisture and then release it back into the indoor air.
How is the subsoil prepared to push out moisture?
Thus, foggy windows or mirrored disks are history. If the ceiling and walls in the basement or bathroom need to be equipped with new plaster, they should be primed first. On tiles and similar smooth soils, wet traps, unfortunately, do not hold up. Therefore, old tiles must be removed, as well as the adhesive used.
Working with ready-made chemical cleaning compositions for cleaning construction contaminants takes a minimum of time and effort. The ALFA-20 concentrate used by cleaning companies is designed to remove lime and cement contaminants. Recommended as an excellent means for soaking lime white that is poorly permeable to moisture. For chalk coatings will do Probel composition diluted with water in a ratio of 1/10 or more.
Wiring for lighting
Once all old plaster, tile, adhesive, wallpaper, paint and other residues have been removed from the walls and ceiling, everything should be well lined with tarps. Glue the fittings carefully so that neither depth nor plaster can damage them. Make sure you have enough fresh air in the bathroom and basement, while you are simply and clean. So the wet protection sticks well to the ceiling and walls, everything is completely covered in depth. Allow the primer to dry for some time, as required by the instructions.
Specialized concentrates Metylan and Quelyd Dissoucol are used both for removing thick chalky deposits and for removing wallpaper. The composition easily penetrates chalk, dissolves pastes, universal and vinyl wallpaper adhesives. A 250 ml bottle of liquid is enough to prepare 1-1.5 buckets of solution. All of the listed compositions are absolutely safe and can be used in rooms with poor ventilation.
Attach plaster profiles and plaster guides to the wall
If you want to plaster your own bathroom, you don't have to be a trained cleaner. A little skill is enough. Mix a small amount of the finished plaster according to the instructions until it can be attached to the wall. Place the lime plaster on the mason and throw it at small points against the wall: these are where the plaster profiles are attached vertically. Place the plaster rails parallel to each other in lime plaster on the wall, you did everything right. should be distributed at a distance of 1 to 1.5 meters so that you can simply operate the scraper over the plaster gauges: so you can be sure that the plaster is applied in an even thickness to the wall.
Advice! If the composition of the whitewash is unknown, just run your finger across the surface of the ceiling. Leaves a white mark on the skin chalk whitewash. Slaked lime, after drying, looks like chalk, but does not stick at all. Oil paints and whitewashes based on an adhesive binder are also not easy to handle, but have a glossy surface.
Treatment and strengthening of the floor surface
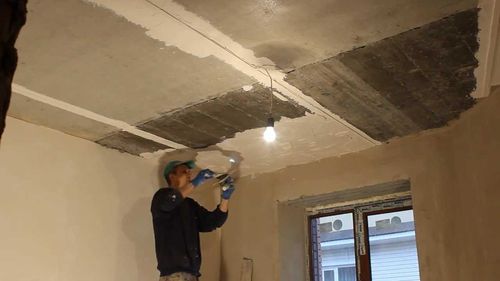
After removing the plaster or wallpaper, all hidden floor defects become visible. The question of whether the ceiling needs to be leveled is clear - possible unevenness will not affect the tension of the canvas in any way. The main attention should be paid to the seams between the floor slabs, and on plastered ceilings, also remove lagging areas of plaster. There is no need to re-plaster the ceiling.
If you need to fix plaster corners in a wall, then gypsum profiles in the form of corner strips are also necessary as plaster pressure gauges. For a perfect result, you must align the plaster gauges vertically and horizontally with water balance. If they are hard, you can start with the actual cleaning.
Wipe down bathroom and basement walls with a damp cloth
Mix all the finished plaster needed for full wall. If it has the correct consistency, spread it evenly using a spatula on the wall. Pull the aluminum pull-out panel over the wall-mounted cleaning fixtures. You should check from time to time with a water balance that everything remains in balance. If everything between the cleaning gauges is plastered, they are also plastered. This is not very easy, as small pendulum boxes form above the cleaning products.
Experience shows that even a firmly seated mortar can fall out due to minor deformations of the ceiling caused by shrinkage of the building and soil movements. In addition, you cannot be sure that the seam will be sealed properly to prevent drafts. Filling and puttying the seams will take time, but is guaranteed to save you from many troubles. The recommended sequence of work is as follows.
Check everything from time to time with a water scale and treat small joints again and again. As long as they are not visible, the wall is still straight. Once everything is done and nice, you wet the finished wall again. Now take this and rub all over the plaster until everything is smooth.
If after some time - ventilation is not forgotten - the floor plaster has dried sufficiently, surface plaster can be applied. On construction market there are many different options surface plaster, some of which can also be simply painted on.
![]()
The ceiling and wall seams are opened, removing the remaining mortar from the side surfaces of the slabs to a depth of 3-7 cm (depending on the width of the seam and the condition of the filling mortar). For convenience, you can use a hammer drill.
The inside of the seam is cleaned of dust and moistened. To seal seams more than 30mm wide, it is more rational to use polyurethane foam. It easily fills a large space and has high adhesive properties. After the composition has set, the remains are trimmed with a knife, forming a small depression for subsequent putty.
If the moisturizing humidification is in the bathroom, basement or garage on the wall, it needs to dry for a while. The plaster can then be painted on. Waterproof latex paint works great for this purpose. Thanks to latex paint the walls in damp rooms remain active in respiration, so that the advantage of wet plaster can be used correctly. Make sure you are buying really high quality latex paint, even if it has a slightly higher price. For this reason, it is much more cost effective to use than the somewhat cheaper latex paint.
Narrow gaps can be filled with polystyrene foam, polyethylene foam or sealants made from other materials. For reliable fixation sealing cord, the seam walls are treated with a primer deep penetration, and the seal is “set” on moisture resistant sealant. The remaining space below is filled with NC cement solution, not forgetting to push the rust to a depth of 2-5 mm under the putty.
However, if you need to paint a freshly plastered wall several times, it may cost more than the pricey, original cost. Please do not use your bathroom until the walls and ceiling are dry. If the plaster needs to be updated in a bathroom, garage or basement, you can do it yourself. All you need is a little convenience and a few tools: a drill bit with a whisk helps you mix, a spatula applies the plaster, and the weight is taken off. Felt board finish: complete.
Or you just mount the rigs on the wall - then you can save the plaster. Don't see the video? Walls can be simple pieces of art - which style suits you? Let your creativity run and customize your walls and ceilings to your liking.
On at this stage Now is the time to decide whether you need to prime the ceiling to protect it from mold. Impregnate the concrete surface with universal fungicidal primers, for example, Starateli acrylic deep penetration primer, Luja Tikkurila acrylate primer, or MILKILL latex composition with a strong antibacterial effect. The compositions are low-toxic, but we should not forget about safety measures - carry out work with safety glasses, gloves and a respirator, and also ensure proper ventilation of the room until the primer is completely dry.
Attention! If there are already areas affected by fungus on the ceiling and walls, you should not limit yourself to removing plaque. After this, you should treat the ceiling with a solution of a strong antiseptic, for example Ceresit CT 99, and only then apply a primer.
To close the seams, any putty with residual elasticity, designed for possible displacements of the slabs, is suitable, for example, Semin Fibrelastic specially designed for this. The fiber fibers included in its composition do not allow the material to crack even with significant deformations. After a day, you can proceed to the final puttying of the seam area.

Do I need to putty the outside of the seam? Of course, and not at all for cosmetic purposes. The outer layer is the last level of protection against drafts and seam spalling. The putty is applied to a slightly larger area than the width of the sickle used (at least 20 cm). The painting mesh is applied to the freshly applied layer and smoothed with a spatula along the seam for reliable adhesion. The finishing layer is applied after the seam has partially dried, since sanding the surface is not required in this case.
Installation of ventilation and electrical wiring
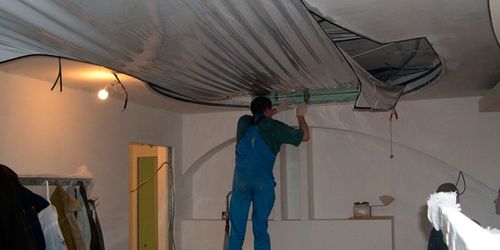
With the completion of painting and plastering work, preparation for the suspended ceiling does not end. It is necessary to complete hidden work in full - this is what is called in construction the installation of elements that will not be accessible after the completion of the repair. This may include the installation of additional fasteners for multi-level ceilings, ventilation ducts and electrical wiring.
Wooden load-bearing elements pre-impregnated with an antiseptic composition and fixed in accordance with the project. Installing plasterboard structures, hangers and mounting profiles are placed with the calculation of attaching both plasterboard and stretch ceiling moldings to them. In cases where this is not possible, an additional profile is attached to the back of the sheet for the baguette screws. 
If ventilation is provided in the room, they try to hide the boxes behind the canvas, but all ventilation holes must extend beyond the ceiling. Elbows or corrugations are installed on the vents located above the level of the ceiling film, directing air into the room. For massive ventilation grilles and fans, it is provided that they are fixed to ceiling slabs installation sites.
Installation of electrical wiring begins with marking the locations of lamps and installing racks. It is advisable to immediately set the base rings according to the expected ceiling level, focusing on the baguettes. The wires are laid in corrugated protective tubes, secured to the ceiling with plastic clamps.
The supply of wire at the connection points of the lamps must be at least 15-20 cm. The correct connection of wires in those located above the level of the suspended ceiling distribution boxes check before installing the canvas.
To completely prepare the ceiling for a suspended ceiling, you will need to spend a lot of time and effort. But the reward for punctuality and diligence will be a long service life of the film coating, not overshadowed by unpleasant surprises.
Apartments in a building have long ceased to be boring. The owners try to make them beautiful and unique. To do this, the ceiling is often transformed, which can set the tone for the room. Various patterns are created and plasterboard structures are installed. But perhaps the most interesting thing today is the suspended ceiling. Before installing the canvas, you must prepare the surface. We’ll talk about how to do this correctly further.
Key Benefits
A suspended ceiling (see photo) can be easily installed both in an old house and in a new building. It helps to hide all existing surface imperfections, as well as those that inevitably appear during the shrinkage of the structure. Other advantages of a stretch ceiling include:
- the possibility of varied planning of the lighting system, the wires from which are easily hidden under the canvas;
- impossibility of flooding the premises by neighbors from above, because the canvas can withstand up to 200 liters of water per 1 meter;
- fire resistance, which does not allow a fire to develop;
- environmental friendliness;
- the fact that they do not change their color over time;
- strength;
- the opportunity not to limit yourself when choosing a room design;
- possibility of choosing matte, glossy or satin canvases;
- possibility of applying a pattern to the canvas, etc.
Preparatory work
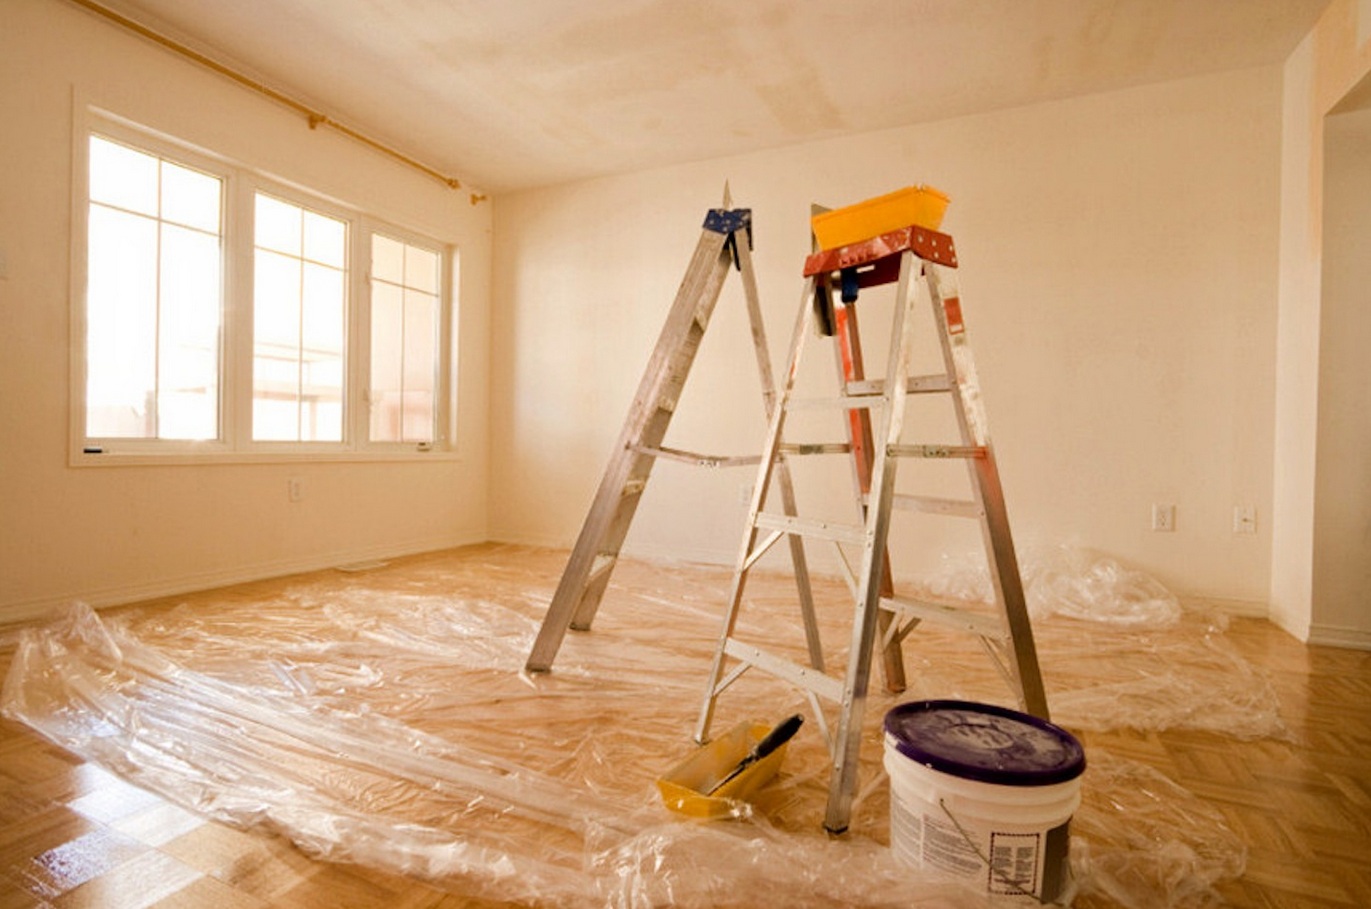
With careful preparation of the ceiling, you can forget about such troubles as sagging of the canvas due to constant fluctuations in air temperature, as well as the formation of condensation. Installation of a stretch ceiling should be carried out only after it has been possible to completely prepare the surface: conduct electrical wiring, level the walls and carry out markings. But first you need to clear the room of furniture, household appliances, indoor plants and all kinds of household items.
If any furniture cannot be removed, it must be moved to the center of the room and covered with thick plastic film. Tension fabrics must be installed before installing delicate floor coverings. But if they already exist, they must be covered with a layer of thick cardboard. In a new building, and especially in an old house, when preparing the ceiling, it is necessary to inspect the joints of walls and ceilings and, if necessary, eliminate all existing defects.
In order to prepare the surface for installing a stretch ceiling, you do not need to first level it, paint it, or perform any other manipulations. This will allow you to save a lot during repairs. The only thing that needs to be done is to remove the crumbling putty or paint, and also cover the surface with a layer of primer mixture, which will prevent further destruction of the finishing material.
![]()
Lighting devices
Before installation tension fabric it is necessary to decide in advance on the number of lamps, including spotlights, and their placement. It is worth noting that the lamps must use conventional light bulbs with a power of no more than 60 W or halogen lamps with a power of no more than 35 W. This will avoid excessive heating of the canvas, and therefore its damage. But LED and energy-saving lamps can have any power, because... they practically do not heat up.

Wall alignment
If the room has not yet been renovation work, before installing a stretch ceiling, you must prepare the walls, i.e. remove the old one from them finishing material. It is better to glue the wallpaper after installing the canvas on the ceiling, because... they tend to collect dust on themselves. The preparation of the walls will depend on what will be used on them in the future. For wallpaper, it is enough to remove the old finish, but before applying decorative plaster it is necessary to clean the surface before plaster or even building material, remove all existing foreign objects, as well as clean defects.
All surface irregularities can be easily removed using plaster or concrete mortar. In order to level the walls before installing the stretch ceiling, you can use putty. It must be done at an angle horizontally or vertically using a wide spatula, as in the video, for example. After the putty mixture has dried, the walls must be coated with a primer that will strengthen the surface, improve adhesion or reduce moisture absorption, depending on the type of mixture chosen.


