A door with old upholstery looks untidy. In addition, it is recommended to change the upholstery and insulation for better sound and heat insulation of the room. If your immediate plans do not include purchasing new door, then it’s entirely possible to update the upholstery and insulate it yourself.
By covering a metal or wooden door with artificial leather you will get the following: advantages:
1. Improved thermal insulation
2. Improved sound insulation
3. Moisture resistance
4. Simplicity and ease of care
5. Wide range of colors and textures
6. The ability to hide some defects in the door leaf.
Required materials and tools
You can easily handle the door trim yourself; for this you will need the following materials and tools.
Required materials
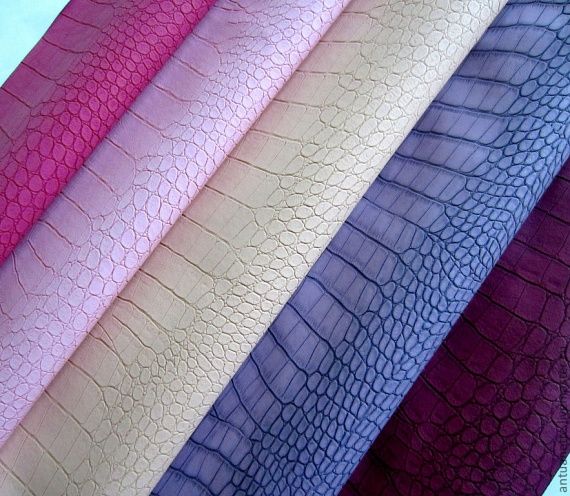
— Upholstery. The quality used is natural or artificial leather. Genuine leather is a rather expensive material, so it is quite possible to use leatherette for door upholstery. Moreover, modern technologies for manufacturing artificial leather produce a product that is almost indistinguishable from natural leather in appearance and tactility.
— Leatherette. Nowadays there is a fairly wide range of leatherette available on the market. Available in a wide range of colors, textures and thicknesses.
Before purchasing upholstery material, you need to measure the door. You need to add 20...30 cm to the length and width of the door - this will be right size leatherette. If you plan to upholster both sides of the door, then you will need 2 of these flaps. In addition to the main flaps for the door upholstery, you will need rollers that are attached around the perimeter of the door. The width of the flaps for rollers should be 12...15 cm, the length is equal to two perimeters of the door, plus 50 cm. Since leatherette usually has a width of 1.1...1.4 m, depending on the width of your door, flaps for rollers can be cut from the remains of the base material.
— Sheet insulation. As insulation, you can use foam rubber, synthetic winterizer or thick felt with a thickness of 10...25 mm. Its area should be the same as the area of the door if the insulation will be used in one layer.

— Round insulation. It can be foam rubber or polyethylene foam, with a diameter of 10...20 mm. Its length should be equal to two door perimeters plus 1 meter.

- Wallpaper nails. The heads of such nails should be decorative and have metal surface or covered with leatherette, in harmony with the main material and color door handle or castle. Using decorative nails and wire or fishing line, you can give the doors a three-dimensional design. The number of nails depends on the chosen pattern. If a pattern is not provided, then the number of nails is calculated taking into account the fact that the distance between them will be 6...8 cm.

—Glue. If you are upholstering a metal door, you need to purchase highly resistant polymer glue (“Moment”, “88”).
There are ready-made kits for door upholstery on sale; by purchasing this you will make the process of door upholstery even easier.
Required Tools
— Medium sized hammer
— Screwdriver or screwdriver with a set of attachments
— Stapler with staples 8…10 mm
— Construction knife
— Scissors for cutting
— Nail puller
— Pliers
Preparatory work for door trim
— Remove removable elements (lock, handles, eyes).
— Remove the old upholstery. This must be done carefully so as not to damage the door leaf. After removal old upholstery, you need to carefully remove old nails and first clean the door leaf.
— Remove the doors from their hinges and place them on a prepared place (desktop, workbench or 6 stools). Sometimes door upholstery work is carried out without removing the door from its hinges.
Upholstery on the inside of a wooden door
We will consider the option when the front door opens inward, which means that in this case, insulation beads are nailed on the inside of the door.
— The main fabric and insulation are being cut. The dimensions of the leatherette fabric should be 20...30 cm more sizes doors. The insulation sheet should be 1 cm smaller than the door itself.
— Insulating rollers are made from strips of upholstery material and strips of insulation, or better yet, from foam strips or made of foamed polyethylene. Insulating rollers will give the door additional sound and heat insulation and ensure tightness between door frame and the door. They are nailed so that they protrude beyond the door by 1...2 cm.
— Using a stapler, strips of leatherette (10…14 cm wide, equal to the length of the door) are fastened with the front surface down. A 4 cm strip is left on the door, the rest remains outside the door leaf.

— Strips of insulation (foam rubber or polyethylene foam) are wrapped in fixed strips, forming rollers that are stapled to the door leaf so that they protrude 1...2 cm beyond the edges.
— The rollers are fastened starting from the upper right corner, then fastened on the vertical side of the door and ends with fixation at the bottom of the door. The bottom roller should not touch the floor, as this will cause it to wear out quickly.
— When securing the rollers, you need to take into account the location of the lock and door hinges. The roller located on the hinge side must completely cover the doorway. And there must be a gap at the place where the lock is attached.

— The insulation is also secured to the door leaf with staples, moving 5...7 cm from the edge. Holes for the handle, lock and peephole are cut out in the insulation.

— Upholstery material is fixed on top of the insulation. It needs to be wrapped around the edges of the insulation and secured with staples in the upper corners. If you want to give the upholstery a pattern, you need to mark it. If there is no pattern, then decorative nails are hammered in increments of 6...8 cm. When nailing leatherette, it must be constantly tensioned so that at the end of the work it is perfectly even.


Upholstery on the outside of a wooden door
If the apartment door opens inward, then the outer side of the door is upholstered in the following sequence.
1. Close the door and mark a rectangle of the door frame on the door leaf - this will be the border of the upholstery.
2. Secure the insulation, retreating inward from the drawn line by 10 mm.
3. Secure the upholstery material on top of the insulation, bending the edges inward, as with upholstery. inside doors. The bottom edge is not yet secured.
4. On the outside of the door, install insulation beads on the posts and crossbar of the door jamb, and not on door leaf. The roller at the bottom is not nailed to the threshold, because it will wear out very quickly. The leatherette strip is attached with the front side to the door jamb with a stapler, a strip of insulation is laid into it, a roller is formed and fixed with decorative nails. The roller should cover the door by 1.5...2 cm after closing it.


5. The lower insulation bead is attached to the door leaf, not the threshold. It shouldn't be too bulky. After its formation, you also need to upholster it with leatherette.
6. The peephole, handles and lock are installed. Holes (cuts) for accessories should be made smaller than the size of the handle (lock or peephole).
On video You can see the upholstery process wooden door
The upholstery of a metal door is similar to the upholstery of a wooden door. The leatherette and insulation are fixed with glue. The approximate glue consumption is 100 ml on each side. The surface on which the glue is applied must be degreased.
In the video you can see how to upholster a metal door and how to decorate the upholstery with a pattern using nails
How to upholster a door
Despite the fact that stores delight consumers the widest range entrance and internal doors, the front design of which is carried out according to the most modern technologies, not every owner of an apartment or house is in a hurry to make such a purchase. The high price of many models is not so bad.
The problem is that replacing the box requires, at a minimum, repairing the slopes and/or wallpaper on the wall - and these are completely different expenses. Besides, old door It may still be quite strong, and therefore it would be a pity to change it. In such a situation, door trim with dermantine is one of the the best ways updates, which can be done with your own hands.
Before we talk about how to sheathe doors with dermantine, let’s bring some clarity to one question. Since dermantine has been used as an upholstery material in our country for almost 90 years. We are used to calling soft door upholstery exactly this way, without going into too much detail.
However, there are fundamentally other materials, which in everyday life are still usually called dermantine.
In fairness, let's clarify what the difference is between them:
| Type of upholstery | Brief information about the material |
|
Leatherette (nitro artificial leather), how to upholster |
This material is a type of artificial leather. It is based on cotton fabric or knitwear with a nitrocellulose coating, which is why it received its second name: nitro artificial leather. The coating can be applied to one or both sides. This is the cheapest finishing material, the price of which starts from 200 rubles/m.p. Thus, the entire door upholstery with dermantine, together with fasteners and insulation, will cost no more than 1,500 rubles. |
|
|
Since nitro artificial leather does not have high aesthetic qualities and wears out quite quickly, more resistant polymers began to be used as a coating for the knitted base: PVC and polyacetate. Vinyl leather has virtually no disadvantages of its predecessor, and often imitates natural leather in appearance. So, the leatherette for the door upholstery that you looked at in the store is most often not nitro leatherette. Be guided by the price tag: even if it says “dermantin” on it, keep in mind that when the price per meter is 600-800 rubles. and more, it is vinyl leather. |
|
|
This option is not faux leather. It is closer to natural leather, as it is a composite of leather and latex. This material is made from leather scraps, crushed into powder bound with a polymer. In terms of strength, elasticity and appearance, it is very similar to genuine leather. A beautiful texture or embossing can be made on the surface of composite leather. Shoes are even made from this material. And the dermantine upholstery of internal doors, as well as wall panels or upholstered furniture, using recycled leather, which will look simply chic. |
|
|
This photo shows a type of artificial leather on a non-woven base. Eco-leather has the highest characteristics regarding strength, wear resistance, thermal conductivity, and even frost resistance. So it can be safely used for upholstering a street door. |


Tools and consumables
In addition to the decorative material that will be used to upholster a wooden door, you will also need a foam rubber backing 10-15 mm thick. It will help solve two problems at once: insulate the door and create a beautiful relief on the upholstery.
- You can, of course, use other dermantine door insulation: batting, felt, padding polyester, but it is foam rubber that allows you to make the upholstery really soft.
- When sheathing is done on both sides- especially if this is the entrance to an apartment or house, rollers are usually made around the perimeter, which decorate the ends of the canvas, and at the same time prevent cold air from penetrating through the cracks. For this, foam rubber is also used, only round - in the form of a rope with a diameter of 2-3 cm.
- For fasteners you will need furniture nails with a wide head. by them Rollers, upholstery, and decorative nails are attached along the perimeter of the canvas. They can have a shaped metal or plastic cap.
Pay attention! Covering a door with dermantine looks best when nails with heads are used. They can be matched to color or contrast. And it’s even more convenient to purchase a ready-made upholstery kit, which contains everything that was mentioned above. It costs at least 850 rubles. on one side, and this depends on the quality and design of the supplied material.

Among the tools for work you will need a tape measure with a pencil, a hammer, pliers, a chisel, and a knife. In the case when fastening along the perimeter is done not with nails, but with staples, a stapler is also needed.
In principle, upholstering a door with dermantine yourself is a simple matter. Not only men, but also housewives can cope with it, since this does not even require removing the fabric from its hinges. Although, of course, it is more convenient to work on the removed canvas. Next, we will introduce you to the process and offer you as visual aid video in this article.
Important points
The maximum width of the door leaf is 100 cm, and the upholstery materials are at least 140 cm. So, the necessary margin is obtained in width on both sides, and there are still strips left from which rollers can be formed. Strips 13-15 cm wide are enough for rollers.
So:
- According to the height of the door, leatherette is also cut with a margin of 10-15 cm on each side. The amount of overlap depends mainly on the thickness of the insulation, but do not forget that it is better to cut off excess than not enough.
- As for the insulation, it is cut exactly to the size of the canvas, and nailed to it with small nails or placed on glue.
- Considering the fact that the door being decorated is old, before starting work, it is necessary to eliminate all faults, preventing it from closing normally; if necessary, strengthen the box; sand and paint the hinges.
By searching: “door upholstery with dermantine video”, you can find many videos that show not only the covering process, but also talk about how to make repairs and other preparatory work. For example, it is very important to beautifully decorate the end of the door, which is not covered with trim and will spoil the whole picture.
And in general: if you don’t skimp on purchasing material with an interesting texture and original fasteners, and also do everything correctly, your door will look no worse than the examples presented above as a sample.
As already mentioned, covering doors with dermantine can be done without removing them from their hinges. But if you want to create a beautiful geometric pattern, it’s still better if the canvas is conveniently located in a horizontal position.
You can use traditional drawings, most of which are presented below, or you can come up with something of your own. Just don’t improvise as you work - it’s unlikely that anything good will come out of it. It is better to think carefully and draw a diagram, and then carry out the cladding according to it.
Before trying on leatherette, you need to remove all the fittings from the canvas: peephole, handles, lock. If there is a door closer at the top, you can not touch its body, but carefully bypass it by making a corresponding recess in the cladding material.
Do-it-yourself cladding, instructions
Sheathing with roller
To form the rollers, use either flat insulation rolled into a tube or a round foam rubber band. To wrap it, you need strips of upholstery material. As a rule, these are scraps of dermantine fabric - this is where the work begins.
The strips are applied to the canvas with the front side, and secured to one edge with simple nails or staples like this. Next, cut the foam rope to the required length and wrap it in a strip, securing its other end to the canvas.

Depending on the volume of round foam rubber and the elasticity of the upholstery material, rollers with a diameter of 5-6 cm are obtained. However, the procedure for their formation may be different.
If you do this before the main door trim with dermantine is done, the roller fastenings will be hidden under it. We see what happens as a result in the picture above.

The following example shows an option in which the roller is formed after the fabric has been sheathed. Then the width of the strip should be such that a hem can be made. In this case, the front fastening is done with decorative nails.
Note that the roller can only be made on the outside of the door - and only on condition that it opens onto the street or landing. Otherwise, the roller will interfere. On internal doors there is no need for it at all, because it is done not for beauty, but to eliminate drafts.
Main cladding
Without a roller, everything is much simpler, and it looks neater. First, the insulation is attached. On a removed door, glue can also be used to secure the foam rubber. When the door leaf is in a vertical position, it is much more convenient to use a stapler for this purpose.
So:
- The fastenings are made in such a way that the foam rubber bends freely at the edges - the indentation size is 5-6 cm. It is needed so that the ends of the sheathing material can be tucked under the insulation before you begin to fasten it with decorative nails.
- In general, there are different ways to fix the soft lining on the door leaf. If it cannot be removed from the hinges, then it is better to first tuck the dermantine under the foam rubber and secure it in the middle with a decorative nail.
- After this, the sheathing material is well stretched and fixed first in the corners and in the area of the castle, and then along the entire perimeter. In addition to nails, you can also use moldings matched to them in appearance, imitating a continuous fastening. This simplifies the work and gives the cladding some originality.

- This is the simplest cladding option that absolutely anyone can do. Complex patterns are made on the removed canvas, and the procedure largely depends on the design. And, by the way, it may not exist at all.
- When is upholstery done? outer door, many craftsmen begin to attach leatherette from the loop side. The material is first laid face down and stapled along the edge, then insulation is laid, and the upholstery fabric is wrapped in the desired position.
- When one long side is ready, the material is stretched well, and, bending along the edges, the end ones are attached. With this upholstery scheme, a roller is also formed, but only from the side of the lock. Therefore, here a strip of fabric is nailed in advance, and then, when the main upholstery is already completed, a roller is formed. Its purpose is to hide the edge of the trim and decorate it beautifully.

When ready-made kits are used, which contain decorative nails covered with vinyl leatherette, which require the creation of a beautiful design, the order of work is somewhat different.
Pay attention! Such nails are not quite ordinary - they are not driven in with a hammer. They are detachable and consist of two elements: flat base with a threaded pin and a decorative cap screwed onto it. This fastener design allows you to cover not only a wooden door, but also a metal door with leatherette.
- To complete the drawing, appropriate markings are applied to the door leaf. For this purpose, it is better to make a pattern from the same leatherette. Holes will be made on it, corresponding in diameter to the size of the nail head. The contours of these holes are also applied to the door.
- In the places where they should be decorative fastenings, the element with the pin is mounted on glue, which is also often included in the kit. Also, some kits provide a special profile that is glued around the perimeter. The grooves in which the canvas should be tucked into. They cost more, but the upholstery is much neater.
- Once the nail pins and profiles are glued, the insulation is spread out and cut to size, and the upholstery material is laid on top of it. The cladding together with the foam rubber is placed on the pins of the nails, and then the caps are screwed onto them. They start from the center and move to the edges in accordance with the picture.

Lastly, the edges of the upholstery are tucked into the profile. This is done with a round spatula, which is usually used for installation. fabric ceilings. Excess material is cut off after it has been tucked into the baguette along the entire perimeter - and the covering is ready.
Finally, we note that when upholstering doors with dermantine with your own hands, watching a video before starting work will allow you to orient yourself much better and master the technology.
The final part of the installation
The last stage is the installation of fittings. In the new upholstery, you need to make holes that are slightly smaller than the size of the holes in the fabric; this is very simple, since they can be easily felt through the dermantine and the backing. Reinstall the handle and lock, door peephole, and hinges. Then you can begin installing the canvas in the opening, place it on the hinges and you can enjoy the work done.
Design options
To make the final result look a little more interesting, you can not just sheathe the front door from the inside, but add several shaped elements to its surface. To do this, you can use the remaining furniture nails. Carefully mark the places for their installation on the surface of the dermantine; after you hammer in the nails, you can tuck a decorative cord under them. The dermantine and soft lining will be transformed: the contours will be pressed through and a peculiar pattern will appear on the surface of the door. Usually diamonds are made this way, but other patterns can be used.

Schemes decorative upholstery doors
It is easiest to work with a wooden door, but with a sufficiently thick and dense layer of substrate, you can make such decor on iron door. To do this, you need to secure the nails or buttons with a strong thread with reverse side before sheathing the fabric, combining foam rubber and dermantin.
Covering a door with dermantine yourself is quite simple and interesting, and besides, it allows you not only to save on buying a new door, but also gives you a unique opportunity to create your own original version of the finish. If done correctly, it will look no worse than the industrial version.
;
Sooner or later, but any apartment owner comes to the conclusion that insulation front door is a necessity. Covering a door with leatherette with your own hands will help solve several important problems - its thermal and sound insulation and decorative design.

The conclusion that the door should be insulated is usually realized in the cold season, when a draft begins to blow through seemingly very small cracks. But is it worth waiting for winter? Isn't it better to carry out such work in advance?
When solving the issue of transforming the door leaf, you can contact the simple way sheathing - even stretch leatherette, but you can use more complex options when multiple pieces of material are used.
In any case, all the nuances need to be thought out in advance and prepared necessary tools and materials for work.
To ensure that nothing distracts the master directly during the work process, you need to do the following in advance:
1. Prepare a sketch of the future cladding, if it has any design. This may be a carefully verified drawing or, as a last resort, even an ordinary pencil sketch.
2. Based on the drawing, you can make a list necessary materials that will be needed for work:
- Leatherette or artificial leather can be purchased in specialized stores where you can find large selection this material. There you can choose it not only by thickness, but also by color and textured pattern on the surface. The standard width of leatherette is 1100 ÷ 1400 mm - it is just suitable for a door leaf in an apartment. Add 200 ÷ 250 mm to the length of the door leaf.

If a door is being sheathed in a private house, which has two leaves, then to the dimensions obtained when measuring, you need to add 100 ÷ 150 mm, both in length and in width of the material.
Leatherette will also be needed to make the rollers framing the door leaf. They are strips of material that have a length equal to the height of the door and a width of 130 ÷ 170 mm. You will need three of these elements.
If the door leaf is sheathed with separate elements of leatherette, then more of it will be needed. When calculating the material in this case, it is necessary to take into account its inward bending on each individual element by 50 ÷ 100 mm on all sides.

Another option for covering with a pattern would be to remove it with separate strips of leatherette. Their number is calculated depending on the selected decorative design.
- Insulation material will help achieve thermal and sound insulation.

Sheet foam rubber is well suited for insulation and sound insulation.
For these purposes, use thick padding polyester, felt or foam rubber. The material must have a thickness of at least 10 ÷ 25 mm, depending on its density and the expected volume (relief) of the pattern, which will be created using constrictions or decorative nails.
If it will be insulated, then you need to purchase foam sheets of the required thickness.
- In the case when you plan to use nails covered with leatherette or artificial leather for decoration, you should choose the color of their heads so that the whole composition looks harmonious.

The sheathing will look more presentable if the nail heads are large enough and the same color as the entire sheathing fabric.
Another option would be nails with metal heads that match the color and texture of the material of the handles and locks.
- To finish a metal door you will need glue, since leatherette and thin layer insulation will be glued to its front side. Universal “Moment” or “88” glue is well suited for this purpose.
- To make sealing rollers, it is best to purchase ready-made round insulation with a diameter of 10 ÷ 20 mm. It is sold by the meter in hardware stores. This material will give the roller a neat, uniform, rounded shape.

3. To work, you also need to prepare some tools:

- A small hammer for driving nails.
- A stapler with staples for fixing material to the surface before driving decorative nails. Optimal size staples - 8 ÷10 mm.
- Scissors and construction knife for cutting and trimming materials.
- To dismantle locks and handles and then install them back in their original place, you will need a screwdriver or screwdriver with different attachments (bits).
- It would be a good idea to have pliers and a nail puller on hand; they can be useful for removing old trim and removing nails that have not entered the door leaf incorrectly.
4. Having purchased all the necessary tools and materials, you can begin the preparatory work.
- First, you need to remove from the door everything installed on it. elements - locks, handles and viewing eye.
- If you are going to trim a door that already has old finishing material, it must be removed. The nailed material can be bent using a nail puller, separating the leatherette from the surface, and then, using the tool to hook the nails, carefully remove the canvas completely.
If the insulation is not glued to the door, the old trim will come off easily. The thin layer of material remaining on the surface does not accommodate the new finish.
- Next, some craftsmen remove the door from its hinges and, for convenience further work, lay her on several chairs or on enough large table. Before removing the door from its hinges, you must make lines on the door leaf along the contour of the door frame.
- In most cases, the sheathing is carried out in a vertical position, without removing it from its hinges.
The process of covering a door with leatherette
As you know, a door is usually sheathed on both sides - external and internal; there are some differences in these processes that you need to know about when starting work. In addition, there is a significant difference in the technology of finishing wooden and metal doors.
And, of course, there are different ones that also need to be considered before starting work.
Lining the inside of a wooden door
When starting work, you need to immediately pay attention to where the door opens - towards the entrance or into the apartment, since the location and size of the rollers will depend on this.
This publication will consider the option when the door opens inside the apartment.
- The first step is to install the sealing rollers. They are made from prepared leatherette strips and ready-made foam rollers or strips of other insulating material.
Leatherette is folded in half and a strip of insulation is placed inside. Then, place the roller around the perimeter of the door, so that it protrudes beyond the door leaf by 4 ÷ 7 mm, since it should cover the gap between the jamb of the door frame and the door, which is formed after it is closed. On the side where the hinges are located, the roller should completely close door frame. The roller is secured using stapler and staples, starting from the top right corner. From there they go to the upper left corner, then frame the sides with it. On bottom part it is secured last.

- The next step is cutting out the insulation. The size of the cut strip should be 8 ÷ 10 mm smaller than the door leaf.

It is also secured with staples to the door plane, leaving 20 ÷ 30 mm free at the edges so that decorative material can be wrapped between the insulation and the door material - leatherette.
- Next, you need to correctly place the main leatherette fabric. The main thing is to avoid distortions, otherwise the work will look sloppy.

When installing the main upholstery, it is very important not to make a mistake with the exact direction of the leatherette strip and its even tension
First, the top of the canvas is secured. It is folded under the insulation and nailed with decorative nails, placing them at a distance of 80 ÷ 100 mm from each other.
After the top edge is secured and the direction is once again checked, the left side is nailed and then the right. As fastening progresses, the material is stretched. The bottom edge of the material is nailed last.

- Next, it is very important to accurately mark and cut out the holes for the locks and peephole.
- If you want to make a drawing on the surface, you first need to mark it, and then fill in decorative nails along the markings, starting from the center of the canvas. In this case, you need to try not to stretch the leatherette too much so that sagging does not appear.
Video: lesson on lining a wooden door from the inside
Wooden door - external cladding
The door trim that opens into the apartment from the entrance side is done as follows:
- Before starting work, you need to close the door and outline the door frame opening on the door leaf. This line will determine the location of the trim on the door leaf. If leatherette is nailed to the entire surface, then both the door and the lock will not close.
- The insulation is cut out 10 mm smaller than the outlined area and secured with staples.

- Next, tucking it behind the insulation, leatherette is stuffed along the marked line, in the same order as on the inside of the door - first on top, then on the sides. The bottom edge remains free for now - it will be attached later.

- In this case, the insulating roller is fixed to outside door jamb on three sides, but it is not installed on the threshold. This element, when fixed, should cover the cracks, extending 20 ÷ 25 mm onto the door leaf. But the keyhole must be free, and this must be provided for in advance.
- The bottom roller should not be made bulky, as it will simply wear off over time and look sloppy.

It is fixed to the bottom of the door itself, and its edge should not extend beyond the marked line by a single millimeter, since the door in this case will not be able to close. When closing the door, this element should fit tightly to the threshold from above, that is, as if located on it.
- The lower part of the main leatherette sheet is pulled and nailed onto the roller nailed to the door, or, as shown in the photo, you can hide the bottom edge in the roller being secured.
- Next, holes are made in the leatherette covering for door accessories - locks, peepholes and handles. They need to be cut very carefully, without expanding more than necessary.
Video: how to sheathe the outside of a wooden door with leatherette
Metal door - leatherette finish
IN recent years In high-rise apartments, a second metal door is increasingly being installed in addition to the wooden one. It’s good if you have the opportunity to immediately purchase insulated and, but very often it consists only of metal sheet and frames made of angle or profile pipe. In this case, the apartment owner picks up the tools and independently brings the door into proper shape.

The inner and outer sides of the metal door leaf also have their own characteristics in their lining.
Inner side of a metal door
If an unsightly metal frame without insulating and decorative materials extends into the room, this can easily be corrected by installing sheets of foam plastic of suitable thickness and covering it all with a decorative panel. The work will require materials slightly different from the lining of a wooden door.

- Foam plastic with a thickness equal to the depth of the frame frame.
- Polyurethane foam will be needed to seal the seams between the installed foam and the metal frame.
- Wooden slats for fastening to the inner sides of the frame - they will be needed as a basis for attaching the decorative panel.
- Self-tapping screws and drills for metal - they will be used to drill holes in the corners ( profile pipe) for screwing wooden slats to the metal frame.
- Decorative nails for fixing leatherette to the surface of plywood.
- Wood screws for screwing plywood sheets to wooden slats.
- A sheet of plywood, in shape and area equal to the door frame, with a thickness of no more than 10 mm.
- Decorative leatherette and thin sheet foam rubber, thickness 10 ÷ 15 mm.
- Glue or double-sided tape to secure the insulation to the plywood.
Finishing work inner surface the door goes as follows:
- Wooden slats are screwed to the inner ribs of the metal frame. Pre-drilling is required through holes through slats and metal elements frame.

- After fixing the slats, gaps may form between them and the metal sheet, which will become cold bridges, so they are sealed polyurethane foam. It will also contribute to the rigidity of the slats.

- Next, polystyrene foam is installed between the fixed and insulated slats, around which polyurethane foam is also passed. This treatment will also help securely secure the foam in the cells and close the last paths of possible penetration of cold.

- On plywood sheet you need to mark the location of the wooden slats in the frame, since it will have to be screwed to them.
- If you need to hide the heads of the screws under the cladding, then the plywood needs to be screwed to its cladding.
- First, the sheet is screwed to the middle slats, so that all edges remain free for inserting leatherette behind them.
- On installed plywood with glue, or better yet, with double-sided glue masking tape fix the foam.
- The leatherette is stretched from above, tucked over the edges of the plywood, and at the corners and along the edges in the middle of the sheet it is screwed through with self-tapping screws, the heads of which are recessed into the plywood. The resulting holes can be carefully sealed with a piece of material, and a nail with a decorative head can be driven in nearby.
- Next, the leatherette is stretched and nailed along the entire perimeter. Since nails are quite difficult to drive into plywood, you need to choose durable ones made of high-quality metal that will not bend.
- Thus, the decorative panel will be well fixed to the frame.
- Then, you need to mark it location lock, cut the leatherette and insulation, and then carefully drill holes in the plywood.

It must be said that instead of plywood and leatherette, you can use laminated lining to decorate the inner surface of the door. It is installed from the bottom and gradually rises to the top, and the sides of the lining are covered with a special corner.
External side of a metal door
When decorating the outside of a metal door, you can use not too thick felt for laying under leatherette, which is glued to the metal surface.

- The insulation is cut smaller than the size of the door leaf by 7 ÷ 10 mm, and leatherette is larger than this size by 60 ÷ 80 mm. This extra section will be used to fold the edge to the other side of the sheet.
- Polymer glue is applied in strips to the surface of the metal sheet.
- Next, insulation is applied to it and pressed. It is necessary to give time for the glue to set and dry.
- Leatherette is stretched on top of the insulation, bent over the edges of the metal door panel and glued to the other side. It is best to use quick-drying universal glue for this purpose.
First, the top edge of the material is glued. Next, it is stretched and secured to the side parts of the door. If excess material forms on the folds, it is best to cut it off, otherwise it may interfere with the free closing of the door leaf.
If the finishing material is very dense, and the folds at the corners are too thick, then it is better to cut off some of the leatherette in these places.
- If you do all the work slowly, the door will turn out neat and respectable.

- Finally, the door frames are installed and screwed onto the door. accessories - locks with handles and a peephole, if provided for installation.
Video: finishing a metal door with leatherette
"Carriage" trim
“Carriage” lining or screed is quite popular, as the door after it looks aesthetically pleasing and respectable. However, not every apartment owner can afford this, since the work to complete it is quite painstaking and requires skill.

The “carriage” trim looks very impressive
This cladding is done with two in different ways- from solid material or from pre-cut pieces of leatherette. Both methods are risky, since in both the first and second options the material may be damaged and the door may not be sheathed if there is no experience in performing such “filigree” work.

...however, do this difficult work Not everyone can do it.
Therefore, for starters, you can practice and sheathe the surface of a stool in this way, for example. Any fabric can be used for training.
In order for all the work to be successful, a number of preparatory measures need to be carried out. It is very important not to neglect careful marking - only in this case will geometrically even shapes of squares or rhombuses be obtained.
- To mark, you need to take a sheet of thin plywood, the same size as the door leaf. It needs to be drawn into even squares or rectangles.
- Where straight lines intersect, they are marked and then drilled round holes, so that their corners form rhombuses or squares.
- The plywood is placed on a foam mat and through the holes on it the places where decorative nails will be driven are marked.

Preliminary marking for “carriage” upholstery
- Next, the marked foam rubber is transferred to a wooden base. If it is too thick, round holes may be cut into it for driving nails.
- They go around the holes or drawn circles with a stapler, nailing the insulation to the base and marking the recesses.
- The leatherette is drawn from the wrong side into even squares, which should be 8 ÷ 10 mm larger on each side than the figures drawn on the foam rubber. These extra millimeters are needed to bend the edges of the material when nailing it.
- Then, the material is cut into marked fragments, and you can begin to attach it to the door leaf.
- The pieces are placed on the foam rubber according to the markings and nailed. You can first mark them with a stapler and then nail them with decorative nails.

Each fragment is laid and fastened separately - extreme care is required
- You need to make sure that the pieces of leatherette overlap each other in one direction, otherwise the harmony of the pattern will be disrupted.
- Without the proper experience, the work will seem quite complicated and long, however, if you have patience, you can gradually complete it successfully.
It is much more difficult to remove a carriage pattern from a solid canvas, since it is very difficult to accurately measure and grab identical strips that will serve as a foam tie between the nails.
Video: one of the options for “carriage” door trim with leatherette
There are other ways to upholster a door using thin stripes leatherette or fishing line, but in order to achieve the desired success, first, in all cases, careful marking of the door leaf is necessary.
If this work is done independently, then not only will you gain experience and skill in performing it, but you will also save a significant amount. Therefore, if you want to try yourself in this unique art of wallpaper, then it’s worth taking a risk by training first on small surfaces.
No matter how expensive and high-quality the door is, after some time it will lose its original appearance and will require restoration. The easiest way to give a door a second life is to upholster it. For door trim you can use a variety of different materials. The technology for carrying out the work remains virtually unchanged depending on the upholstery material. Read the suggested instructions and you can easily complete the repair yourself.

What you will need for door upholstery: preparation for work
There are many suitable options for upholstering doors yourself. various materials, namely:
- PVC film;
- leather;
- dermantine;
- vinyl leather.
The last option from the list is the most preferable. Vinyl leather is superior to leatherette and artificial leather in the main quality characteristics and is cheaper than genuine leather.

Upholstery material can be purchased at specialty store per cut. In general, the cut size should be approximately 15 cm larger than the dimensions of the door on each side.
Upholstery will require you to make special bolsters from upholstery material. In total, you need to prepare three strips about 100-150 mm wide. Select the height individually according to your height door design.
Choose your lining material. Budget option– foam rubber. A lining 1-2 cm thick is sufficient.

If you want to improve the sound and thermal insulation characteristics For doors, use isolon instead of foam rubber. This is very practical material with excellent performance properties. It costs slightly more than simple foam rubber and significantly surpasses it in all characteristics.

Additionally, you will need to buy various small accessories, such as decorative nails. Available for sale huge selection such products in a wide variety of color variations. Choose according to your taste.

If you wish, you can buy upholstery nails that are originally upholstered in leather or leatherette. They will be invisible on the main door leaf, which in many situations is the right decision.

In general, try to choose nails whose color will be as close as possible to the color of the upholstery material. After restoration, the door should have a harmonious appearance, unless otherwise provided by your design project.
Do-it-yourself door upholstery is done using glue. You can buy the most ordinary glue like “Moment”, etc. About 100 ml of glue will be needed on one side of the door leaf.

There should be no difficulties in the process of upholstering a wooden door yourself. Understand the proposed instructions, understand the difference between covering the outer and inner planes of the canvas and get to work.
Finishing the inside of a wooden door
This method is suitable for finishing those models that open inward, i.e. into the space of the room.
First step. Make a special roller. With this element you will hide the gap between the door frame and the leaf itself. Also, in some situations, the roller will contribute to a tighter fit of the canvas to the frame.


Second step. Attach a strip of upholstery material to the front of the door so that it extends approximately 35-40 mm onto the base. Perform fixation using a special stapler.
If the door has overhead locks, start attaching the material from there. If your locks are mortise, fastening should begin slightly below the central part long side doors. Cover the entire perimeter of the canvas with similar strips.
Third step. Place foam rubber or other selected filler. Pre-cut the material into strips about 100 mm wide. To attach the lining, use the same stapler. The resulting roller should stick out by approximately 10-40 mm, depending on the characteristics of the relationship between the door itself and the decorative trim. At this point the roller is ready.


Fourth stage. Measure the space between the inner edges of the cushion you created and cut out a strip of dense foam. To determine the appropriate strip width, subtract 10 mm on each side from the previously obtained roller measurement. Attach the finished foam strip.
Fifth stage. Proceed directly to the door trim. Take a piece of the selected upholstery material by the corner, carefully tuck its edges by about 6 cm and place it in the corner of the door leaf so that the upholstery slightly extends onto the surface of the previously prepared roller.
Drive a decorative nail about 0.5 cm from the edge.
Take the upholstery material by the second upper corner, tuck it in the same way, and hammer in the second decorative nail, slightly stretching the upholstery.
Make sure that the piece of upholstery material is laid evenly. To do this, run your hand along the center line of the door with a small clamp, go to the bottom and, holding the upholstery tightly with your hand, apply its lower corners to the edges of the door. If the distance is the same on both edges, you can continue working. If there are discrepancies, fastening the upholstery will have to start over again, otherwise in the end it will be uneven and unsightly.
Nail the top edge of the canvas with decorative nails in 1 cm increments. Next, using the same pattern, finish any side part, carefully tucking the upholstery material at an equal distance and pulling it slightly.
Get to the bottom edge and move on to finishing the second side piece. Finally, secure the bottom free edge with a stapler. On this self-cladding completed. Proceed to installing the peephole and old or new locks.
If the door structure consists of two leaves, the restoration is carried out in the same order. Important nuance The only thing is that the vertical roller needs to be installed on the sash with a handle.
Video - Do-it-yourself door trim
Finishing the outside of a wooden door
These are instructions for structures that come off outward.
First step. Close the door and transfer the projection of its frame directly onto the canvas. This will give you the outline of the new upholstery. Indentation along the edges is necessary for the “quarter”.
Second step. Fasten the lining material with approximately a centimeter indentation from the intended line.
Third step. Just as in the previous instructions, nail down the main piece of upholstery material, leaving its bottom edge unfixed.
Fourth step. Make an insulating roller. For external upholstery, it is attached to the box rather than to the canvas. It is made in almost the same way as when making internal upholstery, only the volume of internal foam rubber needs to be slightly increased.
Place the bead on the hinge side so that it is flush with the door frame. In relation to the lock side and the top part, the roller needs to be extended 0.5 cm. Attach the bottom side of the finished roller to the door leaf so that when closing it is pressed tightly against the door threshold.
If you attach the roller directly to the threshold, it will wear out very quickly due to foot contact.
Fifth step. Secure the bottom edge of the upholstery with a staple gun, and then install locks, new or old handles, a peephole and, if necessary, decorative elements.

There are two main options for covering a metal door structure: a budget one using materials like vinyl leather, dermantine and the like, and a more expensive one using decorative panels. Read the instructions for each of them and choose the option that suits you.
Video - Upholstery and insulation of metal doors
Budget method
Restoration of metal doors can be carried out using the same materials as wooden doors. However, in this case there is no need to use decorative nails - everything is done with glue.
First step. Carefully lubricate the edges of the door leaf with high-quality glue and fix the foam strips onto it. Trim the excess lining according to the door profile.
Second step. Apply the adhesive to the end of the top of the door and begin gluing the selected upholstery material. First glue the top, then door hinges, after them glue the locks, and finally the bottom of the door. Smooth out wrinkles and get rid of distortions in the material directly as you work.
Third step. After the glue has completely dried (the drying time is indicated in the instructions for the specific product), trim off any excess material, if present, using a sharp utility knife. Be careful not to damage the main upholstery.
Fourth step. Install the peephole, handles and return the locks.
Expensive way

This method involves upholstery metal structure special panels. Overlays made of MDF are optimally suited for external upholstery. They are manufactured in several standard sizes. After such upholstery, the door will look no worse than expensive factory-made analogues.
Perform interior decoration wall panels. Select the upholstery material in accordance with the interior of the room and the operating characteristics of the door. MDF has a more attractive appearance, often imitating the texture of exclusive and expensive wood, but this material needs to be treated with care. Plastic panels are much easier to maintain, but not as beautiful.
First step. Measure your metal drill. You need to know the width and exact height of the canvas. On the inside of the door you will find corners designed to increase the rigidity of the door structure. The width of such corners corresponds to the depth of the door leaf. You also need to record this parameter in your measurements. You will need it when purchasing foam sheets and wooden beams.

Determine the internal height of the canvas as the distance from the bottom to the top corner. The width of the inner surface, accordingly, will be equal to the distance between the side metal corners. Record the measurement results.
Second step. Go to the construction store along with the results of previous measurements. Buy polystyrene foam there, panels from the selected material, wooden beam And decorative corner with a 10-15 percent margin.
Third step. Return home and start finishing the door. First, cut the block into 4 parts. The length of these segments must correspond to the width of the door leaf.
Take a block, attach it to the upper edge of the canvas and, using a marker or pencil, draw a line along this block on the base. Do the same at the bottom of the canvas. Place the remaining bars on the door so that all 4 bars are installed at approximately the same distance. Leave appropriate marks.
Fourth step. Armed with an electric drill, make 16 mounting holes in your door. There should be 4 holes for each block. The diameter of these holes should be equal to the diameter of the screws.
Fifth step. Secure the bars to the canvas using self-tapping screws. This will give you a frame.
Sixth step. Drill mounting holes to secure the upholstery panel. The optimal number of holes for mounting each such panel is usually given by the manufacturer in the accompanying instructions.

Seventh step. Prepare holes in the facing panel for peepholes, locks and handles.
Eighth stage. Secure the panel. For greater convenience, you can remove the door leaf from the hinges.
Move on to the upholstery of the inside of the door leaf.
First step. Attach the frame bars to the canvas as you did for exterior upholstery.
Second step. Cut the foam into pieces, focusing on the distances between the frame bars. Make holes in the appropriate parts of the foam for the peephole, handles and door locks.
Third step. Place sheets of foam in the spaces between all the bars. Additionally, you can fix the foam with high-quality glue.

Fourth step. Secure interior panels on the frame. Plastic panels They are fastened with a stapler, while the MDF panels are fixed with clamps.
Fifth step. Attach a decorative corner from suitable material along the perimeter of the door leaf. It will hide the edges of the upholstery elements and give the door a more attractive appearance.
Sixth step. Install a peephole, handles, locks, and replace trims if necessary.

These simple instructions will allow you to update the appearance of your door with minimal financial and time costs.

Good luck!
Video - How to upholster a door with your own hands
Upholstering a door with dermantine yourself will restore its attractiveness and protect it from the cold. Find out how to do it yourself.
The front door to an apartment can tell a lot about its residents - how wealthy they are, how they like order, whether there are animals in the house. Upholstering a door with dermantine with your own hands will help the owner improve its aesthetic properties. At the same time, I would like it to reliably protect the interior space not only from unwanted intrusion, but also from extraneous noise, summer dust, and winter drafts.
Taking into account that the payment for the work of the master is comparable to the cost of materials, then the amount of the service for restoring the door leaf can save money, which is so necessary for repairs.
Popular door finishing methods
Residential renovation solves two main tasks - creating comfort and an interior that matches the chosen architectural style. Thanks to properly executed finishing, you can emphasize the direction of the design and help create comfort in your home. Among the popular ways of finishing doors, there are several:
— applying thermal film- durable material, often from Israeli manufacturers, creating durable and reliable coverage, imitating the structure of valuable wood species;
— decoration MDF panels 16 mm thick, representing a slab of finely dispersed chips, externally resembling natural wood;
— dermantine upholstery- the most popular type of finishing, which can not only give the door a neat, well-groomed appearance, but also improve its noise and heat protection, and eliminate the entry of cold and dust into the apartment.

You can select material of non-standard color
Properties of dermantine
Modern dermantine, vinyl artificial leather or artificial leather is a material with improved performance qualities. It is an elastic two-layer product - a durable fabric coated with polyvinyl chloride (PVC).
Such decorative material is quite inexpensive and allows even the owner without special skills to do the door upholstery with his own hands. The result is a coating that has a number of positive properties:
— mechanical strength, abrasion resistance, which ensures a long service life;
— no toxic emissions, environmental cleanliness - conditions necessary for products allowed for use in residential premises;
— excellent aesthetic parameters, the possibility of being produced in any shade of the color spectrum, two-color, with a pearlescent effect, with different surface structures, for example, in the form of an embossed pattern or imitation of genuine leather;
— resistance to high and low temperatures , ultraviolet radiation, the influence of moisture, which makes it possible universal use, including use in heated, cold rooms, and outdoors.

Fasten the material tightly
How to insulate doors?
So that do-it-yourself door upholstery with dermantine provides improved living conditions, provides good protection from drafts, extraneous sounds, you should use another layer - . Depending on the thickness of the insulation, the upholstery is divided into regular and blown.
Different materials are used for the interlayer. They have different properties, service life and, accordingly, price.
- Foam rubber- a very popular material that is often used for insulation. It has pleasant elasticity, is moisture resistant, easy to use, easy to cut and attach. Manufacturers guarantee its reliability for 15 years.
- Batting- a traditional product used for insulation, produced on the basis of natural cotton, wool, synthetic fiber, with a service life of about 30 years.
- Modern insulation materials mineral fiber, which include “Ursa”, “Isover”, “Rockwool” and many others, used for up to 50 years.
- Izolontape- is a foam type polyethylene with a one- or two-sided self-adhesive layer, the service life of which is practically unlimited - determined by the manufacturers at 80 years.

Apply insulation under the upholstery
Materials and tools for door upholstery
In order for the door upholstery to be of high quality with your own hands, you need to be patient, as well as artificial leather, insulation, decorative nails, finishing cord, wire, thread. The decoration looks beautiful using thin strips of dermantine, which have the ability to curl into an even tube. It can be used to create an ornament by placing it between fasteners.
Some special tools won't be needed. Those that are in every household will come in handy - a hammer, a knife, scissors, a screwdriver, a tape measure.
Unlike wooden panels, which are finished with nails, metal varieties can be covered by fixing dermantin with glue.
Calculation of dermantine
To determine the amount of material, you should take into account the height, width of the door leaf, as well as the length for the manufacture of rollers along its perimeter, allowing you to close the existing cracks. Depending on the desired type and size of the bend, you need to add 30-50 cm to the dimensions of the door.

It is important to correctly measure the amount of material
Preparatory process
Before you start upholstering a door with dermantine with your own hands, you should dismantle the lock, handles, inspection peephole, apartment number, remove it from the hinges, and remove the interfering old coating. For ease of work, so that all operations on fixing the finish occur accurately, it is better to place the product horizontally, on a hill, for example, a table, stools or other base.
Fastening dermantine to the door
- Place insulation and vinyl leatherette on the door leaf. Temporarily secure them in the corners and along the perimeter with small nails. On the side of the longer part, along its height, carefully bend the leather to a length of about 5 cm. Securely fasten it with decorative nails, driving them at the desired distance, usually 5-10 cm. In order not to damage the figured caps, it is worthwhile to provide soft pads on the them when scoring.
- To make the door upholstery with your own hands smooth, without flaws, the dermantine should be nailed, slightly stretching, symmetrically on the opposite side of the panel, avoiding the formation of wrinkles and distortions. Perform the same procedure on its lower and upper short parts. The material should be fastened along the bottom of the canvas, raising it to the level of the height of the threshold.
- During the process of installing the leather, it is advisable to outline the future location of the handles, core, and all accessories. This is important so as not to spoil the finished coating by punching holes at random.
- In accordance with the chosen style or as desired, you can leave the artificial leather smooth, trim it with nails in the form of geometric shapes, diamonds, squares, stripes, in the form of graceful lines or patterns. For additional finishing, you can use decorative cord, string, copper wire, and cap caps.
- To prevent the formation of drafts, you can slightly increase the release of leather for folding along the edges, make rollers from dermantin and insulation, placing them first around the perimeter of the door from the outside, except for the places where the hinges are attached. For this, strips of vinyl leatherette 8-10 cm wide are used, into which thin insulation strips are inserted.
Practical and inexpensive decoration using dermantine will give the doors a beautiful look in the desired color, with a stylish surface. Such upholstery will make it possible to simultaneously insulate the apartment and improve sound insulation.


