If plaster is used to decorate the facade, then it smooth surface, even painted in the original color, may look a little boring.
More original and interesting design will help you make rollers for decorative plaster. Their relief surface will leave a textured pattern on external wall, but at the same time the entire house will also be reliably protected from large amounts of precipitation and temperature changes by a layer of plaster.
In order to create a decorative finish on the wall, various sponges, stamps, combs and applicators are used, but they can be used if the scale of work is small. And applying plaster with a roller allows you to quickly cover a large area. There are several types in the assortment of stores textured rollers:
- According to the material with which the moving cylinder is covered.
- Based on the drawings that are created during work.
There are also several ways to apply decorative plaster using a roller. In the first option, a textured roller is passed over the still damp plaster (both painted and regular gray) and the necessary pattern is created, which can be additionally painted. In the second case, the tool is dipped into the solution and the texture is applied to a prepared, flat surface.
What are textured rollers?
If previously paint was applied to a plastered wall with a metal cylinder, now a roller can perform various functions. It can be used to apply primer, paint, and even plaster solution, and it will also help you create an original design on a large surface.

Considering all the functionality, rollers for textured plaster are produced from various materials, such as:
- foam;
- leather;
- plastic;
- tree
- silicone;
- textile;
- rubber;
- polystyrene foam
Foam tool
If a tool is selected for work of this type, then you should know that the foam rubber must have sufficiently deep pores, and their diameter can vary significantly. With such features, a pattern will remain on the treated surface that will resemble burst bubbles or lunar craters.
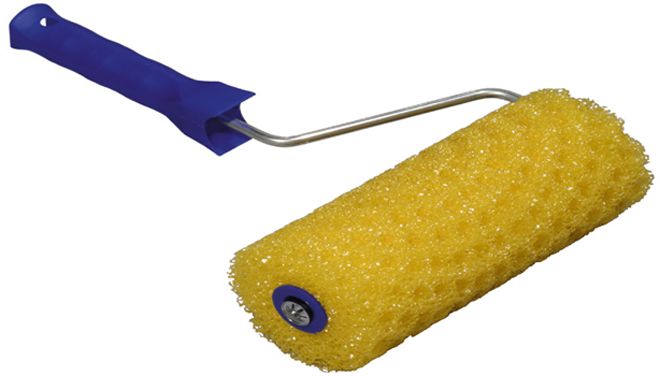
Applying decorative plaster with a foam-coated roller should be done easily; you should not put too much pressure on it, because the soft base, shrinking, will smooth out the entire pattern. Also, you cannot use such a tool if plaster with solvents is selected. These components will easily disrupt the structure of the foam rubber and its particles will remain on the surface of the plaster.
In order to apply decorative plaster with a regular foam roller, you can wrap it with ropes of different thicknesses, vegetable netting, or cut out the desired pattern on it. This will be a roller for decorative plaster with your own hands. It will help bring a truly original idea to life.
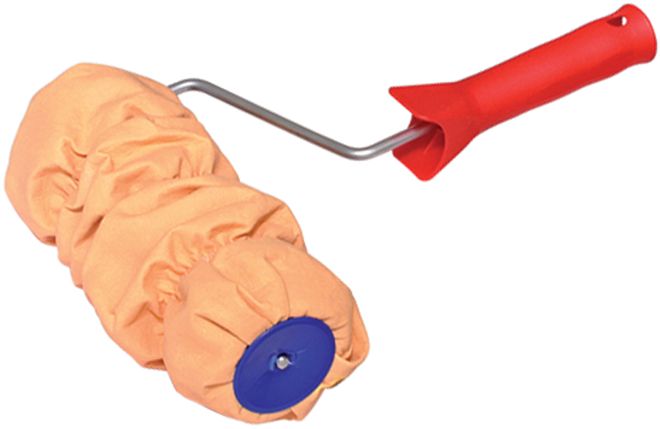
Fur or fleecy rollers
If fur rollers are used for work, the result is a surface that imitates a “fur coat”. An important point is the length of the villi. If you need a more pronounced effect, you should choose options with long pile. There are different tools on sale, the length of the pile ranges from 2 mm to 25 mm.

Both natural materials (natural fur) and synthetic fibers can be used as material for the manufacture of these rollers. You need to choose such a tool very carefully; the pile should not be pulled out of the base. Otherwise, when applying the pattern, the base will be spoiled by the presence of unwanted fibers.
Leather roller
A leather-coated tool will help make the surface similar to natural stone or marble. It is most often used in conjunction with Venetian plaster.
You should select a product from natural material, since synthetic analogues may be of poor quality and can ruin expensive plaster.
Plastic
Textured rollers for decorative plastic plaster are considered the most budget-friendly options.

They may have bulges or depressions on the surface various shapes. This material is not durable; after some time, chips or cracks may appear on the surface of the roller, which will cause defects in the design.
Tree
Textured plaster can also be applied using a wooden roller. This tool can perfectly replace the most popular and durable rubber one. It leaves a high-quality pattern when correct use. Moreover, wood is a rather inert material and does not interact with the chemicals of the plaster.
Its disadvantage is considered to be hygroscopicity. During operation, it can absorb water from the solution and, as a result, swell. This changes the size of the picture. To eliminate this drawback, you need to pause work and thoroughly dry the instrument.
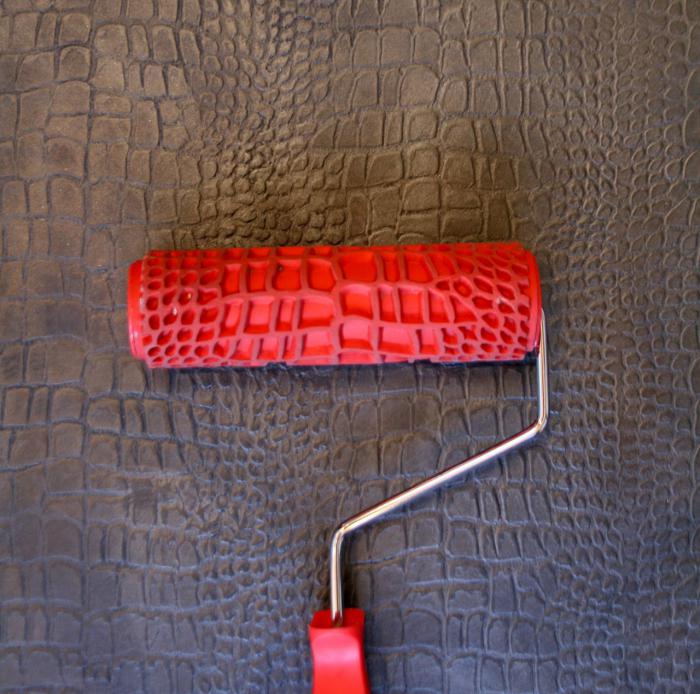
Rubber roller
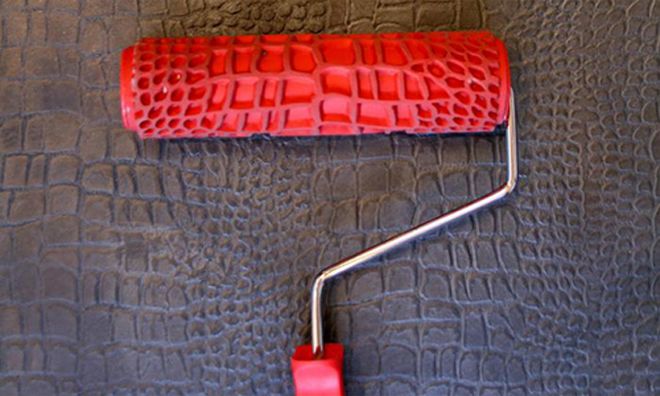
This tool is most often used to create complex textures:
- Geometric shapes.
- Plants.
- Animals.
- Murals.
- Brickwork.
It is used by professionals in their work because the material is durable, easy to care for and convenient to work with.
Foam plastic
This material is just as good as rubber for applying complex textures and patterns. But due to the fact that the material is easily damaged during operation, when processing large surfaces you will need to change the tool several times. If the owner wants to finish a small surface, then this will be an alternative to expensive options.
Operating rules
Before you start decorative finishing walls, you need to prepare the surface. To do this, the walls are cleaned of all contaminants, well primed and leveled. If the base is not even, the design will not be of high quality and uniform, and will not look aesthetically pleasing.
After the leveling layer has dried, you can begin decorative finishing.
- A solution of special decorative plaster is made according to the recipe indicated on the package.
- Next, the mixture is applied to the wall, up to 5 mm thick.
- In order to get a clear drawing, you need to wait a little for the solution to begin to harden on the wall. About 10 minutes will be enough. If you wait longer, the thicker solution will cling to the tool, and if less, then it will liquid basis You won't get a clear print. You also need to remember that the plaster has completely hardened. Do not make a large amount of solution. If you don't use it right away, it will harden in the container. And if you apply it all on the wall, then it will not be possible to treat it with a roller. It is better to work in pairs - one applies the plaster, the other works with a roller.
- They move from top to bottom.
- The embossed plaster roller should not be pressed too hard. Movements should be smooth, sliding.
- Each subsequent strip runs close to the previous one. It is not allowed to use a whip, as the drawing will be distorted.
- The first few strips should be checked using a level or plumb line. If they are not even, it is better to redo them immediately to get a high-quality result.
- If the pattern turns out to be excessively embossed, after drying it can be smoothed out a little using a grater and a sanding mesh.
- If the surface area to be treated is very large, you need to monitor the condition of the roller, especially if it is made of soft materials. When they wear out they need to be replaced.
- After the decorative plaster has completely dried, you can begin painting, if necessary. If paint needs to be applied to protruding parts, use a short-haired roller or brush. If the plaster must be completely painted with a roller, then it is better to use a tool with long pile.
Decorative plaster is widely used in interior decoration. For many years it has been used both for interior works, and for external ones. It has wear-resistant properties, is waterproof, and after application to the surface forms a durable layer. This type finishing material allows you to use many different design solutions, gives the room texture and originality color design. Various designs are applied to the surface using decorative plaster rollers. Having studied the technology, finishing with such material will not be difficult. You can do it yourself without involving expensive professionals.
Decorative plaster
Before you learn how to apply different patterns to a layer of decorative plaster, you need to become more familiar with this material. It is a particularly durable coating that contains certain fillers. For example, pebbles, chips of marble, granite, mica, quartz, wood fiber. Such a solution must contain polymer and acrylic substances; they are responsible for the binding functions. Thanks to them, the plaster acquires elasticity and sets after a certain period of time. It is quite enough to apply a pattern to the surface using textured rollers.
Types of plaster
There are two main types of decorative plaster:
- Textured. This solution forms a relief immediately after application. This is due to the presence of granules in it. Based on their size, the mixture is divided into large-, medium-, fine- and fine-textured.
- Structural. Forms an elastic and smooth layer; decorative plaster rollers are used to apply the relief. The color of the solution is predominantly white, tinted by adding special dyes.
Types of rollers for decorative plaster
The features of this material allow you to create a unique and original relief on the surface. Each of them corresponds to a specific type of roller. Let's look at the most common of them:
Rollers for textured plaster: selection rules
In order to apply the necessary relief to the surface of decorative plaster, the main thing is to choose the right roller.

How to create complex patterns on the surface of decorative plaster?
Natural patterns on a plastered wall look very beautiful. In order to create it, it is enough to use a relief roller and a not very thick solution. It is necessary to apply the mixture in the chosen direction, which is not recommended to be changed later. 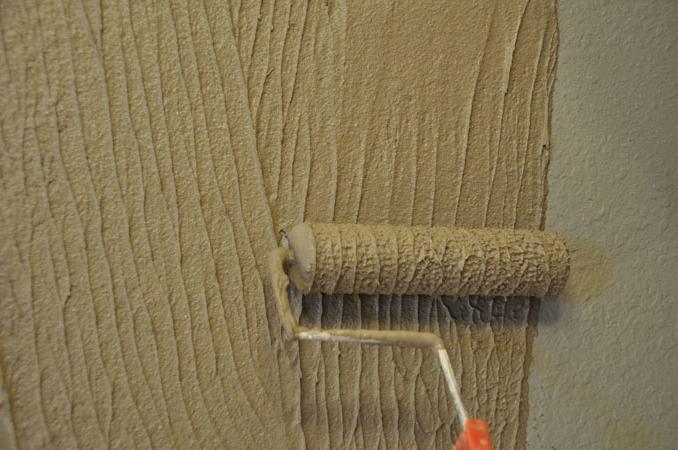
The situation is much more complicated with complex artistic patterns. Of course, there are rollers for decorative plaster with certain reliefs. However, it is impossible to use the technology described above, since in some places the mixture will be applied in a very thick layer, and other areas will be left without any finishing material at all. In this case, it is most important to first apply the plaster with a spatula, and only then walk curly roller. The speed, pressure and direction of movement should be the same throughout the entire area. After the first strip is laid, all subsequent ones are carried out end to end with the previous one; overlaps and indentations are not allowed.
DIY roller
Rollers for textured plaster can be purchased at any hardware store. However, if you want to give the finish a truly individual and unique view, then such a tool can be made independently. Wallpaper is perfect for these purposes. rubber roller, a thick rope, strips of rubber or leather (sometimes you can use regular erasers) and glue.
It is necessary to cut out some kind of shape from leather or other materials described above. Its shape is selected individually. The figures need to be glued at a certain distance so that a clear relief appears on the surface of the plaster. It is advisable to decorate the edges of the nozzle as equally as possible, so that when working with a roller there is no difference between the sides. 
Applying decorative plaster with a roller
So, let's get acquainted with detailed technology applying ornaments to the surface of the plaster.
Other methods of applying patterns
Rollers for decorative plaster are not the only tool for applying designs to the surface. For these purposes, you can use a foam sponge, a brush, a stiff brush, or a rough cloth.
Using rollers for decorative plaster you can give the room an original and unique design. Don't be afraid to experiment and make unconventional decisions.
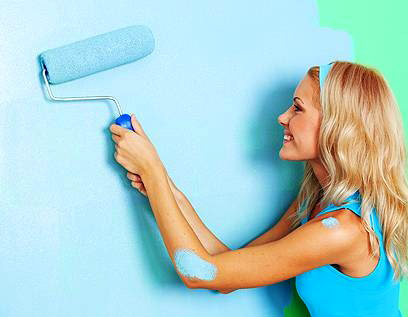
Painting walls today is simple and in an accessible way changes to the interior of the room.
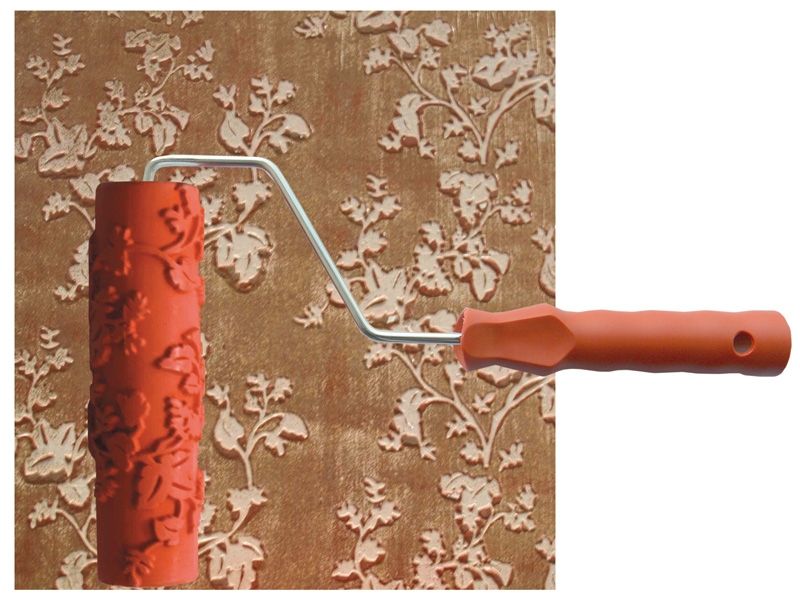
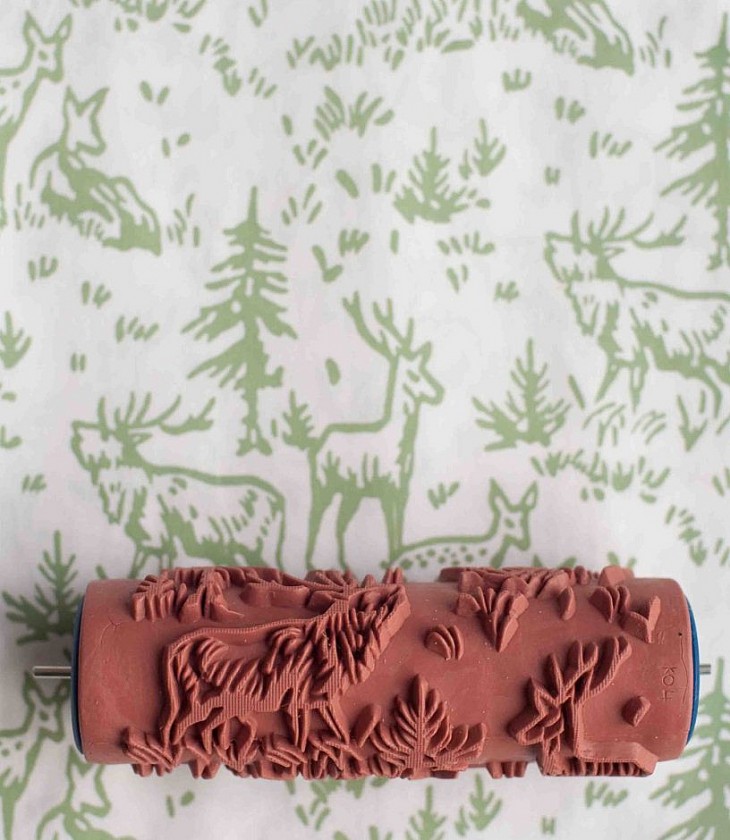
Moreover, today it is possible not only to change the color, but also to create a specific pattern using a roller with a pattern for wall decor.
Performed using this method textured painting looks no worse than walls covered with wallpaper, at a lower cost.
Story
Rollers have been used for a long time to create textured coatings. Only at the beginning it was made of wood, did not absorb paint well, and therefore it was quite difficult to work with it.
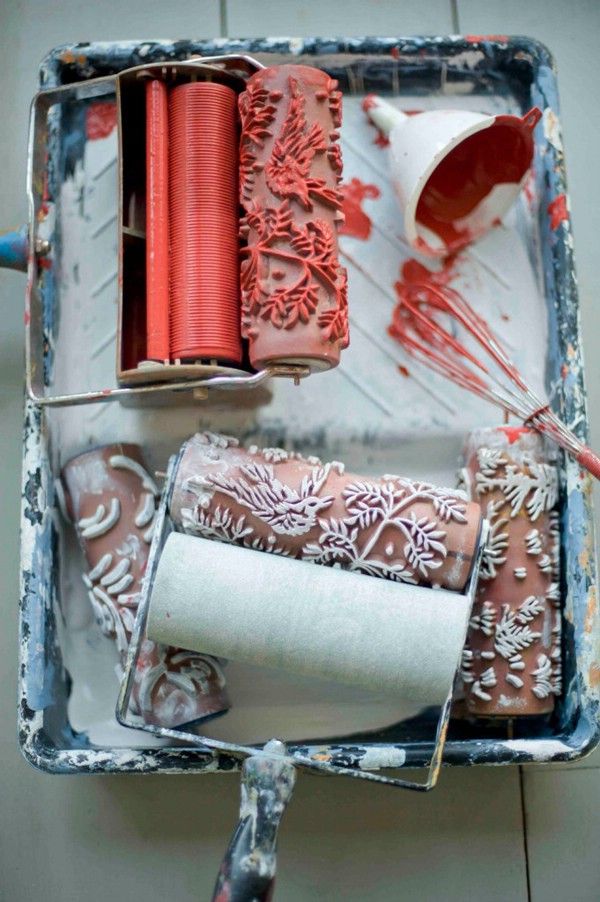
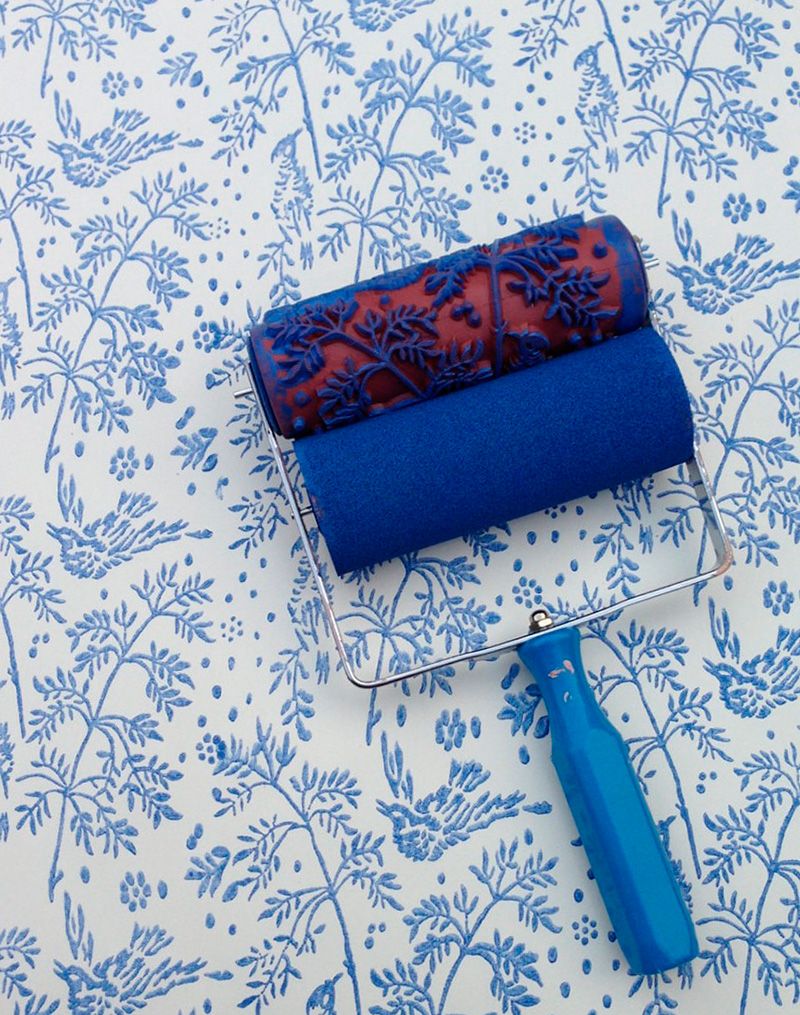 The second cylinder is needed to lubricate the roller with paint.
 Modern designs rollers are two cylinders on a handle, one of which has a pattern cut out on it, and the second is used for applying paint. There are also tools that have containers into which the required amount of paint is pre-filled and applied to the drawing while working in the required quantity.
Work technology
 Test the tool on paper before applying it to the walls.
 To obtain a high-quality textured pattern using a roller with a pattern, you must adhere to the following recommendations:
- Before applying a patterned coating to the walls, it is necessary to perform a test painting on a sheet of paper.
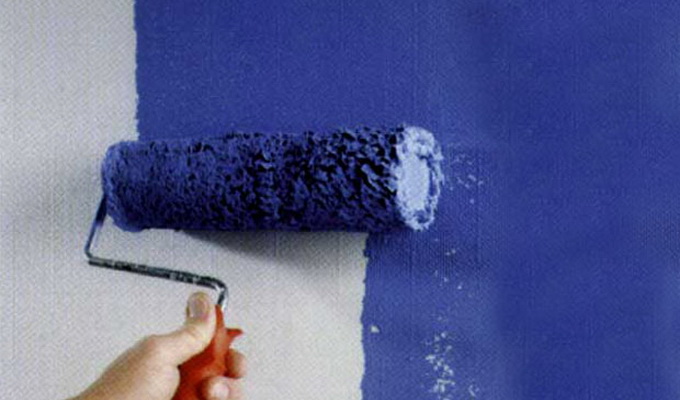
- You need to start painting from the upper left corner, rolling with a roller without intermittent movements.
- The paint should be contrasting.
- Each subsequent pass with a roller on the surface to be painted must be carried out in conjunction with the previous one.
- Before painting, the walls must be cleaned of dirt.
When creating a patterned coating on surfaces whose dimensions are smaller than the size of the pattern roller, apply the pattern using a crumpled rag.
Advantages of painting with a roller with a pattern
Thanks to the roller you can create original coating The most important advantages of this method of decoration are ease of implementation and economic feasibility.
This method allows you to make even the most boring walls with a gray background bright and beautiful, creating a joyful and cheerful interior.
The positive qualities of applying a patterned design with a roller are as follows:
Rollers with patterns allow you to create a space in which attention is focused on a specific area, without cluttering the created interior with various objects.
Interior decoration using a roller with a pattern can be done by painting any surfaces, including glass, ceramic tiles, concrete, plaster, gypsum board and others.
A beautiful drawing made with a roller can transform not only the walls, but also the ceiling, furniture, floor and other objects in the room.
Choosing a roller with a pattern
When choosing a roller with a pattern for painting, you need to take into account the features created interior and wishes of the premises owners. 
 To do this, it is enough to comply with the following requirements:
- before choosing a roller with a pattern, it is necessary to complete a design project for the entire room to create a harmonious combination of interior items, patterns and decorative elements with each other;
- the most popular is a drawing without a large number of small details and bright colors, made in subdued colors;
- To create a beautiful ornament, it is recommended to select templates that have jumpers and thin lines.
Decorating rooms using various ornaments allows you to create additional comfort and coziness in the room.
Features of painting with a roller with a pattern, depending on the room, are shown in the table. For an overview of the patterned roller, watch this video:
Using a patterned roller to paint interiors is well suited for novice decorators and for those owners who want to decorate their premises themselves.
- How to make rollers for decorative plaster
- How to make a textured roller from foil and silicone sealant
Decorative plaster is one of the most popular finishing materials to date. There are a great many ways to apply it, but not everyone is able to use them when working with their own hands. Therefore, many people prefer to purchase ready-made textured rollers.
A textured roller is used to give the walls a pattern.
Such a thing is not cheap; not everyone will agree to pay a lot of money for a roller that will not be used constantly. Craftsmen came up with a few interesting ways making a roller for decorative plaster at home.
How to make rollers for decorative plaster
You will need:
You can make a textured roller yourself from rubber.
- old roller;
- foam rubber, rubber, foil, polystyrene foam;
- rope;
- universal glue;
- double sided tape.
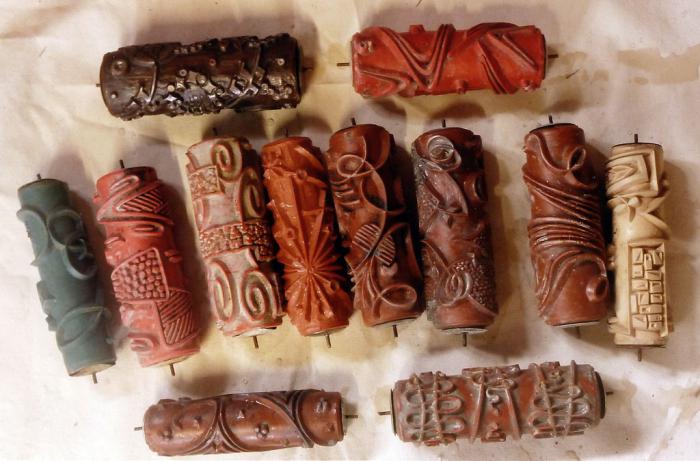
Antique textured rollers that were made of wood have survived to this day. If you have wood carving skills, then nothing will stop you from repeating this idea, but everyone else will have to look for simpler methods, for example, making a roller for decorative plaster from ordinary rope. In this case, an old roller is used as a basis, and a rope is wound directly onto the foam nozzle, crosswise, in the form of strips, or in a random order. The thicker the rope, the clearer the print will be.
You can make rollers for decorative plaster from rubber or foam. It is necessary to purchase a ready-made rubber roller or sheet of rubber with a thickness of at least 5 mm. Using colored carbon paper, transfer the design onto the material and carefully cut it out with a sharp stationery knife or scalpel.
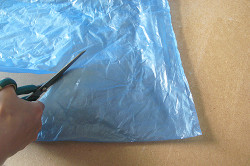
If you want a chaotic pattern on the walls, then use as a basis for a textured roller plastic bag.
If you work on a sheet of rubber, then you need to make sure that the pattern at the joint forms a single whole. In this case, it is better to make not an even connection, but a wavy one. The finished rubber blank is glued onto the roller universal glue. Likewise They make a roller for decorative plaster from foam plastic, the only difference is that first they cut out a cylinder, then apply a design and emboss it.
If you want decorative plaster to have a chaotic pattern, you can use the following method. Take a regular plastic bag, remember it well, wrap it around the roller so that you get as many folds as possible, and secure it with tape. In order to get a more textured pattern, you can use buckwheat, peas, rice or foam crumbs. The selected material is pasted over either the entire surface of the roller, or small fragments are made according to a specific pattern. These can be waves, twigs, flowers, etc. In this case, it is very important to use high-quality glue, otherwise small details may come off when applying decorative plaster to the wall.
Return to contents
How to make a textured roller from foil and silicone sealant
You will need:
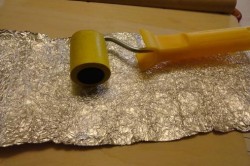
Drawing 1. A design must be applied to the foil and then attached to the roller.
- foil with a density of at least 50 microns;
- acrylic putty;
- crochet hook with rounded end;
- universal glue;
- thin rubber;
- silicone sealant;
- sealant gun.
You can make rollers for decorative plaster using the embossing principle. To do this, you will need to purchase very thick foil (at least 50 microns). Unfortunately, it is very difficult to find it on sale, but there is a way out. Many products, such as sour cream, are sealed with thick foil. This is quite enough for making small fragments of a pattern. A pattern is applied to pieces of foil, then pressed with any suitable tool with a rounded head as in Figure 1. A crochet hook is perfect for this purpose.
It is important that the distance between the elements is not less than 5 mm, otherwise when applying decorative plaster the pattern will quickly become clogged.
After the embossing is done, you need to fix the design with acrylic putty, it is applied to the part and immediately applied to the roller to give the part a rounded shape, then removed and left to dry. After the putty has dried, the volumetric part is glued to the roller.
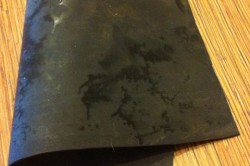
You can make rollers for decorative plaster from thin rubber and silicone sealant. The first thing you need to do is get suitable rubber, high-quality sealant and a special gun. The rubber is laid out on a flat surface and the selected pattern is applied with a marker. After this, take silicone sealant and very carefully apply it to the drawing. In this case, it is better to take a simpler pattern, for example, waves, stripes, simple flowers, leaves or circles.
If you have any textured items (large buttons with a relief pattern, embossed lids, artificial leaves, plaster elements), then you can do differently. The sealant is applied to the surface in a layer of 3-5 mm, an impression is made with the selected object, previously lubricated vegetable oil, leave until the material dries completely, after which the part is removed. A rubber mat with a silicone pattern is glued onto the finished roller. Using the tips outlined above, you can save a lot by making a textured roller with your own hands.
Painting with a roller is simple, convenient and effective way application paint and varnish materials to the surface. On sale you can find the most different models and varieties of this tool, and we want to tell you how to choose a paint roller and how they should work.
Paint rollers
General information

Paint rollers appeared in the middle of the last century, and since then their popularity has been growing.
This is related:
- with a simple design;
- low cost;
- excellent quality of coatings applied using this tool.
The roller consists of a frame on which is mounted a rotating cylinder (roller) covered with absorbent material. The frame is shaped like a number 7 and is short. upper part serves as the axis of the cylinder, and the long one plays the role of a handle.
When the cylinder is rolled over the surface, the paint absorbed into its coating is imprinted on it, while it does not smear, but is shaded as smoothly and evenly as possible.

It was this feature that determined the main advantages of this device, which guaranteed its continued popularity:
- When working with a roller, even an inexperienced painter shows satisfactory results, which are not so easy to achieve with a brush;
- Material consumption is noticeably reduced, which for large volumes results in a significant difference and affects total cost works;
- The speed of work increases, which is especially noticeable when painting large smooth surfaces– walls, floors, ceilings and facades;
- The quality of the coating is always high, its uniformity is especially noticeable, reminiscent of working with a spray gun;
- Roller for decorative painting allows you to create relief, apply patterns, change surface texture;
- When working with stencils, this device proved to be better than other tools, since during the work it presses the stencil and allows you to achieve the smoothest borders and outlines; the paint does not flow under the paper and does not get into unwanted areas;
- The price of the tool allows us to consider it a consumable item.
Important!
This device is used for applying almost all types of paints (including fire-retardant paints for metal Polistil and electrically conductive paint Zinga) on various materials and surfaces.
A roller is especially often used for painting floors, walls, ceilings and facades, since it is most effective on large, flat areas.
Varieties

There are a great variety of rollers. They differ in pile length, coating material, roller diameter and width, roller shape, axle shape, handle shape and length, and purpose.
The length of the pile determines the amount of material that the roller can absorb when dipped into the tray. In addition, long pile more thoroughly paints over uneven surfaces and microcracks, so it is used for painting porous and textured walls.
At the same time, such pile is capable of bunching up and falling into strands, sticking together and splashing, so often metal wire is woven into such models, which allows you to maintain the shape of the coating during operation.
To process smooth, high-quality walls, tools with short and medium pile are used, as well as models made of foam rubber, microfiber, plush and other fabrics and materials.
The size of the roller determines the amount of paint it can absorb, as well as the width and length of one full stroke. All this affects the speed of work, but do not forget that a large roller absorbs a lot of material and becomes noticeably heavier, which can quickly tire you and, as a result, productivity will decrease. To get the hang of these roller painting tricks, you'll need to gain some experience.

Important!
In practice, one can be guided by the following principle: the larger the surface area, the larger sizes roller
However, you should not choose a tool wider than 30 cm, as it will be quite difficult to work with it.
For painting ceilings and high walls, choose varieties with elongated or folding cylindrical handles, which allow you to reach the most remote areas without the use of ladders. Also used for working with ceilings various devices, for example, reservoirs for collecting excess paint, which do not allow the material to drip onto the floor and stain the robe.

Tools with replaceable rollers are popular, because often during work it is necessary to use various paints and apply them to dissimilar surfaces. In order not to spend money on several different instruments, buy one good roller and a set of replacement cylinders with different coatings and purpose.
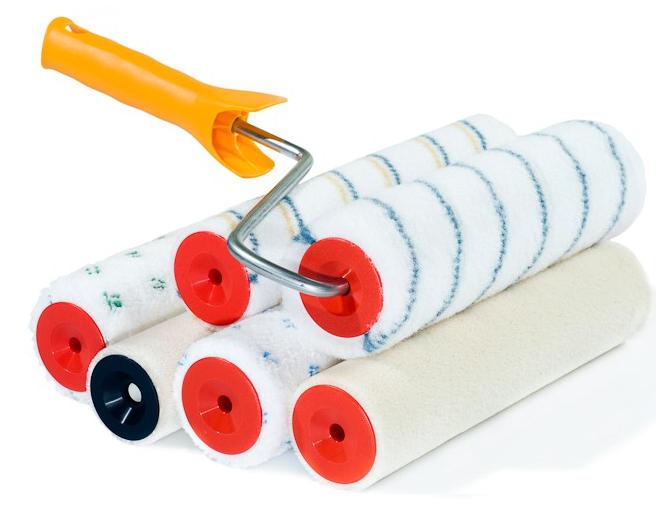
Natural lamb and goat fur, synthetic fur, foam rubber, microfiber, plush, various fabrics, rubber and other materials are used as absorbent coverings. The type of material determines the texture of the coating, the thickness of the layer, the types of paint used and the ability to work with a particular surface.
Important!
A foam roller for painting can only be used with paintwork materials that do not contain solvents, otherwise the foam will dissolve and pieces of it will stick to the wall.
This also applies to other synthetic materials that are afraid of organic solvents.
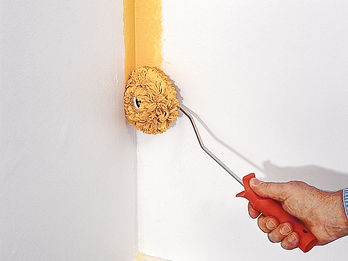
There are special rollers with a narrow scope of application. Among them, there is often a roller for painting corners or a roller for painting pipes, which differ in the shape of the roller and the configuration of the axis. To work in corners, it is convenient to use a narrow wheel-shaped roller with long and thick pile, and for painting pipes, use a tool with a curved axis on which two or more small rollers are mounted.

Separately, it is worth mentioning the embossed paint roller, which allows you to apply decorative elements, patterns, drawings and other decorations. This device has a rubber, leather or sponge surface on which convex patterns are applied. When rolled out, repeating imprints remain on it.
Practice

For those who want to master the technique of working with their own hands, we have compiled instructions:
- The surface is cleaned of dust and debris and primed;

- Borders work area paste over masking tape, cover the floor under the walls and furniture with newspapers or film;

- Pour the paint into a special tray according to the size of the roller. The tray should have a raised area for rolling out the roller and removing excess paint;
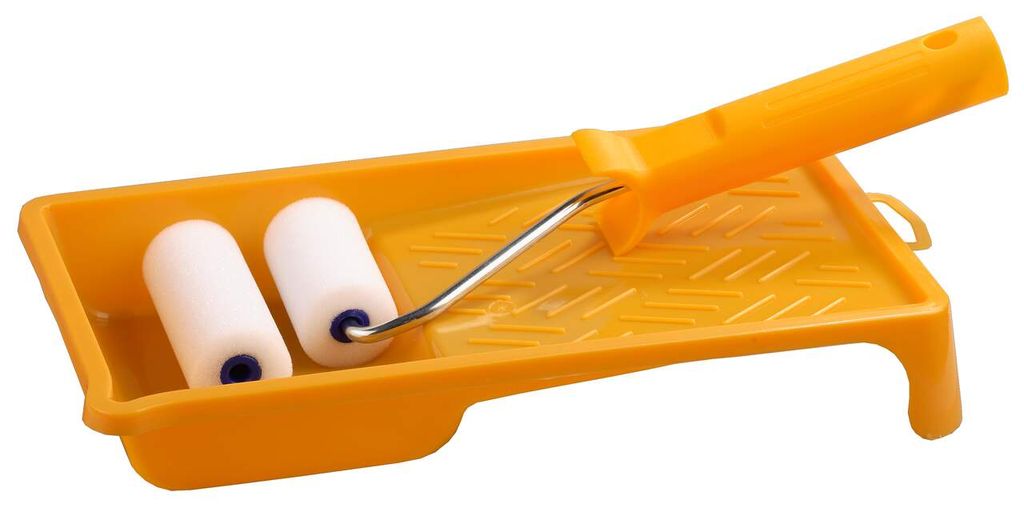
- Dip a long-haired tool into the paint, roll it over the mesh, then apply a thin, even layer. We work from top to bottom, making an overlap of several centimeters between adjacent strokes (stripes) so that the boundaries are not visible;

- After the first layer has dried, change the roller to medium pile and apply a second layer of paint, which we cover on top with a third layer after the second has dried.

Conclusion
Using a roller not only speeds up and simplifies painting work, but also improves their quality. Today there are many varieties of this tool, and to understand how to choose or use one or another type, watch the video in this article and master our instructions.


