How to make an arch in doorway? This question interests many owners of apartments and private houses.
It should be noted right away that an arched opening can look ideal only in rooms with high ceilings.
With low ceilings, such a structure visually significantly reduces the opening. Therefore, you should think carefully before deciding to build an arch. If you accept it, then you can find a lot of materials to implement your idea.
Methods for constructing arches
How to make an arch instead of doors? Today there are such ways to create arches:
- For an arched opening, the wall is hollowed out according to pre-made markings. This method is more suitable for rooms with not very high ceilings.
- If the ceiling height is sufficient and doorways their upper part is sealed with pieces of plasterboard or plywood to give them an arched shape.
When chiseling a wall proceed as follows:

- All decorative trim must be removed, including the door frame.
- From the floor itself, a vertical line is marked on both sides of the opening to the height of the future arch. For accurate markings, use a level or plumb line.
- The width of the marked opening is measured and divided in half. The result is the radius of the arch.
- The center of the arch is marked on the upper horizontal line. A screw, self-tapping screw or nail is fixed to this point.
- A strong thread is tied to the screw, the other end is attached to a pencil. The excess thread is wound around the pencil, leaving a length equal to the radius of the arch.
- A mark is made on the vertical line from the center point downwards at a radius distance.
- A semicircle of the upper part of the arch is outlined.
- On the other side of the wall, the marking operations are repeated.
Now you can start chiseling using a hammer drill or other tool. The choice of tool depends on the wall material. It is recommended to drill as many holes as possible along the intended contour. They will help in the chiselling process. IN wooden wall The opening is cut out with a jigsaw or a hacksaw with a narrow blade. Final stage preparatory work– processing the edges of the resulting opening and decorating it with prepared materials.
With high ceilings, you can make a door arch if you follow this sequence of actions:

- The frame of the future arch is assembled in the opening from wooden or metal profiles.
- Marking is done on drywall or other material from which rectangles need to be cut. Their width is equal to the radius of the arch, their length is equal to the width of the opening. By using large compass or threads with a pencil, mark the upper arcs of the arch and cut them out with a jigsaw.
- The resulting blanks are attached to the frame with hardened self-tapping screws. Their caps are recessed 0.5-1 mm into the drywall.
- The end of the opening is sealed. You can do this with using fiberboard. This material bends quite well. You can use a strip of plasterboard 8 mm thick. It is rolled several times with a needle roller and sprinkled with water. Punctures are made to a depth of up to half the thickness of the drywall sheet.
- If there is no needle roller, punctures can be made with an ordinary awl. The distance between them is about 1 cm. They are made only on the side where the part will be bent. After some time (after about 1-1.5 hours), the plaster gets wet and the strip bends quite easily. It is better to bend it on a wooden or plasterboard template. After drying, it becomes hard again.
- Drywall is puttied and the arch is decorated at your discretion.
Arch configurations
An arch in a house gives the rooms a certain personality. There are many configurations and forms of arched openings. Let's look at some of them:

- The classic version is suitable for rooms with a height of 3 m. Arch correct form has a bend radius of 45 cm or more. If you add it to the height of the doorway, then the total height of the room simply may not be enough.
- The Art Nouveau arch is often erected in standard apartments. Its radius exceeds the width of the doorway, so between vertical elements and the corners remain an arc. They can be made sharp or rounded.
- Romantic style is an arch option for large openings. There can be a horizontal insert between the rounded corners, or it can be installed at an angle.
The configuration of the arch depends on the desire and aesthetic taste of the owner of the home. The arched opening can be wavy, polygonal, illuminated, with various niches and shelves, with stained glass windows and so on.
Materials for arch equipment
The arched opening can be made from monolithic concrete, plastic, brick, metal, wood, chipboard, fiberboard, plywood, from plasterboard sheets and other materials. When using brick, concrete or stone, their weight must be taken into account. Such structures may require a special foundation and reinforcement elements for connection with the walls.

Metal is a material that fits into any style. But not every metal is suitable for these purposes. The stainless steel option is very expensive. Galvanized iron does not look good in interior spaces. It is quite difficult to make complex figures from metal.
Wood is a beautiful material of natural origin. It requires virtually no additional finishing.
The best materials to process and allow arches of any shape to be made are plasterboard, fiberboard and particle board. These building materials can be finished with plaster, painted, covered with a layer of decorative or ordinary plaster, covered with wallpaper, or faced with decorative stone.
Plastic is a material that is easy to process. Plastic structures do not require additional processing and finishing.
For the design of arches, ready-made structures from different materials are also sold.

- Appearance arches must correspond to the overall design of the room. Each side of the opening can be designed differently.
- Any work on the construction of arched openings begins with dismantling the door frame.
- For convenience and speed up the marking process, it is recommended to use a full-size template. It can be made from cardboard.
- When constructing curved frame elements from metal profiles, slots are made on them that allow the workpiece to be bent. The slots are made in increments of about 5 cm.
- For work, a drill or hammer drill, a hammer, iron scissors and a hacksaw are usually used. Sometimes other tools may be needed.
- The frame is attached 10-12 mm deep into the doorway so that the drywall attached to it is flush with the wall after puttying.
- The assembled structure is sanded and puttied. You can cover surfaces and corners with fiberglass mesh.
You can make an arch in a doorway in various ways. Each of them is selected based on specific situation. It is necessary to take into account the construction skills that the home master has, as well as financial capabilities.
It is worth noting that it is possible to qualitatively install an arch in a doorway with your own hands only when all the features of this design are taken into account. The fact is that this finishing option has its pros and cons.
The advantages include the following aspects:
- Visual increase in space. In this case, two factors are combined at once. The first is that an opening without a door unites two rooms, this erases some existing border. The second is based on the shape of the structure.
- An excellent option for zoning. Indeed, an arch can be an excellent solution to the problem of dividing a single area.
- Nice decorative look. This design can decorate any interior. It should be taken into account that overall design must be harmoniously thought out.
We must not forget about the existing shortcomings. They lie in the fact that the peculiarity of this product is openness, since there is no door leaf. Therefore, there is a complete lack of sound insulation, penetration of foreign odors, if we are talking about the border with kitchen area.
 When designing an arch, you should think about the fact that the feeling of security will disappear
Existing options
What is special about installing an arch in a doorway? The point is that there are various types of these designs:
- Ellipse. This configuration is considered to be classic. It is made round. All transitions are very smooth.
- Round. This option allows you to expand the opening. This method is suitable for cases where zoning is required.
- Trapezoid. Assumes the absence of rounded areas.
 Arch - various types of structures
 Note! You can often hear that an arch and a portal are two different architectural elements. In fact, the portal is the most simple solution arched design. It is made in the form of a rectangle, sometimes supplemented with rounded corners.
Features of the construction of arches
You can make an arch in several ways, but you need to take into account the height of the openings.
For low openings
This method of creating an arch involves pre-marking the surface. The marked area is cut out (hollowed).

The general technology is as follows:
- The opening is being dismantled. Deleted old box. Part of the crumbling plaster is removed.
- The height of the future structure is determined. Lines are drawn along two vertical sides. They must be equal and made exactly at the specified height.
- To obtain the radius of the arch, the existing width is measured. This value is divided in half.
- Between vertical posts a horizontal line is drawn. It should be located at a level that will correspond to the beginning of the rounding.
Note! It is important to consider that the distance to the ceiling should not be less than 30 cm.
- The center is marked on the drawn line. The self-tapping screw is screwed in. A cord is attached to the screw, which must be equal to a given radius. A pencil is attached to the end of the rope. This tool marks the bend.
- Trimming is done according to the existing markings. If the wall is strong enough, then chiselling is performed. To make the work easier, pre-drilling is done.
 It is necessary to comply with the requirements for the construction of the arch
 Thus, the required shape is obtained. Next, you should process it carefully. This is done by grinding. The resulting structure is treated with putty or plaster. They can serve as final finishing material.
For high openings
The door arch can also be made in another way. It consists in the fact that plasterboard is used as the main material and metal profile. The technology assumes that everything will be done along an existing opening. The following actions are performed:

Note! The created sheathing should be recessed to the thickness of the gypsum plaster boards used. Minor errors may occur. They can be easily fixed with plaster.

Note! If you need to install an arch very quickly, the best solution would be to use a ready-made structure. These products are made from various materials and have standard configurations.
After all the procedures it turns out almost finished design. All you need to do is install a fragment of a gypsum plasterboard that will close the open arc-shaped space. The procedure is performed as follows:
- The bending section is measured.
- The resulting size is transferred to the drywall.
- The required fragment is cut out.
- This part needs to be bent. To do this, it is cut from the wrong side into strips.
- Carefully place into place and secure.
 Finished plasterboard arch
 The completed design requires additional decorative finishing. It should be noted that drywall makes it quite easy to create an arch with your own hands. If you use wood as a material, you must have sufficient experience to properly process and install such a product.
Fiberboards and plywood are used as substitutes for gypsum boards.
 Plywood is often used to create arched openings instead of drywall.
 There are some tips that will help you get a beautiful arched opening:
- The general appearance of the arch should correspond to the interior design.
- To get more original design– it is designed individually from different sides.
- Existing communications should be laid in advance.
Summarizing the above, it can be noted that there are various ways to make a door arch. You just need to be patient and adhere to certain rules and recommendations. Then everything will definitely work out.
The topic of this article is the manufacture of arched doors, their installation and the intricacies of these processes. We will talk about the types of doors with arches, note their varieties and the features of each type. We will also give recommendations on self-production entrance door in the form of an arch made of solid wood.
Today arched openings various forms and styles are used in the construction and decoration of most premises. They are used as entrance and interior doors.
From the whole variety of doorways in the form of arches (see), the following classification can be made:
- Semicircular arches. They are the most common and are also divided into subtypes:
- Classic (semicircular) - they have a smooth radial shape.
- Ellipsoidal - made in the shape of an elongated oval.
- Modern - have intricate shapes with various protrusions.
- Romantic - shaped more like a rectangle, with the upper edges slightly rounded.
- Horseshoe arches. They are shaped like a horseshoe. They can have not only a smooth semicircle, but also an elongated, pointed top. Most often, openings of this type are used to decorate premises in national styles.
- Gothic (pointed) arches. These structures have an elongated, pointed shape, without smooth transitions.
What types of arched doors are there?
Arched doors have many varieties and are classified according to various factors: installation location, material of manufacture, design features
Types of arched doors at installation site
There are two main categories here:
- Interior doors arched- located inside residential and other types of premises. Most often they are made of wood and have glazing. Stained glass compositions are often used for glazing such structures (see).
- Entrance doors in the form of arches- mainly used in entrance groups ah establishments: shops, organizations, shopping and entertainment centers. Made from plastic profile.
What are arched doors made of?
Due to the complexity of manufacturing this type of door leaf, the variety of material for their production is not very abundant:
- Plastic. This material is used for the production of profiles, from which not only entrance doors, but also windows.
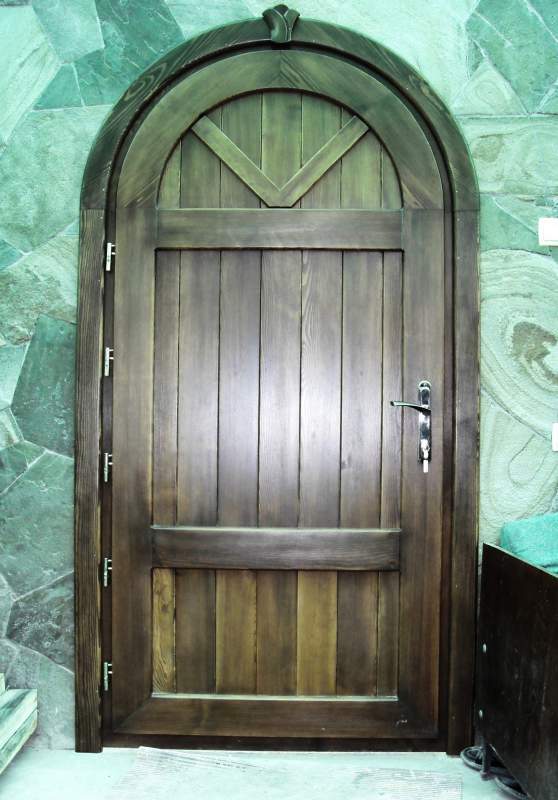
- Solid wood. Wooden door leaves in the shape of arches are used for entrance areas in the private sector, as well as inside any type of premises.
Structural features of arched doors
Based on operating features, installation complexity and cost finished product The following arched door structures can be distinguished:
- Canvases that follow the same contours of the opening. The peculiarity of such doors is that their production takes a long time. They stand quite high. Such models are made from wood (see), since they are arched plastic doors made using a different technology.
- Standard canvases with an arched part fixed above them. Such doors are somewhat cheaper, since their arched part is mounted separately and does not open together with the door leaf. It also becomes possible to use not only swing doors, but also sliding options canvases
Important! The opening height for such doors should be large enough. It is calculated according to the formula: Vpr = 210 cm + half the width of the opening.
- Single doors. They are usually used as interior and entrance options for private houses and public spaces.
- Double doors. For wide openings it is advisable to use two sashes. One of them can be fixed in the opening using a latch. Relevant for entrance groups. In this case, more often than not, the “working” part of the door is 2 times wider than the fixed part.
Making an arched door yourself
Despite the difficulty of making such canvases, it is possible. Now you can see for yourself. You and I will learn how to make wooden arched entrance doors.
It is better to order the box part according to your dimensions, and we will make the canvas with our own hands (see).
We prepare everything you need
First you need to prepare tools, boards and available materials.
We will need:
- Jigsaw with wood saws.
- Electric milling machine with two types of cutters: disk (for grooves) and cylindrical.
- Sanding machine with sandpaper of different grain sizes. The best one is tape.
- Boards, 5 centimeters thick.
- Wooden wedges.
- Two small bars and 4 wood screws. The length of the screws should be 30mm greater than the thickness of the bars.
- Carpenter's waterproof glue. PVA is possible.
Making a blank for the arched part of the canvas
To make the arched part of the door leaf, we first need to measure the final width of the opening. That is, from the total width we subtract the thickness of the “box” part and a 2mm gap between the door and the opening (frame).

After this we do the following work:
- In order for the arch to turn out beautiful, its radius must be made equal to half the width of the doorway. Based on the width of the prepared boards, we calculate how many pieces will be needed. The boards will be positioned horizontally.
Important! Before making an arched door, you need to select well-dried boards. Since if they are damp, the canvas will warp over time.
- Now, using an electric router, we make grooves for a tighter connection. To do this, take a disk-slot cutter. We make the grooves in such a way that the protruding part is about half the thickness of the board. That is, 2.5 millimeters. Likewise with the internal groove.
- Next, we clean the entire surface of the grooves from dust and apply wood glue to them. After this, we connect all the boards and leave them to dry.
Important! In order for gluing to occur better, you need to take a board and attach pre-prepared bars to it with self-tapping screws. The distance between the bars should be 10–20 mm greater than the width of the glued workpiece. Place the workpiece between the bars and spread it apart with wedges.
Cut out a semicircle from the blank
For this operation, we recall the experience of installing plasterboard arches.
We use one of two options to outline the arched shape:
- If the arch has an even semicircle. Mark the middle at the bottom of the workpiece. Then we take a pencil and tie a non-stringent thread to it. Cut the thread exactly to the length of the arch radius. Apply one end of the thread to the mark and draw a semicircle with a pencil.
- If the shape of the arch (as in the photo) has an elongated semicircular or pointed shape, then we use a different method. To outline the boundaries of the bend contour it is very convenient to use a long metal ruler. We also make a mark for the middle and draw a line from it strictly vertically to the length of the radius of the arch. Next, we place the ruler on the edge and bend it so that one edge touches the radius mark, and the other coincides with the edge of the workpiece. After this, draw a line with a pencil. On the second side we follow the same steps.
Important! Make sure you get a symmetrical arched neckline.

Next, take a jigsaw and carefully cut the workpiece according to the markings. After that we take grinding machine with the coarsest sandpaper and process the surface of our arched part of the door on both sides. After this, we repeat grinding with a finer abrasive.
Now the most beautiful part of our door is ready. Arched interior doors can be decorated with the same elements. However, it is worth considering that for interior spaces glazed arches will be more elegant. And their manufacture requires carpentry skills.
Finishing the door leaf
Now we have to make the rest of the door. It will be assembled according to the same principle as the previous part. The only difference will be that the boards will not be positioned horizontally, but vertically.
You should also provide a horizontal part at the very bottom of the canvas. This will help extend the life of the door.
As a result we have door leaf will consist of 3 parts:
- Horizontal bottom cross member.
- Shield made of vertical boards.
- Upper cross member. It is also the arched part.
After all 3 parts of the door are ready, we connect them using the tenon method. To do this, we use a milling cutter to perform the appropriate operations and place all 3 parts on glue. Don't forget to support the canvas with wedges.
The final stage is processing the entire surface of the door protective agent And finishing coat. Pinotex or any other wood protection is suitable for this.
If the door is constantly on sunny side, it is not recommended to cover it with laminating coatings. In this case, it is better to use ordinary colorless varnish for exterior use.
There is an opinion that the arch as an architectural device is more suitable for palaces and museums than for an ordinary house and apartments. But this opinion is wrong. A doorway made in an arched style can look organically in the most ordinary apartment, in almost any interior, and serve as its decoration. Manufacturers offer various types of ready-made arches that can be mounted in doorway, you can make an arch with your own hands.
Advantages of arched openings
Even a person ignorant of the intricacies of interior design and architecture is struck by the fact that the arched structure, unlike a door, does not separate the rooms, but unites them.
Doors separate rooms from each other, and the arch creates a common space.
Experts note the following advantages that distinguish interior arched openings:
- They can create an effect visual expansion space.
- This architectural solution is universal: suitable for a range of interior design styles.
- The versatility of interior arches is also evident in the fact that they fit organically into both spacious and small rooms.
- An arched doorway can add originality and individuality to the interior.
In practice, it has been verified that arches also look good in houses decorated in classic style, and in Art Nouveau or techno style apartments, especially since arched openings allow for numerous design options that enliven their appearance (for example, lighting, a combination of wood with metal inserts, the use of stained glass).

Types of arches
When designing an interior arched structure, qualified specialists take into account the features of both rooms, which are connected by an opening. The height of the ceilings, the width of the opening and other factors are taken into account. This is necessary in order to choose the right type of arch that is suitable specifically for the given conditions. Three main types of arched structures can be specified:
- The classic version is characterized by a certain ratio of the bending radius and the width of the opening: the radius is equal to half the width. This option is suitable if indoors high ceilings(no less than 3 m). The reason for this is purely geometric: with the specified ratio of width and radius and a door width of, for example, 90 cm, the height of the arch will be 45 cm.
And if the doors are wider, then the height of the arch will be greater, and with a low ceiling it either will not fit or will not look aesthetically pleasing enough.
- The Art Nouveau arch has the shape of an oval and can easily be used in standard, including small-sized, apartments.
- “Romantic” type: the design has rounded edges and a straight insert, horizontal or inclined.
Of course, all the variety of possible designs arched openings is not limited to these three options, but they are the most common and are used in the vast majority of cases.

Materials used
To perform an arched interior opening In principle, different materials can be used. But the real possibilities of their use are far from equal.
In terms of convenience, accessibility and practicality, sheet materials come first - fiberboard, plywood, plasterboard. The technology for making arches from these materials is well developed, and various options finishing can give the arch an aesthetic appearance and design it in the desired way color scheme And suitable style. Natural wood- is also an excellent material for these purposes, and its only drawback compared to sheet materials is its higher price.
Often, interior arched structures are made of concrete, brick or natural stone.
These materials make it possible to make an arch of any size and configuration, but it must be taken into account that these materials are heavy, and an increase in weight interior partitions not always desirable (for example, in old houses).
Metal structures are very original, but are not suitable for every interior style. Besides, stainless steel very expensive, and structures made of galvanized iron do not look so impressive. In some cases suitable material is plastic - it is relatively inexpensive, practical, durable and does not require finishing.
Making a door arch yourself
The easiest way is to buy ready-made interior arch the desired type and sizes and mount it in the doorway. But with some skills and necessary tools You can make an interior arch with your own hands.
An example of the process of installing an arch in a doorway can be seen in the following video:
The beginning of this work should be drawing up a “project”: it is necessary to draw the contours of the future structure directly on the wall (on both sides) or make (for example, from plywood) a life-size template.
Before starting work, you should also think through all the details, in particular, the location of lamps and other elements if they are supposed to be built into the arched opening.
The main operations for making arches from sheet materials are:
- Manufacturing and fastening of guides from aluminum profiles. Bend aluminum profile You can do this by first making cuts on it every 5-6 cm.
- Manufacturing of frame parts. These parts must match the template. In order to bend a sheet of drywall and give it the desired shape, it must be moistened. To bend plywood or fiberboard at home, the sheets are moistened and heated with an iron.
- Installation of the frame using self-tapping screws.
- Finishing work. They should be started only after all the mounted fragments of the arched structure are completely dry.

All these operations are quite within the capabilities of a sufficiently experienced home handyman. To perform them, you need the most common tools - a hammer, drill, hacksaws for metal and wood. But if you don’t have experience and skills in plumbing and carpentry, then it’s better to turn to specialists in order to end up with an interior element that is made with high quality and fully meets the requirements of both strength and aesthetics.
Owners of small apartments prefer not to close open openings with doors, but to decorate them with arched structures. Due to this, the space visually increases, the interior of the room becomes much more elegant and two rooms are combined into one.
You can use ready-made arched structures, which are sold in hardware stores and are a set of parts, or you can assemble an arch with my own hands, having previously prepared the necessary materials.

How to make elegant elements? Look at the photo of the arch with your own hands. The list of technologies and materials used is huge - use your imagination!


Installing an arch in an apartment
You can do it at home without any help construction crew and engineering skills to install an incredibly beautiful arch. It is enough to choose the arched design you like and the material with the tool to make it. If you follow the instructions below, you can avoid the most common mistakes that beginners do.

The arch structures themselves usually play a role in the construction industry supporting elements in the construction of ceilings and walls. In our example, doorways are not load-bearing structures. For the first case, materials are taken taking into account the serious load on the walls; decorative arched structures must only withstand their own weight.

The door arch in the apartment replaces the door; it is installed in the same place as the movable structure. This is a future design element.

DIY arch ideas are varied; we will describe the simplest ones in our article. You can make an arch using a beam with a 2-3 cm cross-section or a light profile. This design in any design it will perfectly hold the weight of the finish. The main thing is to securely fasten all the elements to the wall so that beautiful decor did not crumble after a couple of days.

Pay attention! Decorative arch plays more of a design function in apartments, it does not support the main structures. The main load in such a situation is on concrete walls and lintels.

Exists huge selection arched forms And design solutions, each of which is selected for a specific case.

Presented above as clear example the arch has the shape of a semicircle of regular shape. In the latter case, a passage with strict rectangular outlines. Next come intermediate versions of arched structures.

There are many other examples where only one support or curved posts are used. Appearance door arch directly depends on the chosen room design.


You should take into account the size of the openings, the height of the ceilings and some possible features of the room layout. For someone in a house in a classic retro style, an elegant arch with a semicircular shape will fit perfectly, for others in a modernist style - a rectangular portal shape.

These things are influenced by the taste preferences of the owners and design features apartments. Some even choose cone-shaped arches.

When choosing a classic, make sure that the ceilings in the apartment are high and at least 3 meters high. If you have a typical panel apartment With low ceiling, use the “modern” arch system.

The wide pillars of the “romance” model will perfectly complement the arch of the opening with wide pillars. The “portal” arch model is suitable for an interior with clearly predominant straight shapes. This option is an ideal choice for log houses.

Making an arch with your own hands
Make graceful arch can be done quickly using plastic and laminated elements, step by step instructions How to make an arch is presented below. They are cut to required sizes in height, and then attached according to the instructions in the right places. This standard options, which are made according to a single template, do not surprise the buyer with anything, and the price is not always tempting. Yes, and choosing a model of the required size for your opening is sometimes very problematic.

To make the structural elements of the arch, you will need following materials: fibreboards, plasterboards and plywood. How to make an arch with your own hands? If you watched how professional builders work with plasterboard boards, you probably guessed that they are best chosen for sheathing. They can be finished after installation various materials. In turn, thin plywood There is one big plus - it bends easily.

The arch frame is made of a bar with a cross-section of 20 x 20 mm (30 x 30 mm) or a metal profile.

How to properly make an arch in an opening?
An arch made of red brick, concrete or aerated concrete blocks. Red brick can be used without finishing materials. Such an arch will emphasize the solidity and material security of its owner.

Perfect for modern design premises. The weight of such a structure is very large and it is not recommended to build something like this in old apartments, since there is a large load on the walls.

Metal structures complex shape should be left to professional designers and engineers. It is difficult and troublesome to work with metal; these projects are very complex in their implementation and engineering documentation is prepared in advance for them.

Profiles and drywall are the simplest and most affordable things that allow you to make structures of any shape and style.


Wooden arch
Not every person likes pine, but for finishing works any other noble can be used wood material: oak, ash and others. Beautiful arches The interior will be complemented by elegant classic wooden furniture.

In general, working with any tree without experience is very difficult. It’s better to entrust all the work professional builders. Focus on your own capabilities and experience.

The opening of an arched wooden structure is created by assembling many small fragments. By pressing they make round elements, then they are glued or twisted together. This step will require a lot of tools and time.

Photos of arches with your own hands


