Basic rules for redevelopment
1. Homeowners are often faced with the task of remodeling premises.
One of the most suitable solutions for this, in terms of cost and ease of installation, is plasterboard partitions. However, when remodeling the premises, it is necessary to keep in mind that the dismantling of old,
and the construction of new partitions must necessarily be agreed upon with the building management authorities, since independent redevelopment
may affect supporting structures, which is fraught with a significant threat to the safety of the inhabitants of not only the premises, but also their neighbors (if we are talking about an apartment building).
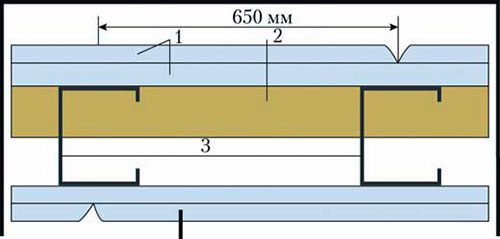
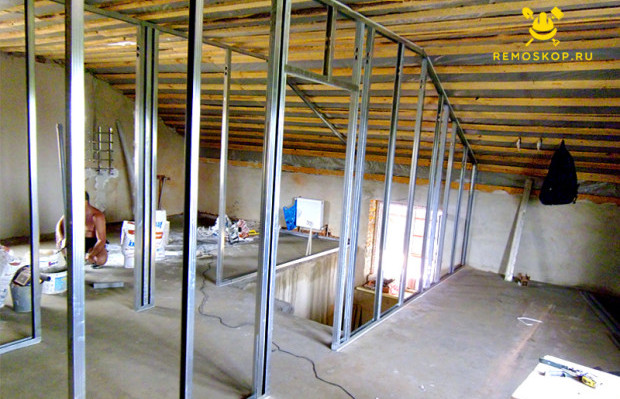
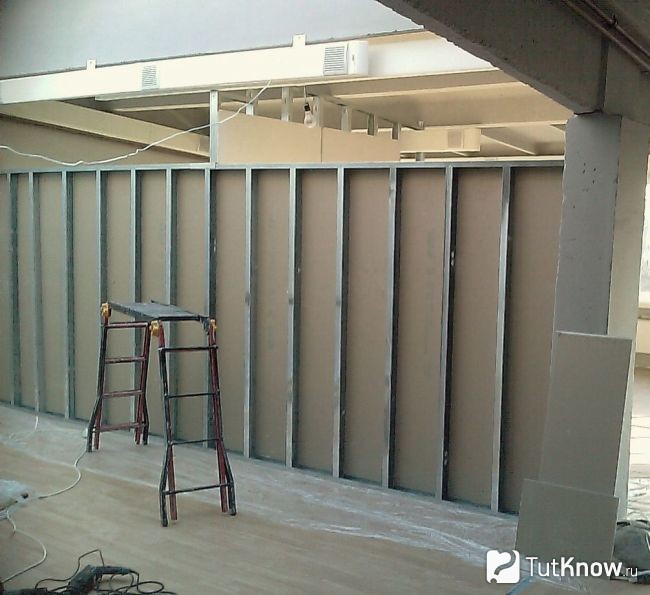
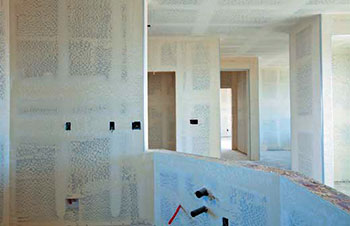 Plasterboard partition
 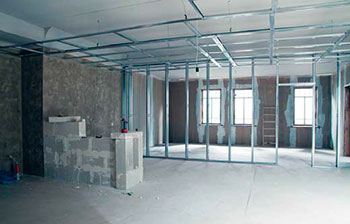 Metal frame of ceiling and partition
In the end, independent redevelopment is simply punishable by law. Recently, the installation of internal partitions using a wooden frame, all
less popular due to various reasons. Therefore, in this article we will consider installation of plasterboard partitions with a metal frame.
What you need to know when working with metal profiles
2. When starting to work with metal, you should keep in mind that you need to cut profiles with special scissors.
When carving with a grinder, the top galvanized layer is removed from the profile - and the profile will subsequently be subject to corrosion. When installing the frame, you should use entire profiles whenever possible; if this is not possible and you have to build up the profile, you should keep in mind that in this case the structure becomes less durable. Places for attaching hangers to ceilings - you should first
treat with sealant - this will significantly increase the sound insulation of the room.
Types of plasterboard partitions
3. The thickness of the septum depends on a number of factors, which we will now describe.
If the partition serves purely decorative purposes - visually dividing the room into two parts -
thickness may be minimal. If the partition should perform the functions of maximum separation of one room from another, then its thickness will depend on
thickness and amount of insulating material, number of layers of drywall, as well as thickness door frame(if there is a doorway). The thickness of the partition will be the sum of the thickness of the insulating layer, frame, and layers of drywall.
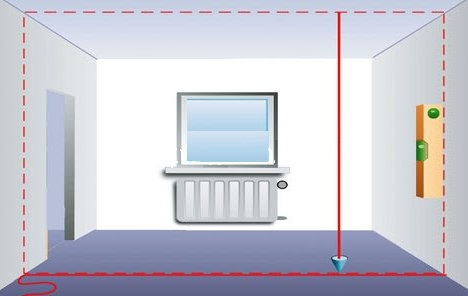
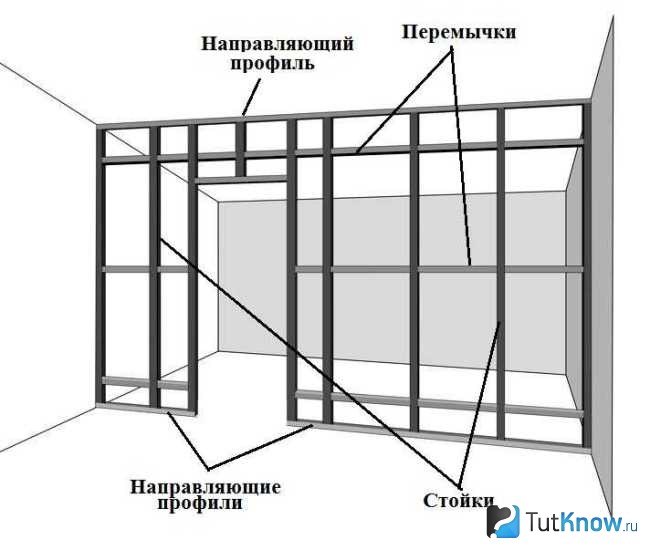
Partition marking
4. The marking of the partition is carried out on the ceilings, starting with the ceiling. After the markings on the ceiling have been made, attach them strictly along the marking line.
guide profile using anchors in increments of 40-50 cm.
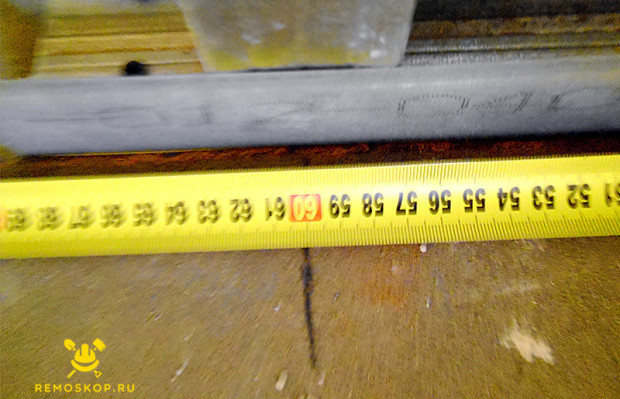
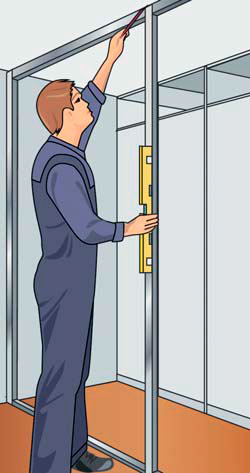 Installation of vertical guides
 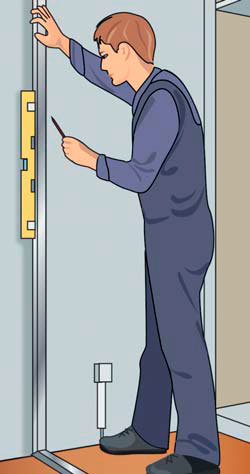 Marking
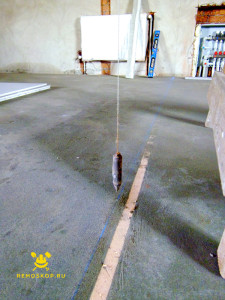
Typically, guides ceiling profiles have sizes from 50x40 mm to 100x40 mm. When the ceiling profile
fixed, using a plumb line to mark the position of the lower profile, which is attached to the base using dowel-nails.
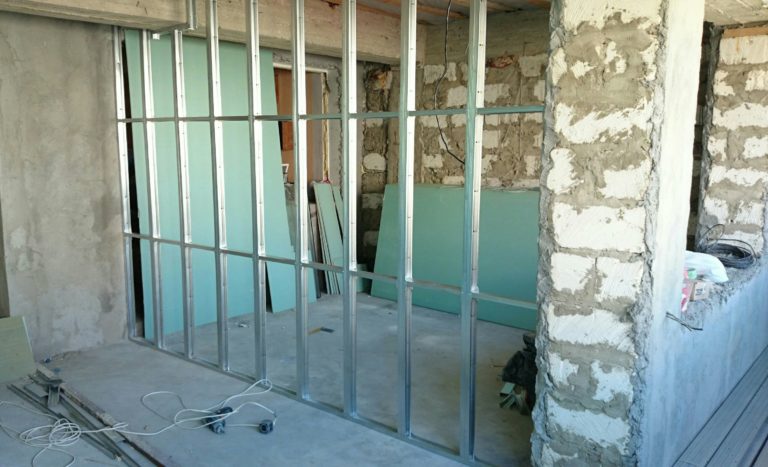
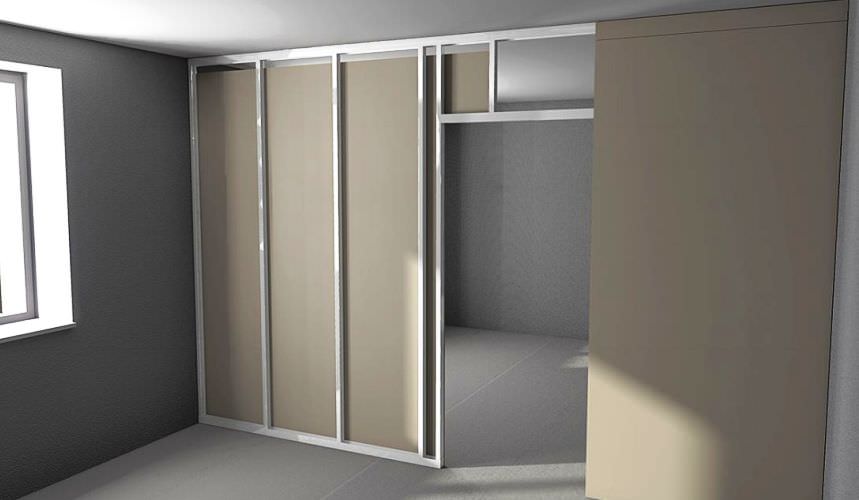
Frame installation
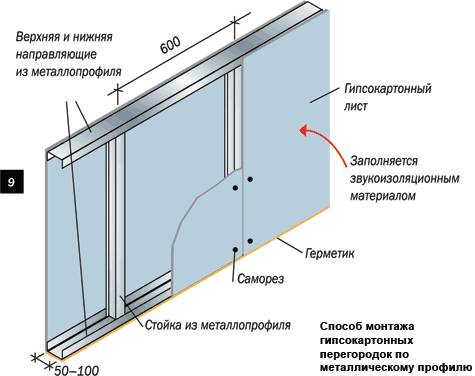
5. The next step is to install vertical profiles.
Their size must correspond to the size of the guide profile. That is, if the size of the guide profile is 100x40 mm.
then the vertical profile should be 100x50 mm, which will ensure a perfect fit of the frame elements and ensure quick and high-quality installation. Size of vertical profiles
should be 5 - 10 mm less than the ceiling height, in this case it is easiest to install vertical profiles in the right place. Vertical profiles are installed in increments of 60 cm.
and are attached to the guide profiles using self-tapping screws. The vertical profile flap should be directed towards the installation. Maximum care should be taken when
installation of vertical profiles, since the joints of the plasterboard sheets should fall exactly on them.
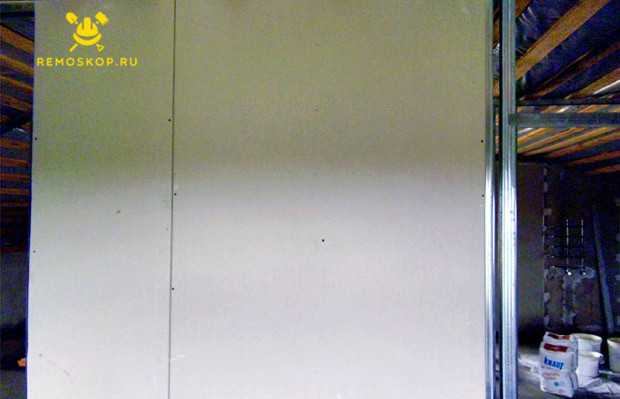
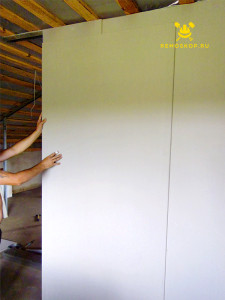
6. As a rule, drywall is attached to the frame vertically.
However, horizontal placement is also possible, although then horizontal seams appear - which must be strengthened with additional horizontal frame inserts. In addition, horizontal seams are more
difficult from the point of view finishing walls. If the height of the walls is large enough, horizontal joining of drywall is also possible, where
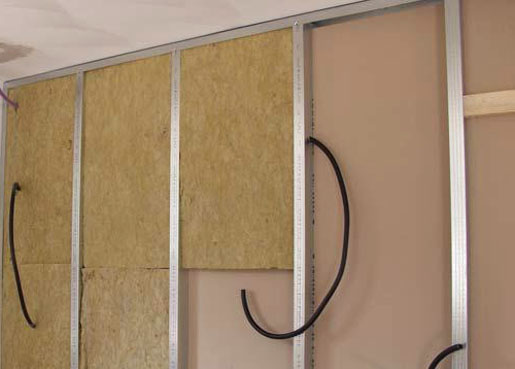
horizontal metal inserts are used. If the design provides for an insulating layer in the partition, it is installed before
installation of drywall. To do this, the insulator sheets are installed by fastening them to the frame with glue. After the frame is stitched with plasterboard, the insulator will be firmly fixed.
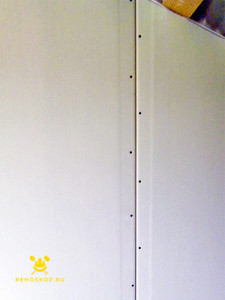
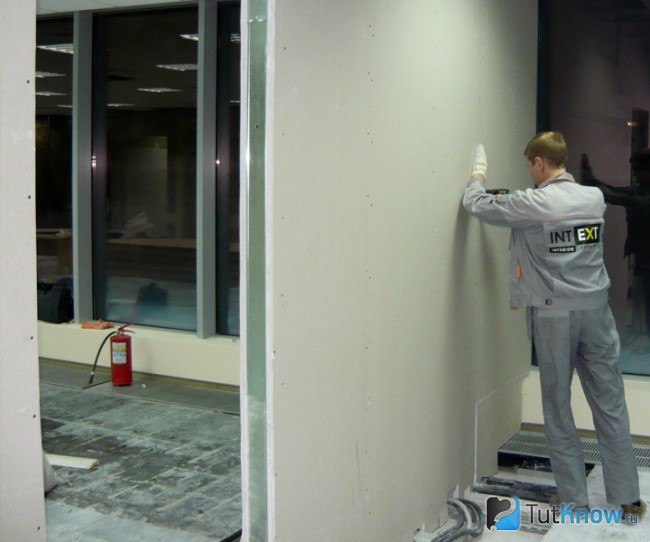
 Laying insulating layer and drywall
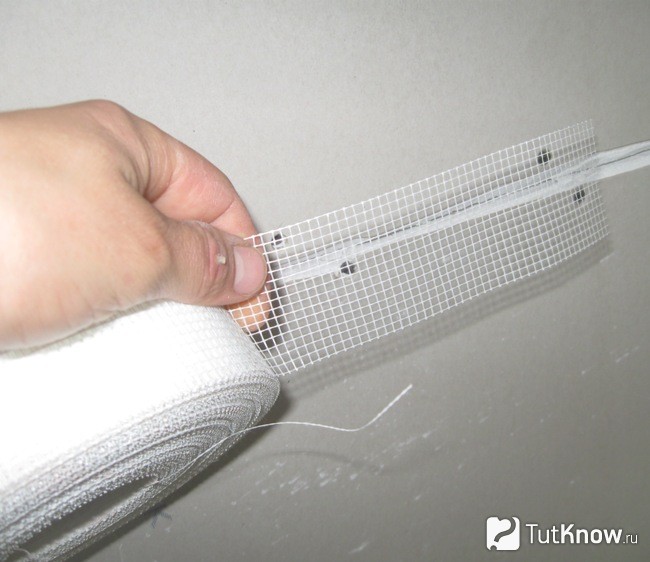
  Applying soundproofing tape
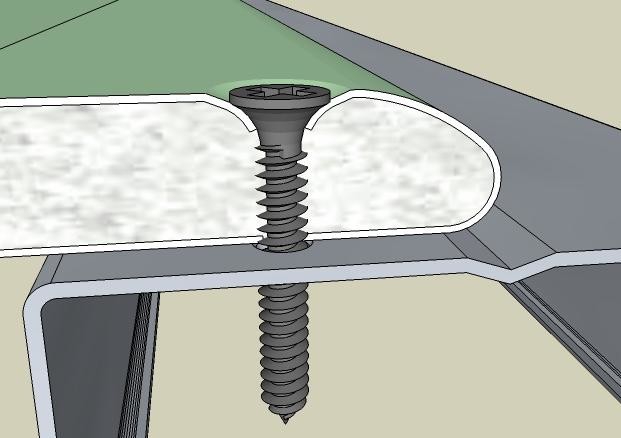
Drywall is screwed to the frame using self-tapping screws. It should be remembered that the self-tapping screws must go through
stitch the sheet and profile leaving it by 10 mm. After one side of the wall is mounted, we add insulation to the voids and flash the other side.
Drywall should be separated from the ceilings at a distance of 3-5 cm.
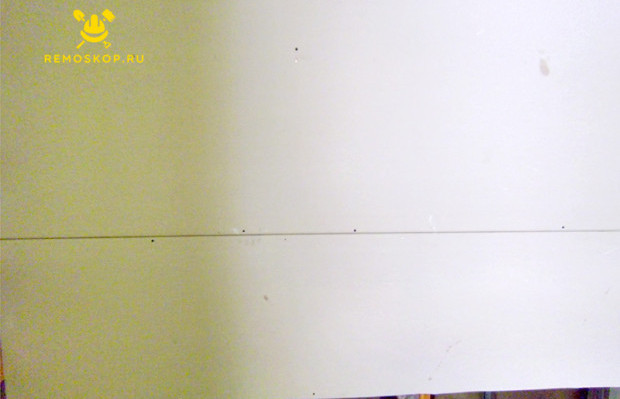
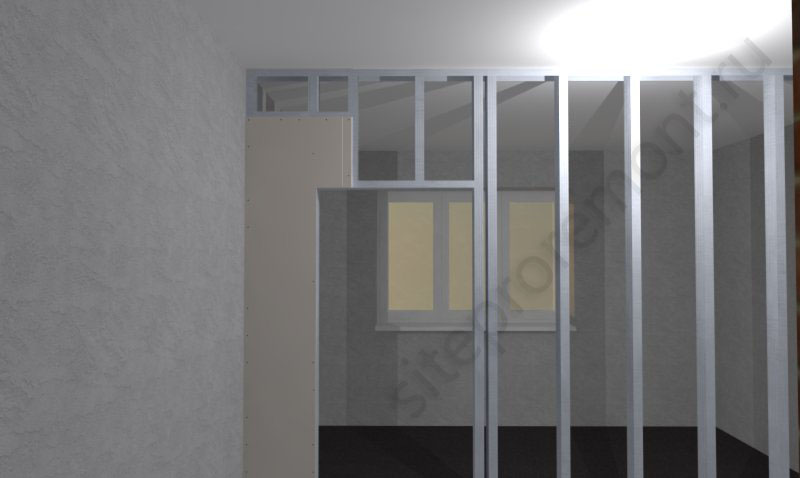
Double-profile design
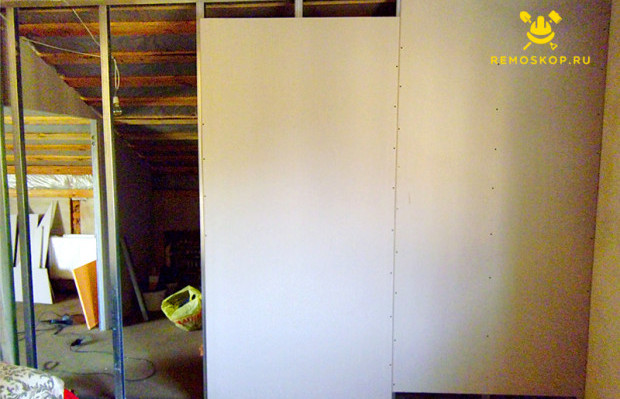
7. More reliable, in comparison with the one described above, will be a design with two rack profiles on each side of the wall, facing towards the inside of the wall - towards each other.
Frame with a double layer of plasterboard covering:
It is easier to work with such a design, since the back area
the profile for attaching drywall becomes larger, and it is also much easier to attach horizontal profile. Although, the material consumption for such a frame increases significantly.
Did you like it? Subscribe to the blog and receive new articles!
It happens that you need to make zoning in a large room, sometimes it is necessary to separate part of a spacious room for an office or a nursery, in general, situations are different, but there is only one solution - installing plasterboard partitions. It is not at all necessary to make a wall that completely cuts off the space to be separated; sometimes a small partition, a hint of a partition, is enough, especially since this option will be much cheaper.
1 How is installing plasterboard partitions better than walls made of other materials?
The main advantage of this material over others used in the construction of walls is the price. If you choose brick, you will have to buy quite a large number of building blocks, cement and sand (cheap materials in volume also affect costs), primer, finishing materials. To ensure that the technology for installing plasterboard partitions does not have any flaws, a few sheets of this material and a certain number of metal profiles, as well as a couple of kilograms of screws, are enough. We will talk about this in more detail below.
A number of other advantages can be listed at once, since all these advantages relate directly to working with the material. Firstly, the installation can be done by one person, and even without haste, the partitions will be assembled in a short time. Secondly, the process of assembling the frame in particular and installing plasterboard partitions in general is not too labor-intensive and does not involve a large amount of construction waste (or dirt in general). And thirdly, this material opens up endless possibilities for your creativity, in the sense that the designs can be given, the result is flat wall, which can be applied to almost any finish.
The undoubted advantage of lightweight frame partitions is the ability to change their configuration literally on the go. That is, if additional sockets or switches are needed, it is easy to dismantle part of the structure, install additional wiring and install the elements necessary to supply electricity to the apartment. Two advantages immediately follow from this: the convenience of laying various communications inside the partitions and the ease of their dismantling if necessary.
2 How to make an estimate for the installation of plasterboard partitions?
To ensure that during the process of assembling the frame it does not become clear that there is not enough materials, or that subsequently there is no surplus left, which would be enough for another structure, the consumption of profiles and drywall should be calculated. Also, before making a frame for the partition, you need to calculate the amount of accompanying materials. First, we measure the room and determine what kind of partition it will be. If it is continuous, across the entire room, then we simply take the necessary measurements without taking into account the doorway and estimate the number of CW and UW profiles, based on the fact that they are installed in increments of 60 centimeters, and their lengths are 2.75, 3, 4, 4.5 and 6 meters. Measuring the wall is even easier.
The cost of installing frame plasterboard partitions directly depends on their area. As a rule, sheet sizes are 1.2x2.5 or 1.2x3 meters. It is logical that if the ceiling height is 2.5 meters, the first option is preferable, and if it is higher, then the second, in order to eliminate horizontal seams, which are inevitable in high-ceiling apartments. The sheet area is either 3 or 3.6 square meters. Now all that remains is to divide the previously recorded area of the partition by the square footage of a unit of drywall and get the number of sheets, which should be multiplied by two, since the sheathing will be double-sided. And add a reserve 10%.
Regarding additional materials, then you will need total number which can be calculated based on the fact that they are mounted on the walls with an interval of about 50 centimeters. You can attach profiles directly to walls, ceilings and floors. Installation of the profile around the perimeter of the future frame is carried out with self-tapping screws, with or without dowels, every 30-50 centimeters, and for fastening drywall, about 60 screws per sheet are required. It is better to take damper tape or serpyanka with a reserve. The amount of mineral wool for sound insulation corresponds to the area of the partition made in one layer, and for multilayer construction You will need 2 times more cotton wool.
It is advisable to lay serpyanka or damper tape at the junction of a metal profile or wooden beam with sheets of plasterboard, this will significantly increase the sound insulation of the structure.
3 Step-by-step installation of interior plasterboard partitions
So, the materials have been calculated and purchased, profiles, sheets of drywall, damper tape, screws and dowels are available, corrugated pipes, as well as soundproofing material.
However, before making a frame partition, it is necessary to prepare and necessary tools. We will need an electric drill with a hammer drill function, a screwdriver, a hacksaw, a construction knife, metal scissors, a plumb line, a level, a tapping thread, and a pencil.

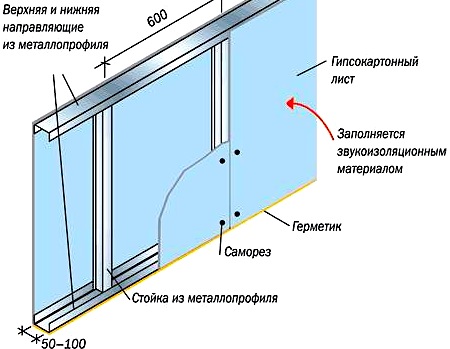
Installation of plasterboard partitions - step-by-step diagram
Step 1: Marking the room
Depending on the size of the area, you may need more than one partition.

Let’s consider just this option, and, for simplicity, a single-layer one. First, we measure the required distance from the wall parallel to which the structure will be installed, and make marks.
We beat off the line with thread.
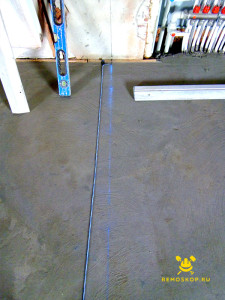
We transfer it to the wall and ceiling using a plumb line, which we hold exactly above the line, placing pencil dots at small intervals until the markings for the guides cover the room with a vertical belt.

Step 2: Installing the Guides
So, the lines cover the vertical perimeter of the room everywhere where the partitions should go, installing guides for which we will now proceed. To begin with, we glue damper tape onto the profiles; it will serve as vibration insulation for structural parts fixed to the floor, walls and ceiling.
We lay the profile exactly along the line, down with the tape, drill a hole if, then use a screw with a dowel, and fix it on wooden surfaces with self-tapping screws.

We mark doorways in advance and do not install profiles in their place.

Step 3: Frame installation
Depending on the length of the purchased profiles, we cut them off or extend them, focusing on the height of the ceiling, and insert ready-made elements into the guides at equal sixty-centimeter intervals.
It is not necessary to fasten them immediately; only profiles require fixing them with screws to the guides doorways, and you need to especially carefully check their verticality.
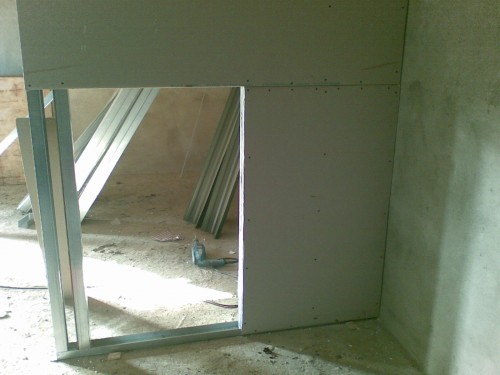
Step 4: Forming Openings
For the lintels, we cut off pieces of profiles, the length of which should be 6 centimeters greater than the width of the openings. Along the edges, we cut out 3 centimeters in the shelves of the bases of the resulting parts, leaving the sidewalls, after which we fix them clearly horizontally with screws at a height of 207 centimeters.
As an additional fastener, we use a vertical piece of profile (cut at the edges in the same way), connecting the lintel to the upper rail.
For greater strength of the doors, we install additional vertical profiles at a distance of ten centimeters from the “jambs”.
Step 5: Preparing the Drywall
Let's get started. If the sheets are slightly larger than the height of the room, cut them to the required size using construction knife. To do this, make a deep cut, after which we carefully bend it along it until the fragment to be separated breaks off, then along the fold of the second cardboard side we finally cut off the excess piece. You can use a saw, but there will be more dust. If the sheets match the height of the ceiling, we immediately begin installation.
Step 6: Installation of the first side of the partition
When fixing the sheets, keep the step between the screws to no more than 20 centimeters.
If, after marking, it turns out that the partition will need several whole sheets and one half, and the drywall is planned to be laid in two layers, we start the first layer with half, finish it, and start the second layer with a whole sheet.
It may turn out that the sheets are shorter than the height of the room, then you will have to supplement them with small fragments.
In this case, frame interior room partitions made of plasterboard can be assembled with your own hands according to a simple scheme. When laying the coating in one layer, we move each sheet in relation to the previous one up or down so that the horizontal seams are either at the floor or at the ceiling.
For two-layer coating bottom sheets we lay it so that the horizontal seams run along the floor, and top sheets We install it by laying additional fragments along the ceiling.
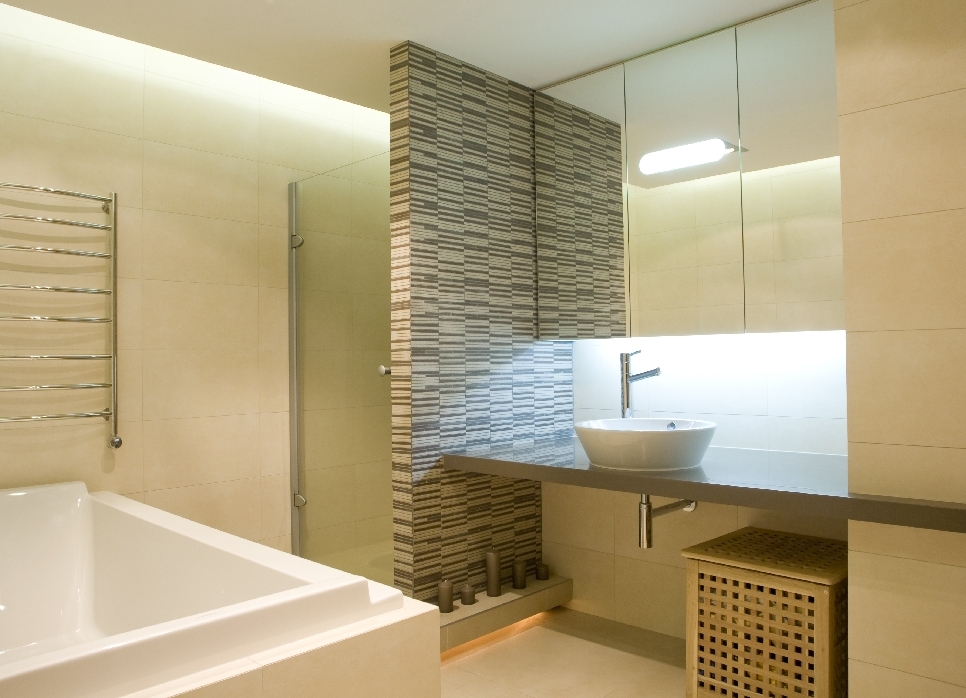
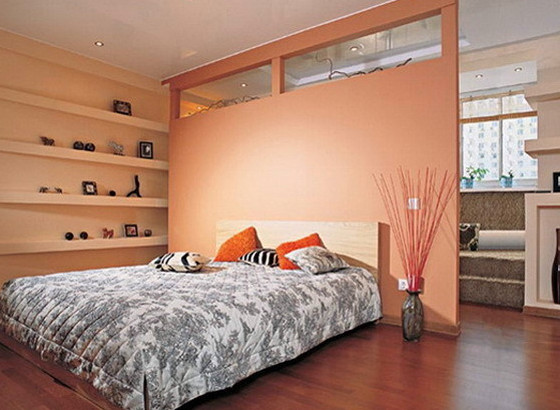
The use of plasterboard as a basis for partitions allows for quick redevelopment in any room. The information in this article will help you learn how to do this correctly, as well as evaluate the benefits of plasterboard partitions in bathrooms.
Basically, designers and planners use such structures for zoning, that is, the room is divided into several zones (recreation, entertainment, work), which can differ not only in size, but also in style.
Most often they find their application in small spaces, where everyone square meter counts, and it is the creation of zones that allows you to use the entire area rationally, with maximum functionality.
Before agreeing to install a plasterboard partition, you should familiarize yourself with the features, evaluate its pros and cons, and also determine the extent to which it is needed in the room. Among the advantages of such structures, experts include:
- Soundproofing properties. Thanks to the thickness of the sheets, as well as the technical space that can be filled with building components, it is possible to achieve an optimal sound barrier in the room.
- The weight of the entire assembled structure does not have a significant effect on load-bearing slabs, compared to building materials, which can be used for similar purposes (brick, gas, foam block).
- The evenness of the surface allows you to save on plastering, as well as perform any decorative and finishing work (painting, wallpapering, installation wall panels, gypsum tiles, etc.).
- Installation does not require special knowledge or significant effort, so it can be done independently. It is also worth noting the speed of installation and relative cleanliness.
- The technical parameters of drywall provide the required level of resistance to fire, moisture, and temperature changes.
- Dismantling does not take much time, and a minimal amount of construction waste is generated in the room.
- In a technical space, between drywall, you can easily hide engineering systems, and communication networks.
- Flexibility allows you to create products of any shape and size.
- “Breathable properties” - allows steam to pass through, absorbs moisture, and returns it when the temperature rises or the humidity level in the room decreases.
Despite the large number of positive qualities, there are also a number of disadvantages:
- Fragility. The material is not characterized by high strength, in comparison with natural building materials (brick, stone, wood). Therefore, under mechanical stress or strong physical stress, deformations can form on the surface.
- Low resistance to moisture. With excessive exposure to liquid, drywall loses its original shape, which entails deformation of the entire partition.
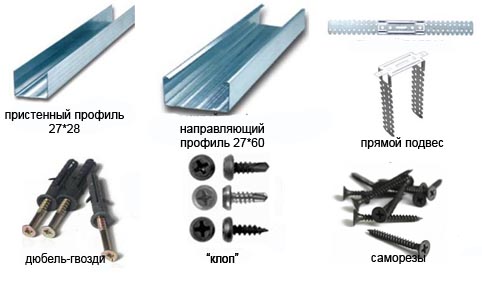
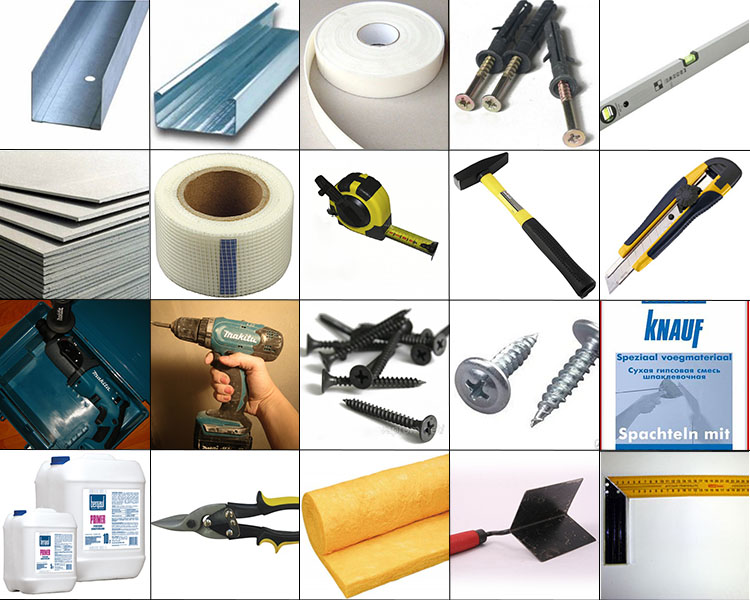
Required materials and tools
The installation of partitions requires the presence of a certain list of materials at the site:
- Directly drywall. Its type (fireproof, moisture-resistant, combined) is selected based on the characteristics of the room and its intended purpose.
- Guide profile. To create partitions, the following profile dimensions are considered optimal - 50x40, 100x40 and 75x40. The number of required units is calculated based on the perimeter of the structure itself, divided by three, and the resulting result is rounded to the nearest whole number. In the case of designing a double frame, the resulting figure doubles.
- Rack profile. It differs from the previous type in increased rigidity, which is formed due to the presence of shelves on the surface. Their number depends on the type of installation chosen.
- Corner profile.
- Small mounting elements - self-tapping screws (2.5 cm), dowels and nails. The plasterboard sheets are attached first to the metal frame; in some situations, the rack sheets are fastened together. The second ones are used for attaching guides to the rough base.
- A wooden block is necessary if the partition design provides for the location interior door. With its help, rigidity, strength, and stability are added.

In addition to materials, it is necessary to provide for the availability of specialized construction tools if installation is done by hand, then you will need:
- hammer drill – designed for dismantling concrete and iron concrete walls, as well as floors. With its help, the process will not take much time, so it will be possible to meet the minimum deadlines for completing all planned activities.
- drill - can be used as an alternative to a hammer drill.
- plumb line - ensures perfect evenness and compliance with a single plane of the assembled product.
- a building level can replace a plumb line, especially when checking the evenness of the installation of guides.
- screwdriver with attachments - quickly twists all parts, as well as sheets to the frame.
- cutting scissors metal products. If you don’t have them, you can use a grinder or a machine.
- hammer - needed for driving in dowel nails, ensuring speed of installation work.
- utility knife – used for cutting drywall.
- tape measure (length 3 m) and pencil for marking.
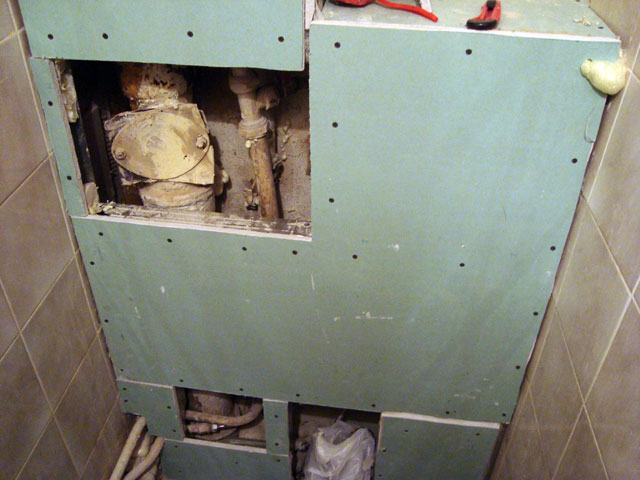
Drywall in the bathroom
Oddly enough, but craftsmen find a wide range of applications for drywall in the bathroom. With its help it is possible to form:
- ideal evenness of the walls;
- suspended ceilings, not excluding options for multi-level compositions;
- decorative partition;
- niches for storage various means hygiene, cleaning, and also hiding internal communications;
- bathroom screen.
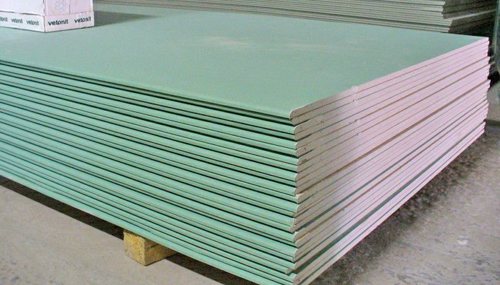
Dry plaster, which is part of the sheets, acts as a noise barrier from sewer risers. However, before purchasing, you still need to find out what type of gypsum board can be used in a room with a high level of humidity.
For such purposes there is special type, called moisture resistant. It got its name thanks to technical specifications, which counteract the formation of fungi and mold; in addition, it does not absorb moisture, that is, it does not have “breathing” properties. Its composition is represented by two-layer cardboard and gypsum internal filling with improved hydrophobic properties. It can be used in rooms where the humidity level does not exceed 90%.
A distinctive feature from other types of material is external color surfaces. International standards, it is established that it must be green.
The price of the masters' work
The cost of assembly and installation work may vary, as it is influenced by a number of factors:
- footage and general dimensions of the room;
- the volume of the partition itself;
- the type of materials used and their cost;
- the need for additional work;
- execution of a standard project or individual design.
Besides this Pricing is influenced by the experience and qualifications of the craftsman. On average, the price per m2 fluctuates in the range of 400-500 rubles. Having given preference to a master from a specialized company who is able to quickly and efficiently carry out all planned activities, using professional equipment, it is worth understanding that the cost of his services may be slightly higher.
Do-it-yourself plasterboard partition?
Very often when planning a design own home, or apartments, the owners decide that, in order to save money, all non-labor-intensive work that does not require special knowledge, but only partial familiarization, can be performed by them themselves. As a rule, they are right, but you need to follow the rules in order to ultimately get the desired result.
First you need to decide on the type of structure itself, that is, examples of work already done previously. These can be photos taken on the Internet, with detailed instructions, which describes the stages of creation.
Step-by-step instructions for carrying out installation activities will allow for error-free installation. Let's take a closer look at each stage.
Marking
Initial work involves drawing up a project, carrying out appropriate calculations and markings. The marking is carried out from the wall with the window, after the required distance has been measured, you need to put a mark on the side walls and draw two vertical lines. To make them even, you can use a long level. If the planned structure is not continuous, or it should only be completed at an angle of 90°, then you should resort to the rule of the Egyptian triangle.
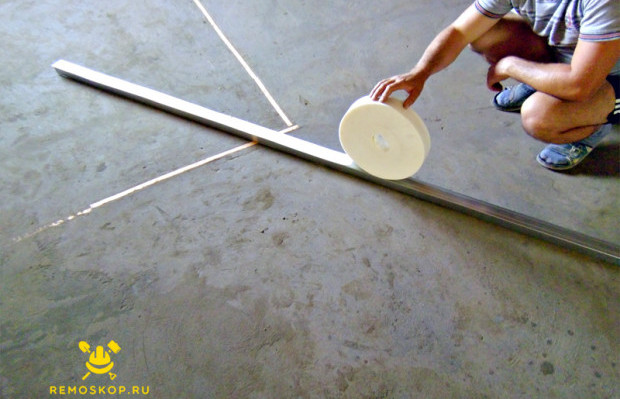
To simplify your task, it is enough to use the short side of the sheet, which is adjusted to the junction of the wall and ceiling, and a mark is made along the long side. Very often, this method is used for marking on the ceiling, and to mirror the data onto the floor, you can use a plumb line.
Fastening the guide profile
Initially, you need to cut the profile to a certain length, but it is worth remembering that the floor will be smaller due to the space of the doorway. At this point, it is advisable to cut the profile and turn it up to a height of approximately 20 cm. For fastening to the base, dowels are used, which are screwed in at a distance of no more than 60 cm from each other. It is important that the profiles are symmetrical.
Finishing doorways
At the location of the door, it is worth taking care of placing additional supporting products; often the openings are strengthened wooden beams. Or, next to the outlined opening, secure another row of metal profiles. If door block, made from natural wood, or has non-standard dimensions that significantly increase weight, then the metal profile must be at least 2 mm thick.
Provided that door leaf has a width of 80 cm, the opening itself should be several centimeters wider, about 6-8 cm, which will allow for a full installation.
Lathing structure
It is worth making sure that the dimensions of the PS (rack-mount) are 1 cm less than the height of the room, it is also important to take into account the direction of the metal profiles, they should not be located chaotically. The stiffening ribs should face the side from which the cladding will begin. The fastening of the first sheet begins from the edge side, and the next one is already mounted to the remaining plane.
Hiding communications and providing heat and sound insulation
To do this, you need to lay the selected material ( mineral wool, expanded polystyrene) into the resulting mines. Cables, wires, and other engineering and communication networks are laid on top of them.
Facing
To do this, it is recommended to use the original markings, based on which the required volume was purchased. It is advisable, if necessary, to prune in advance. Between the floor and the sheet there must be the gap is 1 cm, and at the top 0.5 cm. If the room height exceeds standard height products, then you need to do additional sewing. Joining of sheets is carried out only in the middle of the metal profile. It is recommended to install the sheets in a checkerboard pattern.
Fastening with self-tapping screws occurs at a distance of no more than 15 cm, both around the perimeter and vertical and horizontal guides. The screw heads should be screwed on carefully so as not to damage the integrity of the drywall.
Puttying drywall
The puttying technology for this material is not much different from other surfaces. To begin with, you should start cleaning from dust and other contaminants, then prime. After the soil has completely dried, you can begin the process. Initially, you need to attach a fiberglass mesh to each joint and corner so that it is exactly in the middle of the seam. The tape adheres without problems, since its base is self-adhesive.

The mixture for puttying is prepared in a separate container, following the proportions indicated by the manufacturer on the packaging. Form a solution, preferably in a small volume, as it is characterized high speed setting, and already in 15 minutes, it will lose all its properties. Once the mixture has begun to harden, it should absolutely not be stirred further. To continue working, it is worth mixing a new batch.
The process begins by sealing the seams between the sheets, then hiding the screw heads, after which it comes to the corners. After all the unevenness is hidden, you can begin finishing putty, which involves complete leveling for further decorative finishing.
Calculate the cost of your renovation! For free!
By filling out the form and clicking the “Continue” button, our specialists will calculate the approximate cost of the work and, if you need it, they will suggest good specialists.
Calculate the cost of your renovation! For free!
By filling out the form and clicking the “Compare prices” button, our specialists will calculate the approximate cost of the work and, if you need it, they will suggest good specialists.
Not everyone is satisfied with the layout of the apartment, which was originally intended by the developers, and sometimes there is a need to change the space, what should you do? What actions can you take to change the layout of the space? Various kinds of partitions have been used for a very long time, it can be a small movable screen and almost real wall. If in the first case there is no talk of any insulation, then a strong wall made of lightweight material can completely transform a room.
- Comfortable weight - the material is lightweight.
- Easy to install - one day is enough to assemble the partition alone.
- Cheapness becomes one of the main advantages.
- Externally it will not differ from an ordinary wall.
- You can easily lay all the necessary communications through a plasterboard wall.
- This is a great way to create an opening or niche.
- You can do without dirt - there is no need for wet processes, everything is done dry.
As a rule, the frame is made of metal - it is durable and will last for a long time.
Building a partition from plasterboard with your own hands will be much cheaper than resorting to the services of installers. In the article we will give valuable advice on the job and tell you how to get the job done quickly and with a minimum of effort.
How to make plasterboard partitions correctly and what profiles to use?
There are profiles for the ceiling, guides and racks, we will not use ceiling ones, they are not suitable for us, but we need to talk about the rest separately.
Guides are divided into 4 types by size:
- 50 to 40
- 65 to 40
- 75 to 40
- 100 to 40
They are all produced the same in length - 3 meters, but the width is indicated separately.
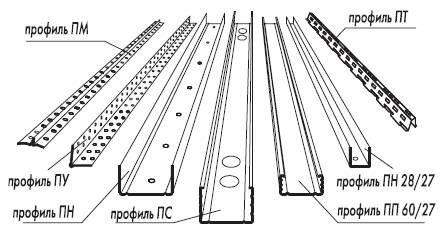
Rack ones also differ:
- 50/50
- 65 to 50
- 75 to 50
- 100 to 50
Moreover, they also have different lengths: 3, 3.5 and 4 m. This is very convenient for those who have high ceilings, there is no need to “build up” the racks on top of each other. In what follows, we will call the guides “PN” and the rack-mount ones “PS”; we will warn you that the strength of 50 and 65 is low, but 75 and 100 are much better; by installing them, you won’t have to worry at all.
We will use hundredths, so the total thickness will be 12.5 cm. This is quite a large volume for a partition; it can be filled with sound insulation in two layers; you must agree, for many this is a huge advantage, for example, if one large room is divided into two small ones.
If you use 75 cm profiles, you will save only 2.5 mm, this may be decisive, but usually this is not such a big plus. We will place the racks in 40 cm increments, this way maximum reliability is achieved. In addition, if you are going to lay tiles on the partition, you cannot exceed this distance.
Drywall also comes in different forms; we need the strongest one, which is used for the construction of walls - 12.5 cm minimum.
Do-it-yourself interior partitions: what will you need?
- Profiles, racks and guides
- Measuring tape
- Dowels
- Level with a bubble, it can be replaced with a laser
- Plasterboard sheets
- Serpyanka – tape for seams
- Knife, you can use a regular stationery knife, or you can buy a special one for cutting HA
- Drill and hammer drill
- Screwdriver
- Self-tapping screws
- Putty
- Soundproofing materials
- Metal cutting shears
- Spatulas of different types
If everything is ready, let's get to work!
Construction of a plasterboard partition: do it yourself
The partition consists of:
- Two layers of HA sheets - on one side and the other.
- One or two layers of sound insulation.
- Metal profiles.
Making a partition from plasterboard with your own hands
Here is an example in which half of the room is fenced off, so let’s make a reservation in advance: if you are interested in the question of how to make a corner partition from plasterboard, these recommendations will also suit you. Just at the marking stage you separate the corner and the main condition is straight lines.
Marking
Let's say you need to divide a room in half. We retreat required quantity meters from the wall and mark this place for ourselves with points at the same level on opposite walls. Then we draw two vertical lines, using not only an eye, but also a level and rulers. Next, we need to connect them into one whole along the floor and ceiling - for this we will use a bevel.
Can be used elementary way– measure everything against a regular sheet of drywall, attach it with the short side to your vertical, and along the long side draw a line along the floor.
Attaching profiles
When the marking is completed and the scope of work is clear, we proceed directly installation work– first of all, we will secure the basis of our future partition – profiles. You can place both PS and PN on the walls, this will not play a big role. The main thing to remember is to glue with a sealant those parts that are adjacent to load-bearing structure. This is necessary so that the entire frame sits tightly in a box of walls, floor and ceiling. In addition, this is a plus for sound insulation and protection against cracks and subsidence of the main body.
Doorway
The next step is the door. Of course, you left a place for the entrance, and here you need to install reinforced profiles. We suggest using two rack profiles at the same time - insert one into the other and secure it.
We warn you that this option is only suitable for the manufacturer KnauFF. If you are dealing with another company, you can insert timber into the profile.
There is another way to strengthen the structure - after the main one, we install an additional door profile. Let us clarify that it all depends on the weight of the door that you intend to hang. When it comes to a plasterboard wall, you need to understand that a massive sheet simply will not hold up.
If we use PS-100, the maximum weight is 40 kg. You can add a few kilos, but in this case you will have to install profiles 2 mm thick. For example, we take a standard door leaf - 80 cm, the opening must include a margin, 8 cm is the minimum.
There are many more nuances. For example, the length of the stand should be cm less than the height of the room. Remember that the PS cannot be installed in any order, they must be positioned correctly - the edge “looks” towards where we will begin to veneer the GC. This necessary measure, since first the sheet is attached to the edge, and then to the profile itself, if this is not provided for, the result will be a crooked wall. Temporarily fasten the PS and PN with self-tapping screws. Then we insert special door profiles and secure the guide between them.
Accuracy in this matter is paramount; mistakes can lead to at least the curvature of the wall.
Since joining the gypsum boards can only be done above the door, and by retreating at least 10 cm, you need to place a couple more racks above the opening.
We mount two profiles with a pitch of 40 cm and secure them with self-tapping screws.
Frame installation
We distribute PS along the entire wall in accordance with the position of these two located above the entrance. We use the rule “The step should be 40 cm.” When all the profiles are inserted into the frame, they will represent a common vertical plane.

Cladding with HA sheets
We will move from left to right. We install the first sheet, it is fixed and the problem is immediately discovered - the passage is closed. We fasten it to the PS with self-tapping screws and then cut it to the required size. Leave 0.5 cm under the ceilings, and retreat 1 cm from below. Sheet joints should only be made on the profile, and there is no need to buy durable and expensive, ordinary ceiling size 60 by 27 will fit perfectly.
When one side is sheathed in this way, we fill the insides with sound insulation and repeat our actions on the other side.
How to make a partition in the house with your own hands? As you can see, there is nothing complicated if you have the desire!
To understand the topic more fully, we recommend watching several videos about how the installation takes place and, in particular, about installing profiles, because this is the most labor-intensive part of the work. Let us remind you that if the PN and PS are installed correctly and in accordance with all the rules, it will not be any problem to cover them with HA sheets.
How to build an interior partition from plasterboard video
Partition made of plasterboard, characteristics of materials, advantages and disadvantages of the design, development of its design, installation of the frame and its cladding, arrangement of the doorway and preliminary surface finishing.
Advantages and disadvantages of plasterboard partitions
Not long ago all the partitions in residential buildings were built exclusively with bricks, concrete or blocks. But after appearing on construction market plasterboard materials, the situation has changed radically due to their remarkable properties:
- Partitions made of gypsum plasterboard on metal or wooden frame have excellent sound insulation, especially in combination with insulation, which in this case plays an additional role. The single-layer sheathing of a plasterboard partition has a sound absorption coefficient of up to 47 dB, and its second layer makes this indicator even better.
- Unlike concrete and stone partitions, plasterboard sheets and metal profiles, making up similar structures, are very light. On average, 1 m2 of gypsum plasterboard wall weighs 25-50 kg, depending on its thickness. This allows you to significantly reduce the load on the building’s floors and save, for example, on fittings, mortar and delivery of materials.
- Plasterboard sheets are initially flat surface, which is good for further finishing: paint, wallpaper, decorative plaster and even tiles.
- GKL is not classified as a flammable material, so it is safe in case of fire.
- Its hygroscopicity allows you to stabilize the microclimate of the room, since the material is capable of not only allowing air to pass through, but also absorbing excess moisture.
- An important indicator of plasterboard partitions is the ease of their installation. For this reason, in a couple of days you can transform a room beyond recognition. And it is quite possible to do this home handyman with at least basic construction skills.
- Included plasterboard sheets Only natural ingredients are included, so the material is absolutely harmless to health.
The material does not tolerate direct contact with water. In case of accidental flooding of the room, part of the sheathing of the plasterboard partitions will have to be changed. This is probably where all the disadvantages of drywall end.
Selection of materials for gypsum plasterboard partitions

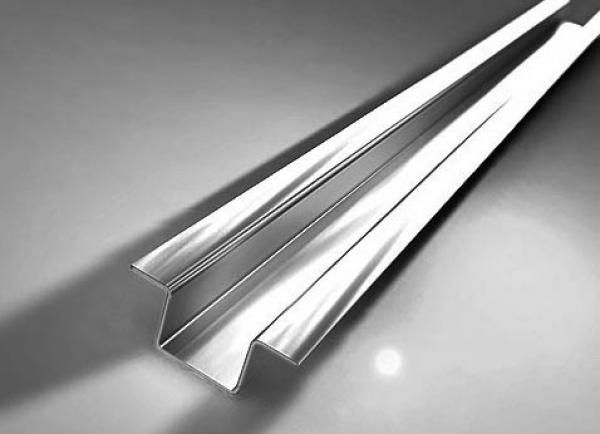
The main materials used for the installation of plasterboard partitions are light metal profiles and gypsum boards. The profiles that form the frame differ in cross-sectional dimensions and functional purpose:
- Guide profile PN (UD). Made in the form of a thin-walled channel. Its width can be from 50 to 100 mm, the size of the shelves is 40 mm. These parameters are always indicated in the marking, for example: PN40-75, where 40 is the width of the shelf, and 75 is the profile. Guide profiles fix the racks metal frame partitions.
- Rack profile PS(CD). It differs from PN in the presence of special locks and bends on the shelves and has similar markings. Rack profiles are used to impart rigidity to the structure and attach gypsum boards (plasterboard sheets) to them.
- Corner profile. It is used when decorating the outer corners of partitions and protects them from mechanical damage.
- Arched profile. Used to create openings of any curved shape.
- Lighthouse profile. He has T-shape and serves as a guide when leveling the walls.
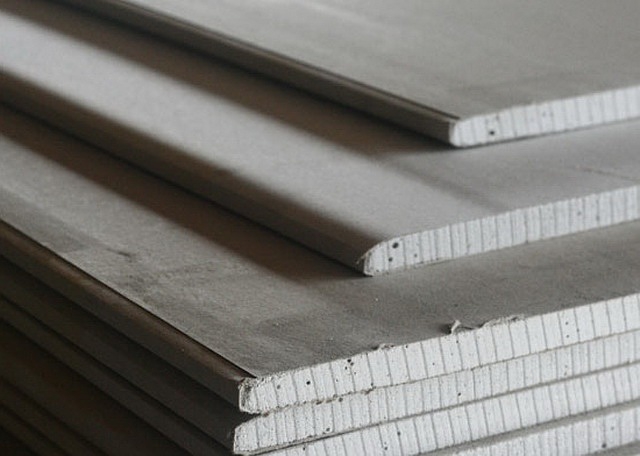
The plasterboard sheets with which the frame is sheathed must have a thickness of at least 12.5 mm. When making a curved opening in a partition, they use thin sheets up to 12.5 mm for ease of design the desired shape. Drywall is divided by type:
- Standard gypsum board. This is the most common material, has a gray color and blue markings. It can be ceiling or wall. Ceiling plasterboard sheets are always thinner.
- Moisture-resistant gypsum board. Used in the manufacture of partitions to separate wet rooms. He has green and blue markings.
- Fire-resistant gypsum board. Used for insulation ventilation shafts or electrical panels. He gray, has a red marking.
When choosing a gypsum board, you should pay attention to its purpose, and not just to the thickness of the product. This will help greatly increase the durability of the entire structure during its operation.
Creating a drawing of a plasterboard partition
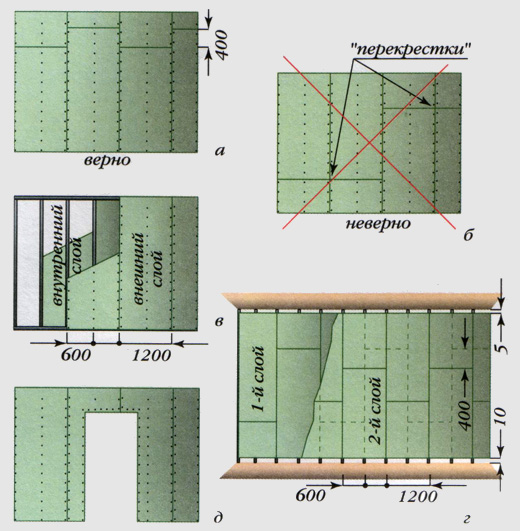
A working diagram of a plasterboard partition is necessary when planning a structure of the required rigidity and volume, as well as to determine the types and quantities necessary materials for its manufacture. Complex calculations are not required here.
Before making a partition from plasterboard, you first need to draw a scale plan of the room on paper, indicating its height, length and width, and then mark the location line of the future partition on it. After this, you should make a frontal sketch of the wall and mark on it the location of the load-bearing profiles and gypsum boards, located in a checkerboard pattern. The installation of horizontal jumpers should be provided at their joints.
The number of rack profiles, as well as their location, depends on the planned load on the structure. External cladding and inner sides partitions should be made so that the edges of the sheets are located on different profiles.
For example, if on one side of the wall the joints of the sheets are located on the third, fifth and seventh racks, then on the other side they should be located on the second, fourth and sixth with a step between the racks of 600 mm. All this must be taken into account when making a drawing of a plasterboard partition for zoning a common room.
Important! Attachment points for pieces of furniture or decor on the partition must be reinforced at the stage of creating the frame with additional profiles.
Installation of a frame for a plasterboard partition

After drawing up a diagram of the plasterboard enclosing structure, counting and selecting the necessary materials, you can begin to manufacture the metal frame. The set of tools used for this work is not that large. These are a tape measure, a plumb line, a level and a marker, a hammer, a stationery knife, screws, dowels, a screwdriver, metal scissors and a hammer drill.
According to the partition layout plan, it is necessary to measure the required distance from the nearest wall in several places and draw lines along the ceiling and floor. When connecting their ends on both walls, you will get a closed loop. Its sides must be strictly vertical; this must be checked with a plumb line.
Then, sealing tape should be glued to the guide profiles and secured, guided by the markings made. To do this, you need to make holes for dowels along the lines of the ceiling and floor using a puncher.
The fastening spacing of PN profiles should not be more than 1 m. The size of the dowels depends on the wall material. For attaching profiles to concrete slab You can use “Bystromontazh” dowels 75 mm long, and for wooden floors you can use ordinary screws 45-50 mm long. Cut profiles according to the right sizes You should use metal scissors, and if you don’t have them, you can use a grinder.
To install a plasterboard partition, the first rack should be placed close to the wall. It is attached to the guide profiles using a cutter. It is also advisable to cover the stand with sealing tape at the junction with the main structure to increase the heat and sound insulation of the future partition.
After installing the first profile, you need to check its verticality with a level, and then attach the stand to load-bearing wall dowels. For concrete walls, their length should be 75 mm.
Then all other racks should be installed. Their number and pitch depend on the planned load on the partition. For decorative purposes, the profile pitch can be 1200 mm. If there is a cabinet hanging on the wall, then the distance between the rack profiles should be 400 mm.
Typically, the installation of racks is carried out under the middle or edges of the sheet, that is, in increments of 600 mm. And only the second rack is installed at a distance of 200-500 mm from the outer profile. This is due to the fact that thinning will be cut off from the sheet, making it narrower. Regardless of the distance between the vertical profiles, the edges of the gypsum boards should always exactly fall on the center of the rack.
On both sides, each rack profile must be attached to the guides with a cutter. When working on placing the racks, you should ensure that you do not have to attach too narrow a piece of plasterboard sheet in the corner of the partition. This can create a problem in the further process and contribute to the occurrence of cracks.
Jumpers must be installed at the locations of horizontal gypsum board joints. To do this, you need to use metal scissors to cut off pieces of the profile 100 mm long and attach them to the posts at the required height. Then the horizontal profile needs to be inserted inside and secured with a notch. This completes the installation of the frame.
Covering the partition frame with plasterboard
Installation of the first sheet of sheathing should begin by cutting its thin part to length. Such thinning on the remaining sheets will be necessary to mask the gypsum board joints after they are installed and puttyed. The first sheet must be attached to the frame so that its entire edge coincides with the center of the profile. Then the gypsum board should be secured with self-tapping screws 25 mm long.
Along the edges of the sheet, their fastening pitch should be 150-200 mm, and in the middle part - up to 300 mm. Self-tapping screws should not be screwed into the corners of the sheets; it is better to step back 5-10 cm from them. The rest of the sheathing is attached according to the developed diagram.
When installing a plasterboard partition with your own hands, you need to take into account several rules:
- It is imperative to leave the necessary deformation gaps for the sheathing: between the gypsum board and the floor - 1 cm, between the gypsum board and the ceiling - 0.5 cm, between adjacent sheets - 2 mm.
- It is recommended to avoid cross-shaped joints in every possible way; such an arrangement of sheets violates the strength of the partition.
- If one side of the structure is sheathed from left to right, then the cladding of the frame on the other side should be done in the reverse order. This will prevent the gypsum board seams from matching on one frame post.
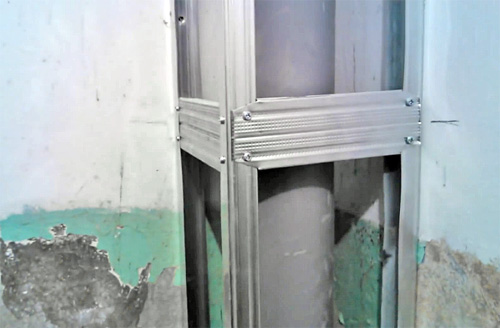
Installation of a doorway in a plasterboard partition

If you are planning a plasterboard partition with a door, you should start work from the opening. After fixing the guide profiles, you need to install rack-mount reinforced profiles for it.
It will be easier if you take a beam of the required length and a thickness slightly less than the width of the metal post and insert it into the cavity of the doorway profiles. That is, when installing a partition from a profile w. 100 mm timber with a thickness of 95 mm is taken, inserted into the rack and secured in it with wood screws in increments of 150-200 mm.
If there is no beam, the racks can be reinforced with a guide profile. To do this, it should be connected to the stand using metal screws. Then, according to the principle described above, you need to secure all other vertical profiles.
The door lintel is installed between two reinforced posts in this way. At each end of the jumper profile, you need to measure 100 mm and cut only its flanges. Then, at the place of the cut, the profile needs to be bent 90 degrees - that’s it, the jumper is ready. All that remains is to screw it above the opening at the required height from the floor. When installing a heavy door top part the opening should also be strengthened.
Features of finishing plasterboard partitions
After completing the installation of the partition, it should be prepared for exterior finishing. The joints of plasterboard sheets are reinforced with sickle tape and sealed with gypsum putty. The outer corners of the partition must be reinforced with a metal perforated corner, which is fixed with the same mixture. The screw heads should be hidden under putty.
After the putty has dried on the joints, corners and fasteners, the entire surface of the partition must be treated with a primer to ensure adhesion, followed by a finishing layer.
Then continuous putty is performed on both sides of the partition. To finish it with wallpaper, it is enough to apply a starting layer of a coarse-grained mixture - it will give the surface the desired roughness. To prepare the surface for painting, you will need an additional layer of fine-grained finishing putty. The work is done with a wide spatula using arcuate movements.
After completing this process, it is necessary to wait time for the applied mixture to dry, and then sand the surface. For grouting, special abrasive mesh No. 100-150 is used. The resulting gypsum dust can be removed immediately with an industrial vacuum cleaner. In its absence, the respiratory system should be protected with a respirator. The result of the work should be a smooth partition, ready for decoration with any coating.
How to make a partition from plasterboard - watch the video:
In this way you can plasterboard partitions any layout standard apartment make it original, not to mention the possibilities of using them in a private home. Good luck!


