Interior wall decoration with plaster is a method that is used to one degree or another in the renovation or construction of any home.
The technology for applying the solution is such that if you have some skills you can perform this procedure yourself, especially when it comes to small volumes, when you need to plaster a separate area.
What kind of material is this?
Plaster – This is a thick pasty mixture intended for finishing walls and ceilings.
It can be used both as a basis for other finishing materials and as finishing coating. Using plaster eliminate significant irregularities and perform final leveling of surfaces for subsequent painting or finishing with facing materials.
Types depending on the base
In the past, when it was necessary to carry out plastering work, there was no need to think about the choice of mortar, since combinations - cement-sand or cement-lime, were the only available options.
Now, the homeowner who started the renovation, faces abundance of materials, differing from each other in their characteristics.
Cement
This type is a cement-sand or cement-lime mixture, made according to certain proportions with the addition of water.
Cement-lime composition works well for finishing walls in rooms with high humidity , which allows it to be used for plastering kitchens and bathrooms.
Cement-sand plaster serves as a composition for leveling walls and bringing surfaces to zero.
Advantages:
- Strength. In this indicator, cement compositions are significantly superior to other materials, forming a reliable coating on the surface of the walls.
- High adhesion. The features of the components included in the cement mortar ensure high-quality adhesion of the plaster to the surface, which makes the use of a primer for pre-treatment unnecessary.
- Price. The materials used to make the solution are affordable and accessible.
Flaws:
- Using the solution requires accurate load calculation on the wall and the thickness of the coating, since cement plaster has a significant mass.
- Plastering – labor-intensive process, which includes several mandatory steps.
- Compound hardens for a long time– about 3–4 weeks.
Read also about the consumption rates of plaster compositions.
Plaster

From the name it is clear that the main component of the composition is gypsum, to which light fillers are added, reducing material consumption.
As well as high-quality modifying additives intended to increase the adhesion of the solution.
Used for application under subsequent decorative finishing using paint or wallpaper.
Advantages:
- No shrinkage. This property allows you to obtain a perfectly flat surface, without the formation of cracks on it during the solidification of the solution.
- Elastic. Due to the good viscosity of gypsum mixtures, thicker layers can be applied to the surface if necessary. In this case, the solution will not deform or drain.
- Vapor permeability. The composition applied to the surface, when hardened, forms a porous structure that allows the walls to “breathe”, which even with increasing humidity protects them from the formation of mold.
- Environmental friendliness. In this regard, gypsum plaster is superior to cement mortars.
Flaws:
- Material not suitable for finishing rooms with constantly high humidity.
- More low strength unlike the cement composition.
- Gypsum coating negatively affects metal objects – nails, screws and other metal fasteners located in the thickness of the plaster quickly rust and become unusable.
Polymer
This material is not intended for rough leveling of surfaces, but used exclusively as decorative covering .
In production based on polymer resins and other synthetic substances. Ready-made plaster can be colored (contains colored granules) or plain (mostly white).
Advantages:
- Fast and even drying, As a result, the surface becomes even and smooth.
- Does not require additional finishing.
- Resistant to moisture.
- Has many options for relief finishing.
- Frost-resistant.
The disadvantages include high cost material.
Silicone

The main component of the material is silicone resin, which mixed with various fillers(fabric fibers, minerals).
Also added to the composition are components improving coating strength and giving it resistance to the influence of ultraviolet radiation and temperature changes.
Used for decorative purposes for processing almost any surface, including wooden.
Advantages:
- High elasticity.
- Absolute water resistance.
- Durability of the coating (more than 25 years).
- High-quality adhesion.
- Good vapor permeability.
Flaws:
- High price.
- Surface before plastering needs to be treated with silicone primers.
Types of compositions by purpose
The different types of plasters on sale today allow you to make a choice in favor of one material or another. according to specific requests and the type of surface being processed.
In this regard, plaster can be divided into two categories: regular (intended for roughing) and decorative (the name speaks for itself).
These two species also have several classifications.
Regular
It can be simple, improved, or high quality.
- Simple the plaster includes two layers - spray and primer, the total thickness of which is 12 mm. Used for finishing non-residential buildings.
- Improved plaster has three layers - spray, primer and covering. The thickness of this coating is 15 mm. During the final finishing, the surface is leveled and smoothed using a rule. This plaster is used both in residential premises and in various public buildings.
- High quality plaster. Finishing is done by spraying, applying two coats of primer and topcoat. Finishing thickness – 20 mm. The primer layer is leveled along the beacons, the covering is treated with a grater. It is used for plastering multi-storey residential buildings and public institutions.
Decorative
Decorative plaster also has several different types. Let's look at them in more detail.
Types of decorative plaster:

Which one to choose?
For reliable operation and coating service life It is worth paying attention to the choice of plaster, which is better than others when finishing a particular type of surface.
When plastering aerated concrete walls the main thing is not to clog your pores, as this will lead to a violation of vapor permeability. Therefore, cement-sand mortar is not suitable here.
Aerated concrete is best finished with gypsum-based plaster mixtures. Finished layer allows water vapor to pass through it well, providing good vapor permeability.
Although aerated silicate blocks are made using a slightly different technology than aerated concrete, they have a cellular structure similar to it. Therefore, for its finishing also gypsum plaster is suitable, in particular, it can be lime-gypsum dry plaster.
Mixtures for finishing walls made of foam blocks differ from the compositions used for brick and other types of surfaces. The main parameters that plaster for a foam block should have are: light weight and good adhesion. Ready-made ones will do here cement plasters(for example, Ш-36 “Decor” or “CeresitCT24”).
You can use solutions for woodworking homemade based on various binder components - clay, lime, cement. The first two materials are rarely used today, despite the fact that have high thermal insulation characteristics and antiseptic properties.
It is also possible to use construction putties(both starting and finishing), but this is already more expensive option.
For plastering over insulation, in particular, we will consider penoplex. The best plaster for this material is gypsum. Knauf Rotband mixtures and Fugenfueller universal plaster have proven themselves well. Plastering performed using reinforcing mesh.
Plastering the interior walls of a house with your own hands
This process includes several basic procedures: marking and priming, installation of beacons, plastering, grouting.
Surface marking and priming
Using a plumb line or water level, find uneven areas and mark them with a marker. Mark the wall for installation of beacons. You should start from the corner, retreating 0.3 m and drawing a vertical line. The distance from one beacon to another should be 1.6 m.

At a distance of 15 cm from the floor and ceiling make holes with a drill, insert dowels with self-tapping screws into them and pull the rope. The same must be done from the other edge of the wall.

Treat the surface with 1–2 primer layers to improve adhesion. After the primer has dried, you can continue marking. Using self-tapping screws, secure several vertically stretched ropes as in the photo above, which will serve as guides when leveling the wall.
Installation of beacons
The approximate length of the beacons is 2.4 m. Prepare gypsum mortar for fixing beacons, which should be similar in consistency to cottage cheese. This will allow it not to fall off the spatula.. The mixture is applied along the drawn line, after which the beacon is pressed into it so that it does not reach the screw heads.

Using a level check the correct installation of the beacon. If necessary, adjust its position, then unscrew the screws from the wall.
Applying mortar and grouting
When applying the solution to a surface that absorbs moisture well, you need to wet it. Pre-cooked mortar is thrown onto the wall and aligned using the rule. You need to start plastering from the bottom.

The rule should be kept perpendicular to the wall. The remaining solution is collected with a spatula and throw it up.
After the applied mixture has dried, start leveling the surface using a trowel. Do this until no dry solution remains on the instrument.
The procedure is performed in stages- by moving from one area to another. This is the final stage of plastering, after which you can proceed to finishing.
Rough (rough) plastering indoors is a labor-intensive process, but Application technology is relatively uncomplicated. But working with decorative plasters, especially with some of its types, requires a higher level of skill and professionalism.
Watch the following video on how to plaster indoor walls:
Decorative plaster has been one of the popular materials for DIY wall decoration for many years. The style, method of application, materials have changed, but the technology has remained the same. The surface is treated with plaster, which not only protects the walls, but also serves as a decorative layer. Thanks to various methods of applying decorative plaster, a room can be treated beyond recognition. The interior of the house can be kept in one style, or you can make it varied. The peculiarity of plaster is that it will not be possible to make two identical designs, so each room will be original and unique. Among other things, the material can be painted in any color you like, there are no restrictions for you. And when you get tired of the base color, you can easily change it. One of the advantages of finishing walls with plaster is the ease of work. Even if you are not a professional, our tips will help you do everything yourself.
So, this article is devoted to decorating walls with decorative plaster with your own hands. Detailed step-by-step instructions will be provided for you, additional videos and photo.
A little about decorative plaster
If this is your first time encountering this material, then I would immediately like to reassure you - there is nothing complicated or supernatural in it. Usually it is sold in the form of a dry mixture, which needs to be prepared during the process, and there is ready-made plaster. The composition of the material is quite simple: binder material, additives and filler. Depending on the type of plaster, the components may be different. The binder can be gypsum, lime, polyurethane, acrylic and epoxy resins. They provide the plasticity of the plaster, which is very important. If we talk about the filler, it can be colored clinker or white Portland cement, and various colored or pigment fillers. Additives are plasticizers and other materials that increase the properties of plaster to repel moisture. Special solid elements are added to structural mixtures to form furrows (bark beetles). These are wood fibers quartz sand, synthetic granules or marble chips. They can be either large or small fractions.
Please note! Plaster happens different types. It is used for decoration interior walls, and external. It can be structural, textured, mineral, Venetian and stone.
Material advantages
Before plastering the surface, you need to understand why plaster is better than other materials. Here are the main advantages:
- No professional skills are required for the job. To do everything yourself, just read the instructions from the manufacturer, take our advice into account, stock up on tools and materials (there are not many of them) and start completing the task.
- The ability to hide any surface irregularities and imperfections. Due to its texture and variety of ornaments, designs and patterns, even the most curved surfaces will look beautiful, as if it was originally intended. For example, when working with wallpaper, the prepared wall must be perfectly flat. But for plaster, small unevenness, cracks and defects are not a problem. The material will fill all cavities.
- When the wall is pre-treated with a primer, the plaster plays the role of a heat-insulating layer (if it is of the required class).
- Appearance and variety of techniques. The processed surface looks rich, beautiful, original, skillful and attractive. The wall can be made to suit any taste, according to your desire.
- Ecological cleanliness. These days it's very important factor. Using decorative plaster, you don’t have to worry about the health of those living in the house. The material does not emit harmful substances and has no smell.
- Durability. Good plaster will serve you for many years. It is resistant to minor mechanical damage, temperature changes and aggressive substances.
- Easy to care for. Some types can be washed.

As you can see, decorating walls with decorative plaster is a profitable business. All the advantages speak in favor of this material. Now we will look at what is needed to do the job yourself. But first, look at the photo. Here you can see different types of decorative plaster.**
Tools required for work
We have already mentioned that expensive and specialized tools are not needed here. They are quite simple, affordable and easy to use. What should you have in your arsenal? It all depends on the material being applied and the desired texture. But the standard set is as follows:
- container for the finished mixture (bucket, basin);
- drill with mixer attachment;
- a set of spatulas of different sizes;
- trowel, grater, grater;
- falcon;
- roller with bath;
- soft and hard brushes for painting works or pattern formation;
- metal brush for cleaning walls.
The photo shows what each of them looks like.

As materials for forming a pattern, you can use a sponge, cellophane, various structural rollers, stencils, even a rubber glove. In this matter, you can use your imagination to the fullest, because you can create any patterns with anything. When the arsenal is complete, you can begin decorating the walls with decorative plaster with your own hands.
Step 1 - surface preparation
There is no point in achieving a perfectly flat area. It is important to complete the basic steps so that the surface is ready for processing. The procedure is as follows:

Step 2 - preparing the composition
Once the primer is dry, everything is ready to go. The next step is to prepare the plaster mixture. Usually the packaging contains instructions from the manufacturer, which indicate the method of preparation and proportions. It is as follows:

This way you can quickly and easily prepare the solution with your own hands in a few minutes.
Advice ! Do not knead too much material. Over time, it will dry out, losing its plasticity. If you are a beginner, then 1 portion should not be large so that you can apply the solution before it dries.
Step 3 – applying decorative plaster
Now everything is ready for surface treatment. Your task is to apply the solution to the wall and form one or another pattern. The technology is as follows:

Since the techniques and subtleties of the work differ depending on the material and method of application, we invite you to familiarize yourself with a series of videos that will describe in detail how you can make various types of decorative plaster with your own hands.
Application of bark beetle:
Application of Venetian plaster:
Application of Desan Versagel plaster:
Application with a textured roller:
Possible difficulties
If you work with mineral plaster, you should know that it tends to fade under ultraviolet rays or exposure to precipitation. To avoid this, the finished surface must be covered with several layers of high-quality paint, for example, silicate paint.
When you have applied a thin layer of material, be prepared for the base to show through. It will be difficult to fix everything with coarse-grained plasters. The wall is simply covered with a colored primer, matching the plaster.
The wall will not always turn out the way you wanted. The reason may be incorrect application of the composition, choice of tool, or consistency of the solution. To prevent this from happening, study everything down to the smallest detail: the product, the method of applying it and the tools for this.
At the end, we invite you to look at photos of different wall finishes with decorative plaster.
It is quite understandable that many owners of private houses want to give their home a completely unique look. They come to the aid of relief plasters, which are made from mortars on various bases and are applied to the surface of the walls either with special tools, or with improvised, sometimes completely unexpected objects, depending on what effect is planned to be obtained.
Do-it-yourself decorative plaster of walls is a great way to stand out from the crowd. Before deciding on the choice of the desired pattern and the technique for its reproduction, it is necessary to consider various finishing options. After the desired relief has been determined, it is advisable to conduct a practical lesson and plaster it in accordance with the plan.
Some techniques for working with decorative plaster can be called art, since they are molded from it three-dimensional paintings with various scenes that can become an exclusive decoration for the wall of an apartment or a country mansion. Experienced craftsmen, using them, create real works from ordinary plaster mass, which set the style for the entire design of the room or facade.
Decorative plaster - what is it?
For a long time, decorative plaster has been used to decorate walls, and with changes in interior styles, its plot patterns and relief changed, becoming more complex or, conversely, simplifying for the sake of fashion. It has not lost its popularity to this day - in our time, with the help of a similar technology, finishing of both the facade parts of buildings and the interior walls of the room is carried out.

Most often, a plaster coating is used, which, in addition to being decorative, also performs a protective function, preventing moisture and dust from penetrating the main wall.

For interior walls, finishing with a uniform pattern or a relief plot panel can be used. By choosing a relief in the form of a painting to decorate your home, you can be sure that it will be guaranteed to be original, since it is almost impossible to depict the same pattern twice in exactly the same way using this technique.
Reliefs applied to the wall are usually covered with one or more shades of color, which give them a deeper dimension. If desired, when you get tired of the original color of the decorative plaster, you can easily change it to another. Moreover, this process can be carried out both on a uniform coating and on a panel. Paint is applied to relief panels with a brush and sponge, and on a uniform surface using a spray gun or roller.
Decorative plaster can have a deep relief, which is called bas-relief - it protrudes above the wall surface by 8÷15 mm, or it can be almost smooth and stand out only in color. Today in construction stores you can find compositions that can form a relief surface even when applied with a regular spatula, and for some of them special attachments are used that are installed on rollers. They are able to imitate tree bark, tall grass, layered rocks and many other three-dimensional patterns.
The plaster mixtures used to create the relief are quite plastic. They are easy to apply to a previously prepared wall surface and transform into various designs.
Basics of technology for applying textured plaster

Work on finishing walls with decorative plaster is carried out in stages, in accordance with the requirements of the developed technology. It includes several stages.
- The first step is to determine the design that will decorate the walls, as well as the tools necessary to reproduce it. The relief sample should be in front of your eyes while working so that you can follow its contours. This is especially important if the plot option of the panel is chosen.
- Next, you need to prepare the tools that will be used to knead plaster composition, applying it to the wall and creating a relief pattern.
- When everything is ready, you can move on to preparing the walls. This process is carried out almost identically for both facade and interior walls - it includes cleaning the surfaces of old coatings, rough leveling, and then priming them. It is better to choose a primer composition with antiseptic additives, then the walls will be protected from damage by mold, mildew, moss, etc., as well as from the creation of nests by insects.
- Then a starting leveling layer of plaster is applied to the prepared, well-dried surface - it will become the basis for the textured finishing layer.
- After the starting layer has dried well, the wall surface is recommended, once again, to create higher adhesion between the layers of the plaster composition.

- The next step, again, after the soil has completely dried, is to apply the finishing coat. textured plaster, from which the relief is formed. In some of the techniques used, the upper part of the applied plaster is leveled into one plane, and textured depressions remain inside, creating a uniform but chaotic relief.

- When reproducing some designs, it is necessary to apply several layers of decorative plaster, and in this case, each of them requires good drying.
- Next, if the color was not added to the plaster mixture, the paint is applied on top of the textured layer. If the surface is given a uniform pattern with indentations, then this process is best carried out using a spray gun. If you plan to paint unevenly, you can use a sponge or brush for tinting. The paint should be applied so that it emphasizes the beauty of the relief of the decorative coating. When tinting a panel, the paint is applied in several stages to create a visual perception of its depth.
When performing work, you must strictly adhere to step by step instructions. Making any changes to the relief manufacturing technology can have a negative impact on the design result. Therefore, there is no need to rush - you need to thoroughly dry each of the layers, observing their order. It is better to immediately prepare for the fact that it will take more than one day to create a high-quality relief wall covering.
Now that we know the general principles of decorating a wall by applying decorative relief plaster to it, it makes sense to consider the tools that can be used for these technological operations.
decorative plaster
Tools for working with relief plaster

When decorating a wall with decorative plaster and using it to form a relief pattern, use the following tools:
- To mix the plaster mortar, you will need a drill and a mixer attachment. With their help, you can easily and quickly enough, without much effort, make the mixture plastic and homogeneous.

- Spatulas of various sizes - these tools can be called the main ones when working with any plaster, since you cannot do without them when applying any of the finishing layers.
- or a trowel are also quite often used to cover surfaces with plaster solutions.
- A special glove that is used both for creating relief and for coloring it.

- A brush with hard or soft bristles, plastic film, rubber gloves, a sponge or a plastic mesh for washing dishes.
- Using a roller and rubber attachments can be called the most popular way to make a wall in relief. The variety of these devices allows you to choose one of the many textured patterns offered by the manufacturer.
In addition, using this technique, the work goes faster, and the print on the wall turns out neat and aesthetic, however, such reliefs cannot be called exclusive. The attachments on the rollers can have patterns of plant patterns, waves, various curls, geometric shapes and others.

Reliefs that imitate the texture of leather or tree bark, as well as other natural materials, look especially impressive.

Nozzles can create a textured pattern located vertically or horizontally, chaotically or perfectly correctly - this factor will depend on the preference of the owner of the home being finished.

Textured plaster expands the possibilities of transforming walls, and the presence of a variety of tools opens up scope for creating numerous designs. It should be noted that craftsmen who professionally engage in this art, when making reliefs, often use completely unexpected tools and household items, for example, wood chisels, manicure spatulas, or even ordinary teaspoons.
Materials for decorative plaster
In addition to properly selected tools, it is necessary to choose the optimal plaster composition. The assortment is quite wide, since many well-known manufacturing companies offer special ones that allow you to easily transform the facades and premises of houses.
Starting plaster
In addition to the decorative mixture, you need to purchase starting plaster, with which you can level the surface of the wall, preparing it for relief decoration. For this purpose, it is better to purchase formulations made on the same basis as finishing, then we can say with confidence that good adhesion will be created between the base and the outer plaster layer. So, for the starting, leveling layer, the following are suitable:

- Starting plaster on a gypsum basis. Distinctive feature This mixture has a short time before setting, so you need to work with it very quickly. If you have no experience in leveling walls, then it is better to choose a mixture that will provide the opportunity for longer work.

- For example, a cement-based mortar is perfect for both experienced craftsmen and beginners. It can be purchased at finished form, or make it yourself from cement and well-sifted sand, taken in a ratio of 1:3. For the plasticity of a homemade mixture, PVA glue is often added to it or liquid soap. Thanks to these components, the solution will become softer and at the same time “sticky” to the walls, and will be easy to work with.
- Sometimes clay is used for the starting layer, which can also be purchased at a hardware store in already prepared form. Most often, clay mortar is used for plastering. wooden surface, but lately craftsmen still prefer to work more modern materials. Although clay has numerous positive qualities, such as elasticity, good adhesion to the surface, environmental friendliness, and in addition, it is a “breathable” material.
Decorative plaster compositions
For decorative finishing, special plaster compositions are used, which are also made on different bases. They are intended for a variety of relief patterns, so some of them are equipped with various additives. On the packaging, the manufacturer indicates the name of the relief for which this mixture is intended, since solid crumbs from different materials can be used as additives, having large and fine fractions and giving different finishing effects.
The table below shows some types of decorative plaster, which are most often used to decorate the façade of a house and interior walls.
| Appearance of packaging | A relief pattern created on the wall | The basis of decorative plaster | Additive fraction size, mm |
|---|---|---|---|
| Mineral "Ceresit CT 35" | "Bark beetle" 2.5÷3.5 |
||
| Mineral "Ceresit CT 137" | "Pebble" 1.0÷2.5 |
||
| Polymer "Ceresit CT 77" | Mosaic 0.8÷2.0 |
||
| Acrylic "Ceresit CT 60, ST 63, ST 64" | "Pebble" 1.5÷2.5; "bark beetle" 2.0÷3.0 |
||
| Silicate-silicone "Ceresit CT 175" | "Pebble" 1.5÷2.0; "bark beetle" 2,0 |
||
| Silicate "Ceresit CT 73" | "Pebble" 1.5÷2.5; "bark beetle" 2,0 |
||
| Textured acrylic "Capital" | "Quartz coat" | ||
| White cement based "Master" | "Lamb" 2,0 |
||
| Acrylic "Optimist-Elite" | "Venetian plaster" white thick homogeneous paste |
As you can see from the table presented, plaster mixtures are produced in a dry and pasty state. Ready-made pastes, diluted to the desired consistency, will usually cost slightly more than dry mixtures, but they are much easier to use, since you do not have to calculate the proportions when mixing.
Ready-to-use plasters can be used immediately after the primer has dried on the prepared wall. Upon completion of the work, the remainder of the mixture is closed in a packaging bucket, and during the next stage, the paste can be reused, since it can be stored for quite a long time in a closed state.
If desired, create plaster self-made, you can take as a basis the recipes given in the table below:
| Components of the solution | Appearance and color of plaster | |||
|---|---|---|---|---|
| White marble effect | Yellow marble | Under red granite | Under gray granite | |
| Quantity in parts by volume | ||||
| Portland cement M400 | 1 | 1 | 1 | 1 |
| Lime dough | 0.5 | 0.25 | 0.1 | 0.1 |
| Marble flour | 0.5 | 0.25 | - | - |
| Marble chips | 3 | 3 | 3 | 3 |
| Mica (based on cement volume) | 0.5 | 0.5 | 0.5 | 0.5 |
| Pigment in % by weight of cement | - | Ocher 3÷5 | Iron minium 5÷10 | Manganese peroxide 1÷5 |
Primers
Wall priming products used on preparatory stage, are sold in paste and liquid consistency.
plaster
- To treat the wall before applying the starting layer, it is recommended to use liquid compounds deep penetration, including antiseptic additives.

- After the starting plaster has dried, it should also be primed, thereby creating good foundation for the finishing decorative layer. For this process, it is best to use a primer that has a thicker, closer to paste-like consistency.

Each layer applied to the wall must be completely dried, and only after that the next one can be applied. Otherwise, the plaster may begin to crack or peel off the surface.
Coloring compositions for decorative plaster
They can be tinted, or they can be painted before starting work. Sometimes the color is added to the plaster by the manufacturer; in other cases, color additives are purchased separately and are also added to the paste or dry mixture before mixing or applying it.
Another option for giving finished decorative plaster the desired color is to paint it using a spray gun, roller or brush. In this case, a white or gray composition is applied to the wall, and then, after it dries, it is given a uniform or voluminous coloring.

To paint textured plaster applied to the wall, paints made at water based– these are emulsion and water-dispersion. Such paints are produced in various colors, but if you wish, you can give them a shade yourself by purchasing separately a white “base” and the color you like. They are mixed immediately before being applied to the wall, and in this case you can achieve a darker or, conversely, lighter shade, which will help give volume and depth to the pattern on the wall.
Varnish for decorative plaster
For textured plasters that have shallow relief or a relatively smooth surface structure, a varnish or wax protective decorative coating is usually used.

Varnishes can be matte or glossy, and can significantly enrich the color of the wall decoration. Thanks to even one layer of varnish, the plaster will retain its original appearance much longer.
In some cases, to achieve the desired effect, it is better to apply the varnish to the wall surface in several layers. For example, if an imitation of polished stone or crocodile skin is reproduced on the wall.

Wax is most often used as a protective agent for Venetian plaster, which can acquire a matte or even mirror-like shine after application. The wax is odorless and environmentally friendly pure material. It is able to protect the wall covering from dust and yellowing, and in addition, it creates a water-repellent layer, and at the same time has good vapor permeability, that is, the walls do not lose the ability to “breathe”. Due to similar qualities, wax coating can be used in living rooms and in rooms with high humidity.
The wax is produced in a colorless version and preserves the color of decorative plaster in its original state. In addition, it can be tinted with metal pigments or pearlescent additives. For example, CERA wax, shown in the illustration, is produced in three color options - colorless, silver and gold, which allows you to enrich the decorative finish with a pleasant soft sheen.
Masking tape

In some finishing works it is impossible to do without the use of masking tape. It is used to protect adjacent surfaces when working on one of them, as well as in cases where it is necessary to separate different textured or color patterns from each other. The tape easily sticks to any surface and is removed without leaving marks. It has a low price, so in any case, stocking up on all the materials necessary for finishing, it is worth purchasing as an auxiliary tool.
When purchasing any finishing materials, it is very important to pay attention to the manufacturer’s specifications, which are located on the packaging, about what kind of work they are intended for, internal or external. Many compositions for external use are well suited for finishing the walls of premises, but materials for internal use, when applied to the facade, unfortunately, will not last long.
Versailles plaster
Preparing wall surfaces
Now, having figured out how to choose a material and what tools you will need for the job, you can move on to considering the process of preparing walls for applying plaster solutions.
Preliminary preparation of wall surfaces
To get a high-quality result, it is very important to thoroughly clean the wall of old coatings, and similar actions are performed as if external walls, and on internal ones. It is necessary to remove old wallpaper, paint or whitewash from them, otherwise the starting layer of plaster will have insufficient adhesion to the surface.
The main activities for preparing wall surfaces are shown in the table below:
| Illustration | |
|---|---|
 | Removing the old layer of plaster from the walls. This process is especially important to carry out very carefully if the old decorative coating begins to peel off from the main surface. If you need to remove a thin layer of plaster, then for this purpose you can use a grinding machine or a construction float with coarse sandpaper installed on it. |
 | If the walls are covered with wallpaper, the old wallpaper must also be removed. Usually pasted old wallpaper is moistened with a spray bottle, and this process is carried out several times, since the canvases should get wet all the way to the wall. After that finishing material removed with a spatula. |
 | Another option for cleaning walls from wallpaper is steaming. For this purpose, a special tool is used or steam iron, and in addition, an air humidifier can be used, which is directed towards the wall that needs to be cleared of wallpaper. |
 | If the wall is painted, then the paint layer must also be cleaned off, otherwise the plaster layer simply will not lie on the wall. Paint is removed using a scraper, softening old paint with a hot stream from a hair dryer. You can also use the abrasive method using a grinding machine with iron brush or an electric drill with an abrasive attachment. |
 | After the old decorative coating is removed from the wall surfaces, a leveling plaster layer or simply the solid concrete base itself will be exposed. Quite often there are depressions and irregularities in concrete that will have to be leveled by applying a putty layer. |
 | If plaster is found good quality, not separating from the main wall, then it does not need to be cleaned. In this case, notches with a depth of 5–7 mm are made on the surface of the wall using an ax or chisel. They will be necessary to ensure better adhesion of the leveling starting layer to the wall. However, they often do without them, using modern “concrete contact” type primers, which provide excellent adhesion of the applied plaster compositions. |
 | However, quite often the situation is such that the old plaster has to be removed completely, since it crumbles and does not adhere securely to the surface. This flaw can be revealed when applying notches, since when tapping in some areas of the wall, the plaster layer can “bounce” or even simply fall off. If a layer separates over a large section of the wall, then it is best to remove the old coating completely - the process, as they say, has already begun, and no one can guarantee that the remaining areas will remain stable. |
 | Once the old plaster layer is removed, serious damage in the form of deep cracks may be found on the wall. They must be sealed, otherwise they will eventually appear on new plaster layers and the work will be ruined. |
 | Detected cracks are expanded, that is, they are made wider and deeper. They are then cleaned and treated with a deep penetration primer. They are filled with plastic repair crew. Special repair solutions are available for sale, but for interior work you can also use regular starting putty. The repair solution must fill the entire volume of the cut crack, to the full depth or width. If a wide crack is found, it can be filled polyurethane foam with a slight expansion. Its excess, which protrudes outward after the material hardens, is trimmed flush with the wall. In some cases, to strengthen the crack and to avoid its manifestation through new finishing layers, a reinforcing sickle mesh is glued on top of it onto the putty solution. |
 | After the repair “patches” on the cracks have dried, they must be cleaned with a construction float with an abrasive mesh installed on it first, and then with sandpaper. |
 | The next step is to coat the wall with a deep penetration antiseptic primer. If the first layer of primer is absorbed into the wall surface without a trace, then one or even two more layers of primer are applied. The primer composition will penetrate the pores of the plaster or wall material, strengthen its surface and create good conditions for adhesion of materials. The solution can be applied with a roller or a wide brush. Each subsequent layer is applied only after the previous one has completely dried. |
Plaster work can be done on a primed and dried wall.
Applying a base leveling layer of plaster
The next important stage is plastering work, which finally prepares the surface for further application of decorative plaster. Alignment is carried out on a primed and well-dried wall.
Methods for plastering surfaces may vary slightly, depending on the wall material and surface quality. But the general technology is still general, and more details about it are in the table below:
| illustration | Brief description of the operation performed |
|---|---|
 | If, when checking a wall using a building level, it is discovered that it requires major leveling, then the first step is to place beacons made of special metal profiles on the surface. They are fixed on the wall in increments of 1000÷1200 mm, controlled vertically and horizontally using a building level and a long rule. These profiles are fixed using cement mortar with the addition of gypsum or just a gypsum mixture, since this material sets quickly and will not delay subsequent work. Between the slides of the solution on which the beacon profiles are attached, a distance of about 400÷500 mm is maintained. |
 | Having set the beacons, you can proceed to mixing the plaster solution. It must be homogeneous, without hard inclusions, otherwise it will be problematic to level it to perfection, since voids may form near large hard fractions, which will weaken the coating. Before applying the solution, the wall can be slightly moistened by spraying it with a spray bottle or brush. The next step is to throw a thick layer of plastic mortar onto the surface, which should be 30–50 mm higher than the beacons. Excess mortar will be removed as a rule when leveling the plaster. |
 | Next, the wet solution applied to the wall is leveled by a rule moved along the beacon guides. Work begins from the bottom of the wall - usually, slowly, it rises, while it is slightly moved from side to side for better distribution of the solution in the space between the beacons. At the same time, the rule collects excess plaster mixture, which can later be used for application to adjacent sections of the wall. |
 | After plastering the surface, it should be left for 2-3 days to set. In this case, it is recommended to periodically spray the wall with water to obtain greater strength of the applied layer. Next, the still wet plaster is rubbed down, pouring cement laitance onto it. This work is carried out using a plaster trowel or grout, which is lightly pressed against the wall and the surface is rubbed in a counterclockwise circular motion, making it even. The rubbed surface is left until completely dry, which depends on the thickness of the layer and can take from 5 to 15 days. |
 | The dried plastered wall should be well primed using a paste-like thick primer, which is applied with a roller. Hard-to-reach areas of the wall are treated with a narrow brush. A water-based primer dries quite quickly, so very often after 2-3 hours it becomes possible to move on to the next stage of work. |
 | If we are talking about internal works, then in order for the result of finishing the wall to be of high quality, it is recommended to apply a thin, 1.5÷2.0 mm, layer of gypsum-based plaster onto the leveling plaster layer. It will make the surface smooth, correcting all the shortcomings of the base layer. The plaster is applied with a metal trowel or a wide spatula, making semicircular movements. At the same time, it must be remembered that gypsum mixture It sets and hardens quickly, so you cannot mix a large amount of solution, since it will no longer be possible to “revive” it by adding water. It should be noted that as this starting layer for decorative plaster you can also use ready mixture cement-based, or one of the common putty compounds. After this layer has dried, it must be primed. |
Decorative plaster - application and coloring
When all the leveling layers have dried and the wall is completely prepared, you can proceed to final stage works - applying a decorative plaster layer.
Several popular methods of applying relief
This is perhaps the most interesting creative process, upon completion of which the wall will take on a completely new look. For this stage, a decorative paste-like plaster mass or a dry mixture is used, which is mixed independently, in the same way as the base solution, that is, using a mixer mounted on an electric drill.
In any case, the mass must be plastic and homogeneous, unless, of course, a coating such as “bark beetle” or “lamb” is chosen, which contains additives from stone chips. But even with such a solution, the solid fractions should be distributed completely evenly in the plastic mass.
| Illustration | Brief description of the operation performed |
|---|---|
 | Venetian plaster can have a different relief pattern, but it is always shallow and chaotic. However, sometimes it is the background for clear geometric or floral designs. Decorative plaster is applied using a metal or rubber spatula in thin layers, the number of which can be from 5 to 8. Despite such a considerable number of layers, the total thickness of the plaster made using this technique is only 3÷4 mm. |
 | To reproduce Venetian plaster, an already tinted composition is most often used, otherwise it will be necessary to paint it after its application and drying is complete, and in this case part of the intended effect will be lost. The desired effect of a “silk” surface is achieved by the presence of several layers of the same color, and each of them is applied and rubbed in different directions. Thanks to this technique, strokes that differ in direction give different reflections of the light falling on the wall. Thus, the surface has a silky sheen. In some cases, in order to create the effect of a deeper spatial volume, translucent from the inside, several color shades close to each other are taken. |
 | Each of the layers of plaster composition applied with strokes is smoothed, but this process is carried out by tangential movements with the application of certain forces. For each layer, professional craftsmen use spatulas and trowels of varying thickness and width, creating a multi-layered chaotic relief pattern from the solution. Using this plastering technique, you can imitate the pattern structure of various finishing stones on the wall. To enhance the imitation effect, after completing the plaster application, after waiting for it to dry, the surface is polished with wax or coated with matte varnish. |
 | A more accessible option for non-professionals is relief plaster. The composition is applied using a regular spatula in one or several layers, each of which must be dried. The relief of each layer can be smoothed, or its protruding fragments can be left in their original form. Smoothing of the solution is carried out using a metal trowel, with gentle touches. Using this technique, you can create various reliefs, and their shape and direction will depend on the creative mood of the master. |
 | If you intend to create a relief that has regular smooth shapes and lines, you can use a notched trowel (trowel), usually used for applying glue when finishing surfaces, to reproduce it ceramic tiles, or a special comb. |
 | This type of relief pattern will not be difficult to reproduce for a craftsman who has picked up a plastering tool for the first time. The first step is to apply a layer of plaster mortar to the wall using a regular wide spatula, and it is not necessary that it be perfectly even. Then a relief is displayed on it in the form of semicircles, checkerboard lines or other patterns that you can come up with yourself. |
 | Another relief option that can be reproduced by anyone creative person- This is a print from an ordinary polyethylene film on wet plaster applied to the wall. In this case, your imagination also doesn’t have to be limited, since the film can be used unfolded or rolled into a roller, or simply crumpled up randomly. In addition, you can come up with own version use of this material, since, achieving the desired pattern, you can safely experiment with the solution and film. |
 | When removing the film after it has been pressed against the wet plaster, it will inevitably pull the solution along with it, and as a result, peculiar relief protrusions are formed, which can be smoothed out with a spatula or trowel. Using this method of creating decorative plaster, you can use a tinted solution, or paint it after the wall has dried after applying the relief. |
 | Quite popular for decorating both internal and external surfaces of walls is such a textured pattern as “bark beetle”. For this purpose it is used special composition plaster, which includes hard stone fractions measuring 1.5÷3 mm. This solution is applied using a metal trowel, and it can be distributed on the surface in different directions, depending on what kind of relief is intended to be obtained. When applying plaster, hard fractions leave behind furrows that imitate damage to the surface by insects. These recessed stripes can be located vertically, horizontally, diagonally, in the form of a semicircle or entire circles - the direction of the relief pattern will depend on the preference of the master and the intended design. |
 | A frequently used tool for applying relief is a roller, which leaves a textured pattern on the surface of the wall. This method of recreating the volume can be used by any homeowner, even those who have never before plastering works. It is enough to purchase a roller with the relief you like on its rubber nozzle and leave an imprint on the fresh solution applied to the wall. The choice of attachments is so large that they can be selected to suit any, even the most sophisticated taste. If desired, you can make a roller attachment yourself, using pieces of foam rubber, twisted coarse rope, plastic film, fur, fabric with deep relief or other materials that can leave the necessary impression on wet plaster. |
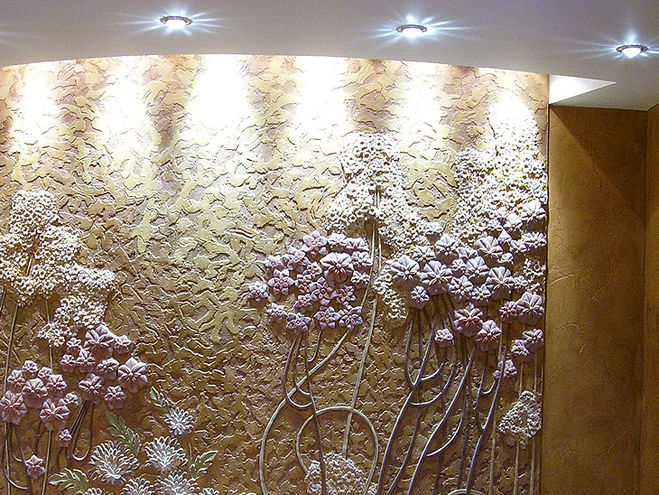
 | If you plan to create the correct floral pattern on the walls, in the form of grass and leaves of different shapes and sizes, then a roller with such a pattern will have to be purchased ready-made. Work on decorating walls using this technique goes quite quickly, since there will be no failures in the process - the plaster mixture is applied and distributed to the surface with a spatula, and while it remains wet, a roller is passed over it, which will leave the selected pattern on the surface. |
 | And this is a completely simple method that does not require special expenses for purchasing a tool for reproducing the relief. For the finishing process, a regular flat brush with soft or hard bristles is used, depending on how clear the pattern is planned to be obtained. The relief is recreated using the same principle as when using a spatula with a notched comb - using fresh plaster applied to the wall. |
 | Another technique of decorative plaster, not performed over the entire surface of the wall, but only in certain areas. The background for it can be one of the above-described types of shallow relief. The panels are usually made from gypsum plaster mortar. The composition is applied in slides to the marked area of the wall according to the pattern and left to dry. After drying, cutting tools are used - this can be a knife, cutters of various shapes and a spatula - with their help, the desired shapes are created. In addition to the cutters, you will need sandpaper with fine and medium grains, which will be used to smooth out the cut out elements of the three-dimensional pattern. In order not to spoil the wall, it is recommended to experiment by creating a small panel or its individual parts on a plywood sheet. Only after making sure that everything works out can you proceed to reproducing the intended relief design on the wall. |
In addition to those listed above, there are other objects that can be used to create relief designs on the surface of the wall. For this purpose, not only professional tools are widely used, but also improvised devices or even fragments of plants, for example, tree leaves or branches of various thicknesses.
Painting decorative plaster
As mentioned above, you can buy colored decorative plaster in construction stores, but working with it is much more difficult, since it is necessary to reproduce all the complex ones with one color. Therefore, most often a white plaster mixture is chosen, which, after final drying, is covered with selected shades, which significantly expands the creative possibilities of the home craftsman.
In addition to applying color to the finished relief wall, there is another technique for creating a colored surface. In this option, before applying it, a certain color is added to the white plaster, and then a relief on the wall is made from material of different shades. This is a rather complex technique, and a professional artist or a person with the appropriate talent can handle it. Therefore, the most the best option All that remains is to paint the finished relief.
Usually, for painting decorative plaster, water-based paints are used, to which the desired color is added. When choosing a color, it is recommended to make it one or two shades darker, since when the paint dries, it will lighten.
| Illustration | Brief description of the operation performed |
|---|---|
 | The most used technique when giving relief plaster a color is to cover it with a light tone of the selected shade. This coloring will become unifying for the entire composition. The paint is applied to the entire surface using a roller, after squeezing it on the ribbed surface of the paint tray. If the relief has a depth of more than 5 mm, then a long-haired roller is used to tint it, or especially deep fragments are tinted with a soft brush. |
 | The first paint layer is applied in one go, otherwise the coloring will turn out uneven. Therefore, if the paint is tinted yourself, you need to mix it enough so that it is enough for the first layer for all the walls in the room, or at least for one wall, but always for its entire area. This is especially important if the surfaces will be painted with one color without additional shades or stains. Coloring is carried out in different ways, depending on the depth of the relief and the desired end result. |
 | One of the options for uneven coloring is done using a sponge. Then they walk over the still damp painted surface with a soft cloth or a dry sponge, barely touching the protruding elements of the relief. This execution technique is aimed at enhancing the “depth of space” of the relief not only with the help of volume, but also with the use of color play. |
 | This method of finishing decoration consists of two stages - painting and cleaning the protruding relief elements with sandpaper. The first step is to paint the entire wall area. general color– this process can be carried out using a roller or spray gun. The second stage is carried out after the paint has completely dried. Fine-grained sandpaper is installed on a construction float, after which the tool is used to go over the protruding parts of the relief. In this way, the paint is removed or lightened from the surface, thereby revealing a three-dimensional pattern. If desired, the cleaned surfaces can be coated with paint that is close in tone to the main color, darker or lighter, depending on the effect you want to achieve. Usually a light shade is chosen, as it visually increases the volume of the relief. |
 | Only an experienced craftsman can make a relief panel, but you can try painting it yourself. However, you need to take into account that this process is quite complicated and time-consuming, since it will have to be done with thin brushes, so the work will take quite a lot of time. It is recommended to cover the finished relief plaster panel with a primer, dry it, and only then begin painting. You should not take pure bright colors, as the relief behind them will not be visible. Therefore, they are diluted to shades of the chosen color or a certain amount is added to white paint. |
 | In this option for painting decorative plaster, two colors are used - one is the main one, and the second is an auxiliary one, which will highlight the relief pattern. The work is carried out in two stages. Firstly, the entire surface is covered with one, primary color. This process can be carried out with a roller, wide brush or spray. Then this layer should be well dried. The second stage consists of applying paint using tangential movements to the protruding parts of the relief using a soft brush, a foam sponge or a mitten worn on the hand. The applied paint should be thick enough and the brush or sponge should be dry. |
Video: an interesting example of painting a wall finished with relief plaster
The final stage of work on decorative plaster is coating the walls with varnish or wax. This process must be carried out carefully, since applying the final layer carelessly can ruin the entire job.
In conclusion, I would like to say that if you have little or no experience in performing decorative plastering, then it is not recommended to choose overly complex design techniques. In the same case, when a specific design is selected and the decision is made to reproduce it on the wall at all costs, you should carefully study the instructions and practice on a small section of the wall or a plywood panel.
Video: demonstration of various techniques for applying and decorating decorative plasters
“Versailles plaster”: a technology accessible to everyone - step by step
In the final section, the design of a wall with the so-called “Versailles plaster” will be considered as an example. In the proposed finishing technology, instead of plaster composition, two types of putty are used - starting and finishing, which allows you to save a decent amount on finishing. In addition, the advantage of this method of original decorative wall decoration is that even a novice master can do it. The main thing is to purchase quality material and use it correctly.

In addition to two types of putty, to obtain desired result, you will need “Quartz primer” for application to the wall under decorative cladding, which creates increased adhesion between materials and also prevents the putty from drying too quickly. The presence of this material is a prerequisite for decorating a wall using this technology.

In order for the plaster layer to turn out aesthetically pleasing, it is necessary to purchase two more components, without which the desired effect will not be achieved.

This is, firstly, decorative color coating type “Adagio Silver” - on an acrylic binder, containing small metal particles various forms. Gives a very interesting iridescent effect, giving the wall a silky look.

Secondly, so-called glitter is used, consisting of tiny particles of polyester film of various shapes. This component is also added to one of the layers of decorative wall trim.
| Illustration | Brief description of the operation performed |
|---|---|
 | The first step is to mix the model mass, consisting of starting and finishing putty in a 1:1 ratio. Mixing proceeds as follows: Part of the starting putty and part of the finishing putty are poured into a container with water in turn, then the sequence is repeated, and so on until the required amount of dry mixture is poured. If necessary, add a little water to the bucket, and then mix the mass using a mixer attachment. Next, the finished solution is left for 10-12 minutes - this time is necessary for it to “ripen”. After this time, the mass is mixed again until smooth. It should be mixed very well and have a medium-thick consistency, that is, not particularly liquid and not thick. |
 | The finished putty composition is applied to the prepared, leveled, treated with “Quartz-soil” and dried wall surface. If the mass will be applied not from the ceiling, but below, along a broken line on the wall, then it is recommended to stick it along it first masking tape, which will help keep the top of the wall clean and keep the top border of the decorative trim even. Work starts from the top line. First of all, the putty mixture is distributed along the masking tape. |
 | The applied layer should have a thickness of 2÷3 mm. Particular attention should be paid to filling the joints of the planes, for example, if the putty will be applied from the ceiling line. The mixture is applied to the wall with a trowel in a relatively even layer. This work can also be done with a spatula having a width of 300÷350 mm. It should be noted that in this finishing option you don’t have to try too hard, leveling the solution to perfect smoothness, the main thing is that the layer of material has the same thickness over the entire plane of the wall and is fairly even. The smoother the putty layer, the easier it will be to see flaws in the relief pattern. |
 | An even facing layer is applied to a height of 1000÷1500 mm from the top down the wall. Then a relief pattern is formed on the wet putty. For this, a plastic trowel with a pointed plate in front is used - it is shaped like an iron. Work starts from the corners or the top line of the wall. The master makes wave-like movements, stretching the mass, while simultaneously creating a chaotic pattern in the form of stripes running in different directions. With the help of a trowel, the mass is lifted above the surface, creating a larger volume of decorative coating and leaving behind grooves of different widths, most often located diagonally on the surface. The convenience of creating a relief in this way is that the design applied to the solution can always be corrected if the master does not like it in some way. |
 | Having worked out the first batch of putty, and having reached approximately the middle of the wall in height, the next portion of the solution is prepared. During this time, the mass applied to the wall will have time to set. Therefore, many craftsmen have the problem of combining the plastered area of the wall with the already set mortar and the fresh, just mixed mass, which will be applied below. The joint between the two areas of the wall should be completely invisible. |
 | In order for the combination to take place neatly and become completely unnoticeable, a fresh solution is applied overlapping the already applied layer by 150÷200 mm, and then the overall layer is smoothed out. This process must be carried out along the entire line of combining two zones - upper and lower. |
 | The overlap line needs to be smoothed out well, and then a general relief pattern must be applied to it. |
 | Applying the relief begins from the area where the design has already been applied. It turns out that it is, as it were, “picked up” with a trowel and extended onto an evenly applied unifying putty layer along its entire length. |
 | When combining two zones of the wall, it is important to ensure that there are no deep dents or clearly even stripes from the trowel left on it. Such defects must be smoothed out and these areas given a general relief, since they will be especially noticeable in these areas. When working on a connecting line, it is recommended to step aside and inspect the work area from a distance. This way you can more clearly identify shortcomings and correct them immediately. |
 | Then, the model mass is applied to the entire lower part of the wall in an even layer, and a relief is formed on it in exactly the same way. When the wall is completely covered with this primary layer of putty with the applied relief, it is left to dry completely for two days. |
 | When the wall dries, they go over its surface with a spatula, with which it is necessary to clean the protruding sharp edges of the relief strips, since they should be rounded. |
 | Then, the entire surface is treated with a construction trowel, with sandpaper No. 60 installed on it. Grouting is carried out with slight pressure, in a counterclockwise circular motion. |
 | After processing, you should get a relief surface with smoothed protruding edges of the pattern. An additional check of the surface, that is, its smoothness, can be done by running your palm over it. If untreated areas are found that scratch the palm, then this flaw must be corrected immediately. The treated surface must be thoroughly cleaned of putty dust - this process is carried out using a soft, wide brush or broom. |
 | The next step is to treat the surface with a deep penetration primer. The primer is applied with a roller with a nap attachment. The composition must be well distributed over the wall, collecting all the formed smudges. This layer dries in 1.5÷2 hours. |
 | Next, take a white water-based paint, add a color of the selected shade (in this case, the master used a beige dye), and the mixture is well mixed until smooth. The paint should be applied easily and not be too thick, therefore, if necessary, the solution should be diluted to the desired consistency with water. The relatively liquid composition of the paint, when applied to the wall, will become translucent, which, in combination with other layers of different shades, will create the illusion of space. |
 | The paint is first applied to the edge of the wall using a brush, and then the main part of the surface is tinted using a nap roller. It distributes the mass well over the relief surface, filling all the recesses of the design with paint, and when rolling out the composition, it collects its excess. As a result, the surface should be neat and evenly painted, free of smudges. After the entire surface is covered with the tinting composition, it is left until completely dry. Water-based paint applied in a thin layer will take about two hours to dry. |
 | Next, a composition made from a regular primer and “silver” - the “Adagio Silver” dye – is applied to the surface using a foam roller. The mixture is prepared in a 1:1 ratio, that is, in this case the master took 250 × 250 grams of these materials. The resulting mixture should have a fairly thick consistency and should not leak at all. The mass is applied to the wall without pressure, so that only the upper protruding elements of the relief are covered. The recesses should not be painted with this composition. |
 | The mixture is carefully rolled out over the entire surface of the wall, highlighting the relief with color. |
 | Next, you will need to prepare a finishing composition that will transform the wall surface beyond recognition. It consists of a water-based varnish and a small amount of glitter. The varnish is diluted with water, in proportions of approximately 1:3, and mixed well. The addition of water is necessary to ensure that a hard, uneven, glossy crust does not form on the surface of the wall after coating it. |
 | A small amount of glitter is added to the varnish, about a tablespoon per 0.5 liter of composition. Then the solution is thoroughly mixed by vigorous shaking. Before you start shaking, the lid of the container with the composition must be tightly closed. |
 | Next, the finished varnish composition is applied to the relief plaster using a foam roller and is well distributed by rolling it over the wall surface. Having completed this stage of work, the finishing can be considered complete. All that remains is to wait for the wall surface to dry, and then remove the masking tape enclosing the wall. |
 | The last illustration shows the result of this fairly long work over the wall decoration. But, you must admit, the technology is not so complicated, and the resulting finish looks very original. |
 Decorative plastering was and remains a popular type of decoration both indoors and on façade walls due to its practicality and the variety of surfaces created. In this article we will look at all the popular methods and techniques for applying decorative plaster, the features of which will be clearly shown in video lessons.
Materials and tools
The trowel application technology includes the following work methods:
- A portion of the solution is applied to the tool and distributed over the wall in short strokes. The layers of plaster are laid overlapping each other. Their direction can be either in one direction or in different directions. If the trowel moves not in a straight line, but in an arc, the relief will be completely different, more bizarre.
- Another popular option to put decorative trim is trowel trimming. The plaster solution is also taken onto the trowel, then the entire surface is easily pressed against the wall and removed. The movements are made quickly “touch-free”, turning the tool in different directions. The result is an effect small "fur coat". You can also first apply the plaster in an even layer of 2-3 mm, and then trim it over the entire area. It turns out as in the photo.
Roller
To decorate walls during renovation, ordinary fur (paint rollers) and special rubber ones with a certain pattern are used. You can also make a structural roller for decorative plaster with your own hands by wrapping its rotating part, for example, with a rag, bag or rope.
The technique of applying a pattern with a structural roller is very simple:
- the wall is plastered in one layer 2-4 mm thick;
- roller is passed over the plaster in one direction, leaving a pattern.
To give the walls a “fur coat” effect, use a fur roller. There are two ways to do it:
- the roller is dipped into the plaster solution and rolled along the wall;
- a section of the wall is completely plastered with a trowel or spatula, then the texture is formed with a roller.
After the mortar has set, you can walk along the wall with a wet trowel and smooth out the protrusions and rub it in.
Important: if the mixture lays unevenly, use a spatula to remove the excess. It is not recommended to take long breaks when working with a roller, as the material will dry out and joints will be visible on it.
Brush
Create using a brush finishing coating, as a rule, using ready-made plasters for decoration. This method has several advantages:
- Economical. The brush distributes the material in a thin layer.
- Rapidity. When applying the mixture to the wall, a texture is immediately created.
- Simplicity. No special skills or techniques are required; decorative plaster is simply applied and distributed with strokes in different directions.
Often such mixtures contain mineral fillers, for example, sand, marble chips. They give roughness to the plaster and complement the texture created by the brush. More details about the application technique will be discussed in the video tutorial below.
Sponge
To create a textured coating, improvised means are also used, for example, foam rubber or sea sponges, plastic bags, rags.
First, lay down an even base layer and use a trowel. Then scoop up a small amount of plaster mortar with a sponge and apply it to the wall in strokes. You can’t cover the entire surface, but only make islands of plaster. After it begins to set (after 15-20 minutes), the tops are smoothed with a trowel or spatula.
In this way, they imitate the texture of stone and create arbitrary patterns.
Evgeniy Sedov
When your hands grow from the right place, life is more fun :)
Content
Liquid wallpaper, flock, and compositions that imitate masonry (wood species) are very popular nowadays. All this applies to the fashionable way of outdoor and interior decoration. How to apply decorative plaster, what is this mixture? You will learn the rules for preparing the composition from the presented review. Given seamless option finishing is an excellent replacement for wallpaper and other materials.
Types of decorative plaster
Finishing according to manufacturing technology is divided into three types:
- Textured has a coarse structure of high viscosity.
- The structural one contains marble chips, the result of application is a smooth granular surface. Works well on drywall and other mineral surfaces.
- Venetian is a decorative stone-like plaster that has a uniform texture. As a result of application, it forms a perfectly smooth surface, similar to natural marble.

Depending on the resulting surface relief, textured plaster is divided into several subtypes:
- The lamb makes the wall surface uniformly grainy.
- Bark beetle The surface treated with this plaster resembles corroded wood.
- The fur coat makes the wall rough and fleecy.
- Travertino is an imitation of brick or stonework.
- The panel is a three-dimensional drawing.
Classification by binder:
- acrylic (based on acrylic resin);
- mineral (cement based);
- silicone (based on synthetic resin);
- silicate. (With liquid glass).

Additionally, specific types of this finishing material should be highlighted:
- Color is available in 15 shades. Used as interior and façade.
- Roller contains natural filler.
- Latex plastic gives the surface a smooth and glossy appearance.
- “Wet silk” contains pearlescent particles and gives the surface of a wall or shelf the appearance of shiny fabric.
- “Sea Breeze” contains fine sand and is used only for interior decoration.
How to make decorative plaster
After applying the primer to the walls, you should begin preparing the decorating composition. How is decorative plaster made? There is nothing complicated about this; the material is sold in the form of a dry mixture, which is diluted according to the instructions. If you add solid components (pebbles, pieces of tiles) to the composition, the surface will acquire an unusual pattern. To give the desired color, paint is added in a ratio of 1/10.
Decorative plaster from ordinary putty can be prepared independently at home. This option is relevant for those who would like to save money by renovating their apartment. The plaster is prepared in a bucket: putty from any manufacturer (Ceresit, Dufa) is mixed with grouting agent and water. The composition is supplemented with the selected dye and other decorative elements.
Materials and tools

Before starting work, it is important to take care of preparing the tools. You will need the following:
- drill with appropriate attachment;
- bucket;
- structural roller;
- spatulas;
- smoother for structuring;
- grater or sandpaper for leveling;
- brushes and sponges.
Materials for preparing the composition are used depending on the chosen putty option. Can be used:
- wax;
- acrylic varnish;
- white putty;
- grouting agent;
- dyes.
Application methods
The technique of applying decorative plaster is a creative process that does not require special skills. Anyone can play the role of a master painter, decorating their room with this material. Before work begins, the walls are leveled and treated with a primer. The composition is applied in a layer of 2-5 mm using a spatula, trowel or roller. It is advisable to choose a tool that allows you to cover a larger area.

Wall decoration with decorative plaster is done in different ways, depending on the composition and consistency of the mixture:
- Application method using a spatula. The composition is distributed over the wall or ceiling in a circular motion or up and down.
- Spreading with a large brush will create a wave-shaped pattern.
- A toothed roller, trowel or stamps create a repeating design in relief.
- The use of crumpled polyethylene will allow you to obtain a non-standard surface relief.
Once the mixture is distributed, it will take some time until it dries completely (8-48 hours). Over time, the walls are leveled and cleaned of dust using a sheet sandpaper. After this, a protective layer or wax must be applied to the surface. As a result, the plaster will be protected from premature destruction under the influence of moisture and dirt.
Whether decorative plaster can be applied to plaster depends on the type and texture of the mixture. If it is coarse-grained, then it is allowed to apply the composition directly to the primer. Fine-grained decorative plaster applied with a roller requires an additional layer of regular plaster. It is important to wait until it is completely dry before applying (this may take several days).
How to paint decorative plaster

Wall decoration with decorative plaster sometimes requires additional painting. Depending on where the walls are decorated (exterior or interior, kitchen or hallway), the design is complemented with new shades or entire paintings. Thanks to this, the plastered surface becomes voluminous and the interior becomes full. It is important to choose and apply paint correctly.
Facade and interior paints are made on the basis of acrylic, silicate, water or silicone. In addition to choosing paint, it is important to know its consumption; it is indicated on the packaging. As a rule, the height of the surface relief significantly increases its consumption. The method of applying paint to decorative plaster differs depending on the surface topography and the type of plaster mixture.


