Stencils for walls for painting are best opportunity decorate the interior with your own hands.
Wall decor using stencils
You need to choose a painter's suit, a roller, a brush, several colors different paints and buy your favorite stencil for wall decor at Olstik. Next, clean the wall old paint, fill cracks and cracks, level the surface. After this, open with a layer of screed.
For finishing work, water-based paint is suitable. If you decide to leave the walls pure white, then you need to repeat the procedure of applying the water-based emulsion a second time. And if you plan to paint it a certain color, then you need to let the walls dry. You can also add color to water-based paint and make a covering a certain color. Please note that the more color you add, the darker the color will be.
After the base has dried, beautiful stencils for wall decoration should be applied to the surface. Secure the stencil with small pieces of tape at the top and bottom so that the picture does not “move out”. Step back and analyze whether the drawing is placed evenly and whether the stencil is correctly fixed. Next, apply paint to the areas where the parts are cut out. If the drawing is large, then use paint roller for applying paint, and for small parts a brush is suitable.
Selection of stencils for various rooms
The unique selection of designs presented by the Olstik company allows you to act in any direction and decorate the surface of walls in the following types of interiors:
- Entertainment venues: centers children's creativity, youth clubs, exhibition pavilions, theater foyers, cinema halls, sports complexes, dance floors.
- Business complexes: trading houses, bars, cell phone stores, restaurants, spa centers, massage rooms, work offices.
- Residential premises: living rooms, hallways, corridors, bedrooms, kitchens and dining areas, loggias and balconies, bathrooms and toilet rooms.
Almost any room can be decorated in an original way using stencils of flowers, ornaments, patterns, etc., if you buy stencils for walls from the Olstik company. We work throughout Russia, including remote regions.
Advantages of buying stencils for decorating
The online store site offers to buy stencils for DIY wall decor. The products are made in accordance with five basic rules and requirements for compositions.
- Possibilities. With these convenient elements, the client will be able to decorate his home independently, workplace, business center.
- Uniqueness. Stencils for wall decor are made of original material, which allows you to draw a clear line between the picture and the wall without blurring the image.
- Exclusivity. The design for many models was developed in our design bureau.
- Convenience. Stencils for walls for painting have a unique structure, making the products comfortable to use. Even a non-professional designer can handle it.
- Quality. The peculiarity of stencils for painting walls allows you to successfully combine several types of drawings, paintings, panels in one room.
Contact us, the quality of interior decor is guaranteed by the manufacturer “Olstik”!
Painting ceramic tiles will come in handy when the monochromatic tiles give you the headache to death. You can do this yourself. Painting ceramic tiles is a fairly simple procedure and anyone can do it. We will simply briefly highlight the main points and nuances.
Price for drilling a hole using diamond core bits
| Diam. holes in mm. | Work with bricks and screed in rubles per cm. | Work with concrete in rubles per cm | Work with reinforced concrete in rubles per sm.p with reinforcement diameter > 16 mm | In reinforced concrete, rub/cm.p Reinforcement diameter above 16 mm |
|---|---|---|---|---|
| 25-52 | 12,2 | 16,4 | 19,4 | 20,1 |
| 62-82 | 12,9 | 18,2 | 21,1 | 23,3 |
| 92-102 | 16,5 | 22,2 | 25,1 | 28,0 |
| 112-122 | 17,8 | 23,5 | 28,6 | 32,5 |
| 132-152 | 20,0 | 26,5 | 31,5 | 35,6 |
| 162-182 | 23,4 | 30,8 | 35,6 | 40,4 |
| 202-222 | 28,5 | 35,8 | 40,4 | 45,5 |
| 232 | 32,0 | 42,6 | 45,5 | 50,8 |
| 252 | 34,4 | 37,5 | 50,8 | 57,5 |
| 282 | 37,0 | 51,0 | 57,5 | 64,7 |
| 302 | 40,6 | 53,9 | 64,7 | 73,5 |
| 352 | 47,3 | 60,1 | 73,5 | 80,1 |
| 402 | 53,4 | 67,5 | 80,1 | 90,1 |
| 452 | 66,2 | 79,4 | 90,1 | 107,8 |
| 502 | 77,8 | 90,2 | 107,8 | 120,5 |
| 602 | 89,1 | 103,1 | 120,5 | 131,2 |
Painting ceramic tiles in your design with our tips
To begin with, you should get a stencil with which you will apply drawings again and again. To make a stencil for painting ceramic tiles in the bathroom, you will need the following materials:
- Durable gasket;
- Thin cardboard or laminating film;
- Primer;
- Aerosol glue 9 can be replaced with paper adhesive tape;
- Tracing paper and pencil, as well as a marker;
- Sponge;
- Tile paint;
- Cardboard cutting knife

Painting ceramic tiles must be done very carefully. It would be a good idea to make sure that the stencil fits tightly to the tile. Otherwise, the paint will simply seep through it. To prevent this from happening, craftsmen recommend using spray paint.
The entire procedure for painting ceramic tiles is as follows. You need to take the stencil, place it wrong side up on the paper, and cover it with an even layer of glue. Then wait 5-10 minutes and apply to the tile. If there is excess glue left on the tiles, they can be removed using gasoline or white alcohol.
Painting ceramic tiles begins with degreasing the surface, that is, wiping it with alcohol. If you have to paint on a large surface, then you will need a primer. It is the latter that will increase the adhesion between the base and the paint layer. When painting ceramics, be careful how you hold the sponge. It must be in a strictly perpendicular position. Don't rush, otherwise you will end up with a blurry drawing.

Now let's figure out how to make a stencil for painting ceramic tiles.
- Copy the design using tracing paper onto the stencil material;
- The finished lines need to be outlined with a marker;
- To avoid cutting the surface of the object you are working on, place something thick under the cardboard;
- And then feel free to cut out all the details that will be painted over later;
- Attach the resulting stencil to the tile. Use either duct tape or glue, whichever is more convenient for you;
- Paint the cut out areas using thick paint. We do not recommend liquid ones, because they are too fluid;
- We wait until the paint dries and remove the stencil. Clean up any remaining glue;
We have prepared one stencil for painting ceramic tiles - rotate it as you wish, in different directions. Then you will get interesting drawings.
If the old cladding has become ugly, and you can’t just wash it off, paint for ceramic tiles can help renew the coating without complete replacement. In addition, such methods are sometimes used by designers to paint and create a unique pattern on tiles.
There are several ways to paint tiles:
- Paint for tiles and glass (stained glass). It can be applied directly to a smooth surface without preparation. Typically the outline is applied first, followed by the acrylic background paint. Due to the high price, it makes sense to use it only as decorative effect. Alternatively, you can use vinyl stickers.
- Epoxy paint. It is harder to find on sale and is more expensive.
- Latex or oil paint. It is necessary to first apply a special primer, for example, Tikkurila Otex.
Quick navigation through the article
Preparatory work
Before painting the cladding, you need to remove the remaining cement adhesive and excess grout from the surface with abrasive materials. The fallen tiles are glued to cement glue or liquid nails and left to dry completely. If they are lost, you can replace them with tiles of a different color. Chip tiles also need to be replaced.
Glue the old tiles in place and grout the seams
See also the article: .
The surface is degreased using acetone, alcohol or solvent.
Apply Tikkurila Otex primer with a short-haired roller and leave it to dry for 12 hours. It is white in color, so it will partially help hide the old color of the texture.
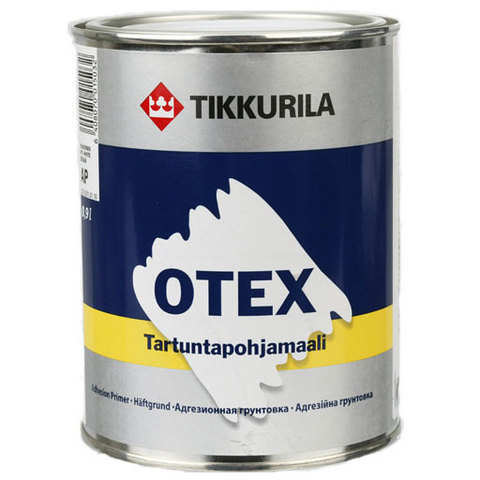
Tikkurila Otex primer
Painting
Tile paint is applied in several layers to completely hide the old pattern and achieve a uniform color. A new layer should be applied only after the old one has completely dried.

Apply the first coat of white primer
If you want to get not a monochromatic surface, but divide it into several parts or diversify it with ornaments, use masking tape to get straight lines of the intended design.
Painting tape to create an ornament is glued only after applying the base coat of paint. The easiest way is to make a geometric pattern out of it.
After the paint has dried, the masking tape can be removed.


The video shows the result of painting an apron in a kitchen with a white and red pattern with oil enamel:
The joints can be additionally painted using a special tile marker (Edding 8200, PUFAS FRISCHE FUGE paint).
Using stencils
A stunning effect can be achieved if you use ready-made stencils. The photo below shows an example of decorating a backsplash made of white tiles with paint. 
Conclusion
You shouldn’t expect to get a cool result after painting. for a long time, because along with a layer of paint, the tile will lose many of its important properties. The decorative layer will no longer be protected by the glaze. It will be more difficult to wash, fungus and mold can form on it, the seams will have the same color, and over time the paint will begin to peel off. I would not recommend that you do such repairs to the tiles in the bathroom unless absolutely necessary; it would be safer to replace the tiles.
comments powered by HyperCommentsNo similar entries found.
13-04-2014Hand painted ceramic tiles - creative, enjoyable and easy way add a “zest” to the interior of the kitchen or bathroom. By painting the tiles with your own hands, you will not only show the world your artistic talents and excellent taste, but you will also be able to save on finishing, because ready-made colored tiles with paintings or patterns are more expensive than white ones.

In order for the paint to adhere to the surface of the tile, you need to use a primer.
Required tools and materials
You should first decide on the working “canvas”, that is, tiles. She should be with smooth surface, without patterns and relief, white or plain colored. It is not recommended to paint floor tiles, since it is subject to increased mechanical stress, and the design will not last long on it. You should not paint those tiles in the bathroom that are often exposed to water. Because of high humidity Even moisture-resistant paint will begin to flake and peel over time.
Tools you will need to paint ceramic tiles:

To increase the durability of the pattern, place the tiles in the oven for half an hour.
Stencil. It can be purchased at specialized stores or do it yourself. The drawing you like (you can, for example, cut it from a magazine) is pasted onto cardboard and cut out along the contour. For those new to design best choice to begin with there will be not very complex geometric patterns.
Stencil large sizes, which can be placed on two, four or several tiles at once, will allow you to create a truly original, highly artistic panel with your own hands. It will look especially advantageous on a kitchen apron.
You don’t have to limit yourself to stencils; you can use curly scrapers to create beautiful wavy lines on the tiles or foam rubber stamps.
Paint is applied to them, then impressions are made on the tiles using stamps.
It is important to choose the right paints. To completely paint the surface of the tile, oil, epoxy, latex paints. To create patterns, special acrylic paints for painting ceramics. When using such paints, please note that they are usually very bright, so they should be diluted with white or solvents before use.
The contours of the drawings are outlined with special contour paints, sold in small tubes with thin dispenser tips. This paint creates a kind of barrier that prevents other paints from spreading.
Return to contents
Let's start creating masterpieces
For painting tiles, acrylic paints diluted with white or solvent are best suited.
The procedure for painting ceramic tiles is divided into the following stages:
- Cleaning and degreasing. Includes processing detergents using a stiff sponge. You can degrease the tiles by pouring sand on a sponge and rubbing the surface thoroughly, or by wiping it with vodka or alcohol.
- The next stage is sanding. It is necessary then to remove the topmost smooth layer of tiles. It can be produced by treating the surface sandpaper or a whetstone for sharpening kitchen knives.
- Next you need to apply a primer. This is necessary to ensure good adhesion of the paints to the smooth surface of the tile. It is recommended to use epoxy primers with high adhesive properties; For bathroom tiles you will need a moisture-resistant primer. It should be remembered that the tiles can be painted only after 24 hours, that is, after the primer has completely dried.
- The paint is applied in 2-3 layers. Complete painting of the tiles is done with a foam roller or sponge. Before applying the next layer, you need to wait until the previous one has dried; after each application, the roller should be squeezed out thoroughly.
- The stencil design is painted over with a special soft brush. To prevent the stencil from moving during operation, it is fixed with temporary aerosol glue or regular tape. The brush must be held strictly perpendicular to the surface of the tile, while the paint is applied in neat strokes. Random drops of paint should be removed with a cotton swab, the blunt end of a match or a toothpick.
- On final stage Waterproof varnish is applied.
After the paint has completely dried, you can safely wash the tiles without fear that the design will come off or fade. It is important to remember that painted tiles must dry for at least 24 hours, and it can take up to 2 weeks to dry completely.
It is worth mentioning that moisture-resistant vinyl stickers, available in a wide range, can be an alternative or addition to the artistic painting of tiles. As with painting tiles, it is vital that work surface was dry and absolutely clean.
Another way to improve the decor is to stick ceramic border beads onto the tiles.

When the need arises for home repairs, the owners begin to grab their heads and feverishly calculate how much it will cost them. There is no need to despair. You can always find workarounds. In this material we have collected 15 ideas that will help you create luxurious interior and not spend a fortune.
1. Brickwork

Brickwork is one of the most popular techniques in the interior design industry. However, its construction requires special skills and high costs. In addition, this finishing option is not always acceptable in city apartments. Fortunately, there are now plenty alternative options imitating natural brick. For example, for interior decoration PVC sheet panels or high-quality wallpaper with a three-dimensional pattern are perfect.
2. Newspapers

Designer renovations will not be possible without large financial investments. Moreover, expenses will require not only the services of a designer, but also high-quality finishing materials. However, you can get by without spending a lot of money by using ordinary newspapers instead of expensive wallpaper. To create the design you will need whole sheets of newspaper. Pasting should be carried out in several stages. First, you will have to clean the walls of the old coating, eliminate existing flaws and thoroughly putty the surface. Next, for better adhesion of the materials, the surfaces need to be coated with a primer and a special glue applied. Place the first sheet on the glue-coated wall, carefully smoothing it out. Each subsequent sheet should be glued with an overlap. At the last stage, secure the newspapers by covering the walls with a protective varnish.
3. Cabinet Makeover

Buying new cabinets will require serious expenses. But before you go to the store, try working on some old DIY ones. Wide range paints, decorative fittings and new handles will transform boring facades beyond recognition and turn them into something unique.
4. Imitation tiles

The construction of garden paths can greatly undermine family budget. However, serious expenses can be avoided by purchasing a special stencil. With its help you can create a similarity paving slabs from ordinary concrete.
5. Stucco molding

Stucco molding is an indispensable attribute elegant interior. Just to own one, you don’t need to be the owner of a luxurious mansion. Cheap foam rosettes can transform a boring white ceiling. In addition, such parts can be partially coated with golden spray paint.
6. Fake fireplace

Not everyone can boast of having a real fireplace at home. However, anyone can build a fake fireplace. To implement this idea you will need one large or several small cardboard boxes. From them you need to build the frame of the future fireplace, fastening the boxes together using tape or a stapler. The next stage is covering the frame with newspapers. After this, the product should be thoroughly puttied, and then covered with paint or wallpaper. Finished product can be placed in the living room by placing several large candles on the floor.
7. Spills

Wooden saw cuts are a fashionable finishing material that can dilute the boring interior of a city apartment and create a truly unique detail. Get fashionable finishing material possible at own dacha. It is better to attach saw cuts to a surface that has been puttied and coated with primer in advance. Joints can be sealed decorative plaster, and then cover the wall with a layer of varnish.
8. Flower pot

You can easily make an exclusive flower pot with your own hands. To do this, you only need an aluminum bucket, plaster, mounting mesh and sea pebbles. To begin, make several small holes in the bottom of the bucket and use a spatula to apply plaster to the sides of the bucket. Wrap the prepared base with a mounting mesh and begin laying the stones. Fill the holes between the stones with grout mixture. New flower pots you can decorate your apartment or place them in the garden of a private house.
9. Candlestick

Shades from an old chandelier can be used to create a beautiful candlestick that will become a worthy interior decoration. In addition to lampshades, you will need several wooden planks from which you should put together some kind of narrow box with round holes for lampshades. You can decorate the base of the candlestick using bright paint or beautiful paper.
10. Mat

It's amazing how many beautiful and unique things you can make with your own hands from completely available materials. For example, from ordinary threads you can make a bright and very soft rug that will decorate any space and become an effective interior decoration.
11. Vases

IN beautiful interior every detail matters. So as not to go broke on designer jewelry, try making them yourself. For example, buy the cheapest ones glass vases and paint them with bright enamel. Such decor will not require any special skills, and the result will exceed all expectations.
12. Wooden slats

An accent wall is a trendy way to freshen up your home without having to commit to a major renovation. For example, you can decorate one of the walls of the bedroom or living room using wooden slats, glued to a pre-prepared wall.
13. Stencil roller

A roller stencil is another device that can create imitation tiles on fresh concrete or putty. Such a device will improve garden paths and facades country houses without special costs.
14. Unique design

An original painting will help decorate plain walls. Good modern devices allow even people without any artistic skills to do this. You just need to get a special roller stencil with three-dimensional patterns and purchase paint of the desired shade.
15. Tile stamp

Façade renovation country house- it’s a very expensive business. A special stamp will help you save on purchasing special tiles or stones to decorate the facade. With his help ordinary concrete or the plaster will turn into an imitation of tile or stone.


