Today, people are increasingly striving to furnish their homes in an original way, avoiding platitudes and cliches. In this sense, decorative painting of walls is quite interesting solution: manages to create incredible textures, artistic images and color combinations. The shops are replete with goods for every taste. Therefore, without much hassle, you can decorate your interior stylishly, even without professional design training.
One of the most popular methods of decorative painting. Use acrylic or oil paint. You must apply multiple layers different shades using a rag to mark them later when the paint is still wet using a brush. You will achieve an amazing velvety texture in which the play of lights and shadows takes on a special vision.
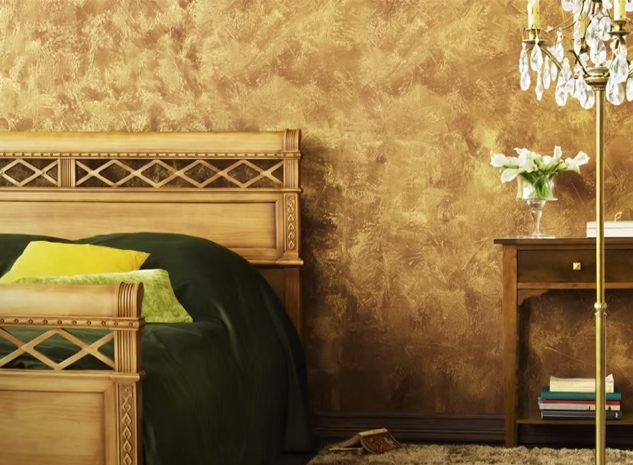
This decoration system with decorative painting imitates the original plaster, a type of wall finish that is generated by mixing powdered gypsum, marble, lime and pigments, materials that achieve a very favorable texture effect. Probably the most known species The plaster is Venetian.
Preparatory stage
Needs to be cleaned work surface. Often marks remain on the walls old paint, whitewash, wallpaper paste. They all have different chemical composition, substances interact with each other differently, and if you still want to repaint the walls, this may negatively affect the final result.
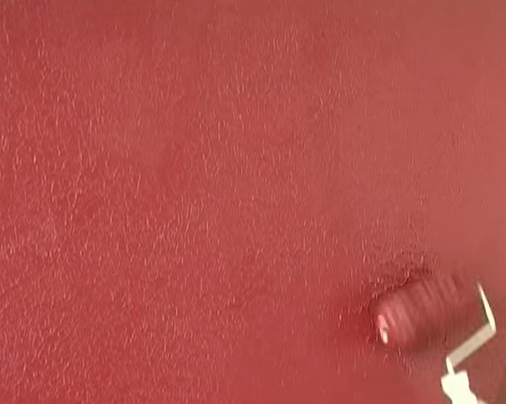
Working with a patterned roller on texture paint. Video
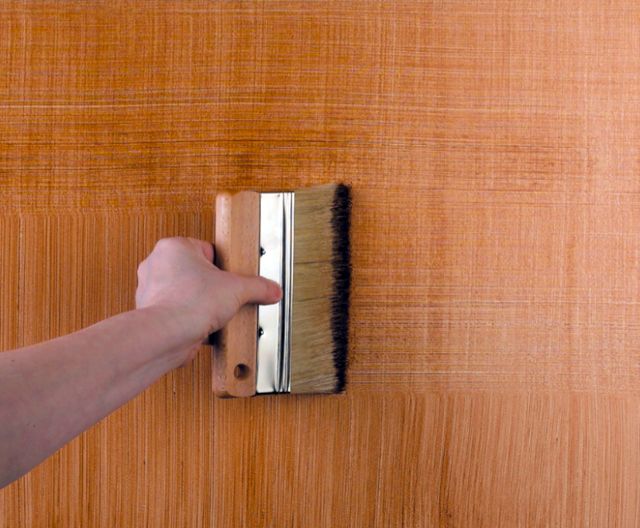
It was used to decorate the wall with irregular and blurred stripes. This is achieved by applying two coats of paint to the wall and allowing them to dry before varnishing with oil varnish. Before it dries, you need to use a long-haired cleaning brush, dragging it in the chosen direction, creating stripes, vertically or horizontally.
Types of decorative paints
This original and unexpected effect for furniture or walls is achieved using a special paint with metal components that react with the activator oxide in a form similar to rusting appearance Sheet iron is achieved and can be applied on walls, furniture and accessories to transform and redefine any space.
Preparing the surface for painting
To achieve chromatic gradation you can use glaze. Are you wondering: what are chromatic gradations? It's very simple, color grading occurs when the steps are shown in how shades of color change become another color completely or fade out gradually. Imagine a wall painted a specific tone at the base, next to the floor, and as you go up, the color blends with others to become a different chromatic proposition. You will get it by applying a layer acrylic paint, very diluted in water, to which natural pigments are added.
In some cases, previously pasted wallpaper cannot be removed from the wall - then it is advisable to use alkyd primer paint. It is recommended to dilute it with white alcohol in a ratio of 1 to 3, mix thoroughly, and apply to problematic areas of the walls.
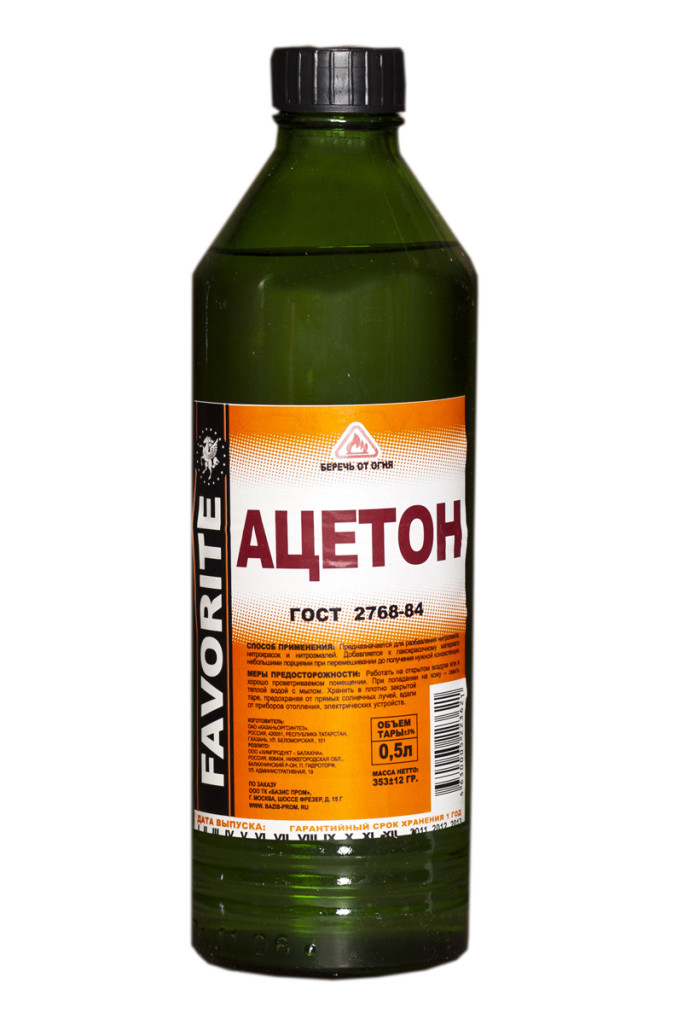
Another important point concerns the removal of dirt, oil and grease stains, fungus (fungal damage is typical for premises in old buildings, as well as in high humidity). Treat oil stains with acetone or pure gasoline. Just apply a little onto a dry, lint-free cloth and wipe the areas where you see grease-containing dirt.
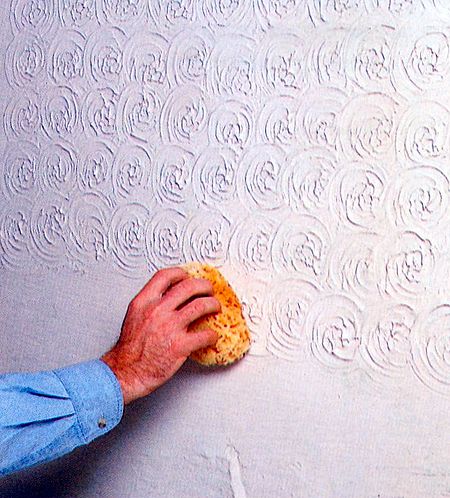
Creating patterns using a roller
Depending on the utensils you use - sponges, rollers, cloths or brushes - you will get one type of finish or another. When you want to apply motifs to the wall, a new alternative is rollers that decorate with decorative paint in a very simple and in an efficient way. You will find different models, and they are very easy to apply in walls, as in furniture.
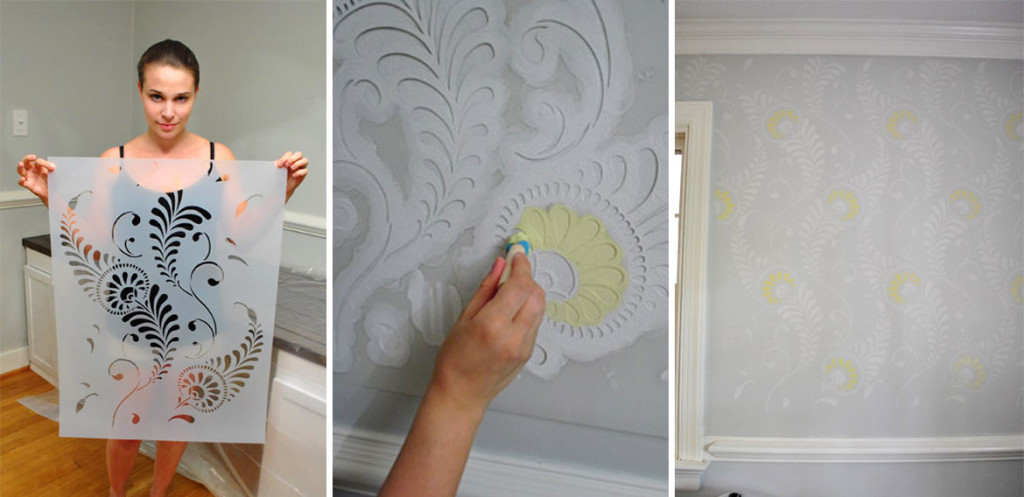
Stencil or stencil technique
The classic way of drawing using templates. You can apply this technique on walls, furniture, fabrics, curtains and accessories. The type of ink most suitable for screen printing is synthetic enamel, acrylic or latex, depending on where you intend to use it.
Examine the wall for old cracks. Most likely, they will also be found. Prime the cracks with as dense a substance as possible, preferably finely dispersed and with high adhesion. The most common materials are cement or gypsum, or a mixture of both. Apply the solution after first moistening the cracked areas with water (this way you will maximize the adhesion of the “native” material old wall and primers).
Cracking or cracking technique
If you're a fan of this decorative painting technique, you can easily purchase templates to serve as molds or make your own. This is a system that is typically applied to wood, allowing it to age as the paint cracks, creating cracks. Very original way updating the appearance of a candelabra, headboard, chests or any item made of wood.
Flow effect that imitates wood
Imagine you want to bring out the veins and knots of natural wood.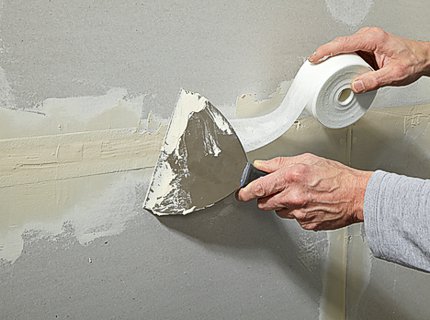
Which paint to choose
It’s useful to start choosing paint long before you get into the process. It is not very wise to grab the first thing that comes to hand from the store counter at the very last moment. In addition, you definitely need to try the properties of the purchased paint somewhere in a separate place.
Tools for work
You only need water or oil paints and a splitter, a tool that will create this amazing decorative effect. A little practice and good game on your wrist and you get any surface to look like real wood. Have you decorated any of your walls or furniture using decorative painting techniques? What was the result? Explain this in the comments section.
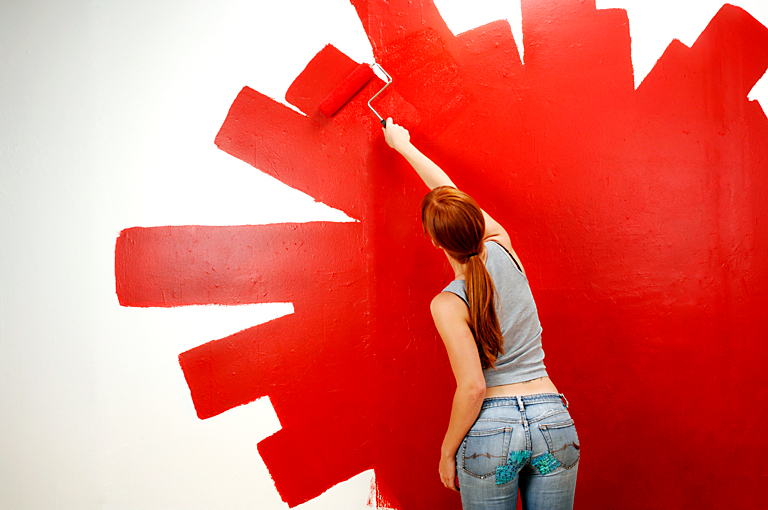
How to decorate a wall
This time with something more complex, but if you have patience you will get a really elegant effect: we are talking about the marble technique. Installation marble tiles can be quite expensive, so if you like the look of them, the marble technique may be good option. You can apply it to walls or other surfaces - furniture, countertops.
Advantages of textured paints
Painting using marble technique. Marbling is an imitative painting technique that involves simulating the appearance of marble. It's a labor-intensive technique, but the end result deserves it. It is based on drawing irregular lines using a finite brush to imitate the veins of marble.
For the marble technique, you will use three colors, one base color and two colors to create a marbled finish. Depending on the colors you choose, you will get more or less contrasting results and a more traditional character - colorful, soft yellows, grays or more modern colors, such as red or blue.
Why is this needed:
- see how it dries (does it leave cracks, quickly or slowly, does it change its original color);
- find out whether the paint will emit a pungent odor (sometimes manufacturers write that the paint is neutral, but in fact it turns out that the paint contains sharp-smelling fractions - for living rooms this is unacceptable);
- make sure that the paint consumption corresponds to that indicated on the packaging ( given value very conditional, because you can never determine with absolute accuracy how thick a layer you apply and how much substance will be used per unit square area).
Attention! When buying a product in a store, do not forget to look at the manufacturing and expiration dates so as not to buy expired paint with changed characteristics.
Before starting work, it is very important to prepare the surface to be painted. It should be smooth so that the result is as close to marble as possible. Correct any imperfections, if any, and apply a primer to improve paint adhesion. If you want to know more about primers, consult our.
Once the surface is prepared, it's time to apply a coat of base paint. For the marble technique, you should use a high-gloss or high-gloss paint. We recommend using them, available in all colors. Apply this coat of paint in the traditional manner, spreading the roller evenly from top to bottom. The choice of base layer color will depend on how you planned your decorating project: in a triad of three tones - one clear, one intermediate and one dark - you can apply transparency and leave the intermediate and dark for effects; or in between, and use transparent and dark effects.
It should be noted that decoration through painting can be done in two ways:
- using special textured paint (the option is more expensive, since such paint has a high price, although it is worth it!);
- using regular wall paint, but combining different colors (in the form of stencils, patterns).
Without allowing the primer to dry, apply a second coat. For your application you will use a brush, draw lines and irregular shapes blending and layering as you go. Before drying, press the edges of your brush strokes with a damp cloth to blend them together.
Once both coats of paint are completely dry, you will give way to veining, a painting process that will mimic the cracks of marble. The grain is made with a third color, which is usually white or gray. For your application you will use a thin brush with which you will paint the marble veins incorrectly. Our trick is to apply different pressures on the same stroke to achieve a marbled appearance and avoid patterns, let them carry. To complement these brush strokes, you can use a stylus to stylize them and finish their ends more subtly.
The consistency of wall paints is quite liquid. When applied, no lumps, grooves or sagging remain. Painting is usually carried out in several layers. The exception is the use of a spray bottle. With its help, it is possible to evenly paint every centimeter, but in most cases it is necessary to handmade. A brush and roller are your tools.
Tools used for decorative painting of walls
Anyone who offers it can paint the walls of their house without any problem. We just need to pay attention to some key issues such as protecting the floor, furniture and other parts, and choosing the right paint. However, once we know the keys, we can expand our knowledge with different painting techniques that will allow us to achieve unique and impressive effects on the wall. So this time we will see three processes that print different textures on the walls.
Application technique with a foam sponge
This is very simple technique and very easy to use, with which we will create unequal effects. Firstly, with the roller we have to paint the wall with a base color, for which we can use plastic paint. Then, using a sponge, we will apply a different color on top, giving small strokes. Additionally, we can use different tones until we get the colors to melt.
Attention! Apply paint only to a completely dry surface - after all cleaning, priming, etc. Otherwise, you will be left with imperfections after the new paint dries.
Maintain uniformity in the speed and amount of paint applied. Start with those sections of the wall where you plan to place wall furniture in the future, hang a panel or a carpet, where there is minimal illumination.
Special wall decoration techniques
If we don't need different colors, we can use the same tone as the base, but this time diluted with water. So, with the brush we will spread the paint and before it dries we will create textures with the sponge. One of the great benefits of this type of painting is that it actually hides any minor damage to the wall.
As the name suggests, this method involves painting the wall using a rag. The first thing to do is paint with a base color. Then we have several options. The first is to saturate the fabric with a different color and apply it to the wall. On the other hand, we can give a hand with paint, but this time dilute it with water, on a base color and, before it dries, create an effect with the fabric, either pressing the fabric against the wall or making it roll as if it were a roller .
This is necessary so that possible defects are not as noticeable as in the most central places. Apply each subsequent layer after the previous one has completely dried.
Rollers for decorative painting of walls
This method consists of simulating the effect of plaster, a wall covering that generates uneven textures, but uses only paint and therefore no relief. To recreate it, we only need a primer and two colors of paint. So first we have to apply the primer. Once we're done with the last one, we'll apply the first color again to fuse both colors.
Types of wall decoration with paint
In any case, the best thing is that before starting from the wall, use the technique to give the necessary movements. Painting is one of the major reforms carried out by households and businesses. This is a way to change the appearance of the rooms directly.
Attention! Apply the very last, final layer in the direction of the light rays falling on the surface.
Decoration
The predominant color is usually white. The budget for a painting for a home with standard craftsmanship and average qualities can be around €,000 per 100 m². Consideration should be given to changes in cost depending on possible cracks, smoothing of walls, fabrication, painting of ceilings, quality and type of paint used.
Frequently Asked Questions Asked by a Professional Artist
To ensure guaranteed results, it is recommended to choose neutral tones for the rooms. You can add a more lively touch to the rooms by highlighting some walls with brighter paintings or furniture colors. What types of paints are there? Which one should be used for each case?
Buy stencils at the store or make your own. Suitable material:
- thin sheet plastic;
- a piece of thin linoleum;
- thick oilcloth, etc.
The point is that the form does not collapse after several movements with a roller or brush. If this is not taken care of in advance, the edges of the form will become uneven and the applied design will have blurry outlines.
Stardust effect
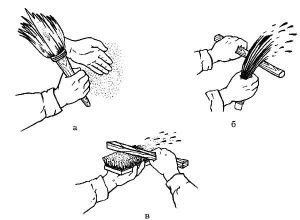
A simple and at the same time interesting design technique: “speckles” of paint of a different color are applied to the dried surface. To do this, you need to take a rough brush with hard bristles, dip it in the paint, squeeze it thoroughly and only then “spray” it in the right place: bend the bristles in the opposite direction, and then release it. Practice somewhere else beforehand to get the quality you need.
The decoration turns out to be very original when you paint the walls in a single color, but in different color – separate areas or different walls the same room. Perhaps these will be large rhombuses or squares, stripes, circles, stains. Draw a design on paper in advance and act based on the picture.
Aging effect
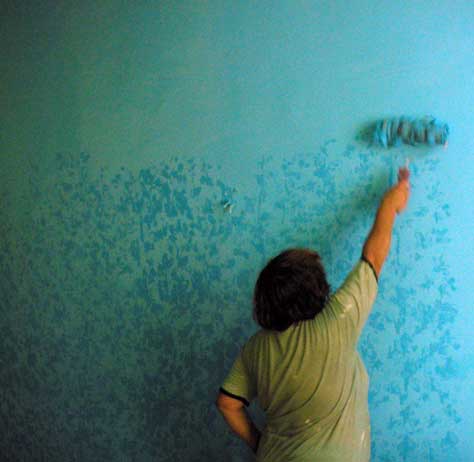
Another name is stippling. Apply a glaze of a contrasting color to a plain surface. Use a wide flat brush for this. Without waiting for it all to dry, touch the surface repeatedly with the same coarse brush (or take a coarse round brush). Spread the “touches” either completely over the entire surface or zonally. As a result, an original texture is formed, and traces of brush marks will not be visible.
Attention! The same can be done not with a brush, but with a rough, dry sponge. The main thing is that the mechanical intervention is performed in a certain given style (the same nature of touches, their more or less uniform frequency).
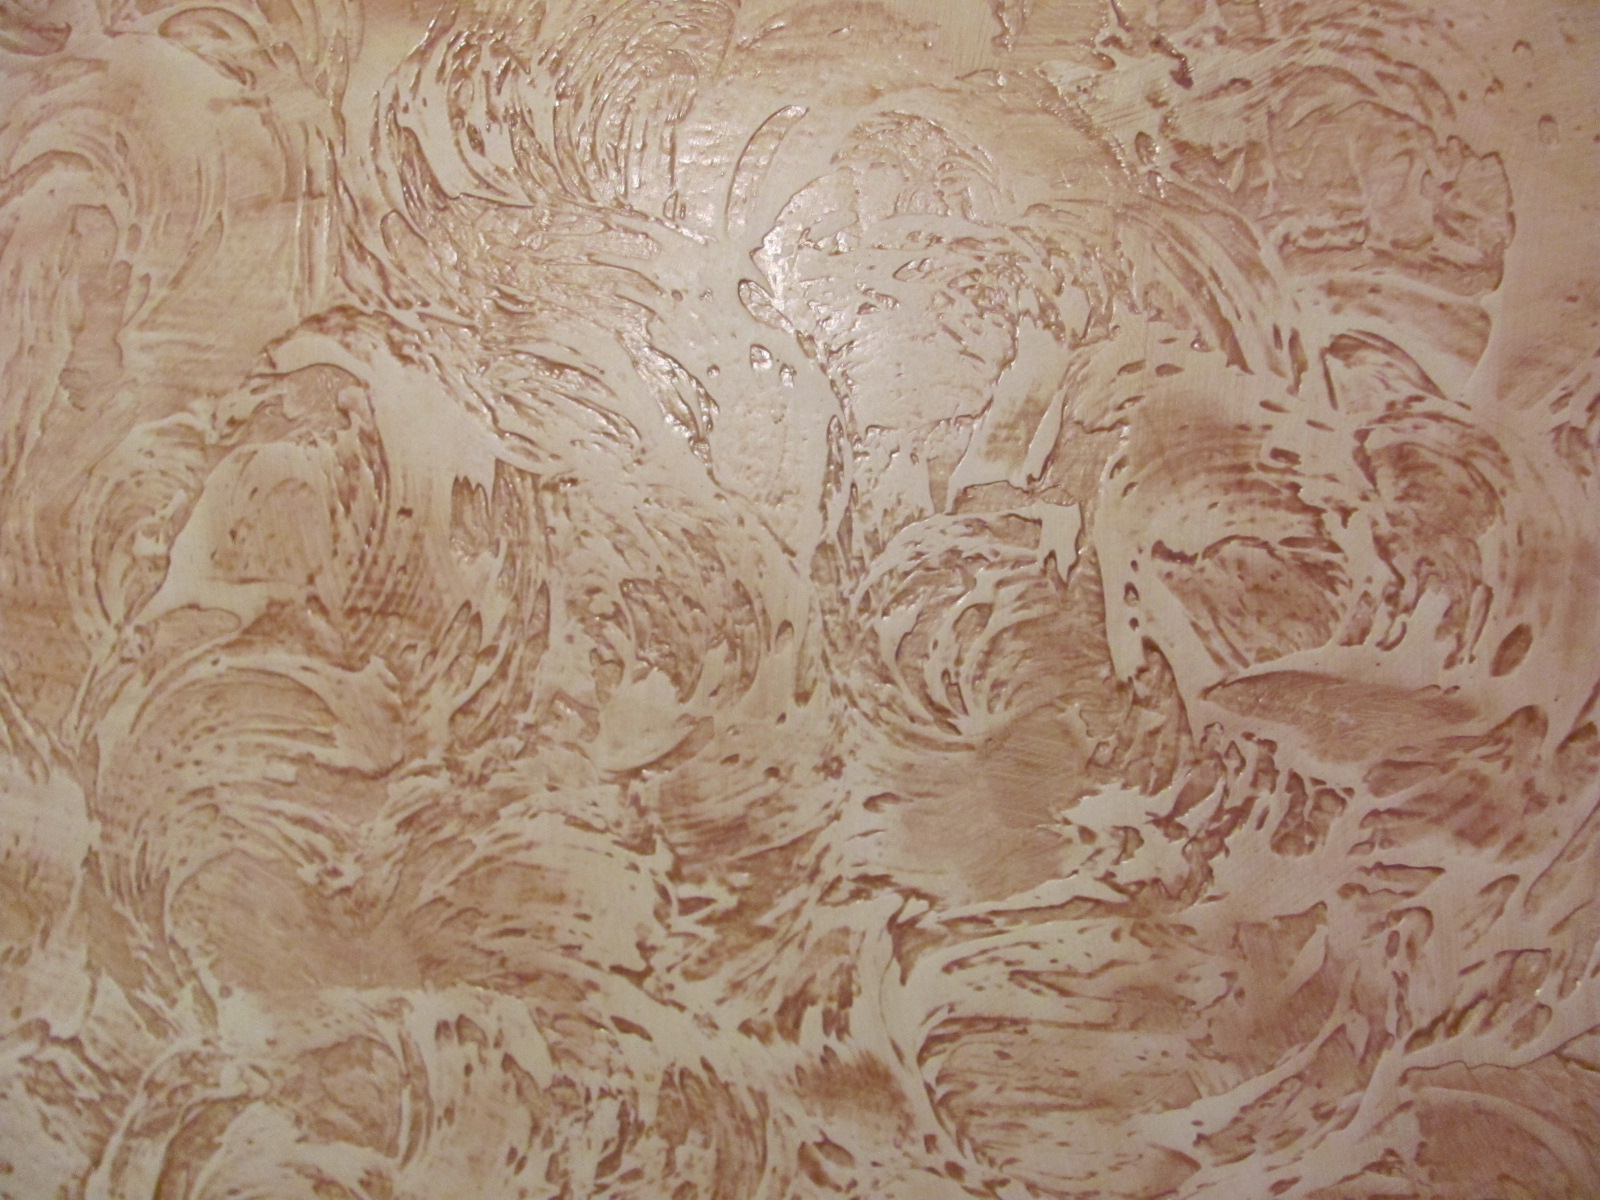
Chaos pattern effect or abstraction
Make a simple roller coated with “torn” material. It will help you apply fine wall paint so that random shapes appear on the walls. Naturally, the applied layer should differ in color from the main one.
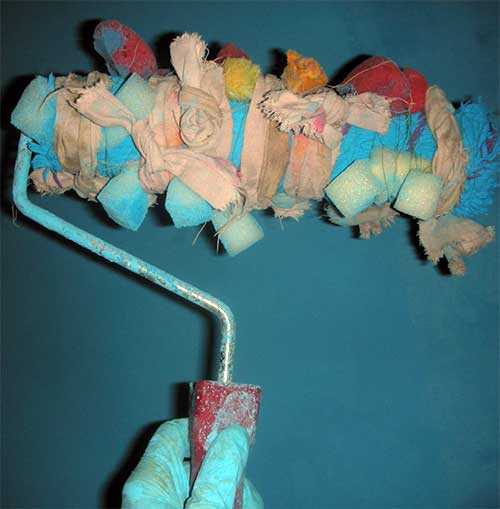

Video - Applying an abstract pattern with a torn roller
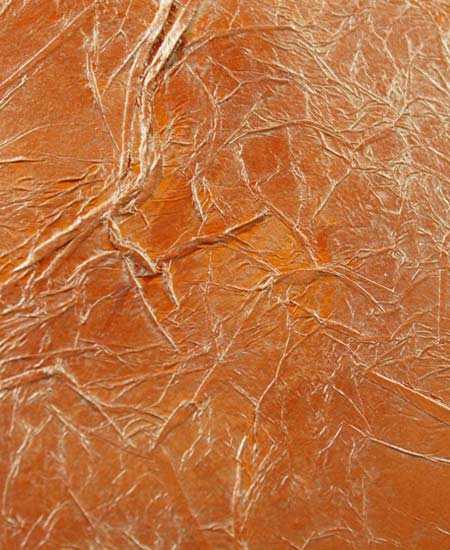
You will need:
- acrylic primer;
- vinyl paint in two shades;
- pearlescent azure;
- decorative paper.
The procedure is priming and painting, applying paper and crumpling it, painting again, removing excess paint from the folds of the “skin”.
Video - Decorative painting of walls with a wrinkled leather effect
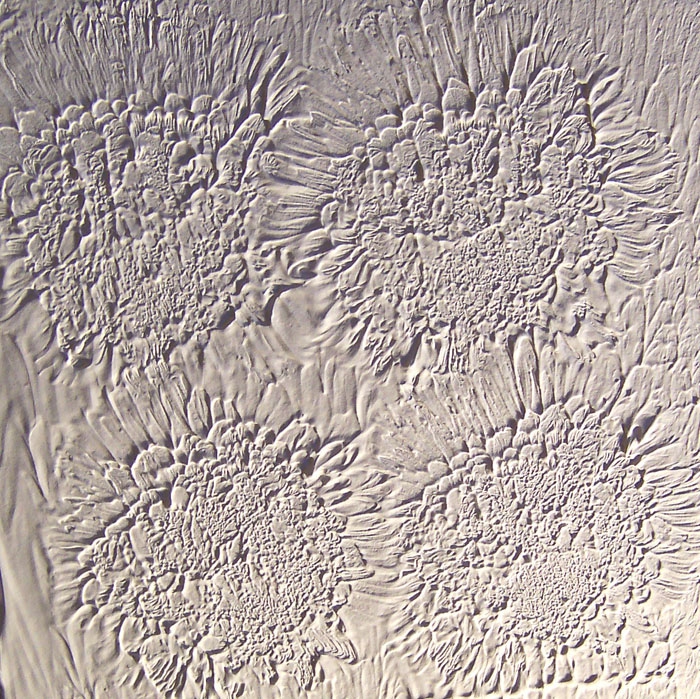
Applying textured paint
By characteristics textured paint very close to textured plaster. But the paint is thinner, and therefore more flexible. Its use gives a stunning effect - exquisite surfaces that will delight the eye with exclusive decor for a long time.
What gives rise to the relief:

You can further refine the coating as follows. After drying, apply to the base layer with a soft brush. regular paint a contrasting shade, not everywhere, but in some places - you get an original, chic decor. Some craftsmen even use not one, but two or three contrasting colors, applying them in a special cascading manner. If you want the same thing, be sure to train in advance, because without skill it’s unlikely to succeed.
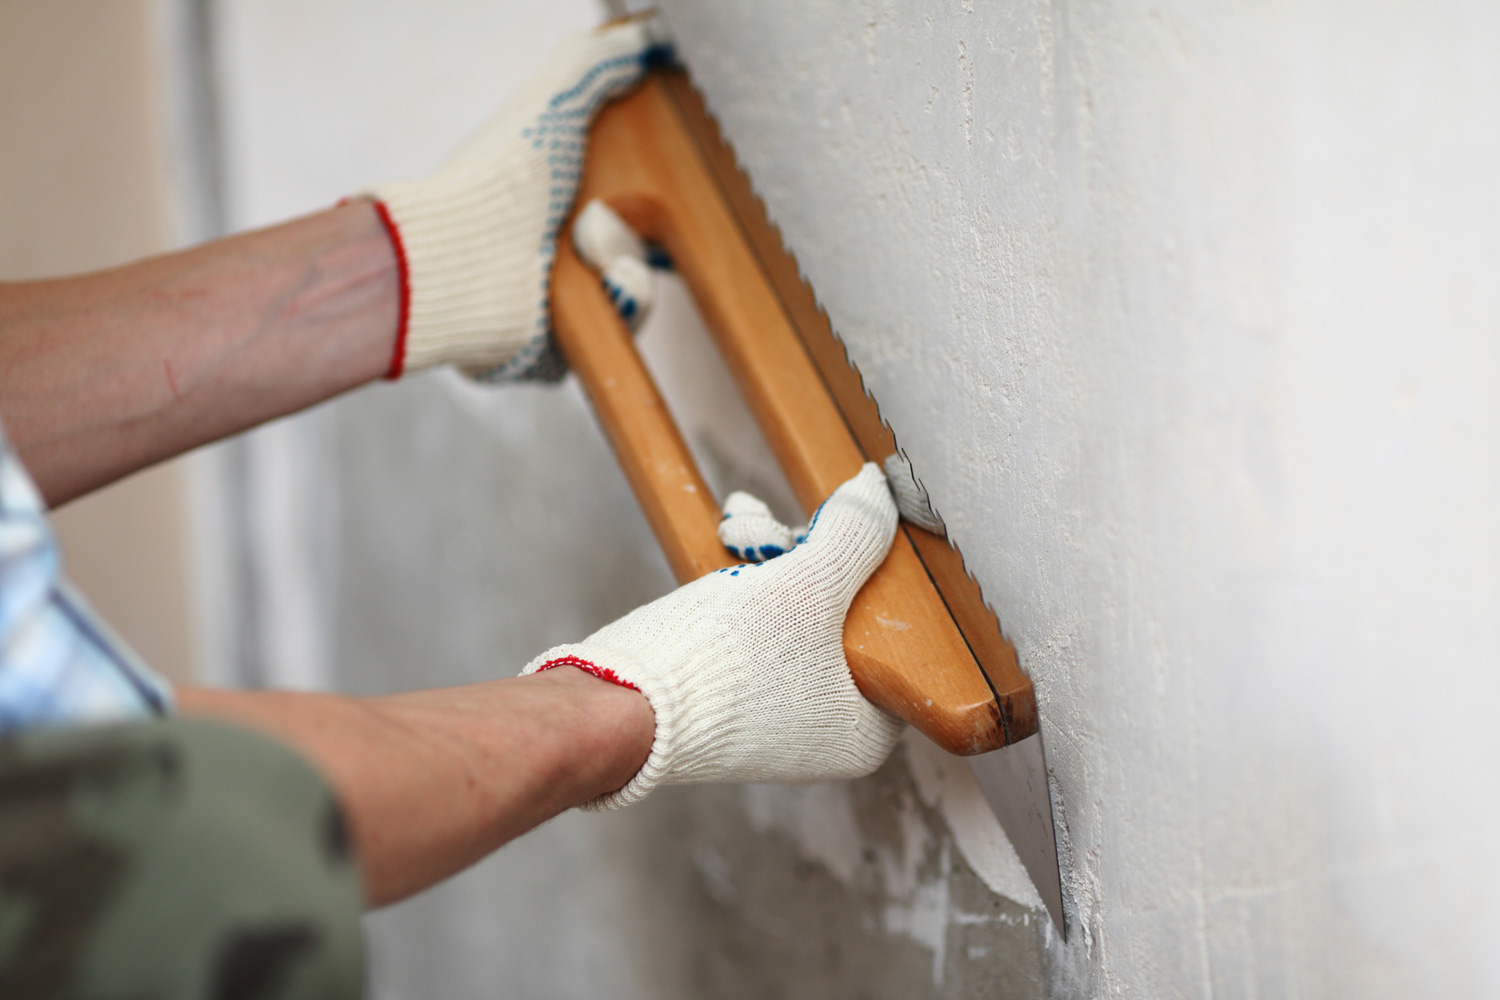
Spreading the glaze with a rubber spatula
Advantages of textured paints
The industry of modern finishing materials provides the widest field for bold experimentation. You are not limited in anything, and you do not need to undergo special training or acquire any specific skills. A relief paint application and experimental courage in artistic painting are enough.
Although textured paints are more expensive than regular “smooth” ones, they have a number of undeniable advantages:
Such a wonderful product is ready for use, and even the most untrained decorator can work with it.
Painting walls is cheap and in a simple way surface finishing. About the nuances of implementation this process and will be discussed in our article.
The price of painting walls depends on what type of work is chosen. There are three types of wall painting:
- simple;
- improved;
- high quality
Simple coloring consists of 5 main steps:
- surface cleaning;
- its alignment;
- eliminating defects;
- priming walls;
- painting.
Improved wall painting involves performing 8 sequential steps:
- cleaning walls;
- their alignment;
- elimination of defects;
- applying the first layer of primer;
- puttying rough areas;
- sanding areas with putty;
- applying a second layer of primer;
- painting the walls.
High-quality wall painting differs from improved painting in that it involves two full wall fillers and two surface sandings, as well as the application of a third coat of primer before painting.
Surface preparation
On at this stage carried out:
- removal of old coating;
- removal of contaminants;
- leveling walls;
- surface priming.
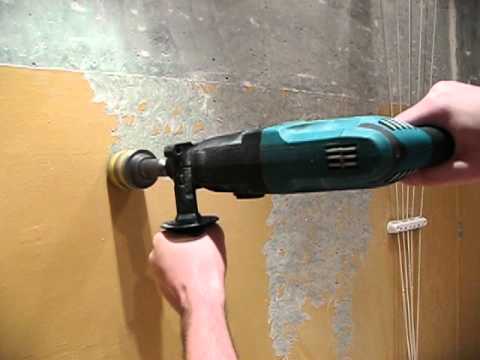
Removing old coating
This process involves performing actions depending on the type of old coating:
- The repeatedly painted surface is cleaned with a spatula;
- the whitewash is removed with a brush, which is soaked in water;
- the adhesive surface is wetted hot water followed by removal with a spatula;
- if the adhesive surface cannot be removed, then a solution is used hydrochloric acid (2-3%).
In most cases, you will have to deal with removing old wallpaper. To remove regular paper wallpaper just moisten them with water. When it comes into contact with water, the wallpaper swells. Moisture gets to the glue under the wallpaper. As a result, wallpaper can be easily removed from the walls along with the glue.
The situation is a little more complicated with waterproof material ( vinyl wallpaper). In this case, the wallpaper is soaked in several layers of water. It is recommended to mix water with cellulose glue, due to which water is retained in the pores of the glue for a longer time. You can also remove wallpaper from the wall using a special electric steamer.
Removing contaminants
Dirt, rust, soot, grease stains - all these defects must be eliminated before painting the walls. If this is not done, the contaminants will appear through the film of the paint product.
Removing soot and greasy stains carried out using a 5% solution of soda ash. To do this, dissolve 0.4-0.5 kg of soda in a bucket of water. To clean the surface of soot, you can also use a 3% solution of hydrochloric acid.
To remove rust, it may be enough hot water. After which the surface is treated with a 10% solution copper sulfate. If rust stains still remain on the wall, then you can make them invisible using rosin varnish, metal primer or white enamel, which dries quickly.
If there is a reinforcing mesh under the plastered surface, rust can be prevented from appearing on the wall by applying an acrylic primer.
Wall alignment
An integral part of wall painting technology is surface leveling. Nowadays, drywall or plaster are used for these purposes.
Using drywall you can perfectly level the surface. There is its installation:
- on a metal frame;
- directly to the wall using special KNAUF glue.
Naturally, using drywall to level the surface will significantly increase the cost of painting the walls. In addition to paint and varnish products, you will need to purchase finishing material, galvanized profiles and other elements for creating a frame (crabs, hangers, screws).
Then you have to study. This will increase the preparation time for painting the walls. If financial capabilities allow, then the use of drywall will become the best solution to level the surface.
Leveling walls with help is a rather labor-intensive process. This is due to the fact that it is necessary to apply several layers of material. And each layer must dry completely.
Surface priming
Coating the walls with primer is the final mandatory stage preparatory stage. Without priming the surface, the paint will absorb more. Matte spots will appear that will stand out from the main color of the wall.
The primer is applied twice:
- after cleaning the surface;
- after sanding the finishing putty.
Applicable deep penetration, which is characterized by increased performance qualities. To apply the composition, you can use either a roller or a spray gun.
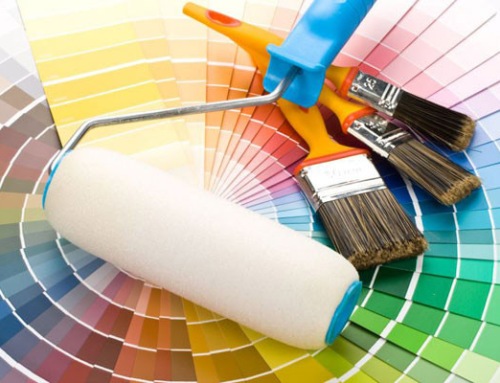
Paint selection
Most suitable material For DIY painting of walls in a living room, use water-based paint. This is explained by its excellent characteristics:
- environmentally friendly (does not contain toxins);
- no pungent odor (does not cause an allergic reaction);
- ease of use (no need to dilute with solvents and other “chemicals”);
- quick drying;
- preservation of the original appearance over a long period of time;
- diversity color solutions(suitable for any interior);
- compatibility with other finishing materials.
Water-based paints are divided into:
- acrylic;
- latex;
- silicone.
Acrylic products are in greatest demand. They are characterized by:
- minimum cost;
- resistance to fading;
- uniform application the first time;
- strength and elasticity (thanks to acrylic resin).
The main advantage of latex water-based paints is increased wear resistance. After it dries, the surface is covered with a moisture-resistant film. Thanks to latex paint, you can even seal small cracks (up to 1 mm).
The most expensive products are silicone paints. Due to its excellent moisture-resistant properties and high elasticity, the material is used for painting the walls of rooms with high humidity(bathroom, kitchen, toilet).
You can coat walls with silicone paint when the plaster has not completely dried. This is due to the fact that the material is vapor permeable. Walls on which silicone paint is applied can be washed with any detergent.
Video about painting walls:
Preparing paint for work
The primary material for painting walls has a rather thick consistency. You will have to add a small amount of water to the paint (except when creating textured patterns). To mix paint with water, it is better to use a drill with a mixer attachment.
After obtaining optimal density, one or more colors are added to the paint. The combination of colors can be done indefinitely. You just need to study the instructions, which indicate the proportions of the colors to be mixed to obtain the desired color. It should also be noted that the paint may change color as it dries.
To determine the material requirement, the length of the wall is multiplied by its width (the surface area is found). Paint consumption per 1 m² is indicated on each can. By multiplying the paint consumption by the area of the wall, we get required quantity material per layer. If two layers are applied, the amount is multiplied by another 2. Experts recommend adding 15-20% to the final amount.
It is better to paint walls at temperatures from +5ºС to +20ºС. When too high temperature the paint dries quickly. And this is fraught with uneven surface coverage and the appearance of sagging, which will become noticeable after the wall dries.
The minimum air humidity should be 80%. When humidity is low, walls dry out quickly. If necessary, you can increase the humidity. To do this, use a humidifier. There should be no drafts in the room where the walls are painted.
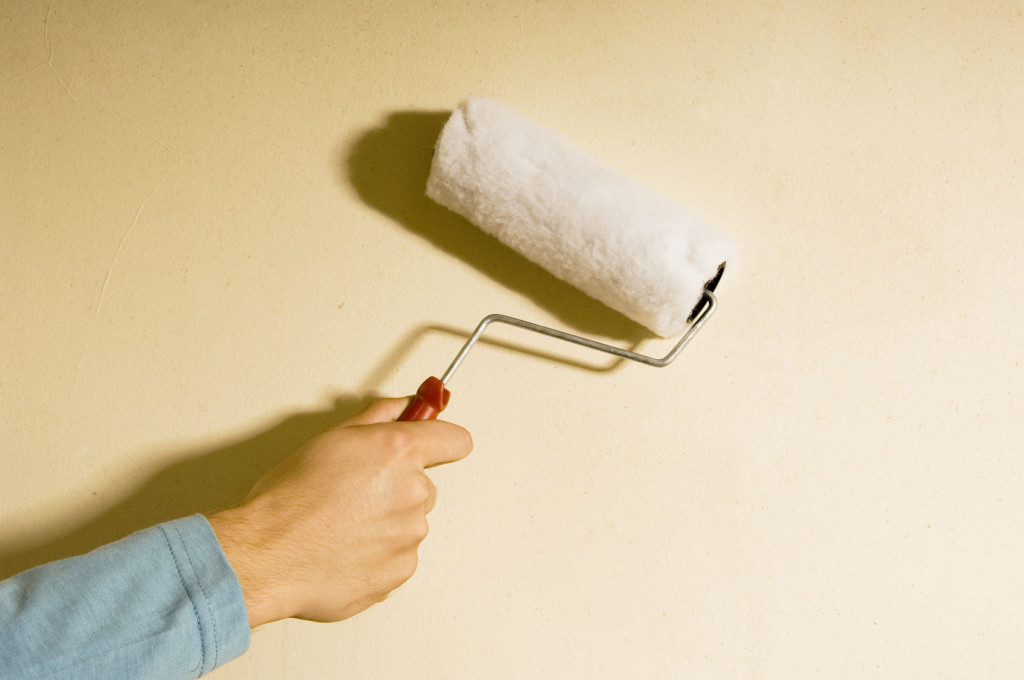
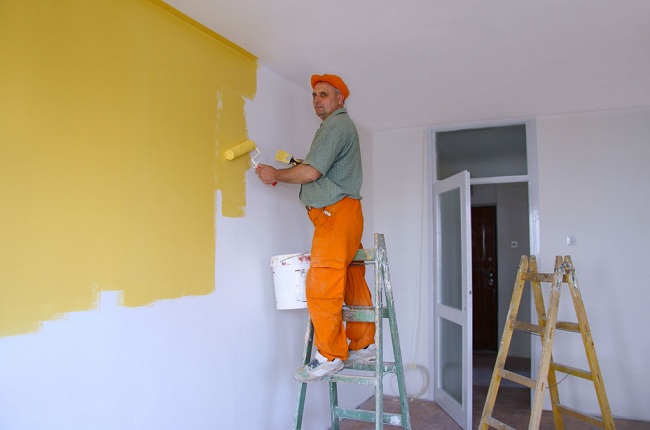
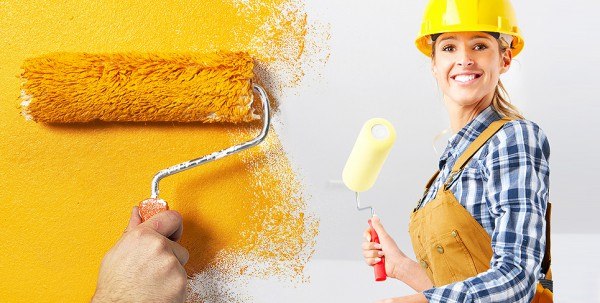
Painting the wall
The best tool for painting is a roller with medium-length bristles. With its help, the material is evenly distributed over the surface. Brushes are used to apply paint in joints and hard-to-reach places.
The technique of painting walls includes the following steps:
- a small amount of paint is poured into the tray;
- the roller is lowered into the container;
- the roller is rolled out along thick paper(it should be soaked normally);
- painting begins from the top of the wall, gradually moving down;
- apply 2-3 layers.
If you need to paint wooden walls, then you need to carry out the following preliminary work:
- treat the walls with an antiseptic;
- replace wood in areas affected by rot;
- drown the nail heads in the wood;
- cover with putty the places where the knots have fallen out or the boards have dried out;
- sand the surface with sandpaper;
- Wash off any remaining skin and wood with water.
Coloring wooden walls made with the same material as was previously finished. Otherwise, this will lead to swelling of the old paint with subsequent appearance of cracks on the wall.
Decorative painting
It is clear that walls painted in one color begin to get a little boring after a while. This problem can be solved by decorating the surface. There are several ways to decorate walls.
Steepling
When decorating walls in this way, the effect of aging of a single-color surface occurs. Flaw this method- the impossibility of hiding some wall flaws: chips, unevenness, small cracks. In this regard, due attention is paid to surface preparation.
Steepling consists of the following stages:
- covering the wall with paint of the desired color;
- preparing acrylic paint with a pleasant contrasting shade;
- adding colored glaze to contrasting paint;
- applying glaze to the wall (you can use a wide flat brush);
- touching the non-dried material with a brush (the stains will become invisible, and the surface will have its original texture);
- Lightly press the trim brush against the wall (movements are made randomly and without strong pressure).
As you pass the brush over the surface, you should periodically remove the glaze from it. If you need to create a more detailed and fine-grained aging effect, use a sponge (it must be dry).
Skin effect
This view decorative painting will fit into the interior of a living room or office. The “Skin” effect is created as follows:
- the walls are cleaned of the old coating and washed with a damp cloth;
- areas that will not be painted are sealed with masking tape;
- two layers of latex paint of the required color are applied to the wall;
- the paint dries;
- suede fabric is cut into several pieces 7-8 cm wide;
- the shreds are folded in half, connected and secured with an elastic band at the fold (that is, a suede whisk is made);
- the glaze is mixed with latex paint, which is distinguished by a darker shade of the color of the painted wall;
- dark paint with glaze is applied to a small area of the wall;
- a suede whisk is moistened in water, wrung out and passed over the undried glaze (a small layer of coating should be removed);
- strongly pronounced lines on the wall are additionally moistened with suede material.
Movements with a suede whisk are aimed at creating the natural texture of the skin: small folds, irregularities and “pores”.
Imitation of Venetian plaster
Venetian plaster - stylish option for wall decoration. But it is a rather expensive material.
The best solution would be to paint the walls like Venetian plaster:
- a large amount of paint is poured into a large container (preferably to the very edge);
- a colorful pigment is added to one of the conditional halves of the container;
- in this half the pigment is mixed with paint;
- the formation of two sides should occur, differing in shades: light and dark;
- Use a plastic spatula to scoop up light paint and apply it to the wall;
- make the same movements with a spatula as when finishing the surface with plaster (from bottom to top, from right to left);
- Parts of the wall are covered with dark paint.
As a result of painting the surface, areas with light and dark paint should alternate. To create maximum effect on top part Light material is applied to the walls, darker paint is applied to the lower walls.
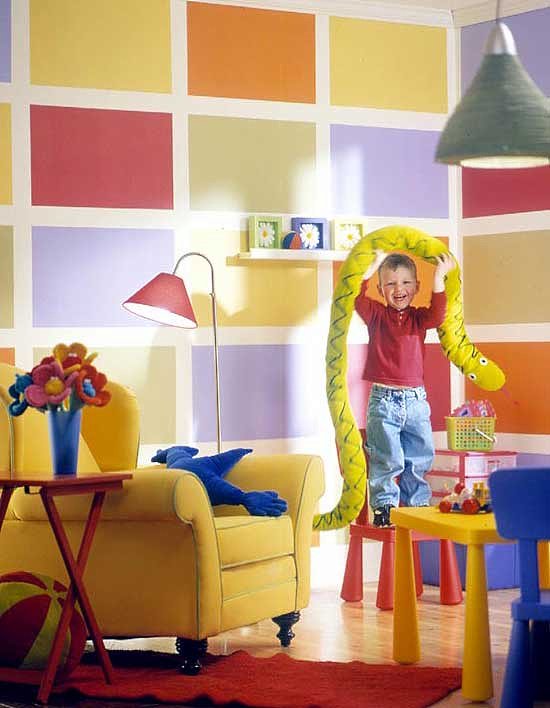
Using a cloth roller
This surface decoration creates a warm, comfortable environment. For this reason, painting walls in this way will be the best solution for decorating a children's room and bedroom. Using a rag roller, all cracks, chips and uneven surfaces are made invisible.
The technology for creating a glaze surface is as follows:
- the wall is covered with base paint;
- the coating dries;
- a harmonious paint with a slightly contrasting shade is prepared (the water-based emulsion is mixed with ordinary water);
- a clean rag is dipped into the prepared composition (there is no need to completely soak it);
- the rag is twisted into a rope;
- the paint should be evenly distributed over the roller.
Applying paint to the wall starts from the top. During painting, the direction of movement of the roller must change. To obtain a beautiful textured pattern, the tool is rotated at different angles.
Video about decorative wall painting:


