When the main renovation in the bathroom is completed: the tiles are glued, the bathtub is in place, then the question arises of how to seal the unsightly gap between the wall and the bathtub. Sealing is very important because it extends the life of plumbing products and prevents moisture from penetrating under the bathtub, causing mold and destroying the tiles.


Peculiarities
The gap between the wall and the bathtub occurs due to a mismatch between the dimensions of the bathtub and the room, uneven walls or due to missing corners. The size of the gap depends on specific situation.
At the moment, quite a lot of options have already been invented to solve this problem., we'll talk about them. How to close large gaps(more than 5 cm), small gaps, best ways resolving these situations depending on the input conditions - we will consider all this later in the article.


Modern methods of sealing joints
There are particularly popular methods for sealing the gap between the bathtub and the wall:
- using cement mortar;
- using polyurethane foam;
- seal with silicone sealant;
- plastic or tile baseboard;
- sticker of border tape or corner.


The decision to use each method must be made depending on a combination of many factors, such as:
- gap size;
- bathtub shape;
- wall material.

By choosing the right material, the sealing job will be simple, and the result will be long-lasting.
Sealing with polyurethane foam
The use of fine-pored foam to seal the gap between the bathtub and the wall is a progressive and convenient method that can be used even with large gap sizes, since this foam tends to expand greatly in volume.


When choosing foam, you should pay attention to its moisture resistance, because this is the main criterion when choosing building materials for work in damp rooms. A one-component polyurethane composition is optimal.
Sequential sealing with foam looks like this:
- cleaning surfaces from dirt and degreasing using specialized products;
- thorough drying of surfaces;
- preparing a construction gun (if this is implied by the foam you choose);
- careful distribution of foam, filling all the cracks (the container must be shaken before use);
- quick cleaning of excess foam (after drying this will be extremely problematic);
- waiting for expansion and drying (on average up to 8 hours);
- Next, cut off the foam evenly and mask the joint using comfortable material– ceramic tiles or plastic corner.

Important: when working with polyurethane foam, it is better to protect your hands from getting it on your skin.
Using curb tape
Border tape is a white polyethylene tape produced in rolls. On one side of the tape - smooth surface, coated with antifungal agents and impervious to moisture, and on the other side the tape is represented by an adhesive layer.
As a rule, curb tape is not used as independent remedy sealing joints, and as an additional decorative coating after filling the gap with polyurethane foam or cement-sand mortar.


When choosing a tape, you should know the width of the gap that you want to close and choose at least 2 times wider (since one edge of the tape rests on the wall, and the second on the gap and the edge of the bathtub).
The tape is attached as follows:
- the working surface is cleaned and thoroughly dried;
- To further strengthen the tape, it is often recommended to coat the seam with adhesives (for example, liquid nails) or use additionally silicone sealant;
- the border tape is glued evenly: so that one half lies on the wall, and the other half on the bathtub;
- for reliability, all joints are coated with sealant;
- It is also necessary to prevent moisture from entering the side during the day for drying.


Curb tape is a short-lived method of sealing joints, it’s worth remembering. It is easy to care for, but even with careful use it is difficult to extend its service life: it peels off quite quickly and loses its attractive appearance.

Using cement mortar
When using cement-sand mortar, you need to understand that this method is very economical, but is not suitable for gaps more than 4 cm in width, since it simply will not hold with a larger gap.
At larger size gap, you can use special mounting supports, for example, wooden slats, which can serve as a support for the solution.
Sealing with cement mortar is carried out as follows:
- surface preparation: the wall needs to be treated with a primer - this is done to increase the adhesion of the mortar to the wall material;
- preparing the solution itself - this is done in accordance with the instructions on the package;
- impregnating the rag with the solution and placing it in the space between the bathtub and the wall;
- after the rag has dried, apply the solution, which should be carefully leveled with a spatula;
- waiting for hardening;
- painting or covering a crack covered with cement mortar with plastic or tiled decor.


The main disadvantage of this sealing method is inelasticity. frozen solution. Accordingly, at the slightest fluctuations to which the bath may be subject, the solution may crack and cease to perform its function.
Sealing cracks with silicone sealant
Using silicone sealants, you can ensure high-quality sealing of the gap between the bathtub and the wall, but only with very small gap widths (up to 5 mm).
Bathroom sanitary sealants are suitable for the job: they have sufficient elasticity, antibacterial and fungicidal (antifungal) additives, and are resistant to temperature and humidity changes.


Another undeniable advantage of silicone sealants is the increased degree of adhesion: any glossy coating does not require special preparation for high-quality fixation.
Silicones in tubes are usually white or transparent.
The sequence of actions when using silicone sealant for a joint is as follows:
- degreasing and drying the surface;
- for ease of distribution of silicone sealant, it is better to use a construction (plunger) gun;
- the nose of the balloon tube is cut off depending on the thickness of the seam;
- silicone is applied evenly along the entire length of the gap;
- Wetting your finger in soapy water, you need to spread the sealant in an even layer;
- It is recommended to apply several layers of silicone: the first layers should be pushed deeper into the seam for high-quality sealing;
- waiting for it to dry.


Thus, it can be seen that eliminating unwanted gaps in the bathroom using silicone sealants is not difficult. You can do this work yourself without involving specialists.
Other possible options
We have discussed all the main methods of sealing seams above, now let’s talk about less popular or specific means for eliminating cracks.
- Skirting boards and borders. Skirting boards and borders from polymer materials quite common due to their low cost and aesthetic appeal. What is worth knowing about this method is that ready-made adhesive bases, often applied by the manufacturer to the baseboard, are not suitable for quality work. Therefore, when installing plastic skirting boards and borders, you should think about additionally purchasing waterproof, quick-drying glue. Plastic skirting boards hide gaps up to 3 cm wide.


Installation procedure plastic elements sealing:
- cleaning the gap from dust and dirt, thoroughly drying;
- measuring the sides of the bathtub for proper trimming of the baseboard;
- at the joints of the plinth it is necessary to trim at an angle of 45 degrees;
- we try on the trimmed border, and if everything matches, then apply masking tape along the edges of the bathtub and the wall (above the intended border) to protect it from glue;
- apply glue to the gap, proceed in accordance with the instructions on the packaging with the adhesive composition;
- install the plinth and carefully press it, fixing it for several minutes;
- remove the masking tape;
- We seal the joint of the baseboard with the wall and the bathtub with silicone compound.


- Installation of ceramic border. The most common material for cladding walls and floors in bathrooms is tiles. That's why using ceramic borders It will fit as organically as possible into the design of such a bathroom. A large selection of tiled borders allows you to make the border an attractive element of the interior, and not just the need to hide the gap.
In case of working with tiled borders You should be especially careful because the material is fragile. It is worth taking care and taking a couple of elements more than you need, so that in case of unforeseen circumstances you can replace the damaged one.


The procedure will be as follows:
- clean the working surfaces of the bathtub and walls;
- seal the gap around the perimeter using mounting foam or cement-sand mortar;
- Using special tile adhesive, lay ceramic elements and, if necessary, trim borders;
- rub all seams with the compound suitable color or use silicone sealant.

Large gaps
Sometimes conditions are created such that the bathtub is 7-8 centimeters smaller than the size of the room. Such cases require a special approach and a combination of sealing methods already known to us.
Most often, a cement mortar with a lining to fix it is used for rough sealing. The seal itself is in the form concrete surface is impractical and unaesthetic, as it can often cause allergic reactions and contribute to the accumulation of dust.

Let's look at several methods to solve this problem:
- in the simplest and most economical way finishing concrete covering is painting with acrylic or enamel paint;
- the use of plastic panels is also an economical solution;
- you can use the same material as on the walls, for example, tiles (this solution will fit harmoniously into the overall picture);


All of these methods can also be combined with curb tape or plastic curbs to prevent water from pooling in the corner of the joint.
Enough in an interesting way To close a large gap is to design not a border, but a functional shelf. This method is good both from the point of view of functionality and from the point of view of aesthetic appeal.
In this case, a metal profile frame is mounted, it must be lined with waterproof materials on top (tiles in this case will be the best choice).
Even a small gap between the wall and the bathtub can cause major problems. In the worst case, you will have to pay for repairs in the bathroom of your downstairs neighbors, and in the best case, you will have to watch mold grow under your bathroom and various unsightly insects appear. These consequences can be avoided by initial stage repairs, because main reason The appearance of cracks lies in uneven surfaces.

Reasons
The walls in the bathroom must meet at an angle of 90 degrees, otherwise a gap is inevitable. If during the repair process you notice that the toe-in angle is wider than necessary, the walls need to be leveled. The same goes for the floor: it must be perfectly level.
It also happens that the bathtub itself is installed crookedly on a flat floor. In this case, the situation can be corrected with the help of adjustable legs.

There is another reason for the appearance of the gap.
If the bathtub is shorter than the wall along which it is installed, then a gap cannot be avoided.
In this case you will have to either:
- install an additional false wall made of plasterboard;
- if the first option “eats up” too much usable space, groove the walls and install a longer bathtub.
However, if the repair has already been completed and there is no desire to dismantle the trim and start all over again, you can try to get rid of the gap after the fact. In most cases, this is not difficult, you just need to choose the most suitable method.


Gap sealing solution
Cement mortar is an almost universal remedy that can solve many problems. household problems. This is one of the most reliable, but far from the most aesthetic solution, therefore, after all the work is completed, you will need to ensure that to give the sealed gap a more aesthetic appearance:
- Clean the gap from dirt and mucus, and if necessary, remove the old finish.
- Prepare the solution. When kneading, try to achieve the consistency of thick sour cream.
- Assess the size of the gap: if it is wide enough, the cement mortar will spill onto the floor. To avoid this, first soak old rags in the mixture and fill the gap with them.

When the rag has dried a little, moisten the gap and begin to slowly and carefully pour the solution into it. Make sure that the outer part of the seam is as narrow as possible.

The method of masking the seam must be chosen based on the materials used to finish the walls. If it is a tile, then along the side you can lay a border from its remains, preserved after the renovation. If this plastic panels, then simply lay a plastic border over the seam. If the walls are painted, then paint over the seam with the same paint, having first filled it with putty.
Polyurethane foam
A faster, but no less versatile product than cement mortar is polyurethane foam. With its help, you can seal the gap between the wall and the bathtub in a matter of minutes. Unlike mortar, polyurethane foam can only be laid on a dry surface. Therefore, after you clean and degrease the gap, blot it from the inside with a dry cloth and leave it to dry for a while.

It is best to work with gloves, since polyurethane foam is very difficult to remove from the skin. And from all other surfaces too, therefore, when filling the gap with it, make sure that the splashes do not fall on the walls and the bathtub.
To work in the bathroom, choose moisture-resistant polyurethane foam; this information is indicated on the packaging.
Sequence of actions:
- Shake the can several times, insert the spout into the gap and begin to carefully pour. Remember that as the foam dries, it expands greatly, sometimes several dozen times, so do not try to fill the gap to the brim. Polyurethane foam dries in about an hour.
- After the drying time has passed, use a sharp knife to trim the edges so that the surface is as smooth as possible.
- You can disguise it using the same methods as in the previous case - facing tiles, PVC border or waterproof paint.
Sealant
The most modern remedy is silicone sealant. Available in stores large selection sealants intended for different purposes of use. Among them, you need to find a bathroom sealant, as it contains antibacterial substances that prevent the formation of mold. There are sealants different colors, but we advise you to purchase the transparent one as the most versatile option.
Sequence of actions:
- Remove any remaining building materials, dirt and slime.
- Treat the gap with a degreasing solution such as alcohol or acetone and wipe dry.
- Open the spout on the tube of silicone sealant and fill the gap with its contents, using mounting gun. The width of the line will depend on the angle at which the nose was cut. The sharper the angle, the narrower it will be. Make sure that the line is straight and not interrupted.
- While the seam is still wet, trim it by moistening your finger with soapy water.
- For greater aesthetics, the seam can be masked. We described the methods in detail above.


Within 24 hours after sealing the seam with silicone sealant, you cannot use the bathtub, otherwise all the work will be useless and the seam will quickly become unusable.
Plastic skirting boards
Plastic skirting boards- the most popular of all bathroom baseboards. They are successfully used to seal the gap between the wall and the bathtub. PVC skirting boards can be easily and quickly installed and just as easily dismantled. In addition, plastic is a fairly soft and elastic material, so this skirting board can be easily adjusted to the size of the bathtub.
In stores you can find plastic skirting boards with ready-made adhesive base. We do not recommend using them in a bathroom environment as adhesive composition, applied to them, is usually not moisture resistant. It is better to use waterproof glue designed for plastic. It should be white, or even better – colorless. Be sure to choose a quick-drying compound as you will have to press down on the baseboard until the adhesive sets.

Sequence of actions:
- Clean, degrease and dry the gap.
- Take all the necessary measurements and cut the baseboard at an angle of 45 degrees.
- Attach the plastic skirting board to the junction of the bathtub and the wall, without glue for now, and glue the masking tape to those areas of the wall and bathtub that join it.
- Remove the baseboard and coat the gap with glue.
- Secure the baseboard in place and press it down for a few minutes.
- After the adhesive has completely dried, you can peel off the tape.
- Joint plastic skirting board Be sure to treat the wall with bathroom sealant.

Border tape
Another inexpensive one modern method, not requiring special effort– this is the use of curb tape. It is made of polypropylene and impregnated special composition which prevents the formation of mold.
Pros:
- does not require additional decoration;
- It is characterized by high water resistance, so it can be safely used in conditions of high humidity.
The only drawback This method means that even the highest quality border tape will last you no more than two years. But if you use the bathroom actively, you will have to change it every year.

The width and thickness of the tape will depend on the size of the gap. Fill the pre-cleaned, degreased and dried gap with colorless silicone sealant. Next, cut a piece of tape of the appropriate size and apply liquid nails to it. Now you can glue the tape over the gap. You need to wait at least 24 hours before starting to use the bathroom.
Ceramic tiles
All the methods described above for getting rid of the gap between the wall and the side of the bathtub are suitable only if we are talking about a small gap, the width of which does not exceed 3 cm. If you are dealing with a wider gap, then you will have to stock up on finishing materials and use construction skills .
You can fill the gap with tiles. It is best to use the one left after finishing the walls. If after the repair there is nothing left, just purchase white tiles of a suitable size, so that a minimum of trimming is required. White tiles will blend in with a white bathroom, provided that you have a white one and therefore the border will be practically invisible. If you used a decorative border when decorating the walls with tiles, then you can decorate the joint with the same border.
Gaps between the walls and the bathtub usually form due to a mismatch between the installation dimensions of the latter and the dimensions bathroom. In some cases, this discrepancy may be caused by uneven walls (the exact geometric dimensions of the room are not maintained, for example, when the angles differ from 90°).
Before you seal the gap between the bathtub and the wall, you will need to familiarize yourself with by known methods sealing the gaps formed during the installation of the bathroom. In this case, the type of material from which this product is made must be taken into account. Even a small gap between the body acrylic bathtub and a wall, for example, you are unlikely to be able to seal it with silicone, since acrylic easily bends under load, which over time leads to destruction of the seal.
Pay attention! The first condition for high-quality sealing of voids between the bathtub and the walls is its reliable fastening at the installation site, which allows the vibrations of the body to be reduced to a minimum.
The method of sealing cracks and the material used are ultimately selected based on the size of the gap formed during installation, so it is this parameter that we will take as a basis when studying the issue that interests us.
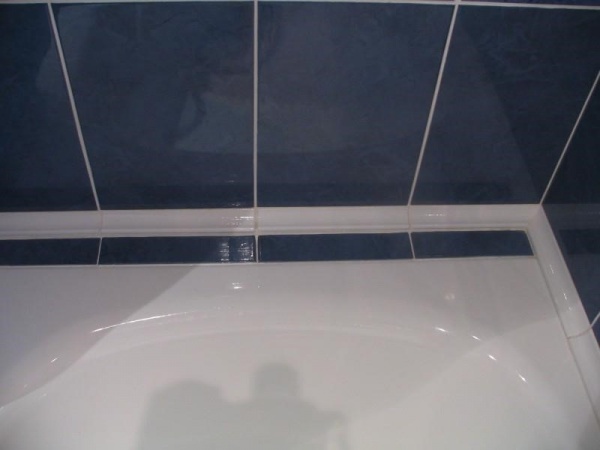
Gap up to 10 mm

To close a gap of this size, you will need to prepare a white outer corner, usually used for tiles and white silicone sealant. Operations for sealing cracks are carried out in this case in the following order:
- We cut off a corner blank, measured exactly to the length of your bathtub, and trim its ends at an angle of 45°.
- We fill the free gap between the bathtub and the wall with silicone.
- We close the seal on top with a plastic corner.
There should be so much silicone in the voids that when pressed with a corner, it appears not only against the wall, but also on the side of the bathtub. Excess silicone is then removed using damp cloth. When using an acrylic bathtub, sealing the cracks should be done after filling it with water and maintained for 12 hours.
Gap size from 10mm to 30mm

Since the maximum width of a special corner for tiles rarely exceeds 12 mm, it is not suitable for sealing gaps larger than 10 mm. In this case, choose from two options:

Installation of plastic plinth is carried out similarly to the procedures described above; the only difference is that the gap in this case is not sealed with silicone. But this is not necessary, since success this method sealing cracks is determined only by the reliability of gluing the baseboard to the walls and to the bathtub body. All that is required of you is to thoroughly dry and degrease the articulated surfaces.
All of the above is also true for the case of closing the cracks with a self-adhesive border. When installing such material, it is necessary to follow a strict order, according to which one of its sides is first glued (to the wall, for example), and only then the other.
Big gap

To seal gaps larger than 30 mm, you will have to make a frame and sheathe it moisture-resistant plasterboard. Stacked on top ceramic tiles match the color of the tiles on the walls. This is discussed in more detail in the second video.
Video
A method for designing one of the options for sealing the joint between the bathtub and the wall is presented below:
This shows how to close big gap when there is a void between the bathtub and the wall:
Photo

Just a couple of decades ago, there was a meager selection of building materials that would allow you to aesthetically design a bathroom. Sealing with cement mortar followed by application of enamel paint is the favorite method of the majority of the population in the recent past. An indispensable condition long-term operation joint without destruction was the absence of the slightest vibration of the bath. Intensive development of the chemical industry and improvement technological processes filled the market wide range products that allow high-quality and elegant sealing between tiles and bathroom joint.
Joint design options
In the process of re-equipping a bathroom, the question of the sequence of work performed regularly arises, preventing further water leakage at the junction of the tiles and the bathtub. Experienced specialists offer a lot of options for solving the problem, providing the opportunity to choose the most optimal method in a specific situation.
Planning for long-term use of the bath allows you to install its sides into the wall. After the plumbing has been properly fixed, the tiles are laid and the connecting joint is treated with grout. Such a solution has certain nuances. Complete elimination of the risk of water leakage is a significant advantage of the proposed method. Among the disadvantages is the possibility of disruption of the tile laying at the joint as a result of insufficient stability of the bathtub. The unforeseen situation of replacing a piece of plumbing will entail additional investments of financial and labor resources to dismantle the tiles and reinstall them. The chance of choosing a finishing material from a similar collection is small, so replacing a bathtub can trigger a complete renovation of the restroom.
It is much more effective not to embed the bathtub into the wall, but to use modern materials for sealing the joint. The following options have gained steady popularity:
- use of tile grout;
- use of solution;
- finishing with polyurethane foam;
- working with silicone sealant;
- installation of curbs.
Each method has certain advantages and some disadvantages, which are eliminated when several methods are combined simultaneously. A detailed acquaintance with the process of sealing between the bathtub and the tile joint will allow you to choose the most appropriate option in a particular situation.

Tile grout

Connecting the bathtub close to the wall allows you to seal the joint with minimal effort and money. Having ensured high-quality fixation of the bathtub, it is enough to seal the gap with white grout, or one that matches the shade of the tile. Long-term color retention and moisture resistance are the key advantages of the method. Additional treatment in the form of a fugue-gloss coating will significantly increase the level of protection against external contamination and rust. However, the conditions for a tight fit to the tile around the entire perimeter and stable fixation of the bathtub are not always feasible, so they resort to more reliable options.

Application of the solution
The traditional solution to seal the joint with a cement-based mortar has a right to exist. The cost-effectiveness of the long-known method ensures its continued popularity. To decorate the gap in the bathroom, you can use the remaining tile adhesive or create it yourself sand-cement mortar. Sealing the joint with plaster is also appropriate. A sufficiently thick consistency of the solution is an essential condition for a high-quality result. The joint sealing process includes the following steps:
- The surface of the bathtub and adjacent tiles is thoroughly cleaned of dirt.
- The treated area is wetted with water to increase adhesion.
- This will help eliminate the possibility of the solution falling under the bathtub. plastic mesh, used for plastering or puttying corner surfaces, fixed at the junction of the tile and the bathtub. The absence of serpyanka can be successfully replaced by other available materials fixed under the edge of the bathtub.
- After applying a small amount of solution, tamp it down.
Warning ! Sealing the joint between the bathtub and the tiles with cement mortar requires additional protection from moisture.
To increase the level of moisture resistance and give the bathroom interior an aesthetic appearance, the joint needs subsequent finishing. Experts suggest treating it with water-repellent impregnation or epoxy resin. The final design of the bath is done using tiles or self-adhesive tape.

Using polyurethane foam
The use of polyurethane foam greatly simplifies the process of removing the joint between the bathtub and the wall. When purchasing a container with the composition, make sure that it has moisture-resistant properties. Before starting work, make sure to protect your hands with gloves. If there is no protective barrier and foam gets on the skin, thoroughly rinse the body area with water, preventing it from drying out. Similar to the grouting process, the surface of the tile and bathtub in the joint area is pre-cleaned. The key to a quality result is careful actions when applying the material. Avoid contact of foam with foreign areas. After it has completely dried, the excess from the bathtub and tiles is removed by cutting with a stationery knife. In conclusion, they resort to one of the most suitable finishing methods - tiles, tape or border.

Silicone sealant
To seal a small gap between the tiles and the bathtub, silicone sealant is used as the main one. installation material. Gaps reaching sizes up to 3 cm require pre-treatment joint with polyurethane foam. Buy now sanitary sealant, preventing the future appearance of mold in the bathroom. The sequence of work to seal the gap is as follows:
- The surfaces of the tiles and bathtubs adjacent to the joint are treated with a solvent for the purpose of degreasing.
- Paper tape pasted along the joint will prevent contamination of the bathroom and tiles.
- After making a hole in the tube, attach the supplied tip to it.
- Having secured the tube in a special gun, silicone-based sealant is carefully distributed over the joint.
- The designated area between the tiles and the bathtub is filled in a single movement. It is impossible to apply an additional layer to the frozen mass.
- Prepare a soap solution and a brush of suitable width.
- Soaked in soapy solution a brush is passed along the silicone joint in order to give it flat surface. Movements must have a strict direction. Chaotic strokes will lead to the formation of an uneven surface.
A rubber spatula can be used to notice the brush. As a last resort, you can smooth the seam between the tiles and the bathtub with your finger or spatula. After the silicone joint has dried, the paper tape is removed. If it is missing, remove excess installation material from the bathtub and tiles using a damp cloth.
Important ! When working in the bathroom, take care to follow safety precautions.
Working with solvents requires that the room be well ventilated. A mask and gloves will protect against the negative effects of chemical fumes and prevent skin damage in case of contact with a caustic substance.

Borders: plastic, ceramic, self-adhesive tape
After sealing the joint with a sealing compound, care should be taken to decorative design area between the tiles and the bathtub. Most often, various borders are used for these purposes.
Plastic skirting boards are justifiably popular. This relatively inexpensive product is convenient to use for final sealing of the joint between the tile and the bathtub. Consumers are offered a choice of various models. The most common design is one that closes the joint between the bathtub and the tiles by attaching them to liquid nails. To form a joint in the corner, the plinth is cut at an angle of 45° or special fittings are used. Required condition long-term operation, refusal to use aggressive chemicals and abrasives. The second option is used less frequently. In this case, the joint is sealed simultaneously with laying the tiles. The baseboard is pre-installed - one edge is on the side of the bathroom, the second is embedded in the adhesive. Finally, the tiles are installed.


It will cost much more to seal the joint between the bathroom and the tiles with a ceramic baseboard. Advantage of the method:
- increasing the period of operation;
- resistance to the influence of chemical compounds;
- the surface is practically not scratched;
- The baseboard does not change color over time.
The disadvantages include small selection color palette. Docking is carried out similarly to plastic skirting boards.
Advice ! Ceramic products are trimmed using a grinder with diamond blade. Using a fragmented disc can cause chipping of the edges and lead to a deterioration in the appearance of the joint between the bathroom and the tiles.


The easiest way to seal the joint between the tiles and the bathroom is with self-adhesive tape. The sequence of work includes the following stages:
- thorough cleaning and degreasing of bathtub and tile surfaces;
- removing the protective film from the tape;
- easy heating of the product with a hairdryer;
- close the gap by pressing the tape.


44136 0 21
How to eliminate the gap between the wall and the bathtub: 5 ways to solve the problem with purely Slavic ease
The gap between the bathtub and the wall not only disrupts the aesthetics of the entire bathroom, but can also cause such serious problems, How the appearance of mold under the font or flooding of neighbors. And if it’s still relatively easy to overcome the fungus, then in order to pay for repairs in someone else’s apartment you’ll have to tamper family budget. Therefore, I personally decided to eliminate the cause of possible troubles even before they “knock” on my shoulder from behind.
In our realities, we can distinguish 5 main methods for eliminating the described gap, one of which I also happened to use. But I will describe them all so as not to limit your choice of means if you suddenly encounter a similar situation.
Causes
But first, I want to look at the reasons why a gap may form between the wall and the bathing tank. For what? So that you can eliminate its appearance even at the stage of installing the bathtub. In my case, this, unfortunately, was no longer possible, but this information may be useful to you:

| Description of the reason | Solving the problem |
| Absence right angle between walls where the font is installed | The situation can be corrected by leveling the wall with a layer of plaster or a sheet of drywall |
| Bathtub is not long enough to reach the opposite wall | There are two possible options here:
|
| Incorrect installation | This is my favorite situation, which requires only twisting the legs and controlling the horizontal position of the bath using a building level |

Remedies
In my case, the gap between the bathing tank and the bathroom wall was formed due to the unevenness of the walls, and at that moment there simply was not enough financial resources and time to level them. Thus, major renovation I put it off for a while, but decided to fix the problem described immediately, fearing negative consequences.
I looked into my workshop and immediately formed 5 possible plans actions that I will introduce you to:
Method No. 1: Cement
How can you seal the gap between the bathtub and the wall in any situation? Of course, the most universal material, which is a cement-sand mixture. I just had a couple kilograms of it left after concreting the pillars for the greenhouse at the dacha.
But here, however, I would like to immediately point out some disadvantages of this option:
- Labor intensity. Cement work has never been easy and clean, so everything threatened to develop into pouring a full-fledged, albeit small in area, screed;
- Questionable aesthetics. A concrete seam is not something you want to look at during the adoption process water procedures. Of course, it can be beautifully decorated, but it means additional finishing work;
- Possibility of cracks due to the mobility of the bath.
All this was enough for me to continue searching for a more suitable solution for myself. But I will describe the technology itself, since this method is still quite effective:

- Mixing the solution. I had a ready-made cement-sand mixture, which can be purchased at any hardware store, and then simply mixed with water until it becomes a mushy substance. If you have cement and sand separately, then use the following proportions to combine them:

If you use a drill to mix the solution, be sure to use a special regulator to reduce the number of revolutions its motor makes per minute. Without doing this, you will simply burn the tool, which is not designed to work with a viscous substance at full capacity.

- Arrangement of the gap. Estimate the distance from the side of the font to the wall, and if it is large enough for the solution to begin to fall into it, then do not rush to cement it. First, soak rags in the mixture and fill the gap with them;

- Applying the mixture. After the rag has dried and the cement that has soaked it begins to set, apply a layer of mortar on top, carefully leveling it with a spatula.

After the seam has completely hardened, you will need to decorate it yourself. Of course, you can leave everything as it is, but from an aesthetic point of view this will be incorrect. The finishing material should be chosen similar to that used for wall cladding:
- Tiles - lay pieces of ceramics;
- Plastic - install a plastic skirting board;
- Paint – Paint the cement surface.
Method No. 2: Polyurethane foam

I also had such a wonderful thing in my household even after installing double-glazed windows on the balcony, and I must say that sealing the gap between the bathtub and the wall with construction foam done quite easily and quickly. And although I did not settle on this option, I highly recommend it for use. It consists of performing the following steps:

- Arrangement of the gap. Although the name of the stage sounds the same as one of the points in the description of the previous method, its essence is somewhat different. The sticky substance will not fall through, so it is not necessary to seal the gap with rags, but it is necessary to clean, degrease and wipe the treated surfaces dry with a rag to increase their adhesive properties;

- Pouring foam. Now you need to shake the can several times, insert its spout into the slot and squeeze out a certain amount of content. At the same time, we must not forget that this mounting mixture will increase several times after application, so do not overdo it with its quantity;

- Trimming. After about an hour, the substance will harden, and its excess can be carefully cut off, which should be done with a sharp knife.
Decoration is carried out as precisely as after cementing.
Method number 3: Sealant

How to cover the gap between the bathtub and the wall so that you can do without additional decoration? A sealant is suitable for this purpose. I also still had a small amount of this one after replacing it. sewer pipe in the toilet.
Since masking such a seam will not be necessary, then, consequently, the price of this method of eliminating the gap will be more economical. But it also has one important limitation: you simply cannot seal a large gap. That is why this option did not suit me, although it is quite progressive.
When purchasing sealant, be sure to pay attention to the “for the bathroom” label. This type of glue has antibacterial properties that prevent the appearance and spread of mold, which is very important for a bathroom with excessive humidity.
The process itself looks like this:

- Arrangement of the gap:
- Removing dirt and mucus from the edges;
- Treat them with acetone;
- Wiping with a dry cloth;
- Applying glue. Here you need to open the tube, and choose an angle for the cut so that the thickness of the strip being squeezed out is just right for the gap. Then the can is inserted into a special metal gun, its spout is brought to the area to be treated and after pressing the lever of the tool, the glue fills the gap between the bathtub and the wall. Try to make the seam even and continuous;

- Alignment. If there are still any flaws, wet your finger in a soapy solution and correct the applied stripe.
You should know: under no circumstances use the bathtub for 24 hours after the work has been done, otherwise the applied seam will become unusable and everything will have to be redone.
Method No. 4: Plastic fillet

As a result, after examining my supplies, I decided to do the traditional Slavic thing and choose to fix the problem what I didn’t have, namely a polyvinyl chloride baguette. With this thought in mind, I went to the store.
The point is not that I wanted to complicate the task for myself and implement additional costs. I just considered this option to be the most successful for the following reasons:
- Ease of execution. There is no need to dilute special solutions or trim off the protruding excess of the finished seam; it is enough to simply install the fillet in the right place. In addition, plastic is easy to cut and bend, so adjusting the product to a specific gap is not difficult;
- No need for additional decoration. Baguettes themselves are decorative elements;

- Versatility. You can choose a model to fit a gap of any possible size;
- Variety of visual effects;

- High efficiency in resolving the issue. Special baguettes for bathtubs have a special shape that allows them to close the gap as tightly and reliably as possible. In addition, they are completely moisture resistant.

So, I bought the skirting board I liked best, which best suited the interior of my bathroom, and a special moisture-resistant transparent quick-drying glue, and then I set about the task:
- Cleaned and degreased using acetone, fillet installation location. Then I wiped everything dry with a clean rag;
- Took measurements, according to which made the cut baguette with a hacksaw. If you need to seal a whole corner, then the edges need to be cut at an angle of 45 degrees so that the connection of the planks is smooth and beautiful;

- Attached the finished piece to the installation site and glued stripes on both sides of it masking tape to prevent the formation of adhesive drips;
- Removed the fillet and applied glue to the edges of the gap;
- Returned the baguette back, pressed it tightly and held it there for several minutes until it was securely fixed;
- Removed the masking tape.

Method No. 5: Border tape

While I was choosing a suitable baseboard in the store, I came across another material that could elegantly and quickly solve the problem at hand. This is a self-adhesive border tape that just needs to be applied to the gap to hide it.
The advantages of this option:
- Ease of implementation. Removed protective film on the back side and glued the strip to the right place;

- Quite aesthetically pleasing appearance . A neat white ribbon looks quite decent against the background of the bath and without additional decoration;
- Low price. The tape is made of polyvinyl chloride, which has never been expensive.
But there is also a very significant disadvantage: short service life not exceeding two years. I don’t like to solve problems temporarily, so I finally opted for a more durable baseboard. Although if you need to eliminate the gap quickly, for example, before your mother-in-law arrives, then this is exactly what you need.
It is possible, however, to increase the service life of this option. To do this, the gap is first filled with silicone glue, and the strip itself is fixed with liquid nails. But then there's no point in talking anymore high speed and the simplicity of this method. This will look more like using sealant and then decorating the seam.
Conclusion
How to close the gap between the bathtub and the wall is up to you. I have described to you the most popular methods in our area for solving such a pressing issue. The main thing is don’t delay, otherwise you may end up making your neighbors happy free repair. So if you have a problem, arm yourself with cement, polyurethane foam, sealant, fillet or curb tape and go ahead!

The video in this article contains additional information, which is directly related to the topic presented. If you have any questions about this material, you can ask them in the comments.
August 17, 2016If you want to express gratitude, add a clarification or objection, or ask the author something - add a comment or say thank you!


