Even the most luxurious front door can go bad appearance, if the slopes around it are not made carefully. These products serve as a beautiful frame, complement and highlight the main object. Its role is played by the front door. To decide how to make the correct slopes for the front door, you need to look at its style, color scheme and design.
Materials for finishing slopes
The slopes framing the entrance to the apartment must correspond not only external features doors, but also the design of the hallway as a whole. In addition to a purely decorative function, such elements around the door serve as additional insulation. They also cover the joints between the frame and the wall.
For this purpose you can use various materials or put existing slopes in order. If the door is strong and reliable, but does not stand out in any way in appearance, it is enough to level the slopes with plaster and strengthen them. Such work is usually carried out not only from the entrance, but also in the hallway. Plastered slopes look quite neat. They can be painted in a color similar to the shade of the door itself or to match the wallpaper in the hallway.
If the walls of the house are quite thick and the slopes are wide, you can use drywall for finishing.
It will reliably close the joints between the wall and the door frame, and will also make the walls warmer. Due to this, the slopes will take on a neat appearance. Drywall can be:
- cover with wallpaper;
- cover with paint.
 This material has many advantages. The main advantage is that there is no need to level the plaster according to building regulations and then clean the wall. You can trim the slopes from natural wood
, if it is suitable for finishing a doorway.
This material has many advantages. The main advantage is that there is no need to level the plaster according to building regulations and then clean the wall. You can trim the slopes from natural wood
, if it is suitable for finishing a doorway.
Wood has always been in demand and never goes out of fashion. It combines perfectly with any interior. It can be easily tinted using modern or folk remedies. The tree will serve for many years, maintaining its decorative properties. As a last resort, you can paint the wood to match the color of the hallway.
An alternative to wood can be laminated lining made from fiberboard. It is produced in various color scheme and imitates a textured pattern various breeds tree. Accordingly, you can choose housing to suit any hallway design. But it is not recommended to finish slopes with this material outside doors, since it does not stay there for long.
Another finishing option is ready-made PVC panels. They are made in various widths and in a wide range of colors. The production of such parts and their subsequent sale are carried out by profile diagrams. They have a subway that installs panels. This finishing option looks respectable. It has good aesthetic properties. PVC panels can last a long time. But it is better to place them on the side of the apartment.
On the entrance side, it is better to use 1 or 2 finishing methods, which were discussed above. If you are confident in your abilities, then you can install ready-made slope parts yourself. Another option is the use of polymers for finishing with inside. This plastic lining. It can be easily matched to the color of the walls in the hallway. Available in stores wide range the specified material.
 Slopes are sometimes sheathed with chipboard panels. They are usually used for very thick walls. But it should be noted that today this finishing method is becoming less and less popular. This is explained by the appearance alternative materials, capable of replacing these massive panels.
One way or another, if material of the required size was found at home, you can use it to design door slopes from the inside. It should be noted that there are other materials that can be used to install slopes on the front door. They can be used to arrange planes around the door. And yet the options that were described above are the most popular.
List of basic tools
To finish the slopes you will need tools and materials that will make it possible to carry out the work carefully. What is needed for plastering when finishing the slopes of the front door:

Tools for measuring work must be prepared in advance. The list includes:
- jigsaw;
- hacksaw or screwdriver;
- hammer;
Once everything necessary is prepared, you need to move on to surface preparation and installation.
Finishing process plan
 Each type of work on finishing door slopes after installing the front door has its own nuances. Installation of the presented materials is carried out using the same technology. Some finishing methods are extremely simple. If you approach the work correctly, they can be completed with your own hands. There are techniques that can be done independently when the owner of the premises has the necessary skills to work with tools and building mixtures.
Any measures for installing slopes begin when the door leaf is installed and all the cracks between the wall and the jamb are closed. In addition, broken fragments are removed from the slopes. It is necessary to clean all areas that are crumbling. After completing the specified work, they proceed to finishing using the chosen method.
Plastering methods
If you decide to level the walls with plaster, then the process must have a certain sequence. First, clean the surface of any dirt. Prime properly. It is better to use two layers for this. The primer material is applied only after the previous layer has dried. Find out how smooth the slope angles are. If a deviation is detected, then this must be taken into account when installing reinforcing corners. There is no need to level surfaces that have slight deviations from the vertical.
Following this, it is necessary to place perforated corners at the corners of the slopes according to the level. It is better to plant them on finishing putty. This material is available in stores in finished form. It is applied to the corners of slopes. The composition serves to glue the corner and makes it possible to align it to an ideal position horizontally or vertically. The resulting excess solution leaks through the hole in the corner. Remove them immediately with a spatula.
 Once the corners are perfect, the solution under the corners is left to dry. If the surface of the slope is uneven, then before installing the perforated corners, set the direction from the door jamb. To do this, fix a narrow strip of drywall with a width of 8 to 10 mm along it. It is fixed with putty. If it is made on a gypsum basis, then it takes very little time for the material to harden. The edges of the drywall and the strips that reinforce the corner become points that are connected with putty and level the plaster.
After the elements for adjusting the wall have dried, spread the putty. Focus on the proportions indicated on the packaging. You should get a paste-like consistency. Using a spatula, throw the finished composition onto the wall. Start from the floor.
Throw a certain amount, approximately a meter high. Level up building rule. The role of the beacon in this case is played by a perforated corner and a piece of drywall glued to the wall.
Following this, the solution is poured onto the next area and leveled again. This continues until the top of the opening is reached. Puttying the ceiling area is much more difficult. This requires putty and a wide grip. A short rule is used for leveling. After this, the putty is applied to the wall above the doorway. Cover the upper zone of the metal corner with it.
After treatment with putty, the slopes are left to dry. This requires varying amounts of time. It depends on the composition of the putty and the thickness of the layer. After this layer has dried, the quality of the surface is checked. Any possible shortcomings are corrected. To do this, you need to chip away and clean the protruding irregularities. Following this slopes must be treated with finishing putty for perfect evenness.
After drying, the putty is coated work area primer. The resulting surface can be painted. You can paint it, apply decorative plaster or wallpaper it.
Plasterboard finishing
It is much easier and more pleasant to work with this material than to remove slopes with plaster. But, one way or another, you will have to work with the finishing putty. She will play the role adhesive composition for sheets of material. Instead of her use special glue for working with gypsum-based gypsum plasterboard fragments. If there is not enough space, then drywall is ideal for decorating slopes. This process carried out in the following sequence.
First, all surfaces on the slopes are measured separately. The obtained values are transferred to GVL sheets. They are used to cut out elements that will be mounted on the wall. The finished parts are mounted going in the direction from the ceiling part. For this purpose, glue is applied to the plasterboard blank in several layers. Firmly press the element to the installation site and fix it in this position with supports. They need to be prepared in advance. Cut out parts from gypsum plasterboard.
They are used for finishing walls and slopes. Apply glue in small layers to the prepared products. Press the sheet against the wall and check the level. Drywall can be fixed with driven dowels; I made through, but not too wide, holes for them using a hammer drill or electric drill.
At the corners of the slopes, in the same way as when applying plaster, perforated metal corners are secured using putty. It is used to cover all joints and level the layer. After drying, clean the surface properly. Subsequently, the entire surface of the slope is covered with a primer. To ensure an ideal plane, apply thin layer finishing putty. It should not be more than 1 mm. The material completely hides any joints and irregularities, including holes for dowels. As soon as the putty has hardened completely, sand with fine-grained sandpaper, if there is such a need.
Following this, they move on to decorative design slopes. They must be covered decorative plaster, pasted over or painted. Drywall is glued differently if it is necessary to level the surface, covering a large area of the wall. For this purpose, bars of the required cross-section or metal profiles. An alternative is angles or components U-shaped, which form the sheathing. It helps to align the wall and ensure it is in the right direction.
This method of fastening has a number of advantages. First of all, it is possible to lay insulation on the guides fixed to the wall. Subsequently, the structure is covered with plasterboard. It is screwed with self-tapping screws to the bars. The process then proceeds in the same way as in the first option.
Application of lining or panels
 There is a list of materials that are not marketed in rigid panel form. These include various types linings, MDF, fiberboard. Their technology for attaching to the wall is similar. Their use is attractive because panels make it possible to align corners, characterized by a large deviation from the norm. Algorithm for working with the following materials:
The surfaces of the slopes are primed. Markings are made in order to later attach metal profiles or bars to them. Finishing materials will be installed on top of these products. Auxiliary components are placed at a distance of 30 cm from each other if installation is carried out across the slope. When lining is used for finishing, it is necessary to fasten the products in parallel door frame. If it is required that the panels lie across the surface, the bars are fixed closer to the corner along the jamb. For a wide surface, use not 2, but up to four bars.
When the installation of the sheathing is left behind, it is necessary to lay insulation between the pieces. This can be polystyrene foam or mineral wool. Following this, installation of the selected material is carried out along the sheathing. facing material. Solid, even panels are placed end to end with each other. The lining is connected with a tongue-and-groove fastening.
A plastic lining or laminated material is fixed to the bars on the side of the lock chassis. Metal holders are used for this. They are put on the bottom flange of the groove with their protrusion and mounted with self-tapping screws or small nails with guides.
Panels with a large area are screwed to the sheathing with self-tapping screws. Their heads must be recessed 2 mm into the structure of the material. These elements are sealed with wood putty with the addition of a dye of the appropriate shade.
When the installation of the panels is completed, it is necessary to refine the appearance of the slopes with corners. They are selected in accordance with the color of the cladding. Corners are glued on the outer horizontal and vertical corners. This must also be done in the area of the junction of the door frame and the finishing material.
After installing the new entrance door, all that remains is to update them with brand new slopes. They can be integrated into interior design in different ways, suitable for decoration are plasterboard, laminate, MDF, PVC sandwich panels, as well as non-standard materials(for example, imitation natural stone). In order not to spend money on the services of a specialist, you can install the slopes yourself, following the instructions.
Plastering slopes
Slopes are most often plastered along with the entire apartment when the finishing is not completed.
Required tools:
- Spatula.
- Level.
- Trowel.
- Rule.
- Painting mesh.
- Painting tape.
- Painting corners.
- Construction mixer.
Materials:
- Plaster (dry mix).
- Finishing putty.
- The primer is liquid.
- Sandpaper.
- Water-based paint.
Do-it-yourself plastering sequence:
- Clean the surface.

- Prime.
- Install and fix the beacons using a level.
- Close the junction of the wall and the slope using a painting corner.
- Paste over masking tape entrance door and frame

- Attach the painting mesh.
- Make a solution.
- Fill potholes.
- Apply the solution to the entire surface, stretch along the beacons, then wait for it to dry and seal the cracks.
- Prime.
- Level with finishing putty.
- Wait until dry and sand with fine sandpaper.
- Paint with water emulsion.

The finishing is complete.
If we are talking about a private house, it is advisable to treat the cleaned opening with an antifungal primer before work and add a little to the solution itself.
Drywall slopes
Drywall is a popular material for finishing the slopes of the front door with your own hands. It is inexpensive, reliable and easy to install.
Required materials:
- Drywall.
- Dowels.
- Self-tapping screws.
- Profile guides.
- Glue.
Required tools:
- Drill.
- Roulette.
- A simple pencil.
- Rag.
- Level.
- Spatula.
- Construction mixer.
- Hammer.
The procedure for installing slopes with your own hands using drywall:
- Clean the opening from dust and foam residues.
- Drill slots for dowels around the perimeter at a distance of 20 cm - this is necessary to improve the adhesion of the material to the surface.
- Using a tape measure, measure the width and height of the door opening and cut out guides: two side and one top.
- Stepping back about 1.5 cm from the door opening, attach the guide to the self-tapping screws so that its narrow edge is in the inner part of the slope.
- Measure the size of the strips for the slopes and cut them from plasterboard. When cutting, try to ensure that the edge of the drywall does not crumble and is even.
- Dilute the glue to a homogeneous, thick sour cream.
- Apply the adhesive mixture in heaps to the cut-out parts of the drywall.
- Coat the dowels with glue.
- A sheet of drywall is inserted into the guide and pressed.

- Check the position of the slope with a level, then fix it for 6 hours.
- Remove any protruding glue with a rag.
- Periodically tap the surface with a hammer through the scrap.
The next day after installation, the slopes can be further processed: putty, paint.
Laminate slopes
Laminate – flooring, is often used for entrance door slopes; it does not require additional processing, it resists mechanical stress. Do-it-yourself finishing has a lot of nuances.
There are two ways to install laminate slopes:
- Frame installation. With this technology, you can insulate the opening: fill it with mineral wool or polyurethane foam. The disadvantage of the design is that the slats are placed only in a horizontal position.
- Glue installation. It requires a flat surface of the opening, or it must correspond to the dimensions of the laminate. The laminate is glued to the foam (at low pressure).

The first method is preferable for apartments, the second is universal.
Slopes made of MDF panels
The most common finish: affordable, looks good, easy to install.
Required materials:
- MDF panels.
- Wooden bars, width 3 cm.
- Dowels.
- Self-tapping screws.
- Liquid nails.
- Platbands.
- Decorative corner.
- Guide strips.
Tools:
- Hammer.
- Drill.
- Scissors, knife.
Installation of MDF door slopes - do-it-yourself installation algorithm:
- Clear the opening.
- Drill holes around the perimeter for dowels.
- Afterwards, attach the slats and guides.

- Measure dimensions and make templates for parts for slopes.
- Cut out the details.
- Install the top part onto the screws. Check that there are no gaps.
- Install into the side guides: inside on nails, outside on screws.
- Cover the outer corners with a flexible decorative corner to hide screws and irregularities.
- Cover the inside corners with decorative strips and the finishing is ready.
After finishing the work, you need to install the platbands. If there is still wallpapering to be done, they will be installed after the renovation is completed.
Advantages: the finish looks presentable, easy installation.
Sandwich panel slopes
PVC sandwich panel is two thin sheet plastic with a layer of insulation (sheet thickness 1 cm).
Materials, tools for installing slopes of PVC sandwich panels on the front door:
- PVC sandwich panel.
- Profile (starting, cover).
- Plastic is liquid.
- Roulette.
- Self-tapping screws.
- Screwdriver.
- Drill.
- Screwdriver.

Installing slopes from sandwich panels, or how to do it yourself:
- Clean the opening from dust and foam residues.
- Take measurements of the parts of the sandwich panels (length width): one top, two sides. For convenience, you can cut out a cardboard template so that there are no gaps between the parts of the PVC sandwich panels after installation.
- Slice starting profile, attach with self-tapping screws (10 cm indents) along the edge. You don’t have to use a profile: make an opening in the foam 1 cm deep, insert the edge of the sandwich panels there.
- Install the PVC top panel.
- Afterwards, cut the starting profile to the width of the slope, install it under the ceiling and at the base of the floor. This need not be done if there is liquid plastic- the cracks can be sealed with it. But do not use sealant - it will darken.
- Installation of strips of sandwich panels.
- Cover the sections of the sandwich panels with a “lid” profile. Cut and install. An overlap forms in the corners of the structure.
- Where there is an overlap, cut the profile at an angle of 45 degrees.
If desired, the space between the PVC sandwich panel and the wall is filled with polyurethane foam. This is done after installing the sandwich panels.
For more information about installing slopes with your own hands after installing the front door, watch the video
Non-standard solutions
In addition to the above standard methods using popular materials, you can use more original options that will highlight the interior, decorate the front door and surprise your friends:
- Artificial stone – non-standard finishing slopes. The main advantage is resistance to mechanical stress (if it is not a plaster model, it is fragile). Not cheap option, requires the participation of a specialist.
- Tile. A type such as clinker (imitation brick or stone) is suitable.
- Plastic panels are an affordable but unreliable finish.
- Decorative plaster – in terms of aesthetics and durability, it has no equal. But you will need to work hard to find a good specialist in this field, because this work requires creativity and professionalism.
Materials can be combined if their properties are similar (sandwich panel parts + stone, laminate + tile and others).
After entrance doors have been installed in an apartment or house to ensure the safety of the home, it is necessary to finishing work. From the outside, the entrance doors are improved with the help of platbands, and if there is damage to the wall, they are sealed with mortar. From the inside, everything needs to be done beautifully, and to hide the unevenness, slopes are made. You can make them yourself, there is nothing difficult about it. It is necessary to select the material, and then carry out all the work in accordance with the developed technologies.
Features of the design of entrance door slopes
If the doors are installed by professionals, then finishing the slopes is not their responsibility. You will either have to pay extra for such work or do it yourself. If you understand the sequence of finishing, you can handle it without any problems.
Slopes entrance doors not only allow you to give a beautiful and complete look to the entrance to an apartment or house, but also hide the attachment points of the door frame, thus increasing protection against burglary. In addition, properly executed slopes help to insulate entrance doors and increase their soundproofing characteristics.
Even the most expensive and beautiful doors will look unsightly if there are no slopes at all or they are done carelessly. When designing this element, it is imperative to take into account both the material of the door leaf and frame, as well as the design of the corridor. The slopes must fit harmoniously into the interior of the room, so special attention must be paid to the choice of material for their manufacture.
Door slopes there are:
- external. The entrance door is almost always mounted flush with the wall surface. To finish external slopes, it is enough to install platbands, and if there is minor damage to the wall, they are sealed with mortar, then the wall is covered finishing material;
External slopes are usually covered with platband
- internal. Since these elements are located inside the apartment and are constantly in sight, a wide variety of materials can be used to decorate them. different materials. Internal slopes should be in harmony not only with the material of the canvas, but also with the entire furnishings in the room.
For finishing internal slopes Different materials can be used, the main thing is that they are in harmony with the interior of the entrance area
For entrance door slopes you can use:
- plastering. It's cheap and reliable way, but to cope with it, you need to have certain skills. First you need to properly prepare the solution, and then evenly distribute it over the surface of the wall around the door frame;
- panels secured with glue. The walls are carefully leveled, special glue is applied to them, and then glued finishing panels. They may be made of different materials, but the principle of performing the work is the same;
- panels installed on the frame. This finishing option allows you to close uneven walls. The frame is made of metal profiles or wooden blocks, attached to the wall and panels are installed on it. Inside you can hide wires and other communications, install lighting fixtures or lay thermal insulation material.
What materials are slopes made from?
There are no ideal materials, they all have their advantages and disadvantages, and the choice depends only on the financial capabilities and taste preferences of the owner of the house or apartment. To do it correctly, you first need to familiarize yourself with the characteristics and features of all used slope finishing options:
- Drywall. This is a popular, but rather labor-intensive method. First, the sheets are attached to the wall, and then puttied and covered with finishing material. The result is a perfectly flat surface that can be painted in the desired color. Among the disadvantages, it should be noted that over time the paint will be smeared, and if wallpaper is glued, it may tear.
Using drywall to finish slopes is a popular, but rather labor-intensive option.
- Ordinary plaster. This type of finishing requires special skills to obtain a beautiful and flat surface. After plastering the opening, it will also need to be painted or wallpapered. The main advantage of this option is its low cost. Cons - finishing coat Over time, time can become damaged, and during operation a lot of dirt and debris can be generated.
After plastering, the slopes must be finished with finishing material
- Decorative plaster. This modern look previous material, it is applied to a previously plastered surface. You can choose textured plaster or with colored chips. This coating has a long service life and beautiful appearance. Its disadvantage is that it is expensive, and also that the work is quite dirty and labor-intensive and also requires special skills.
Decorative plaster has a long service life and beautiful appearance
- MDF panels. This is the simplest and affordable way. To install MDF panels you will need simple tools, and even a novice master can cope with such a task.
Finishing slopes with MDF panels is simple and quick
- Laminate. Laminate, like MDF panels, is easy to install. It's cheap and available material, but slopes made from it will not look very presentable and will not be suitable for expensive apartments.
Laminate is not suitable for finishing entrance door slopes in apartments with expensive interiors
- Natural wood. It's expensive and environmentally friendly material, but it is not difficult to attach. This solution is suitable when the hallway is decorated in the appropriate style. Wooden surface must be periodically treated with special compounds that protect against moisture and rot.
Natural wood is suitable when the hallway is decorated in the appropriate style
- Chipboard panels. This material has a low cost, but its service life will be short. Chipboard is afraid of moisture and high humidity begins to delaminate.
Chipboard panels are afraid of high humidity
- Extensions are ready-made special elements that are used for finishing slopes, both entrance and interior doors. You can choose a material that will exactly match the door frame. The cost of additions is higher than panels or laminate, but their appearance is more attractive.
- PVC panels. They will be cheap, we can handle it installation work anyone can home handyman. Plastic is not afraid of moisture, has a long service life, and is easy to care for. The disadvantage of PVC panels is their not very presentable appearance.
Even a beginner can finish slopes with the help of PVC panels
- Natural or artificial stone. You can create beautiful slopes from stone, which will also have a long service life and high wear resistance. The disadvantage is that laying stone requires a certain skill and a lot of time. If the slopes are finished with natural or artificial stone, then the adjacent walls must be plastered, since wallpaper or panels are not suitable in this case.
Artificial stone slopes have beautiful view and high wear resistance
- Mosaic and tiles. This is also a durable and strong material, but tiles are usually used in the kitchen, bathroom or toilet and many people do not perceive it on the slopes of entrance doors. In addition, laying tiles, and even more so mosaics, takes a long time and requires special skills.
Not all people perceive tile slopes, since this material is usually used in the kitchen and bathroom
Required tools and materials
In order to finish the door slopes yourself, you first need to decide on the method of their installation. Depending on whether the surface will be plastered or the material will be laid with frame and frameless way, you may need:

The main stages of finishing the entrance door slopes
After you have decided on the method of finishing the slopes of the entrance doors and purchased necessary materials and tools, you can begin installation. Almost any home craftsman can do this work with his own hands; it is enough to carry out all the steps in accordance with the developed technologies.
Preparatory work
Although various materials are used for finishing slopes, preparatory work in all cases they are performed the same way:

Plastering
It is best to plaster the slopes of entrance doors at the stage of apartment renovation, since a lot of dirt is generated during the work.
- Surface primer. This step is necessary to ensure good adhesion of the solution.
Primer increases adhesion of materials
- Installation of beacons. Beacons are installed using a building level. They allow you to mark the thickness of the plaster application and help distribute it evenly.
Beacons help to apply the plaster in an even layer
- Installation of the corner. Using a solution, fix the corner at the junction of the wall and the slope.
The corner protects the junction of the wall and the slope
- Attaching the painting mesh. It is necessary to increase the strength of the plaster layer.
- Application of the solution. The solution is poured over the beacons, after which it is distributed as a rule.
After applying the solution, it is leveled using the rule
- Primer of the plastered surface.
- Applying finishing putty.
- Grouting the surface. The coating is processed with a fine grater to make it perfectly smooth.
For grouting use special tool and mesh
- Painting. Usually used water-based paint, as it dries quickly and has virtually no odor.
Water-based paint is used to paint slopes
Video: plastering door slopes
Adhesive finish
You can glue different materials to the slopes, including drywall, laminate, MDF or chipboard panels. This method can be used when the walls do not have serious defects. Minor deviations from the level can be corrected by applying a layer of plaster, the thickness of which should not be more than 8–10 mm.
The process of installing panels using the adhesive method consists of the following steps:
- Base primer. For this they use special compounds, which allow increasing the adhesion of materials.
- Measurement of slopes. With the help measuring instruments measure the dimensions of the slopes and transfer them to the material used for finishing (plasterboard, chipboard, MDF, sandwich panels). Drywall can be installed both vertically and horizontally, since then all the seams will be puttied. It is better to install MDF and chipboard panels as one sheet so that there are no joints.
Slope measurements are transferred to the material used
- Applying glue. This is done in a square-cluster manner every 15–20 cm. It is not necessary to completely cover the material with glue. A film should appear on the surface of the glue; for this you need to wait a few minutes.
The glue is applied using the square-cluster method.
- Fastening panels. They are laid starting from the top edge and pressed firmly on the places under which the glue is located. The panels can be fastened with liquid nails, polyurethane glue or polyurethane foam.
The panels are installed in place and pressed well against the supporting surface.
- Finishing. If drywall was used, then after installation it is necessary to apply a finishing coat. Laminate or MDF boards no additional finishing is required.
Video: adhesive finishing of the slope
Frame method of finishing slopes
In order to eliminate the possibility of surface deformation after applying plaster or installing heavy MDF sheets, a frame method for finishing slopes is used. To create a frame, both metal profiles and wooden blocks, treated with an antiseptic.
Work order:
- The surface is treated with an antiseptic primer.
- Mount vertical profiles. The outermost profile is leveled and secured with dowels. The second rack is set in accordance with the first and is also fixed.
To increase the rigidity of the frame, transverse profiles are installed
- Install wiring and insulation. If you plan to install an electric lock, a cable is laid inside the frame to connect it. Insulation is also placed in the cells ( mineral wool or polystyrene).
- Execute interior decoration. If these are MDF boards or laminate, then finishing not needed. Drywall is puttied and painted or covered with wallpaper.
Drywall or other finishing material is attached to the finished frame
Finishing slopes with artificial stone
To decorate the slopes of entrance doors in an original way, artificial stone or clinker tiles are often used. In this case, they follow the rule: there is more stone on the bottom, less on top. This solution allows you to smooth out the transition to other finishing materials, and irregularities give the slopes a more natural look.
Sequence of work:

Video: creating entrance door slopes with your own hands
Professional finishing of entrance door slopes must be performed by qualified craftsmen. On Yuda you can order the services of such specialists, and also find out the current prices for repair and construction work. The performers registered on the site perform high-quality finishing of slopes.
Door slope finishing services
High-quality finishing of the entrance door slopes, which you order on YouDo, is carried out at the time you specify. The craftsmen will carry out the work quickly and accurately. Specialists use different types of materials, including:
- decorative stone
- laminated panels
- drywall
Services for finishing entrance door slopes include preparatory rough work, as well as connecting switches after installation decorative covering. Discuss with the contractor the need for purchase consumables. Specialists registered with Yuda will provide assistance in selecting elements for finishing.
Features of the work of masters
The finishing of the entrance door slopes is carried out taking into account the characteristics of the selected material. Professionals work with both expensive and budget options decor. Order their services if you need to finish slopes using:
- wallpaper
- paints
- putties
Craftsmen also install plastic slopes. If necessary, specialists attach cable television wires around the perimeter or hide them along with the electrical wiring. Rough finish includes crack removal cement mortar, surface leveling. Specialists carry out insulation of portals and installation of waterproofing.
Yudu performers achieve an absolutely even and neat decorative coating. Finishing the slopes of entrance doors lasts a long time.
Prices for professional services
Prices for the services of specialists registered with Yuda are low. In the shortest possible time you will find a suitable contractor. The cost of work depends on:
- type of selected material
- difficulty of the task
- urgent need to complete work
You can also order other repair and construction services on youdo.com. Craftsmen inexpensively install entrance doors, lay laminate flooring and remodel rooms.
When changing doors in an apartment, a person inevitably faces the question: “How to finish door slopes?” Even if the door installation is carried out by an invited specialist, he is not your assistant in this matter.
The master will only install the box level, fill the seams with polyurethane foam, and hang door leaf, inserts the fittings - and that’s it. What to do next, you will decide for yourself.
We'll tell you about everyone possible options finishing slopes, and how to do it yourself. There are several types of materials that can be used for this purpose.
Most often, this method of leveling the slope is used when the walls of the premises are also sheathed with plasterboard. Depending on the width of the slope and the degree of its unevenness, finishing can be done using two methods.
So:
- If assembly seams small and the slope is slightly damaged, parts cut from a gypsum board sheet can be glued using gypsum glue. To do this, the surface on which the gluing will be carried out must be thoroughly cleaned and covered with a layer of primer.

- Naturally, you need to cut out the details of the slope as accurately as possible, taking into account the angle of the slope. Installation begins with the installation of the side panels.
Dilute the dry adhesive mixture with water, as directed by the instructions on the package. Apply the finished glue in a continuous layer to the slope part and press it against the prepared surface. - When the panels are installed, they must be fixed masking tape and let the glue dry. Then all the seams need to be puttied and then cleaned with sandpaper (zero).
After applying another layer of primer, the slope is ready for subsequent finishing.

- The second method for finishing door slopes is to install plasterboard panels on a frame made of aluminum profile. It is more complex and is used when frame cladding walls of the room, which significantly increases the depth of the slope.
- This is the prerogative of specialists working with drywall - few people can do this on their own without certain skills.
To protect the corners of the slopes from accidental damage in the future, decorative plastic corners. This applies not only to plasterboard slopes, but also to plaster and plastic ones.
Plaster slopes
Considering that in most residential premises the walls are plastered, it is quite logical that finishing the door slopes with your own hands will be done in the same way. No special knowledge is required here, only some tools are needed, without which flat angle it won't work.
Tools and materials
To mix the solution, in addition to the container, you will need a drill with a “mixer” attachment. To ensure straight lines for the slope, you need: a two-meter building level and a rule.
You also need two spatulas: one with a width slightly exceeding the width of the slope, the second smaller. To prime surfaces, it is convenient to use a flat brush.

So:
- If you do not plan to use plastic corners for subsequent finishing, protect external corners the slope can be done differently. For this purpose, a perforated metal corner is also used, which, before finishing the door slopes, is attached to the base surface of the slope with “liquid nails” glue or polyurethane foam.
- To strengthen the slope plane, or opening without a door, it is used plaster mesh made of fiberglass. And there is a version of a corner combined with a grid into a single element - it is very convenient to use.

- To prepare the solution you will need to purchase dry gypsum plaster, diluted with water to the desired consistency. To save solution, you may need polystyrene foam.
- If there are deep potholes in the slope, or its thickness exceeds two centimeters, pieces of foam plastic are placed in the most deep places, and a layer of plaster is applied on top.
- In order not to spoil the door frame, its surface is first covered with masking tape. Only after this can you begin priming and plastering the slope.

The last stage of rough finishing of the slope will be treating the plastered surface with fine sandpaper to achieve smoothness, and another layer of primer. To see how it is made plaster finishing door slopes - videos, of which there are many on the Internet, will help you a lot.
Plastic slopes
The easiest way to finish the slope is plastic. The price of this material is the lowest compared to others.
The only “but” is that plastic slopes will not look harmonious everywhere. It is most advisable to finish the slopes of windows and doors with plastic, if the window, door, or wall cladding of the room is made from it.
Ideal option Such finishing is usually used for kitchens, loggias, and bathrooms.
So:
- The most important thing when working with plastic is to achieve the most even and accurate cut possible. For this it is better to use electric jigsaw, not a knife.
Naturally, the measurements must be taken accurately, then it is much easier to adjust the parts to each other.
- For window slopes White sandwich panels are most often used, and for finishing doorway Any PVC panel will do. If this is a balcony door, the trim of the slopes of which is made of colored plastic, then the slopes of the window next to it are decorated in the same way.
In the picture above clear example such finishing. - If doorway during dismantling old door suffered greatly, then before finishing the door slopes with plastic, it is better to first remove plaster slope with a margin of 1 cm. There will be no need to grind it under plastic, and the solution can be used not gypsum, but cement.
- If there is no significant damage to the opening, the potholes can simply be filled with foam. The same is done when MDF panels are used for finishing.
- To install the PVC panel, a plastic starting profile is fixed to the door frame with self-tapping screws. The side parts are installed first, and then the horizontal part.
Any universal adhesive designed for working with this material is applied to the plastic. - The panel is inserted into the groove of the profile and pressed tightly to the surface. Then the glued part must be further fixed until the glue dries completely.
You can do this with masking tape, or just prop it up with something.

When the panels are installed, the seams between them must be filled with sealant and then closed decorative corners. This finishes the slopes on balcony door finished.
Wooden slopes
Considering that interior doors are made of wood, it is quite logical that the slopes can be made of the same material. This doorway design will look harmonious in any interior.
So:
- To finish the slope, you can, of course, use solid wood panels, but most often veneered or laminated MDF is used. Suitable and regular laminate, used for flooring.
The main thing is that its color is perfectly matched to the color of the door. - Installation technology wood panels similar to plastic, only instead of a guide profile, there will be strips that are attached to the base surface with dowels. Next, the panels are screwed to the slats with self-tapping screws, not forgetting to apply glue to the back side.
The joints between the panels are also sealed and covered with a corner.

- There is another option: when buying doors, you can immediately buy additional strips in color. Sometimes they come included.
They are made of chipboard covered with PVC film that imitates the texture of wood. - Extensions can also be used if the width of the doorway is larger than the width of the frame. Since these strips are attached directly to the frame, the extensions are installed in the groove located on the back side even before the door is installed.
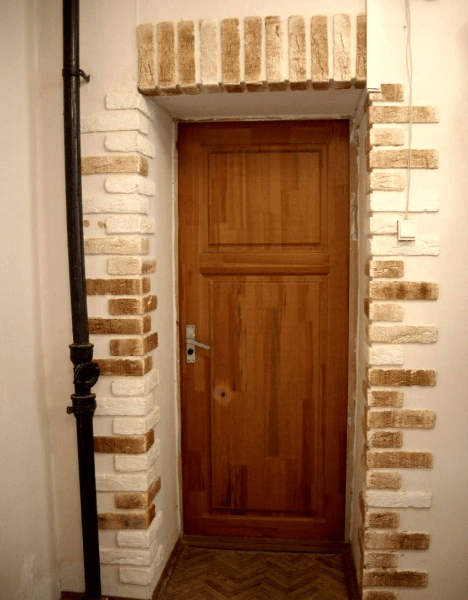
Sometimes door slopes are trimmed with decorative stone. This option is more suitable for entrance doors.
Indoors, such finishing is rare - mainly in design projects, yes in the interiors of mansions. The floor or fireplace can be laid from the same stone, and appropriate accessories can be used to decorate the room.
In this case, the slopes from decorative stone look original and appropriate.


