Decorative plaster for interior wall decoration is now enjoying unprecedented popularity. It is widely used in decorating facade surfaces, but we will talk about what to pay attention to when working inside the house. Applying decorative plaster allows you to get a unique design ordinary apartment or a country mansion.
You can independently choose any color and texture to suit any style direction. The surface withstands any mechanical stress and is easy to clean. In addition, it performs a practical function: it softens temperature and humidity changes, and serves as additional sound insulation.
Types of decorative plaster
By chemical composition basics they are divided into:
- Acrylic. They retain their original appearance for a long time, but become easily dirty during use.
- Mineral. They are not afraid of moisture. Can have a variety of colors. Lacks elasticity.
- Silicate. Slightly more expensive than those mentioned. But durable and flexible. They are easy to care for.
- Silicone. They deserve the highest rating, because... durable and reliable for a long time.
One more classification of modern decorative plaster can be made, depending on the type of its composition and the effect it gives when applied to the wall:

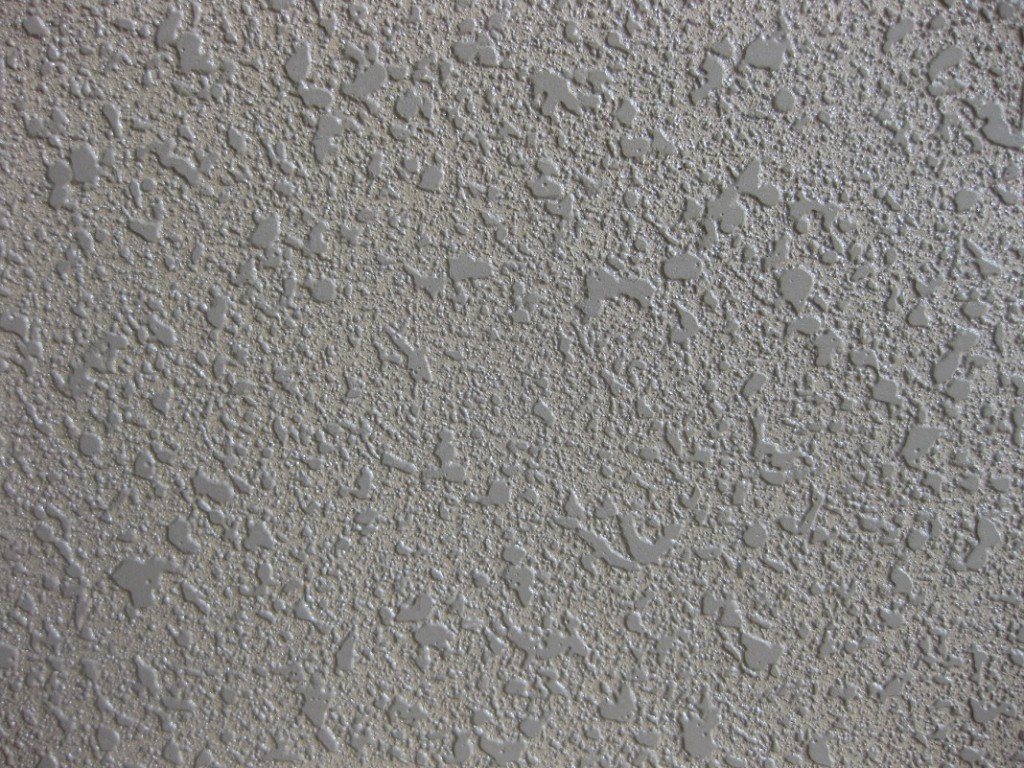
- Structural. This plaster mass may have some inclusions and additives, for example, granules, small pebbles, wood fibers. They are usually water-based, very plastic, and can be worked with any tools. For non-specialists, they are convenient because they are already sold finished form, they do not need to be diluted and mixed, checking the proportions. On the Internet you can find many options on how to achieve unique design using such a composition.
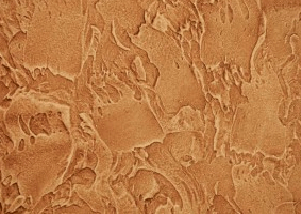
- Textured. The surface can look like wood or crumpled paper, repeating the structure of hewn stone. As in structural, various fibers, mica or stone chips can be used. The main ingredient is lime flour or polymer materials, which gives a more pronounced relief that does not crack over time.
- Venetian. Imitates a marble surface. It has a very expensive look and can be tinted in any color. The base is also a water emulsion and slaked lime; the use of marble chips gives an imitation of the “pearl” effect. One of the advantages is water resistance, as well as practicality and fire safety. As a rule, beautiful view achieved by using two shades.
- Flock. This is an imitation of a woven covering, one of the modern decorative plaster techniques that uses silk fibers. The technology used to create an expensive design is complex, consisting of several stages.
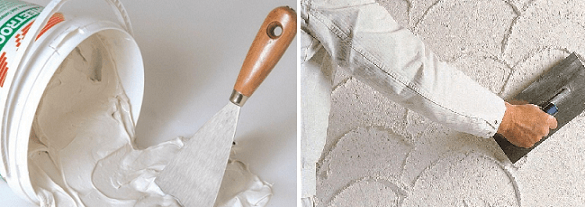
What tools are needed?
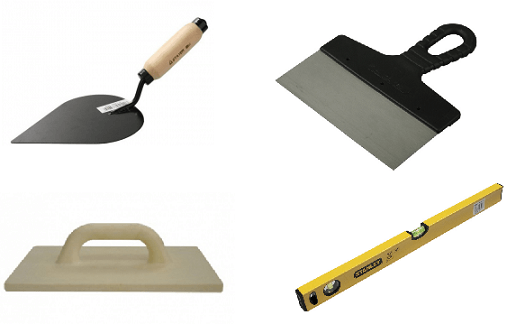
To obtain the desired texture, you need to prepare the tool and that’s it necessary materials in advance. You must have a trowel and a rule, several spatulas, a grater, a level and a plumb line. Depending on the effects you will achieve during your work, the set of everything you need may change.
Perhaps a finishing line will be added acrylic putty, one or more structural rollers, polyethylene, masking tape, brushes and brushes of certain sizes, regular or coral sponges, a cuvette, cotton rags.
It all depends on what type of finish you are looking for. If you have never dealt with such an activity before, study a master class on decorative plaster. Before you start, prepare a piece of plywood or some other material on which you can practice your hand.
Alignment of walls

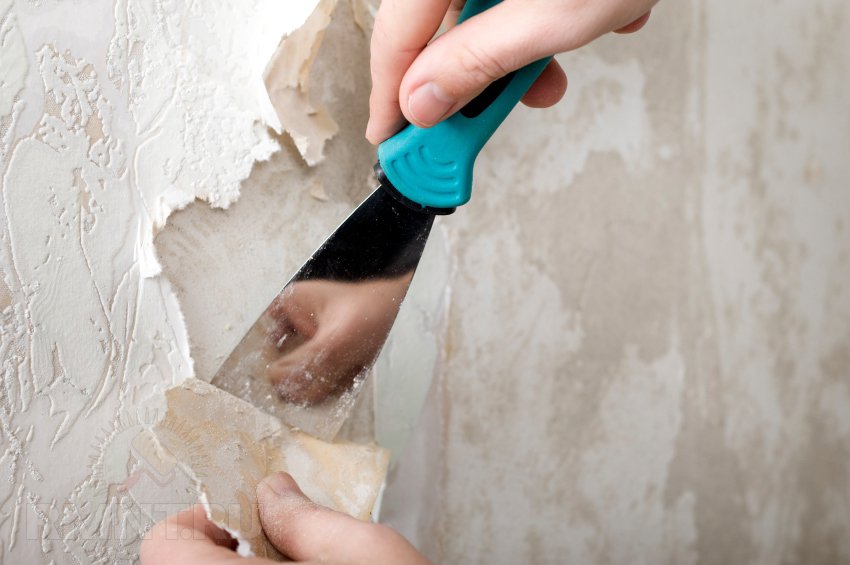
Application of decorative plaster requires careful preliminary preparation. Before work, the walls should be thoroughly cleaned of paint and wallpaper, all cracks should be repaired, voids should be identified by tapping, all old crumbling coating should be removed, and all bumps and recesses should be ideally leveled. If there are large cracks, they need to be repaired.
Treat the entire surface with a steel brush, then with a soft brush. You can also vacuum it. Acrylic decorative plaster, for example, tends to repeat all the irregularities of the wall. Therefore, you should achieve a perfectly flat surface. After leveling, the walls are coated with a primer, after which they wait until completely dry.
Application methods
Each type of composition determines the order of work, special tools and methods of applying it to the walls of the house. The types of textures dictate the features of working with a particular type of surface. Do not apply the composition in the middle of the wall. How to apply decorative plaster correctly?
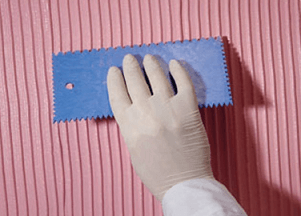
Firstly, it must be stirred thoroughly. Then, using a spatula for decorative plaster, it is applied to the trowel and distributed evenly, from one corner to another, over the entire area. The thickness of the layer should not be more than 2 cm.
You can also use stamps, for which they use structural bolsters for decorative plaster with a wide variety of patterns, metal brushes made of thin wire, trim the surface with a brush or sponge. This decorative plaster imitates stone.
The spraying technique involves the use of a dowel, which is hit with a broom, as a result of which the composition is sprayed onto the wall. In Italian finishing, a second layer is sprayed on top of the leveled first one, using a combination of several colors. A similar technology is used in decorative plaster using the “snowball” technique.
“Sgraffito” is a method of covering walls, in which, using rollers for decorative plaster, you need to apply several layers plaster mixture. Subsequently, its dried surface is “scratched”, giving an unusual effect.
Types of textures
One of the most simple technologies to apply decorative plaster is to apply a film to it. It should be larger in size than the wall being decorated to create more folds, and this work will be easier to do with two people.
If you decorate the second wall of the house on the same day, it is better not adjacent to it, so as not to spoil the design. The film is removed after 15 hours, then you need to let the wall dry. Only after this is the final painting carried out. On a fresh putty surface, texture can be obtained using the most common means at hand.
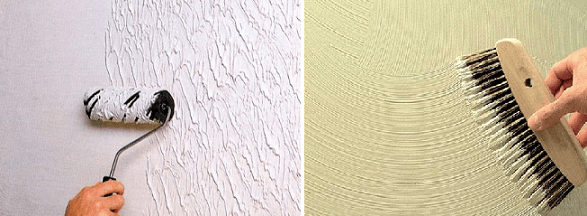
Using a roller
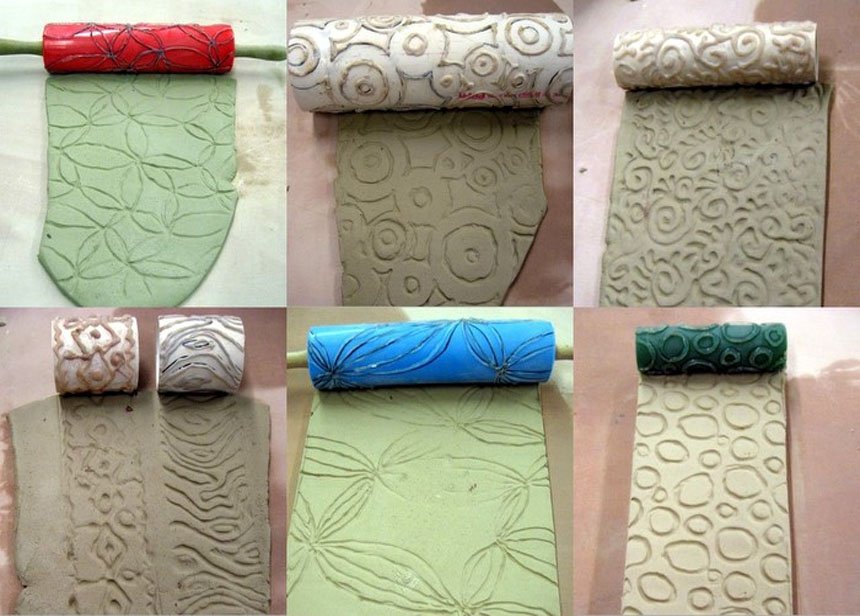
Rollers for decorative plaster can be either with a factory attachment or made with your own hands from foam rubber, polyethylene film, rope, coarse fabric, fur, etc. Decorative plaster, its wet layer is processed with a roller with a pattern you like. Using a roller you can achieve a variety of textures and reliefs: stone or brickwork, with imitation of wood fibers or mat weaving.
Using a stencil

Decorative putty plaster processed using a stamp (“Africa” or “Safari”) is similar in technique to that produced using a roller. The base layer is impacted with a special tool, the desired impression is obtained, which is then further processed with a flexible stencil, sandpaper, then again with several layers of paint of different colors, using decorative plaster rollers.
Then the surface is cleaned again, and at the very end it is processed special composition. For gloss and wet effect, decorative plaster varnish is applied.
Using a comb
Perhaps the easiest way to get the finish decorative plaster. A regular soft or harder brush creates a relief. The design of such a finish may vary, depending on the force of pressing the instrument, how much different shades paint is applied.
Application technologies
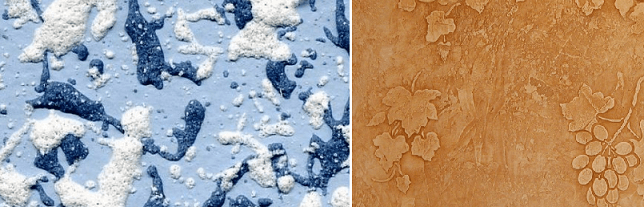
 Imitation various types natural texture, application various techniques provides great variety for non-traditional home decoration. Decorative plaster imitating stone, with a sand effect, imitation of reptile skin, cracks, and other unique designs looks unusual. Decorative plaster “rain” is the easiest to use and has a good decorative appearance.
Each time, craftsmen find new techniques and ways to apply it to create a relief image and a unique design. This can be helped not only by regular putty plaster, various rollers and colors.
Bark beetle texture
Achieve interesting drawing surfaces can be done not only with the help of tools. Decorative bark beetle plaster resembles the texture of wood eaten away by insects, and this effect is achieved by coating with a special type of decorative plaster.
This finish resists moisture, temperature changes and significant mechanical stress so well that it can be used for work outside the building. Decorative bark beetle plaster can be made on a gypsum basis or using acrylic components.
Marble chips are most often used as granules, which imitate beetle-eaten wood.
Mosaic wall decoration
This technique uses a polymer as a base and binder. And the filler is crushed marble, malachite, and granite. The smaller one is used and gives beautiful effect in decorative plaster for interior work, and the large one is outside the house. Finishing with mosaic plaster can be used on various coatings, which thanks to it can breathe, which prevents the development of mold, mildew, and other microorganisms.
Silk decorative plaster looks very beautiful, giving an imitation of a silk surface. If you try to look at the wall from different sides, then thanks to the pearlescent fillers in the composition, you can admire the play of light and the apparent transparency of the walls. The design of premises decorated with its help will delight both owners and guests.
Liquid decorative plaster, or liquid wallpaper, is convenient for use on concave and curved surfaces, contains natural ingredients, cellulose and cotton, is available in liquid or powder form, and is very environmentally friendly.
Decorative paint - plaster with the effect of wood, stone, leather or velvet and silk, playing with rays of light, creates an atmosphere of wealth and luxury.
Making your own mixture

If the desired type decorative putty If you haven’t found or don’t have a suitable color scheme, you can make it yourself. The basis is gypsum decorative plaster. For 6 kg of putty you need to add 200 g of PVA glue. It will take about 2 liters of water. The mass needs to be mixed thoroughly. The mixture should be prepared just enough so that it does not remain and harden.
It will not be possible to reuse it by diluting it with water. Compliance the right technology When creating decorative plaster, using exactly the recommended amount per m2 is a guarantee that it will last a long time, will not crack, and will not suddenly fall off.
The instrument must be held gently and confidently; you should not work on one area for a long time; you may lose the desired effect, because The coating dries very quickly. The joined areas should look like seamless decorative plaster; there should be no visible boundaries or layers.
Dry decorative plaster is made using cement based. According to the recipe, it needs to be poured into a container with water (not vice versa!), mixed thoroughly, and used immediately after preparation; after 1.5 hours it will already begin to set.
Lime paste is prepared by diluting dry lime warm water in a ratio of 3:1. Let sit for 24 hours.
Some nuances should be taken into account at the finishing planning stage.
Acrylic plaster, for example, is vapor-tight. Therefore, you need to think about in which rooms (bathroom, kitchen, bedroom) they can be used and in which they are not. The same acrylic contains resins in its composition, which causes flammability.
Some are supposed to contain gypsum, but since it hardens very quickly, it is not always convenient to work with. But it promotes porosity and allows steam to pass through. Mortars containing cement or lime have high strength, but low elasticity; when drying and shrinking, they can crack.
The choice in favor of plastering walls is dictated by the simplicity of the work and the effectiveness of the final result. Wait for it to dry completely and enjoy the fruits of your labor.
There are a lot of materials for decorating walls, but decorative plaster is the leader in simplicity and effectiveness.
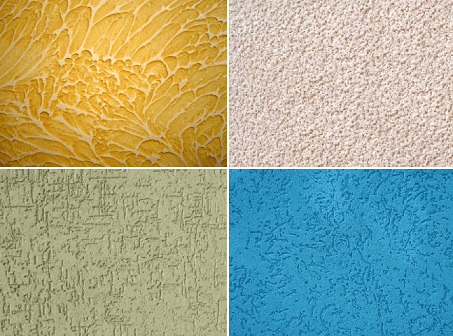
Based on its composition, it is divided into three types: structural, textured and Venetian.
Structural
Grainy plaster with small granules is structural. For indoor work, it is better to choose a base based on odorless water.
Not required for application perfect surface, only clean and always dry. Then treat the wall with a primer, when dry, apply plaster. Apply a layer of plaster in a circle using a trowel. After 3 hours there will be a durable coating that will completely harden in a week.
Textured
Compositions with which you can create a relief are called textured plaster. They are easily recognized by their imitation of cut stone, wood... Fillers made from granite chips, marble, polymers or fibers affect appearance. They don't crack when dry.

Applying this decorative plaster requires preparation: you need a flat wall that must be dry and clean. Then primer, when dry, you need to apply paint for good adhesion.

The plaster must be applied in 1-2 layers using tools. If the pattern is more complex, you will have to apply more layers, but thinly. For protection and pearlescent shine, transparent paints or wax are needed.
Venetian
This plaster is almost transparent and contains marble flour. For finishing with decorative plaster you need flat wall, can be painted in any shade. The main difference is that it is waterproof, odorless, as well as fireproof, quick drying and environmentally friendly.
After priming, the surface should dry well. Use a tool to apply the mixture to the surface. When the layer dries, remove unevenness in each layer (from 4 to 12). Cleaning is carried out in a circle using sandpaper. Finally, coat it with wax for shine.

Original "antique"
It looks a little shabby, rough to the touch. Artificial mixtures containing more friction will give a lighter “worn” shade. These mixtures can also be used in outdoor work. When dried, they produce an environmentally friendly, fire-resistant film with micropores.

The composition of mixtures for facades is slightly different from internal decorative plaster of walls in that they are water resistant and do not react to temperature changes.

Preparatory work
First you need to evaluate the wall before covering the walls with decorative plaster, just like before painting. Then the walls must be primed with a mixture of latex, which dries in an hour.
After masking tape we glue the frieze on the ceiling, wallpaper - everything that comes into contact with future work.
The mixture must be applied from corner to corner, do not throw it in the middle of the wall. The acrylic putty is mixed well in a bucket until it forms a homogeneous stretchy mass. Using a spatula, we begin work from the corner in semicircles, all over the wall, one layer no thicker than 2 mm.
Then we take more polyethylene over the wall area, start from the corner, as if gluing it to the putty, it’s more convenient to do this together. We create a lot of folds on the film.

When the walls are covered with film, after 15 hours the putty dries, you need to remove it. Under this film from the putty, moisture will evaporate extremely slowly. If it remains soft in some places, let it dry for another day without polyethylene.

Important! Cannot be used heating devices(fan heater, etc.) for drying, cracks may appear.
When completely dry, use the edge of a spatula to remove any pieces of texture that break off. There is no need to be afraid, the dried putty is durable, and the excess will not fall off.

Then you need to sweep away the dust from the wall, and re-stick the tape (painting tape) in its original place. This is the easiest way.
Coloring
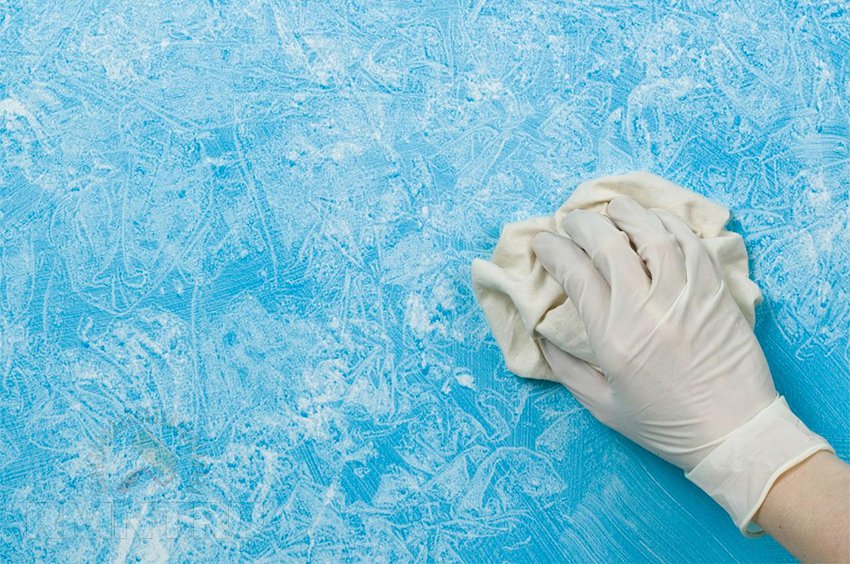
After applying the selected plaster, you will need wax with a coloring pigment. You need to add water 20% of the total volume of colored wax, stir.
It is better to apply wax to the walls with a roller or a sponge to distribute the wax evenly. Another sponge, well soaked in clean water, we need to walk lightly along our wax-covered wall.

Next, continue to rub with a damp sponge until texture patterns appear. Please note that bright spots should not appear. 15 minutes after waxing, be sure to wipe it lightly with a damp cloth. white so that the texture appears.

After coating with wax, the wall dries in about 4 hours. Then cover acrylic paint with mother of pearl, always water based. Dilute the paint with plain water in a ratio of 40% to the volume of paint. The light will play beautifully on the wall with a metal tint (silver, copper or gold).
You just need to remove the tape and the job is done.
Decorative plaster can also be used to decorate ceilings, but this will require special skills.
There are many ways to decorate walls with different types of plasters.
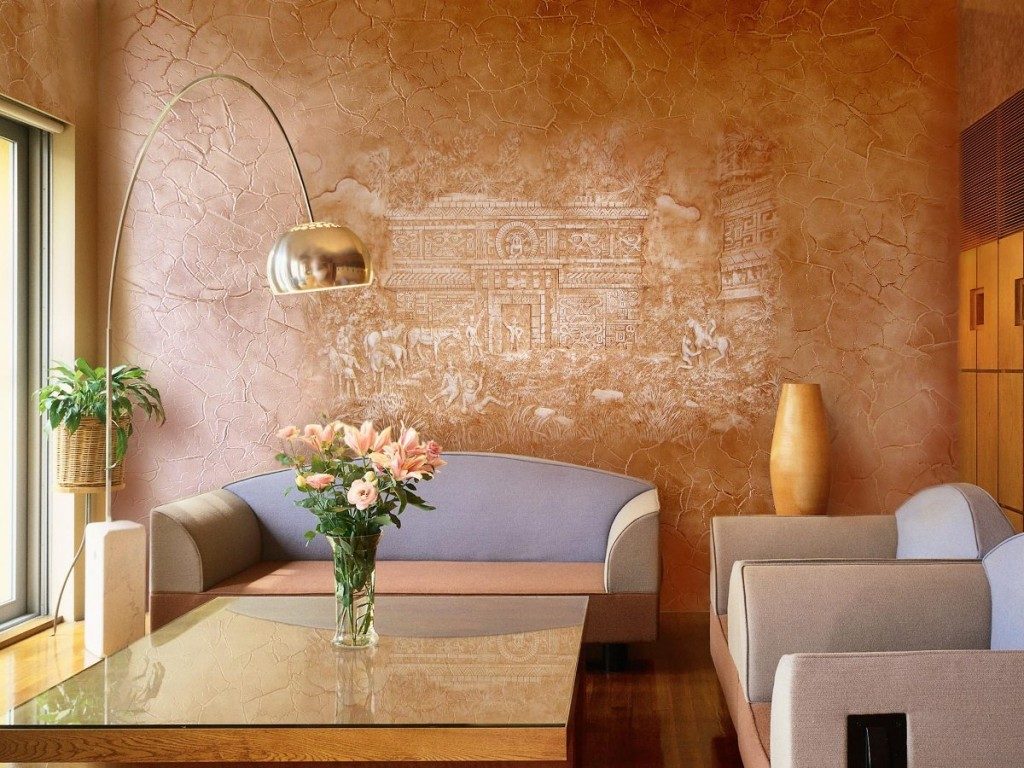
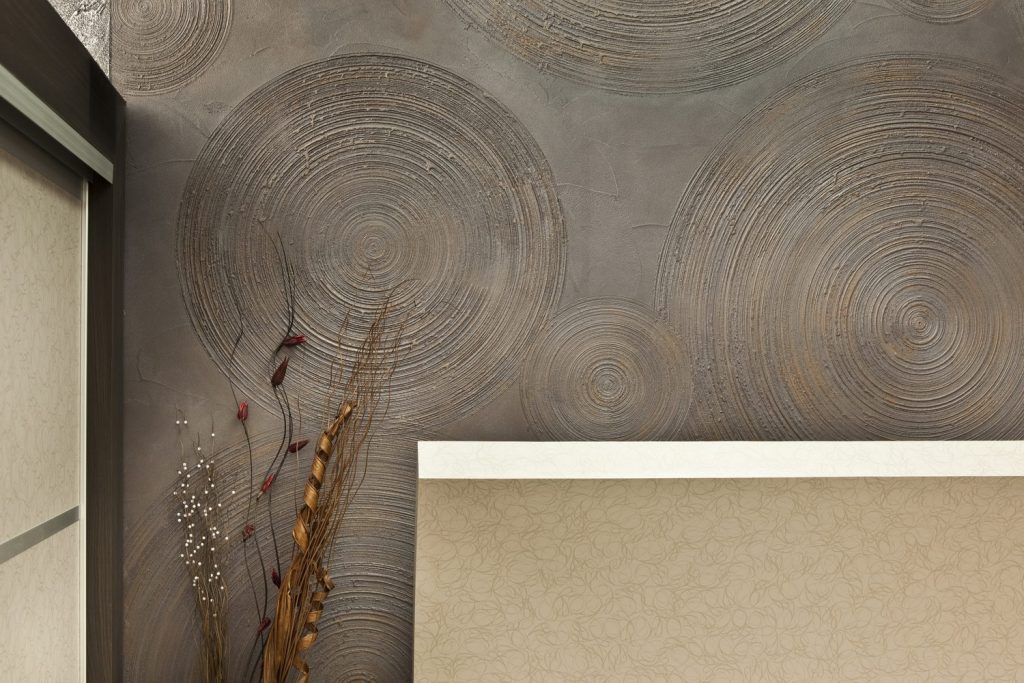
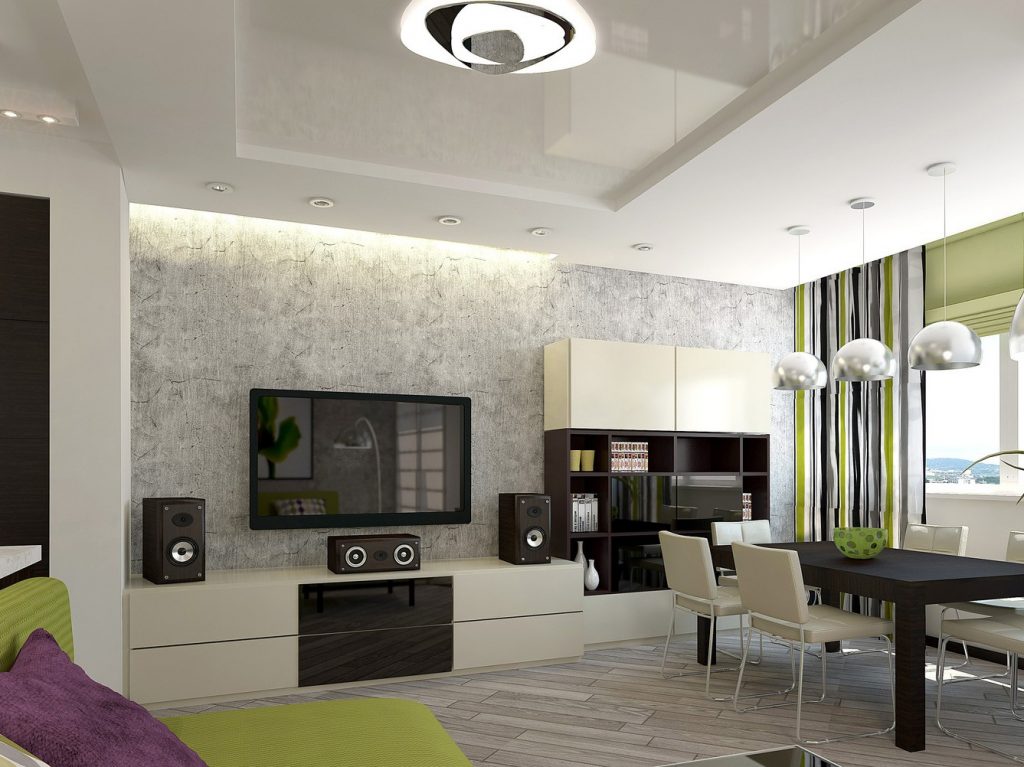
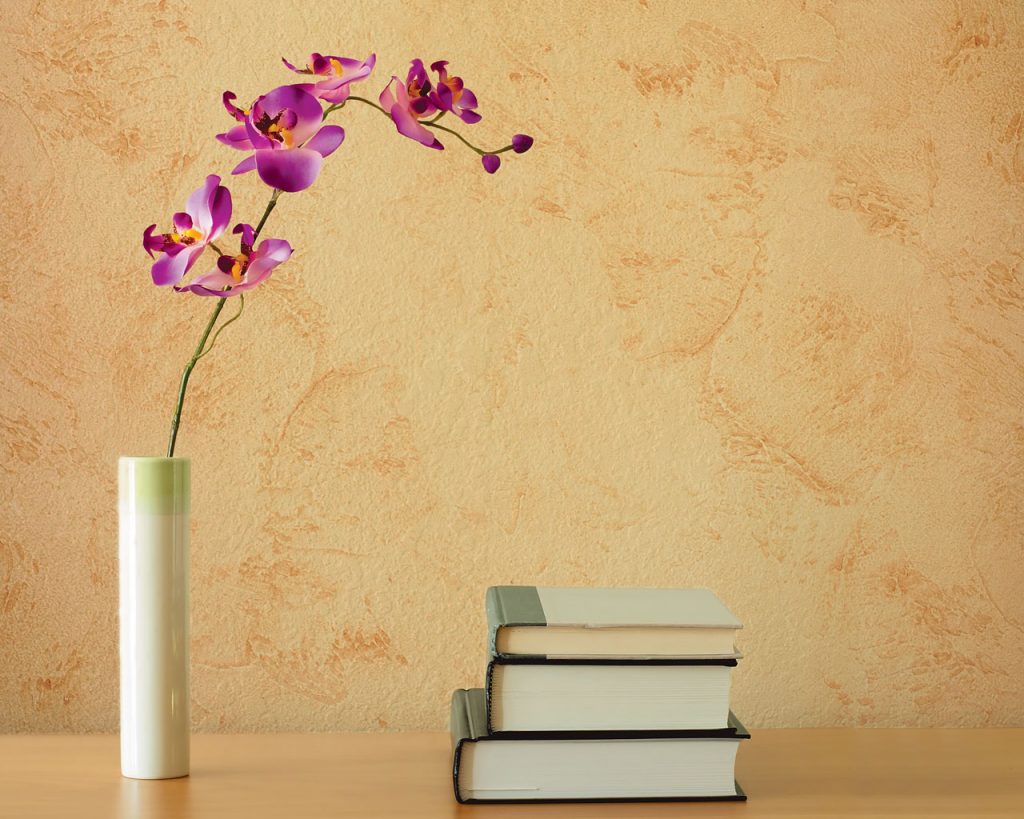
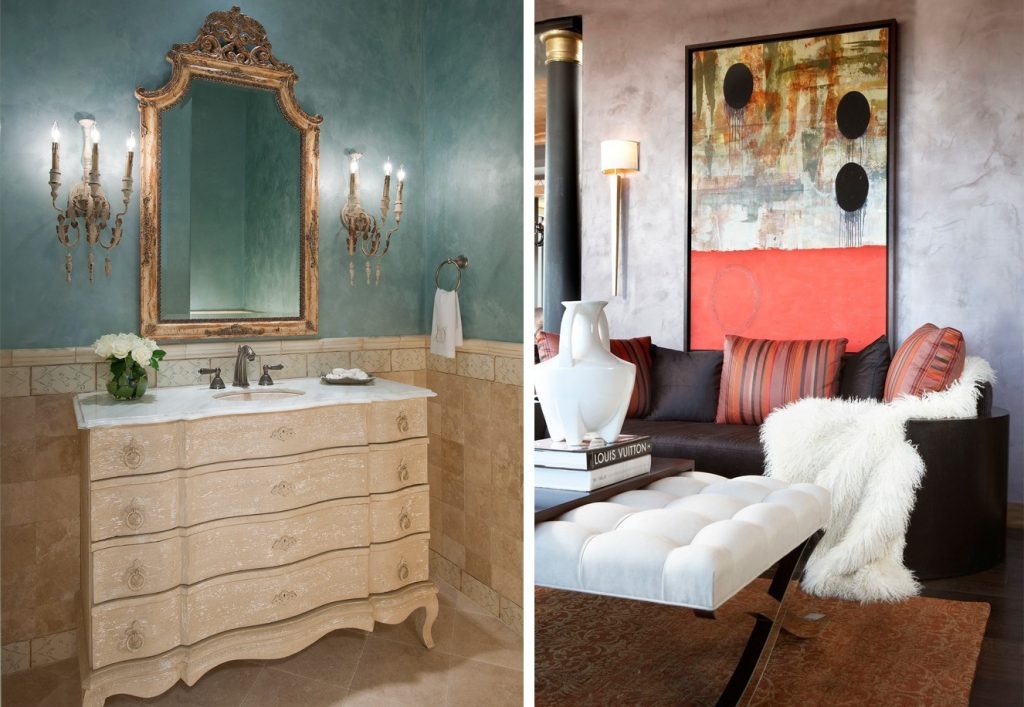
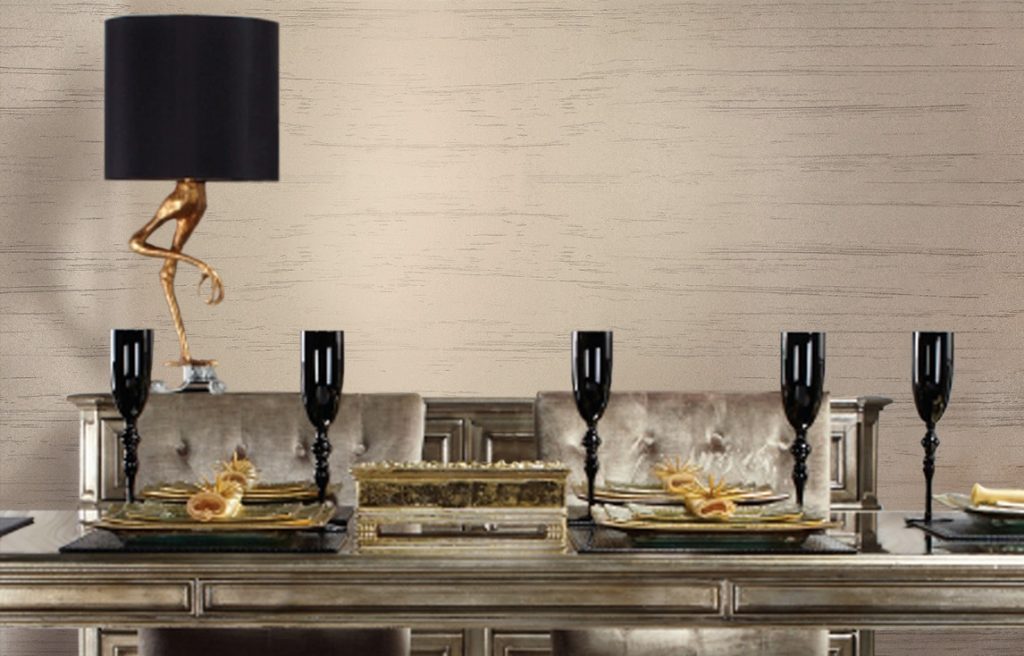
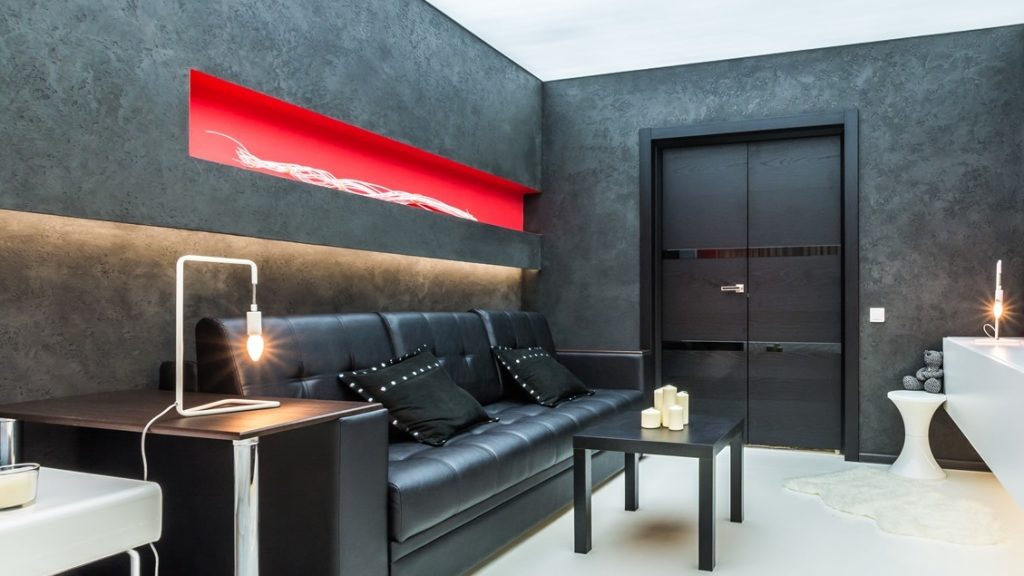
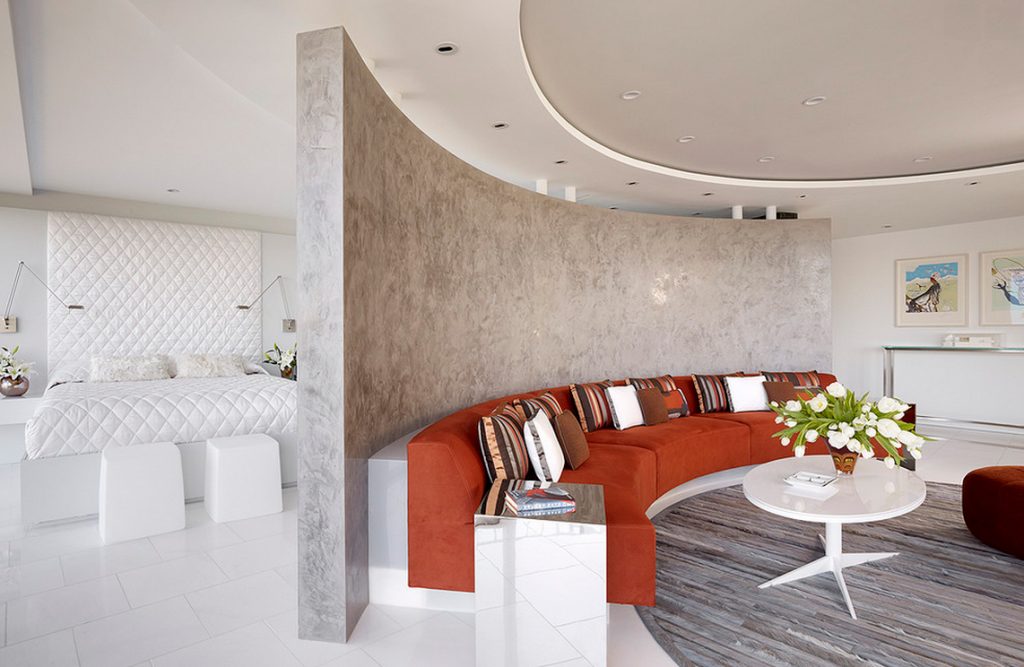
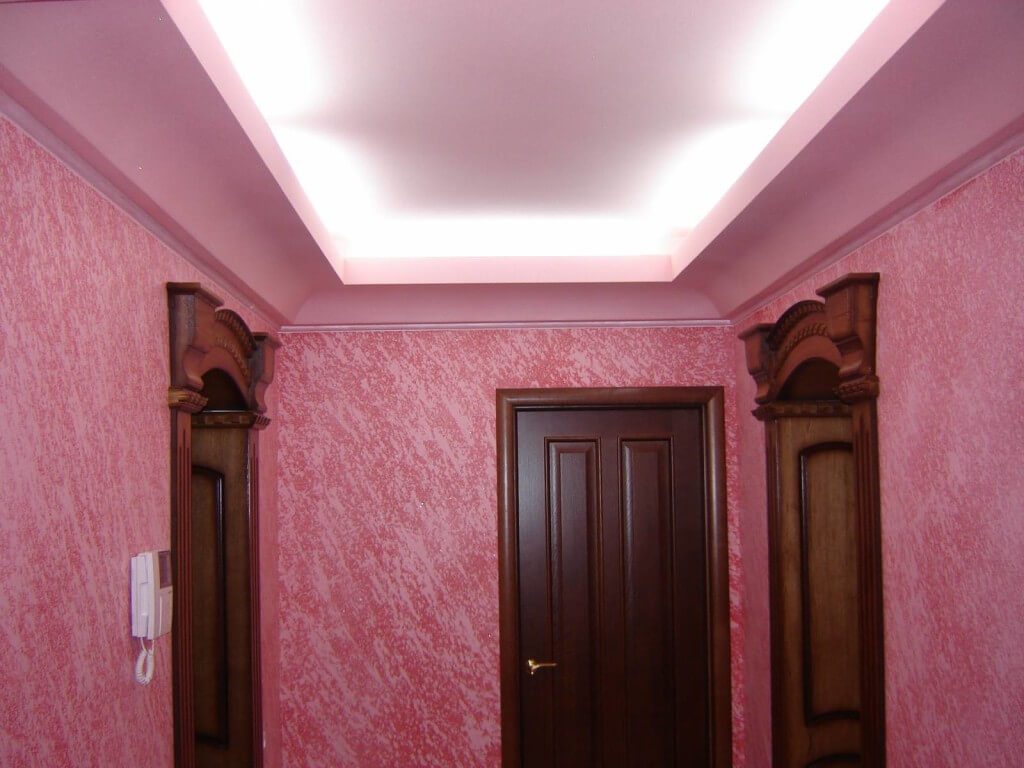
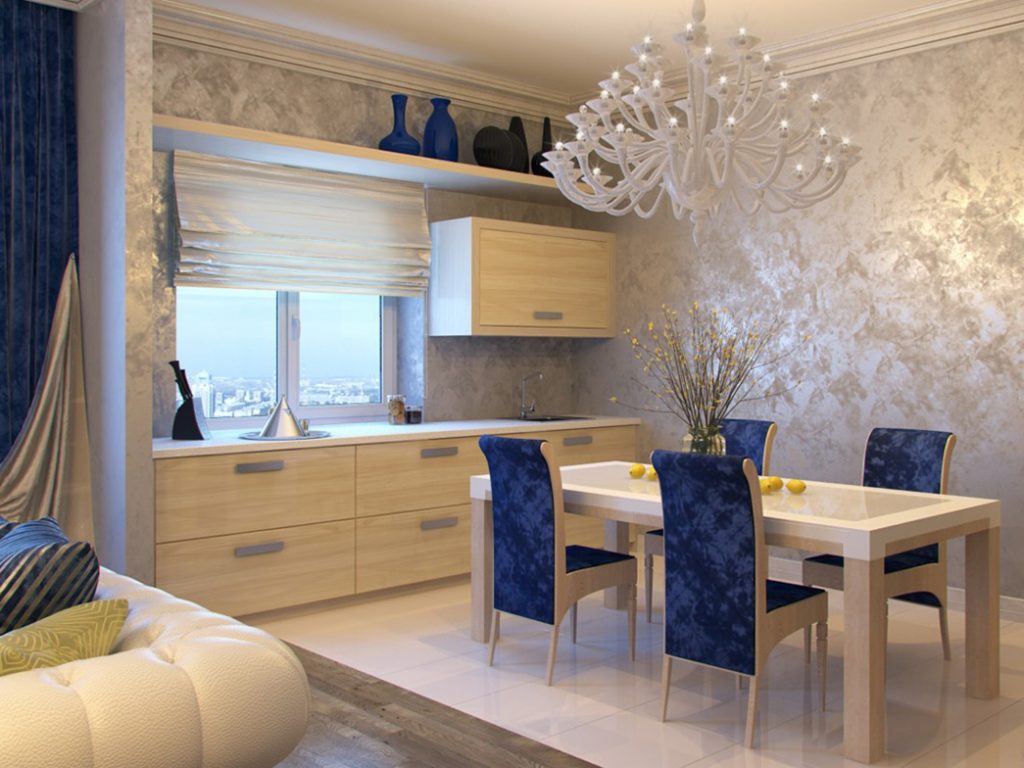
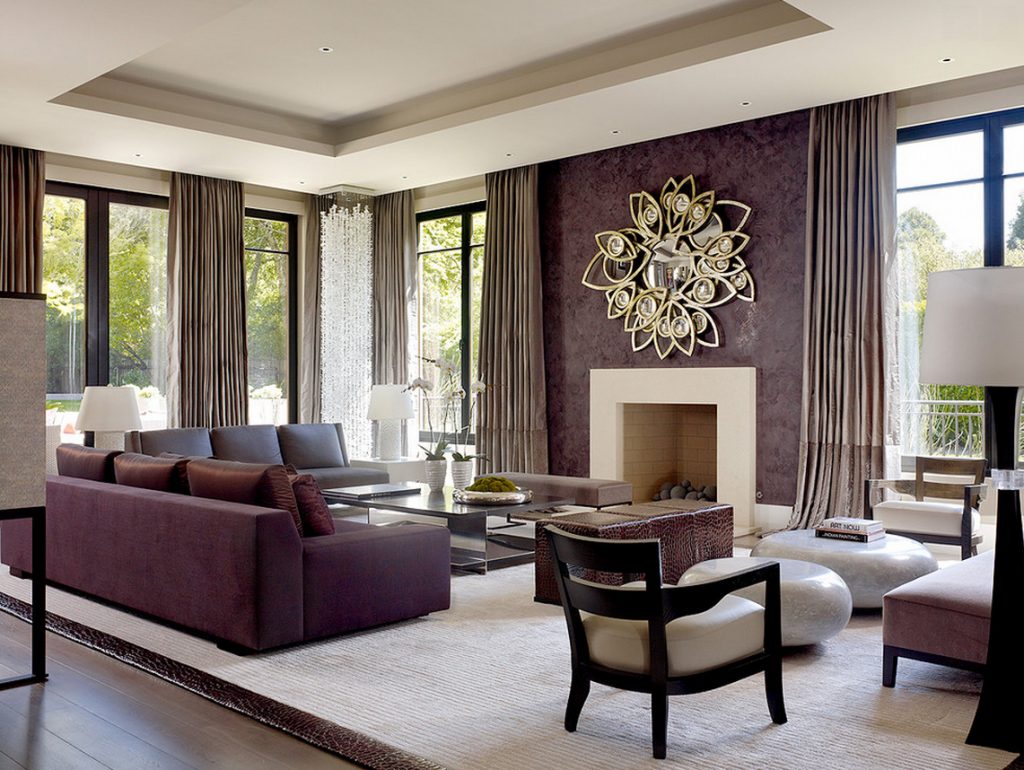
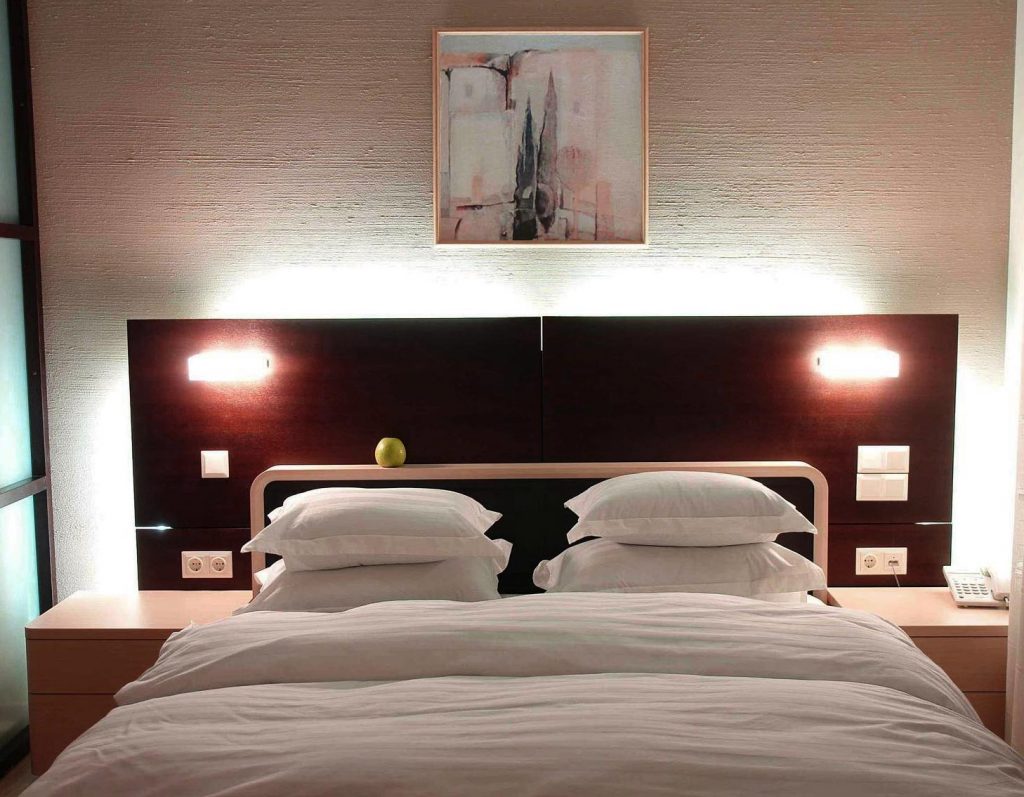
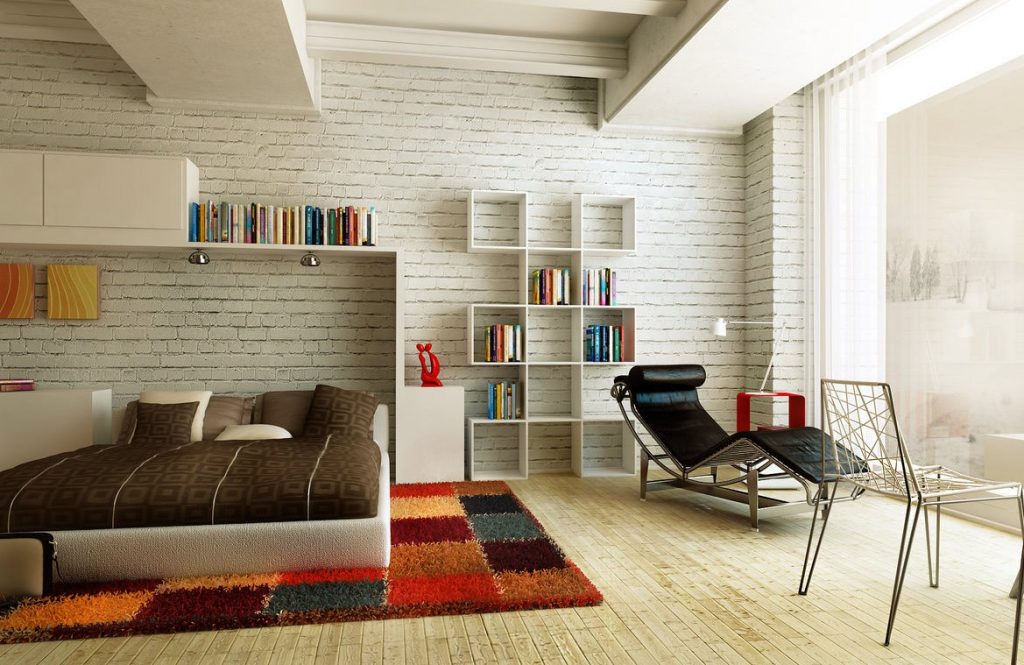
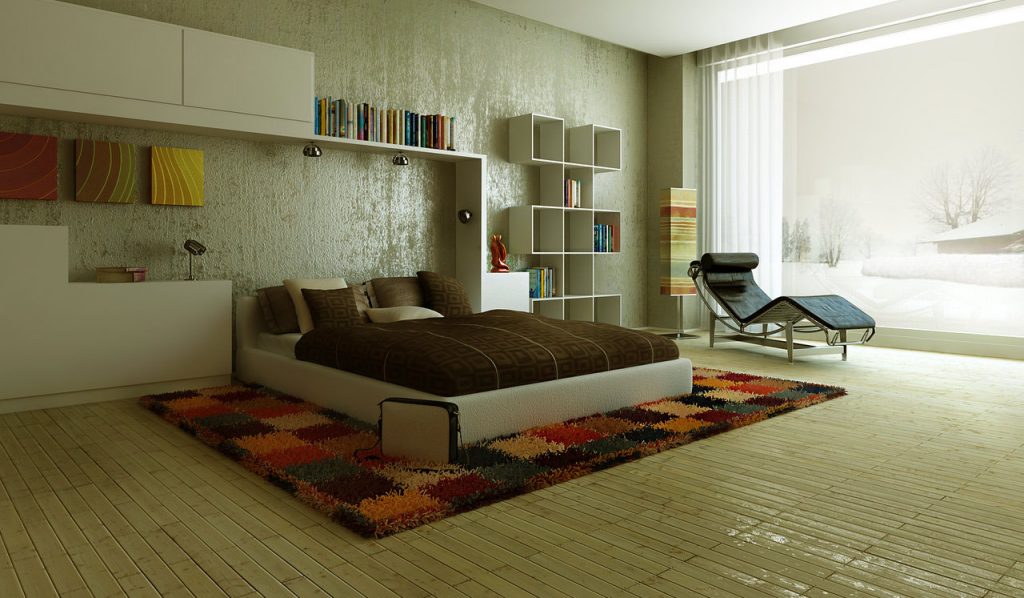
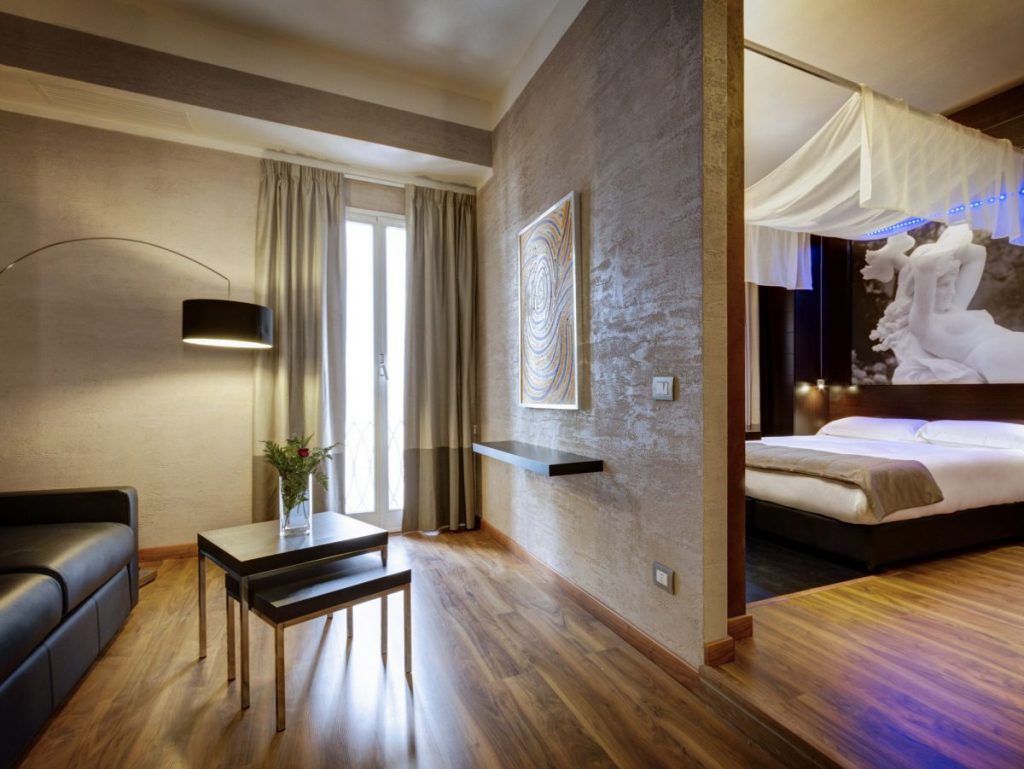
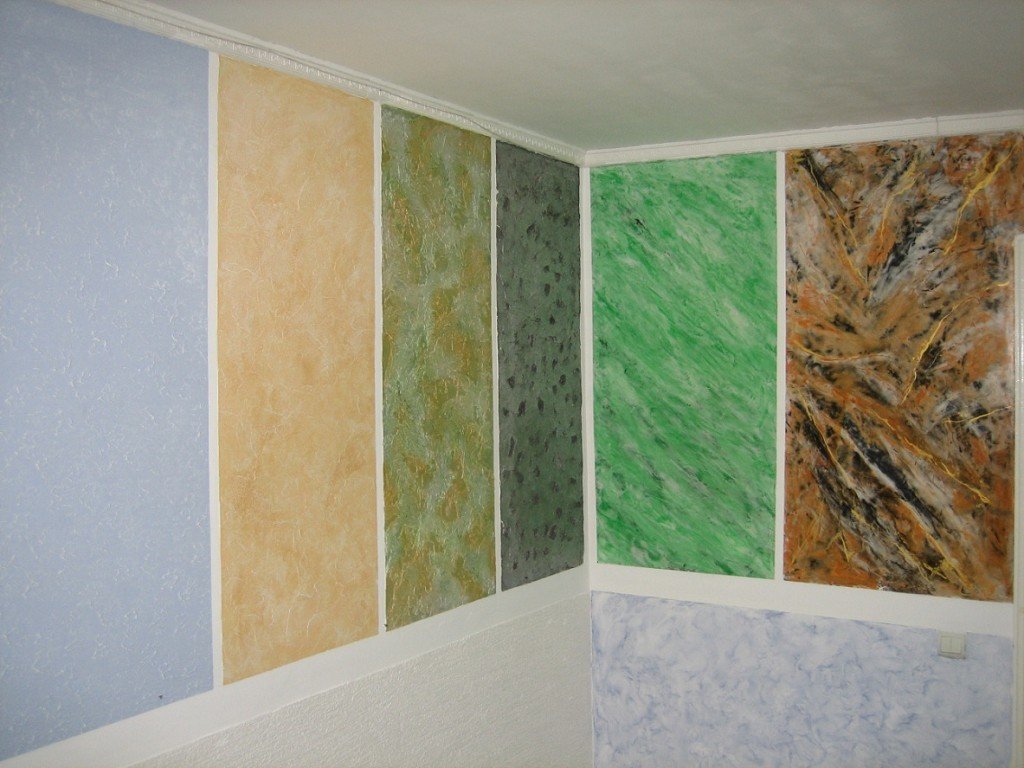
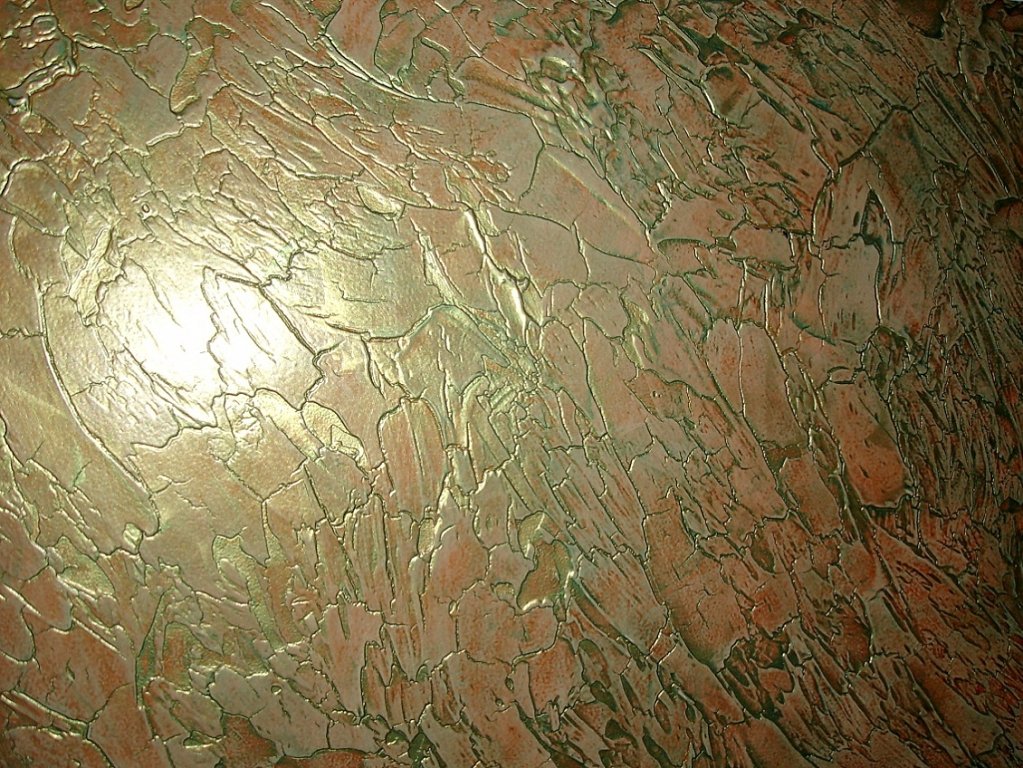
Photo of decorative plaster in the interior


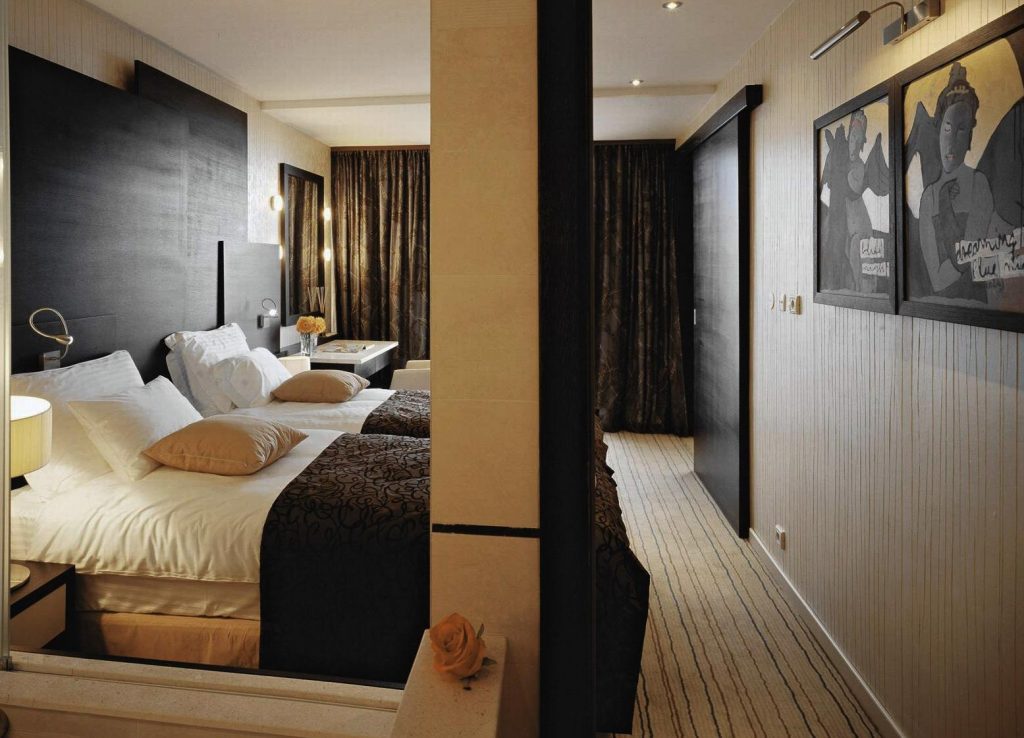

![]()
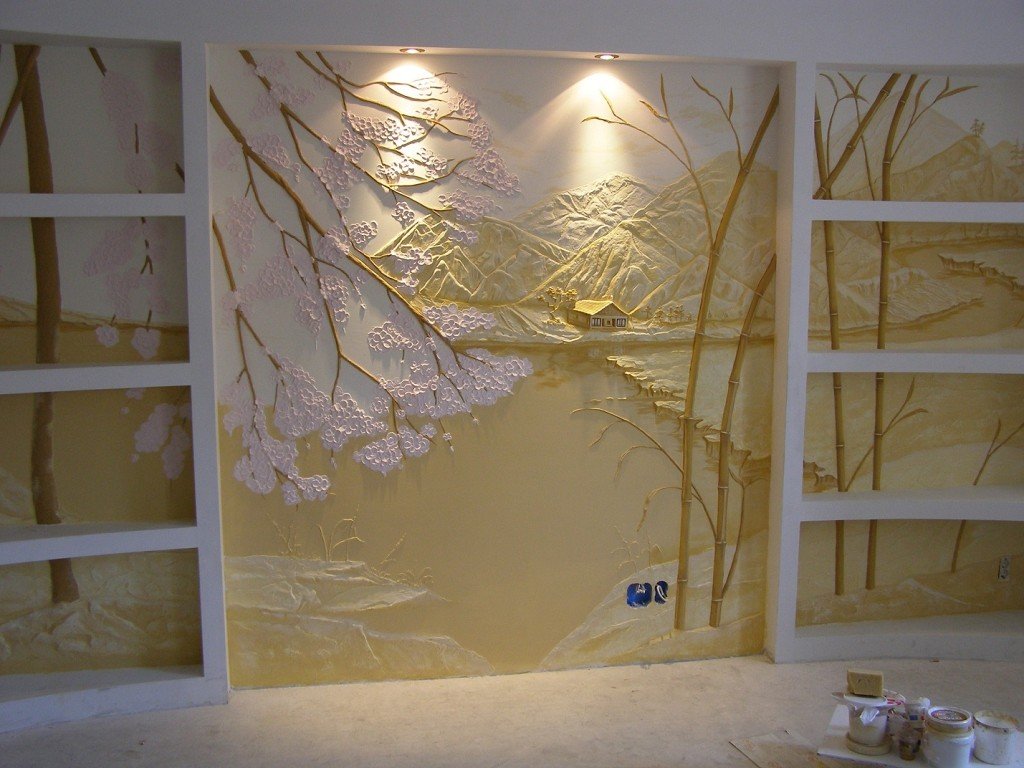
When we talk about plaster, we most often mean a technical finishing material for leveling walls. But there is a separate type of it that allows you to combine the stages of roughing and finishing and manifest creativity when working with your own hands. This is the so-called decorative plaster. The idea of giving this material decorative qualities cannot be called new, it has been known since the frescoes of the Renaissance. However, thanks modern technologies This type of plaster has received a new composition and properties, allowing it to become one of the most popular and promising finishing materials. Finishing the walls with decorative plaster will help give any apartment a unique and original look and realize any design delights.
What is decorative plaster?
Technically, this material is a mixture of binder, filler, dye and water. Cement, lime, synthetic latexes, and potassium silicate are used as adhesive bases in production. Stone chips and wood fibers can act as filler.
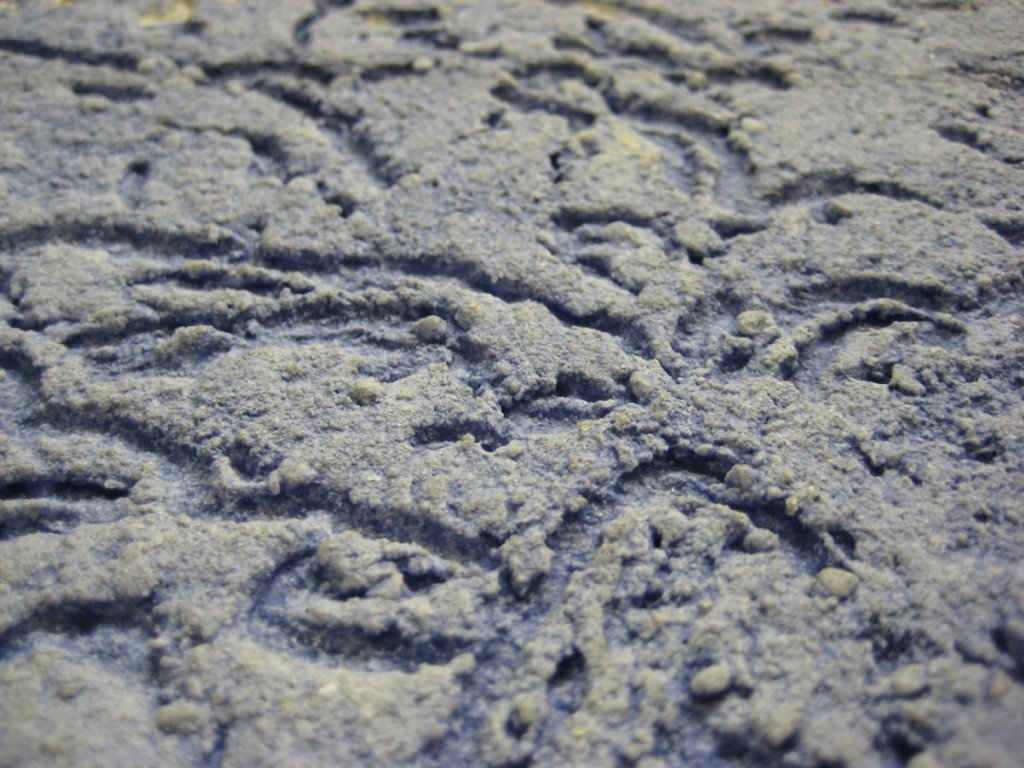
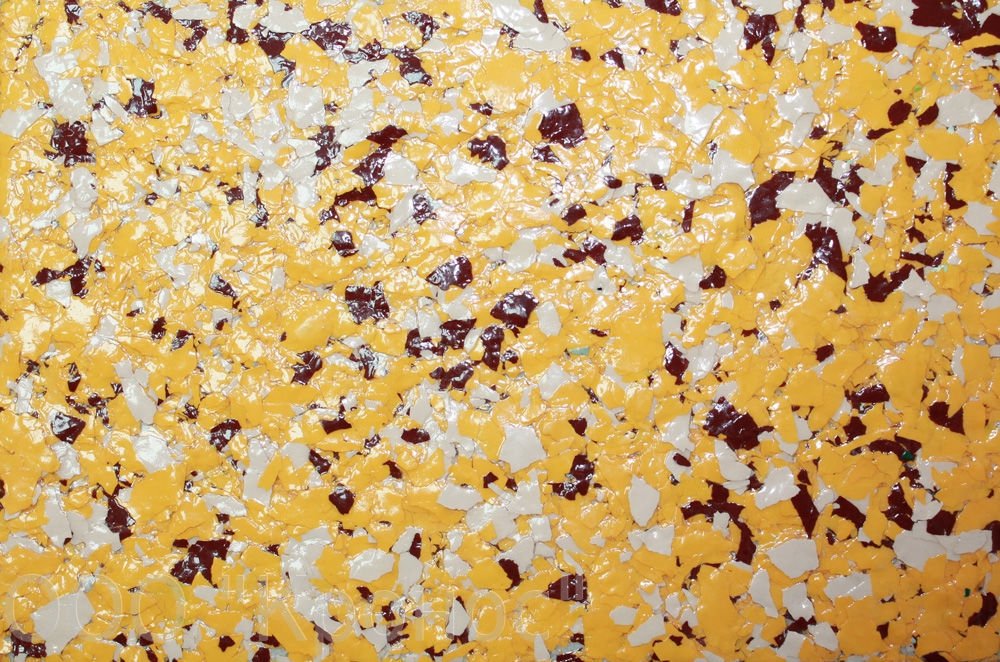
![]()
Decorative plaster is also called textured plaster, because when applied, the surface acquires a certain texture. Different types of textures are achieved in various ways. Some mixtures become porous due to oxygenation. Others create a grainy texture due to the sand and pebbles included in their composition. Certain types of plasters have properties that, with certain skills, allow you to give them absolutely any texture.

One of the most important advantages of decorative plaster when performing DIY repairs is the reduction in labor costs finishing work. In general, this method of finishing an apartment has such a quantity positive aspects, which simply leaves no chance for other materials.

Advantages and disadvantages of finishing with decorative plaster
The advantages of this type of finishing material include:
- no need to carefully level the surface of the walls;
- the unnecessaryness of many procedures, for example;
- smoothing out wall irregularities due to volumetric texture;
- absence of joints and seams;
- strength and durability;
- environmental friendliness;
- vapor permeability;
- resistance to stains and ease of maintenance;
- variety of textures and palettes;
- the ability to implement a variety of original design solutions;
- excellent compatibility with other finishing materials;
- wide scope and availability.
Among the disadvantages, we can only mention the relative complexity of application and dismantling. But there is no need to be intimidated by the complexity of the work; anyone who improves their home with their own hands can do it. If you are a beginner, there is absolutely no need to immediately try to realize intricate artistic ideas. Decorative plaster is suitable for everyone - from beginner home craftsmen to professional artists and finishing specialists.

Types of decorative plasters
Depending on the base material connecting the components of the plaster, the following types can be distinguished:
- mineral;
- acrylic;
- silicate;
- silicone.
Let us briefly consider the features and differences of different types of plaster mixtures.

Base: cement, lime or gypsum.
Features: sold as a white dry mixture, diluted with water immediately before starting work, needs tinting. Requires pre-treatment walls with a special primer containing quartz sand.
Application: finishing walls made of concrete, brick, plasterboard. Suitable for both interior and exterior decoration.

Advantages: strength, moisture resistance, vapor permeability, ease of application for DIY finishing, low cost.
Disadvantages: low ductility, possibility of cracks.
Acrylic decorative plaster
Warp: acrylic resin.
Features: packaged and sold in finished, diluted form. Requires two coats of primer before application. Allows you to achieve a certain texture in two ways: using an additionally purchased filler or manually.
Application: interior decoration premises.
Advantages: excellent elasticity, good adhesion to the surface, ability to withstand slight deformation of the base, ease of application and structuring.
Disadvantages: it is a flammable substance and should not be combined with wooden walls.
Base: silicone resin.
Features: sold in finished tinted form, requires the use of a special primer before application.
Application: interior and exterior decoration.
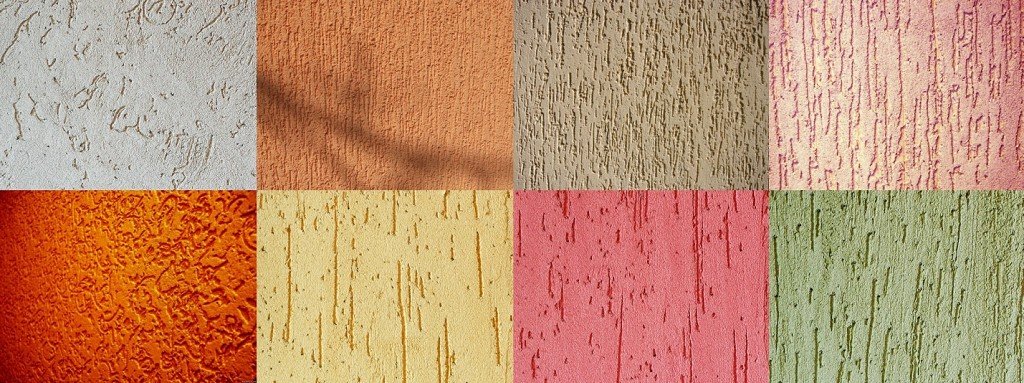
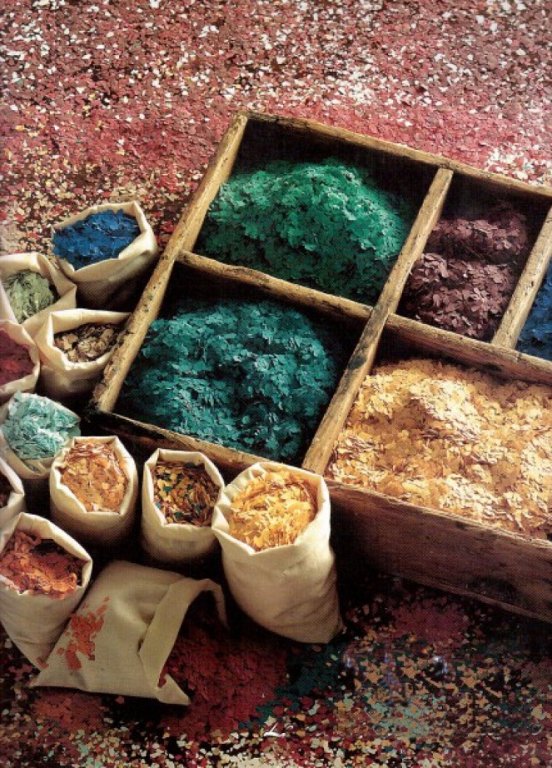
![]()
Advantages: high elasticity and hiding power, moisture resistance, increased vapor permeability, long service life, high adhesion, self-cleaning ability, a huge variety of shades.
Disadvantages: expensive material.
Base: potassium glass.
Features: can be purchased ready-made, requires the application of a silicate primer.
Application: mainly for finishing building facades.
Advantages: excellent elasticity, moisture resistance, strength, vapor permeability, durability, high adhesion.
Disadvantages: poor color range, requires certain working skills due to rapid drying.

Based on the method of creating texture and pattern, the following types of decorative plasters are distinguished:
- structural plaster;
- Venetian;
- "stone chips";
- flock coating and other varieties.
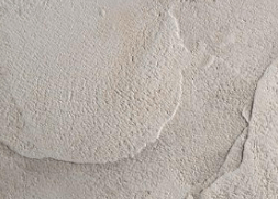
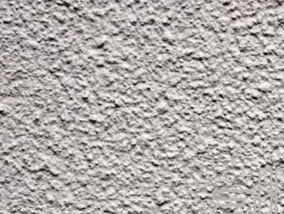
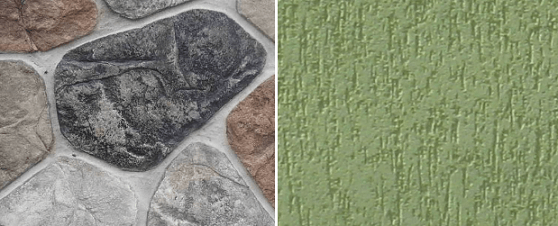
Of all kinds decorative covering This one is the most popular and inexpensive. Heterogeneous components are used here as filler: pebbles, mineral chips, mica, wood fibers, flax, cotton. It can be used to simulate different types natural materials, such as tree bark or masonry stone. This coating perfectly masks surface defects and looks very interesting and voluminous. It is very plastic, so it is suitable for DIY finishing and allows you to use any tool.
This finishing material is considered the most expensive and difficult to work with. Filler – marble chips. Fits perfectly into antique or classic interior. Allows you to create the effect of a marble pattern. With its help, you can achieve absolutely incredible effects, but when decorating an apartment with your own hands, it is not recommended for beginners to use it.
Flock is particles of acrylic paint different colors, shape and size.
Flock coating is a mixture of water-acrylic base, flock and protective varnish. It is new in the world decorative finishing and has a number of advantages. When applied to the wall, it dries for a long time, so it does not require any experience and is easy to apply with your own hands. Flock covering is suitable not only for walls, but also for ceilings, window sills, doors and cornices. It combines aesthetics, durability and environmental friendliness.

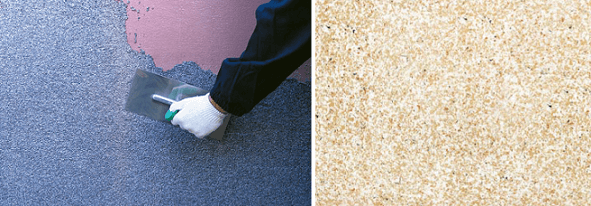
Stone chip coating is a mixture of binding material and fragments natural stone several types (quartz, granite, marble). Plaster with fine crumbs is suitable for finishing rooms, with larger ones - for facades. Since this material is considered cold, it is better not to use it in an apartment. living rooms, and use it to decorate the corridor. In addition, it can be used to highlight some part of the wall or interior detail. Stone chips can have a wide variety of shades, and is sold in the form of a finished mass. Its application is not difficult, the main thing is to achieve an even layer.
Methods of applying decorative plaster
There are a huge number of methods and techniques for applying decorative coatings, some of them are simple and suitable for doing it yourself, some can only be done by experienced specialists.
We will look at more simple ways, accessible to beginners.
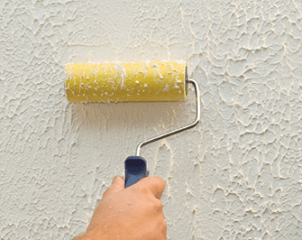
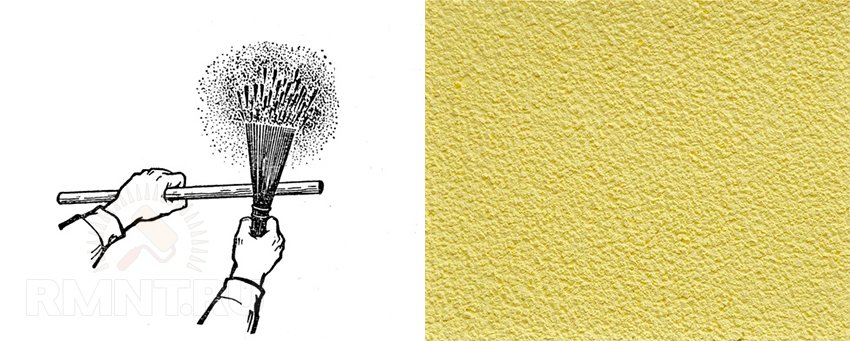
- Spray method. The simplest way to achieve a relief structure on a plastered surface. After the first layer of plaster has dried using any convenient tools start spraying the wall. You can use a regular broom, and for a coarser layer, spray it through a mesh.
- "Tree bark." Imitation of bark is obtained by smoothing the plaster with a roller with a fur coat. For an additional effect, after drying, the wall must be sanded and varnished using the same.

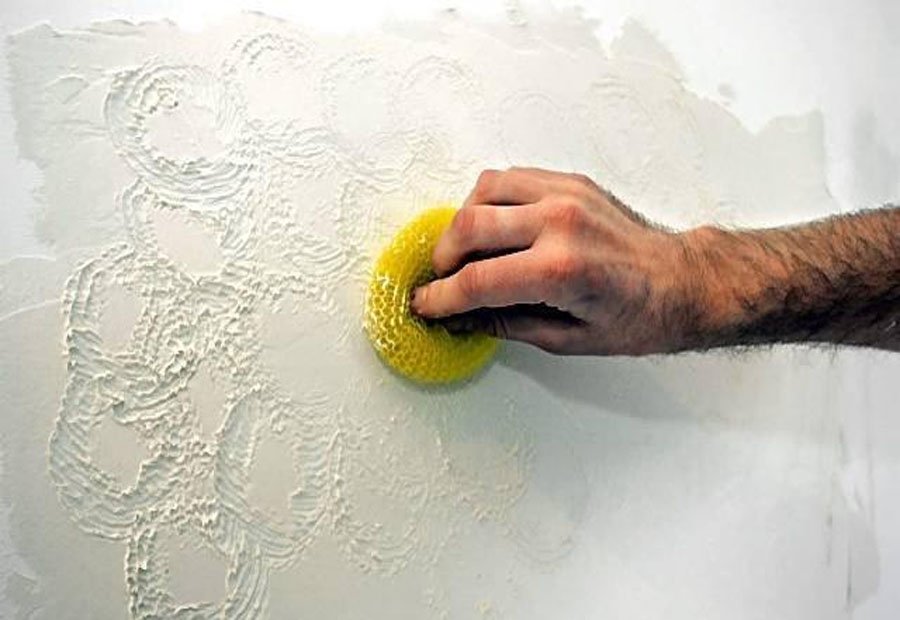
- "Circles" To create such a coating, a regular sponge is used, which is pressed against the wall and turned half a turn. To get circles different sizes, you need to use several sponges. In order for the drawing to look harmonious, you need to maintain the same pressure.
- "Stone". Imitation of a non-uniform surface natural stone can be obtained using a chisel or hydrochloric acid, which are used to process the dried layer of plaster.

- Sgraffito technique. The surface made using this technique has a multi-layer pattern. Several layers of plaster of different colors are applied to each other in the required sequence. On top layer Using a stencil, a pattern is outlined, and layers of material are removed in the right places until a layer with the desired color is reached.

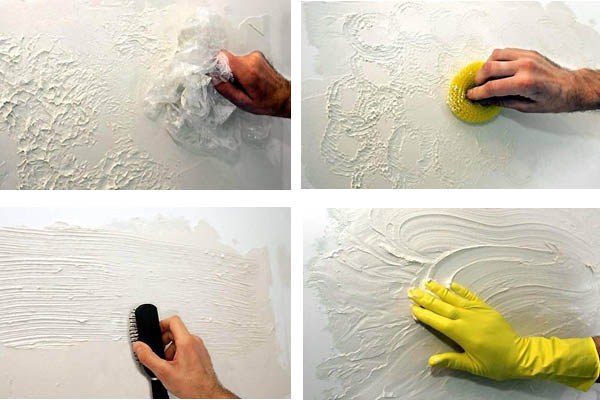
- Use of improvised means. To obtain an original relief, you can use any tools and materials. It is enough to take a regular one plastic bag and, crumpling it, apply it to the wall. You can take leaves, feathers, pieces of fabric or canvas and leave their “prints” on a damp surface. This will allow you to create a unique and unique finish.

- Using a relief roller. You can get a beautiful design even without skills and artistic abilities by using special rollers with relief or embossing.
Before using a certain technique, you need to practice on a piece of drywall or a small section of the wall to “get a feel” for the material.
2 , average rating: 5,00 out of 5)
Decorative plaster is a practical wall covering that flawlessly performs its aesthetic functions and is characterized by sufficient wear resistance. The material is used both for cladding transit zones and residential premises. In this material we will consider the basic principles of working with decorative plaster.
It is not surprising that the demand for plastering walls decorative composition increases, as does the cost of professional services. But you can do without a specialist: performing this type painting works within the capabilities of homeowners.
Classification by type of binder filler
Before proceeding to the features and nuances of application decorative mortar, it is useful to decide on the type of material. The finishing materials market includes: acrylic, mineral, silicate and silicone plasters.
Acrylic plaster is an elastic, ready-made water-dispersion composition. The decorative coating repels water and is resistant to ultraviolet radiation and dirt.

Mineral plaster - environmentally friendly pure material, which is recommended to be used for decorating the walls of residential premises. The basis is lime or cement with the addition of solid filler particles of mineral origin.
Silicone composition is a paste-like mixture based on silicone resin. The material is not afraid of dampness and temperature fluctuations.

Silicate-based plaster contains: liquid glass. This determines the main advantages of the material: resistance to ultraviolet radiation and high humidity, fungus formation, high level fire safety.
Advantages of the composition over other finishing materials:
- the decorative coating visually eliminates the imperfections of the base surface;
- visual seamlessness;
- ease of use;
- durability;
- environmental friendliness of the building composition.
Based on decorative properties, plasters are divided into: textured, structural and flock.
The textured appearance of decorative wall coverings is used to create an imitation of the surface of stone, wood, velvet and silk. The material has good masking properties (hides surface defects) and can be used for cladding walls in damp rooms.

Flock plaster consists of an acrylic base with an admixture of rounded “flakes” of a certain size. Thanks to the use of flock, you can create a “leather-like” effect, imitation of velor or suede fabric. The coating is UV resistant and does not require additional detergents for cleaning.

Structural plaster is a granular mass of heterogeneous consistency interspersed with granules of mineral or synthetic origin: stone, quartz, wood fibers, etc. To create a colored coating, add a tint pigment to a mixture of dry plaster and water.

Preparatory work
There are three basic stages:
- Preparing the base.
- Padding.
- Preparation of building composition and application of decorative plaster.
To prepare the base surface, you first need to dismantle the old coating, remove cracks and other base defects. Level the walls using cement putty or ready-made mortar.
For good adhesion of the coating to the wall, it is necessary to apply a primer to the base. deep penetration with a strengthening effect. If necessary, treat the surface with an antifungal compound.
Tools and auxiliary materials
In addition to the tools for plastering walls, you must purchase:
- a rubbing sponge (can be replaced with a kitchen sponge) is used for grouting. The rough side of the foam sponge can be used for rough grouting, and the soft side can be used for final grouting;
- construction mixer for mixing decorative plaster;
- tools for leveling and creating a relief surface: plaster float, scraper, spatulas, brushes and rollers;
- container for mixing the solution.
Preparation of construction personnel
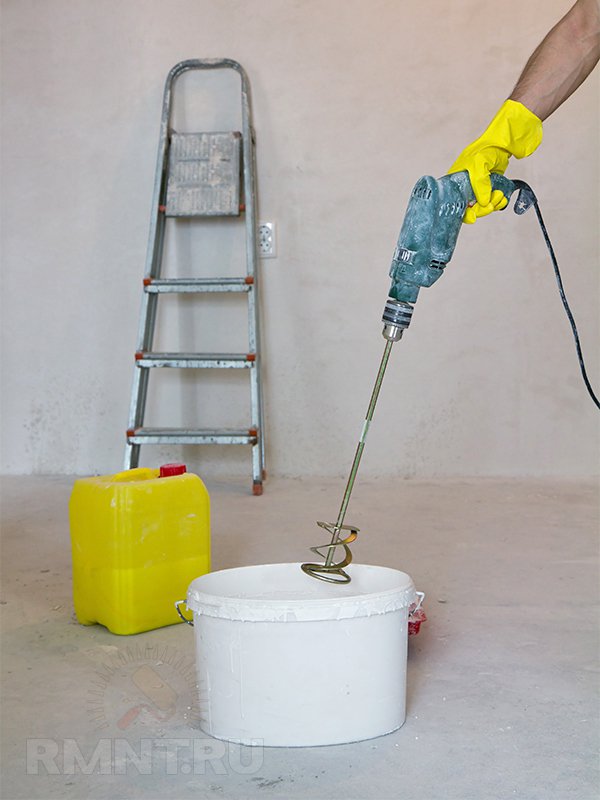
When preparing the mixture, you should strictly follow the manufacturer's instructions, which indicate the amount of dry mixture and water, as well as the sequence and method of mixing them. For mixing, use a drill with adjustable speed and a mixer attachment. The minimum speed should be set to prepare a homogeneous mixture.

It is important to correctly adjust the consistency by adding water: when applying by spraying, the maximum allowable amount of water is 5%, when applying by hand - 2%. The plaster sets quickly, so it is recommended to mix the composition in small portions.
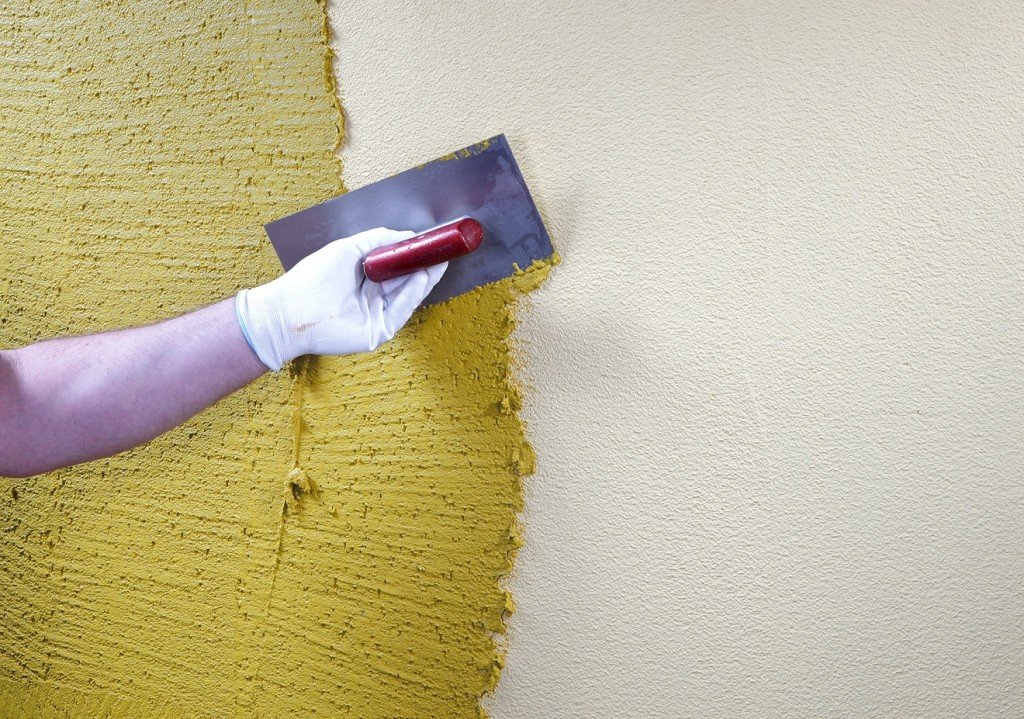
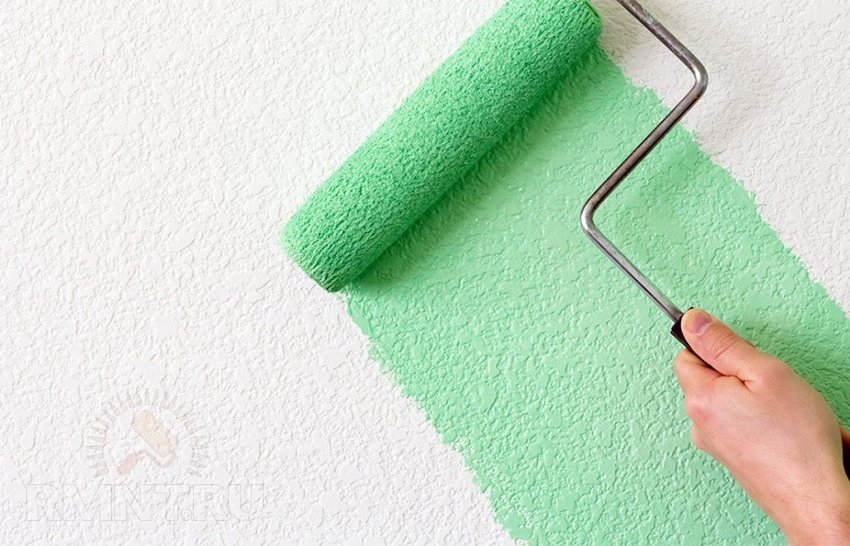
Technologies for applying decorative plaster
“Stretching” is a popular method of applying decorative coating to walls. The solution should be applied with a wide trowel in continuous movements from one corner of the base to the other. The thickness of the layer depends on the thickness of the fraction and varies from 2 to 5-7 mm. Smear construction composition It is necessary to apply the decorative coating evenly over the entire area of the treated area, and apply the decorative coating to the adjacent area “overlapping” by 4-5 cm.

Since the layer of material dries out quite quickly, it is recommended that two people apply decorative plaster: first, one person covers the walls with a layer of material, and the other then levels the decorative layer to the grain thickness of the fraction.
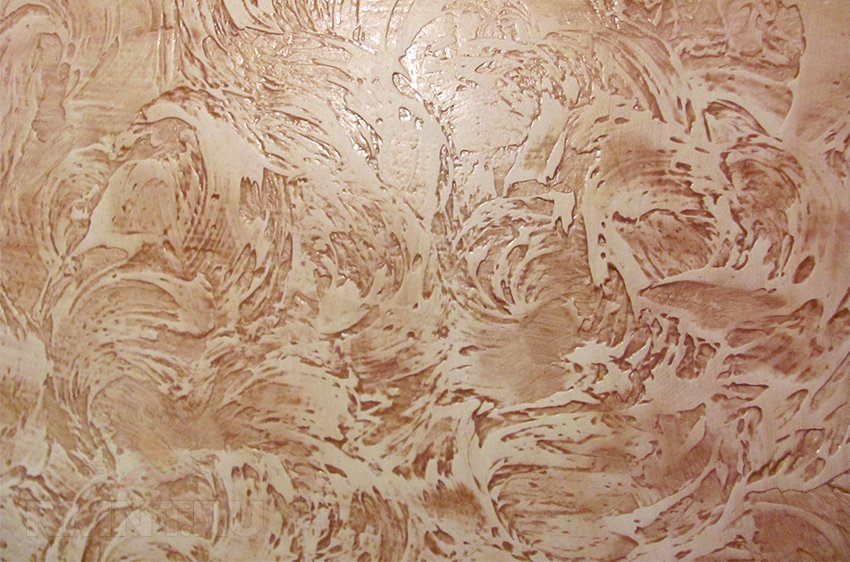
After applying several base layers of decorative plaster, you can begin to create artistic effects on the wet surface. We offer you several simple ways.
Surface decoration options:
1. The technique using an artificial sponge involves light blotting movements. At the same time, “spots” form on the wall. For greater effect, they can be painted in several colors.

2. You can get the effect of crumpled paper using a piece of well-absorbed fabric. The material must be crumpled up and walked over the wet base with blotting movements.
3. Alternatively, you can use special textured rollers, the use of which significantly speeds up the process of decorating the base.
![]()
The “spraying” technique is somewhat more complicated. First you need to apply two or three layers of decorative coating, and then begin to add volume to the texture. For this you will need a broom and a stick. Having soaked a broom in the solution, you need to hit the stick with it in such a way that the splashes hit the pre-plastered wall. In this case, it is advisable to use one color for the base, and to create a “splash” effect, a lighter or darker shade.
After 24-48 hours (after the finishing coat has completely dried), it is worth cleaning it, removing poorly attached particles of plaster, using fine-grained sandpaper.
Painting the decorative layer
You can start painting the surface only after the decorative surface has completely dried, this will take from 8 to 48 hours.
To paint a surface with a coarse filler fraction, several colors are used. The first - lighter - is applied using paint roller, allow the base to dry completely, and only then cover the protruding areas of the relief with a more saturated shade. This method allows you to make the walls voluminous and massive, so it should be used only in large rooms.
In order to do finishing coat durable and shiny, the glazing technique is used. In the old days they used wax, but working with it was very labor-intensive, so now they use transparent acrylic-based varnish. It is most convenient to cover the walls with it using a long-nap roller or a wide paint brush.
The wallpaper that decorated the walls of the home is no longer relevant. They were replaced by finishing the walls of rooms with decorative plaster - universal material, combining elements of construction and aesthetic type. Using plaster, you can achieve an imitation of granite, metal, marble, silk. It allows you to hide flaws in the walls, does not harm your health, and is durable in use. How to choose the right type taking into account its features, how it is carried out correctly, how to create the desired texture?
Manufacturers indicate the following components as part of decorative plaster: water base, special fillers, substances for binding mixture elements, types of thickeners, antiseptics and the like. In addition to the filler, they differ in their composition.
There are the following types of plasters for interior decoration:
- Mineral decorative is sold in dry form and is offered by the manufacturer on a cement basis. Before use, it will need to be mixed with water with a construction mixer. Suitable for mineral bases. A quartz primer must first be applied to the walls. After you finish applying this coating, it should be painted. The price when purchasing mineral plaster will not seem high to you. Although there are expensive options with marble chips or sparkles.
- Acrylic is a material of synthetic origin. It is based on acrylic resin. Such wall covering will provide them with a moisture-repellent effect, excellent ductility and other qualities. Please note that the material is poorly resistant to possible ignition. It's easy to apply it yourself. To work, you only need a roller and a spatula. It is necessary to prepare the base and primer before starting application. The mixture can be purchased ready-made. It must not be stale, as the expiration date on the package will inform you about.
- Silicone has such qualities as plasticity, durability, the ability to pass steam and many others. It exhibits self-cleaning properties, so it can also be used for outdoor work. Offered by the manufacturer in a wide range of colors and finished form. After its application, painting the walls is not required. The material is convenient to work with and is easy to apply with your own hands even without special skills.
- Silicate is produced on the basis of special potassium glass. It is more often used for outdoor work. Sometimes they are used for wall decoration, which we will discuss later. Silicate is capable of releasing environment substances that are not particularly beneficial to human health. Applying it with your own hands is quite difficult - you need to hurry, since the material quickly hardens on the surface.
 It also differs in the type of finished surface - with imitation of granite, rain, marble chips, etc. There is a division of types of coating depending on the type of filler.
Textured plaster is one of the most sought after modern market building materials. Its advantages include reasonable cost and ease of application.
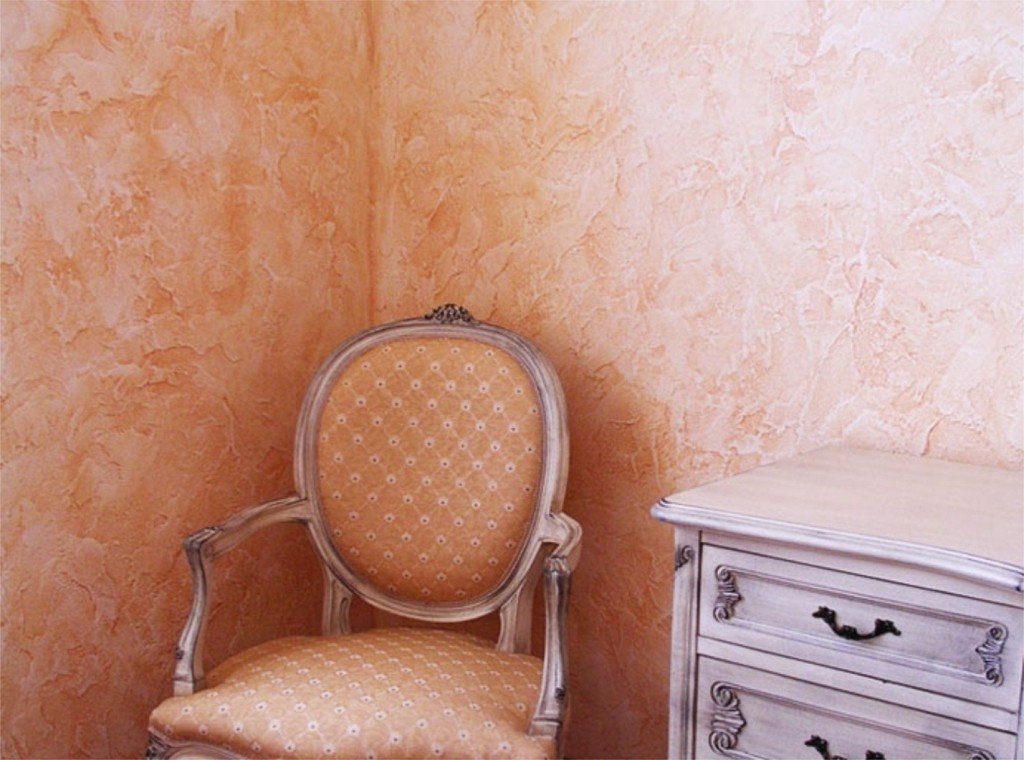
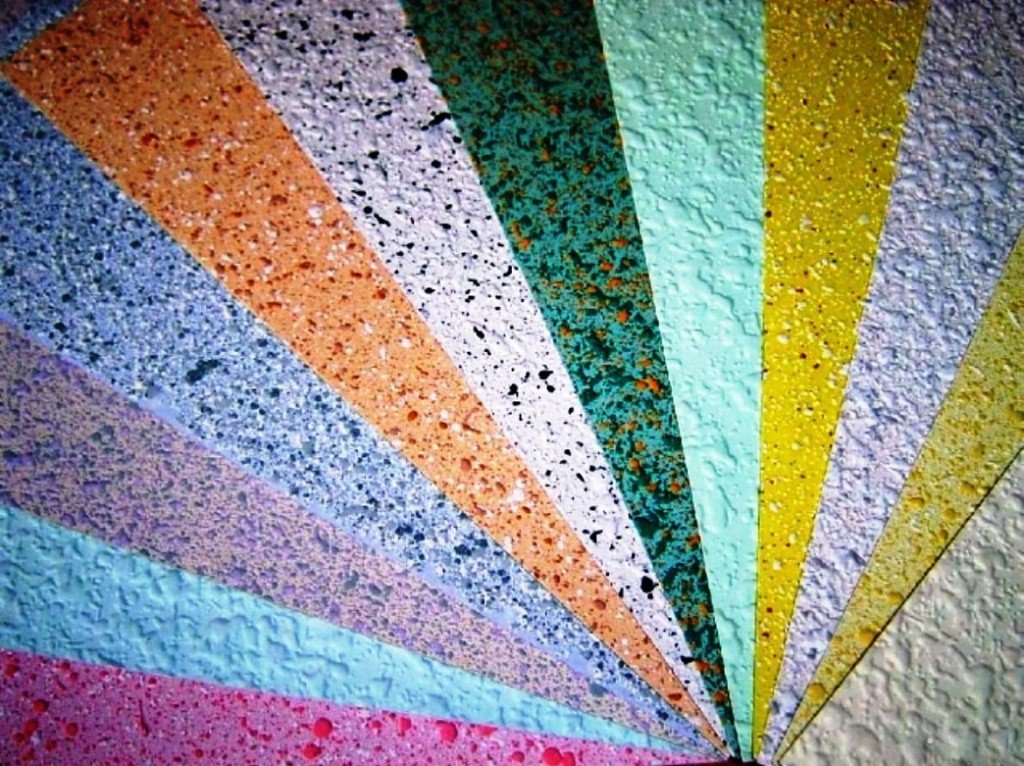
To create a beautiful pattern on the wall of your room using this coating you will not need any special tools or knowledge. The filler for this type of plaster can be flax and wood fibers, mica, crumbs of various minerals, stones small size. This material has proven itself to be excellent when performing external and internal work. Textured plaster allows you to hide and correct flaws in the surface of the walls. Make sure it is dry before starting work. Experts recommend treating the surface with “concrete contact” before applying it. ![]()
Structural contains the following components: marble, quartz chips, and pebbles. The main components of this material are liquid glass and acrylic. It is customary to use it to cover walls in the bathroom and hallway. It is also well suited for outdoor work. The material is valued by professionals and those who prefer to do all types of work with their own hands, for its moisture resistance, normal tolerance to temperature changes, and ability to withstand shocks. To complete the work you will need a roller, spatula and sprayer.
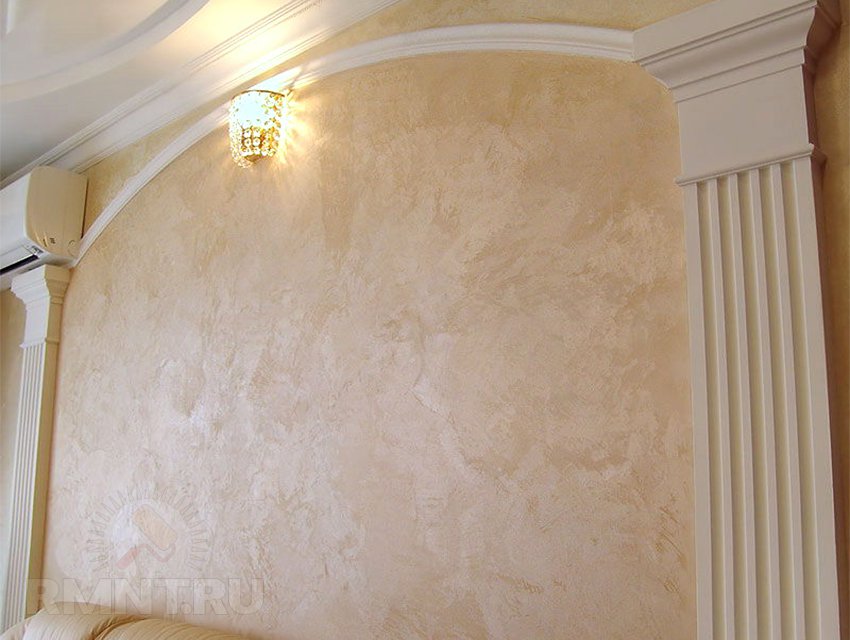
Venetian plaster is the most sophisticated and presentable material for wall decoration. Venetian plaster appeared in Ancient Rome and remains at the peak of popularity to this day.  Advantages Venetian plaster are the high level of strength of the resulting coating and durability during operation. Venetian plaster is always in trend. The technology of applying Venetian plaster to walls requires a high degree of skill. The result of the appearance of Venetian plaster on the walls of the room will be the creation of a magical fairy-tale interior that will shine before your eyes with many facets.
Venetian plaster is made by manufacturers from marble sand or dust with the addition of water emulsion and slaked lime. The resulting plastic solution of transparent Venetian plaster is used to decorate the walls, carved cornices, columns, structures without joints. The technology of applying Venetian plaster allows you to achieve the visual effect of having a single piece of marble. It is difficult to apply it correctly with your own hands; it is better to invite a professional.
Flock material allows you to create an interesting surface on the walls. Application occurs in several stages - done adhesive base, then flocks - insoluble particles of different colors. The final stage of work will be the application varnish coating. Most often used for interior rather than exterior work. 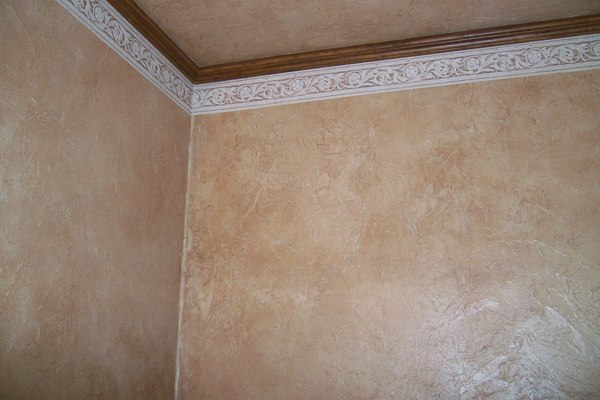
Preparation
Finishing walls with decorative plaster requires serious preliminary preparation. Each stage is very important to ensure that everything goes smoothly in the future. You should select the following materials and tools - a container for plaster, a piece soft fabric, a set of spatulas, a trowel (to create the desired relief), special brushes, a sponge (toilet sponge for grouting, coral sponge for applying a pattern to the surface, horse sponge for rough grouting), stamps, rollers, primer, putty, cement solution, gloves, stick (mix the plaster solution).
Next comes the choice of plaster. The pigment gives it a characteristic color and can be sold separately. Pigments can be combined to obtain the desired color. Modeling components and special fillers of the material will help create a beautiful relief pattern on the walls. How durable the created coating will be depends on the polymer elements intended for the binder. Before proceeding with the technology of applying plaster, it is imperative to prepare the surface of the walls. The requirements for it are not so complicated. 
Remains of finishing materials or mortars need to be removed from the walls. The surface is cleaned of dust and finished with a primer. You should wait some time so that the primer can dry properly. Next, the existing recesses and cracks are sealed. Cement mortar It is usually used when large cracks are detected. The putty is applied carefully to fill all pores, cracks and recesses. You can easily do this yourself. The surface is coated cement putty. The layer of this solution is made medium in size. No need to try to get it perfect flat surface, because after decoration the roughness will disappear.
Next, a layer of plaster is applied. It should be based on expanded vermiculite. Mixtures of this kind are commercially available in a dry form. When stirring them before use, check the packaging to see how much water is needed. Leave this layer to dry normally. The next step will be the application of a primer that has the ability to penetrate deeply into the surface structure. Don't forget to vacuum the applied primer. If you have made your choice in favor of an exquisite Venetian plaster, then applying this type of plaster does not involve priming the walls. 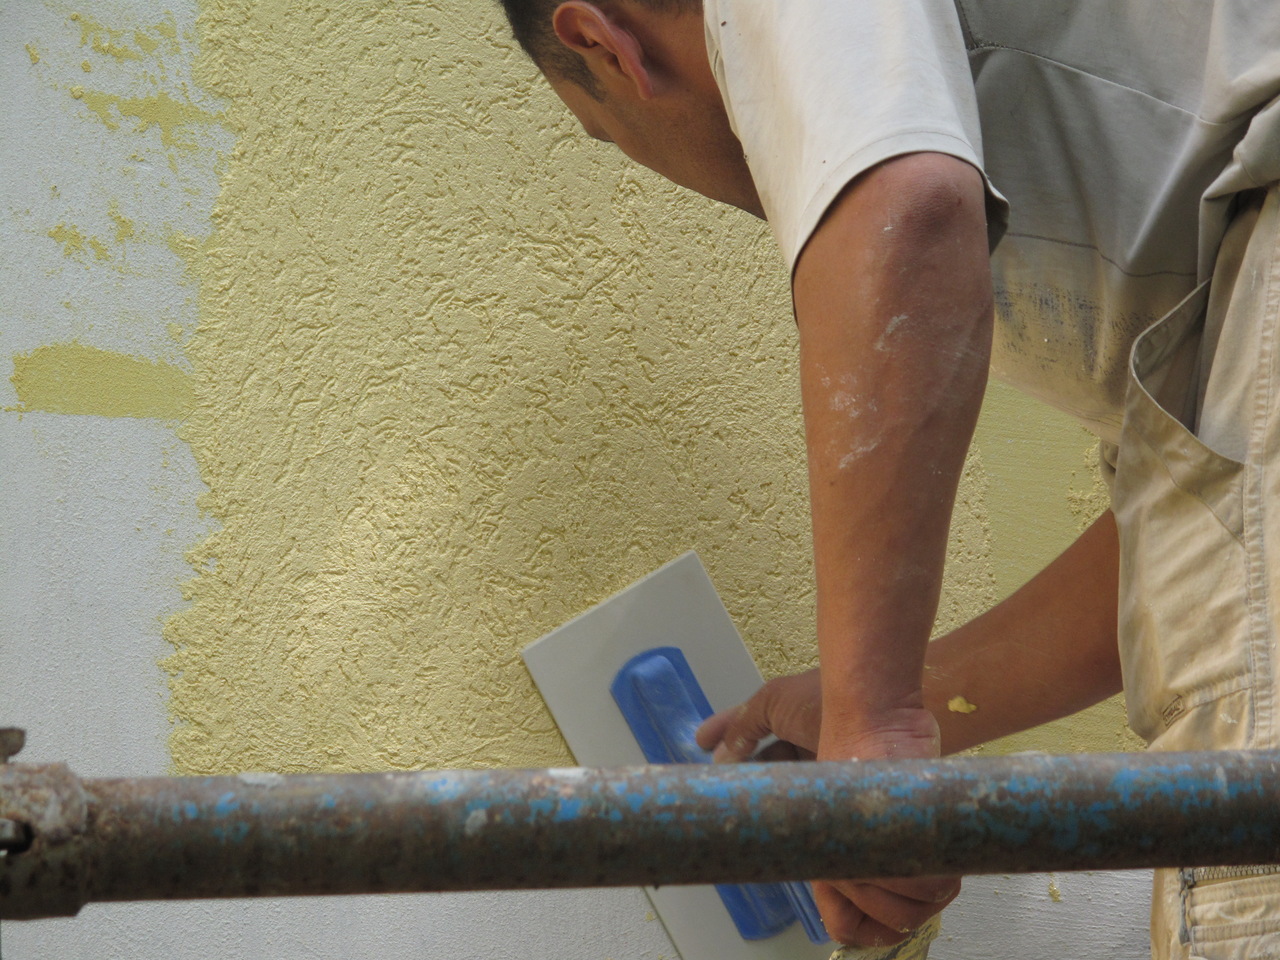
Experts recommend at the stage of carrying out preparatory work use a sand base. For her quartz sand combined with acrylic paint. The resulting composition covers the desired surface in the room. A more expensive option is to use pearl powder for this purpose. It is also capable of serving as a solid basis for the further creation of the Venetian relief. When carrying out preparatory work before finishing the walls with your own hands, remember that each of the applied layers needs at least two days to dry properly. To prevent cracks from occurring, it is recommended to use a self-adhesive mesh called “serpyanka”.
Wall treatment promotes adhesion of the decorative surface. If you prefer a putty that has good absorbent characteristics, you can make the primer layer stronger - a special impregnation will protect it from delamination in the future. The requirements for applying the primer are as follows: the thickness of the resulting layer should not exceed 2 cm. During grouting, it must be compacted with sandpaper. 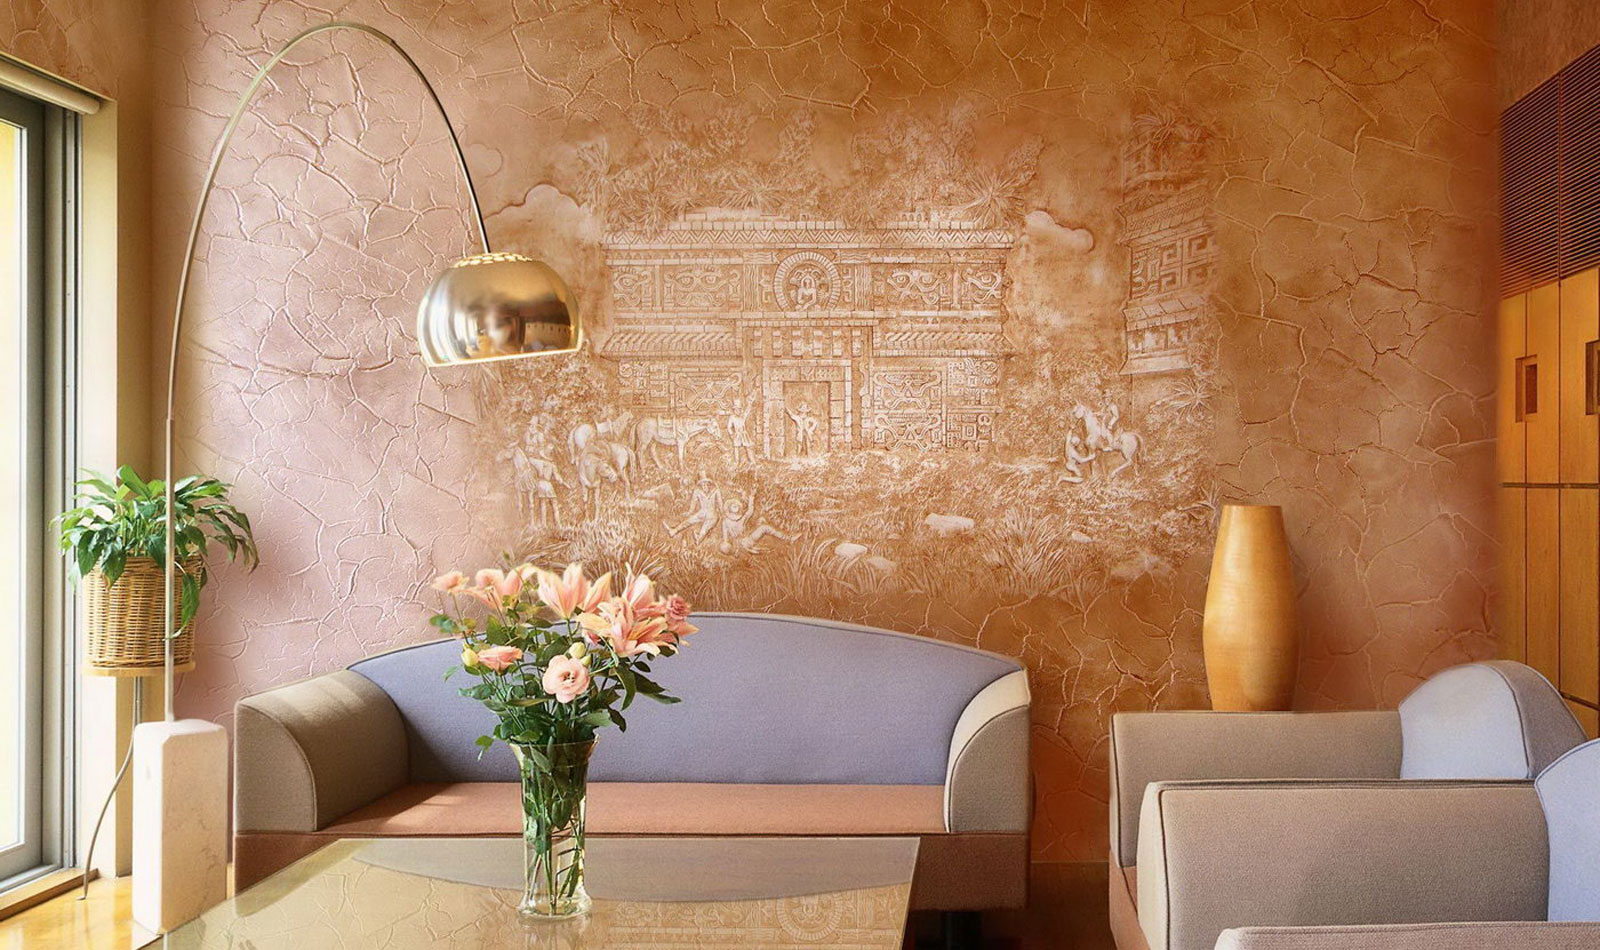 The surface will have to be moistened regularly within a week. It is recommended to complete the preparation of walls for plastering with a test check of the surface. A trial application of plaster allows you to check how ready it is for processing. Not far from the corner of the room, select a section of the wall onto which a small amount of solution is applied. This test will allow you to see the quality of the selected material, evaluate the beauty of the texture and shade color range. Notice how smoothly the transitions appear between the textured and smooth stripes.
How to create an invoice
Application can be carried out by spraying, decorating using a trowel, by “hatching-backcombing”, or by stamping with a roller. The spraying method is an easy option for creating texture. This is done using a broom, mesh or industrial equipment. The technique involves spraying the solution in layers. Each of them should dry normally after application.
Using regular blows of a broom on a stick or through a mesh, the solution is distributed over the surface of the primer. The result is the appearance of a beautiful, elegant design. The texture depends on how thick the solution is. A coarse-grained texture will appear if you spray through a mesh with large compartments, a fine-grained texture will appear as a result of working with a roller. Using a trowel involves creating a non-standard pattern on the primer. First, a covering layer is applied, onto which the solution is then placed using a tool with a mixture using longitudinal movements. As a result, you can create a mysterious, mysterious design.


