Specialization: master in construction plasterboard structures, finishing works ah and laying floor coverings. Installation of door and window units, finishing of facades, installation of electrical, plumbing and heating - I can give detailed advice on all types of work.
From my own experience, I know that those who decide to do a budget bathroom renovation often spend even more than those who don’t particularly bother with saving. This is due to a number of factors: from using not quality materials before hiring unskilled workers. I will share my experience of carrying out work and tell you how to meet the minimum budget and get an excellent result.
Workflow Description
In order to have a good understanding of all aspects of this topic, I will explain using a specific example. So we have:
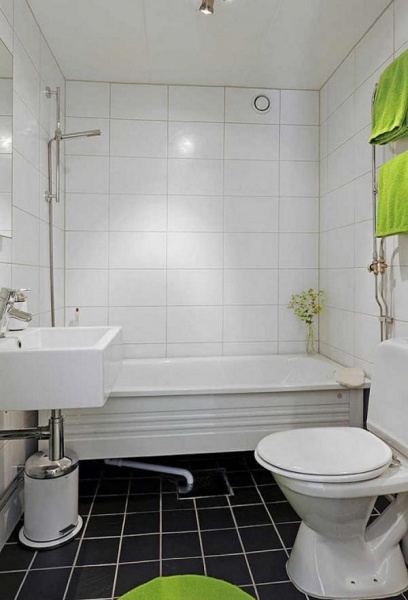
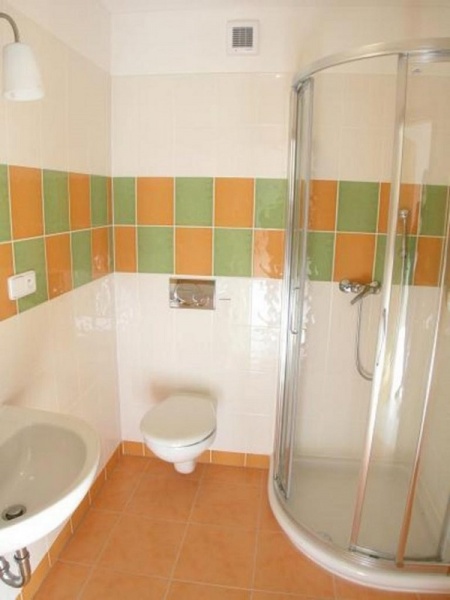
- typical room in a nine-story building of the P-44 series;
- The size of the room is 1.7 by 1.7 meters, the ceiling height is 2.64 meters.
We will look at how much the finishing will cost us; I will not touch on the plumbing, since most often if the repair is done as economically as possible, then these elements do not change.

Stage No. 1 – competent organization of the process
If you want to save on repairs, then these rules should become fundamental for you:
| Do it yourself | If we consider the cost of specialist services, we will notice a peculiarity: their work costs about the same as the materials. And taking into account the fact that we will use the most budget-friendly solutions, it is easy to guess that you will pay more for the services of builders than for materials. The conclusion is simple: we do everything ourselves and reduce the cost of the project by more than half |
| Use quality materials | I talk about how to make repairs using inexpensive, but not low-quality materials. In pursuit of savings, many begin to go too far and buy the cheapest product options, but this is not worth doing, since their reliability and appearance leave much to be desired. I'll tell you how to choose good solutions and still pay a little |
| Follow the work technology | Below I will tell you how to finish each of the sections; the process is described step by step, and there is not a single unnecessary step in it. There is no need to skip individual stages, as this will inevitably reduce the quality of the work and negatively affect the final result. |
| Don't remodel | If you want, among other things, to change the layout, then hope for the most cheap repairs It's stupid to say the least. Any manipulations with rearranging plumbing lead to the need to rearrange communications, and here there is no point in saving, everything must be done expensively and reliably |
Another very important recommendation, which directly affects the cost of the project - the use of those materials that are easy to work with and that you can lay or attach with high quality. Many times I have completed repairs for those who overestimated their strength and, having completed a small part of the repair, realized that they would not be able to handle it. Then, of course, you need to spend a lot of money on paying the builder.
Be prepared for the fact that you will have to spend a lot of time and instead of cozy, quiet evenings watching TV, you will have to demolish, level, lay, saw, fasten, and so on. Free cheese There are no mousetraps, you will have to pay for the savings with your time, but if you take into account all the tips from this article, then the costs will be minimal.

You must have a work plan in advance in order to make economical repairs from scratch with your own hands; you need to clearly plan each step and accurately calculate the materials so as not to purchase too much. Just read all the sections below and you can easily create a clear plan based on them.
Stage No. 2 – purchasing everything you need
I will tell you how to prepare a simple estimate for a bathroom renovation - the sample can be adapted to your space in order to carry out all the calculations. An estimate is a list of necessary materials indicating their quantity and cost. Since we carry out the work ourselves, there is no point in including their cost, unless you assign yourself a financial incentive for a successfully completed project.
Cost calculations are made for individual parts of the room; we will look at each of them and start with the floor. Linoleum will be laid on the floor, let’s figure out how to choose it:
- Since the room is damp, you should purchase options without a base or based on PVC, since it is not afraid of dampness and mold and mildew do not form in it.
- The dimensions of the bathroom are 1.7x1.7, the area is 2.89 square meters, but no one will cut the material to our sizes; it is sold in linear meters. In our case, the optimal width is 2 meters, since it will produce the least amount of waste, we need 2 linear meters, that is, 4 squares;

- After calling all the retail outlets, I found a PVC-based option that cost 224 rubles per square meter. Upon inspection, I was convinced that the surface was durable without damage or defects, the substrate was elastic, and the material... As a result, I paid 896 rubles for 4 squares;
- To keep the joints of the floor and walls neat, you need a plinth; I found plastic “Comfort” for 56 rubles per piece, 2.5 meters long. We need to close 3 walls, and on the fourth there is a door 60 cm wide with 8 cm strips, that is, the opening takes up 76 cm. The opening is not located in the corner, so on one side we need 20 cm of plinth, and on the other 76 cm, that’s enough for us waste from elements that will go on the walls;

- As a result, you need to purchase 3 plinth strips for 56 rubles each, 4 internal corners for 35 rubles each and two plugs - right and left for connecting to door frame, they cost 27 rubles. Adding up all the results, we get (56x3)+(35x4)+(27x2)=362 rubles;

- To fasten the baseboard we will use liquid nails; I bought a convenient 200 ml tube for 104 rubles.

Now let’s sum up all the expenses: I spent 896+362+104=1362 rubles on finishing materials for the floor; if we compare it with regular projects, the amount is several times less.
We will level the ceiling with putty and paint it with moisture-resistant paint. white, so we will need the following materials:
- To level the surface, I use Vetonit VH, which is intended for use in damp rooms and guarantees a reliable result. The ceiling did not have significant unevenness, so one bag of the composition weighing 20 kg, which costs 456 rubles, is enough;

- For painting we will need paint for wet rooms; I chose the latex-based option. The composition needs to be applied in 2-3 layers, so I bought a 3 kg package, for which I paid 190 rubles;

- To treat the surface and strengthen it, a primer is needed, I purchased Tikkurila products in a volume of 900 ml for 124 rubles, this is quite enough for our purposes.
Now let’s sum up all the costs: 456+190+124=770 rubles we need for the ceiling.
Let's move on to the most expensive part - the walls, for which I chose PVC panels 250 mm wide and 2.7 meters long - there will be a minimum of waste. This material is not afraid of moisture, it is easy to wash, so it is perfect for the bath.
Let's figure out what we need for work:

- You need to calculate the number of panels; if their width is 250 mm, you need to divide the length of the walls by this figure. But we must not forget that on one of the surfaces there is an opening measuring 700x2100, on one side there will be one entire panel, on the other three, and above the doors we will need three pieces 540 mm long, that is, we will cut one element. This means that we need 4 whole panels for the wall with the door, remember this number and move on;
- We divide the length of the wall of 170 cm by 25 cm, we get 7 panels, we multiply this result by 3 and we get 21 pieces. We add 4 panels from the point described above and we get 25 elements - this is how much is needed to decorate the walls in the bathroom. I found products for 127 rubles apiece, the final costs were 3175 rubles;
- For installation we will need components, first of all this internal corner, these elements are sold in pieces of 3 meters and cost 50 rubles. We need 4 pieces, that is, the cost will be 200 rubles;
- On top, bottom and along the perimeter of the opening, I decided to put a starting profile, which is sold in pieces of 3 meters, 4 elements are needed on top, 2 elements are needed to frame the doorway, pieces can be joined at the bottom, since this part will be covered with a plinth, but you will still need 1 a whole piece. A total of 7 starting strips are needed, the cost at a price of 45 rubles will be 315 rubles;
- We will attach the panels to a block measuring 25x50 mm; it will be positioned horizontally in increments of 30 cm so that the surface is strong and does not sag. With a height of 264 cm, you need to fix 9 rows, we calculate in linear meters 9x1.7 = 15.3 meters, multiply by 3 whole walls and get approximately 46 meters;

- On the wall with the door there will be less material, 3 pieces 170 cm long, 6 pieces 80 cm long and 6 pieces approximately 20 cm long. In addition, you need to nail vertical strips along the opening, 2 pieces 210 cm long to frame it securely. As a result, we get the following result (170x3)+(80x6)+(20x6)+(210x2)= 1530 cm or the same 15.3 meters;
- Summing up all the numbers, we get 61.3 meters, the bar is sold in pieces of 3 meters, that is, we will need 21 pieces. Our lumber of this type costs 40 rubles per piece, that is, I spent 840 rubles for the entire volume;
- I will fasten all the elements using a stapler, I will need staples, a package of 1000 pieces costs 45 rubles, and this is quite enough to get the job done.

- The block will be fastened with 6x50 quick-installation dowels; approximately 200 of them will be used for all walls; at a price of 25 rubles, the total cost is 500 rubles.
Let's calculate all expenses: 3175+200+315+840+45+500=5075 rubles.
For clarity, I will show all the results in a summary table:
| Bathroom floor | ||
| Name of material | Quantity | Amount, rubles |
| Linoleum | 4 sq.m. | 896 |
| Skirting 2.7 meters | 3 pcs. | 168 |
| Internal corner | 4 pcs. | 140 |
| Plug left and right | 2 pcs. | 54 |
| Liquid nails | 200 ml. | 104 |
| Ceiling | ||
| Putty "Vetonit VH" | 20 kg | 456 |
| Latex paint | 3 kg | 190 |
| Strengthening soil | 900 gr. | 124 |
| Walls | ||
| PVC panels 2500x250 mm | 25 pcs. | 3175 |
| PVC inner corner | 4 pcs. | 200 |
| Starting bar | 7 pcs. | 315 |
| Edged block 25x50x3000 mm | 21 pcs. | 840 |
| Staples for stapler pack. 100 pcs. | 1 pack | 45 |
| Quick installation dowel 6x50 | 200 pcs | 500 |
| TOTAL: | 7207 | |
As you can see, cheap DIY bathroom renovations are not science fiction or fairy tales, and I did not use the cheapest compositions and materials; everything I purchased is of good quality and attractive appearance.
Stage No. 3 - dismantling old coatings
You cannot carry out work without removing old tile or without removing worn flooring. Of course, if your floor or ceiling is in good condition, then it makes sense to leave them. For example, if the tiles on the floor look fine, you can refresh the surface by removing the old grout and filling the joints with a new compound. The same applies to the ceiling: if it is smooth, then you can remove the old coating and repaint it.
But in practice, most often it turns out this way, then you need to do both the floor, the walls, and the ceiling, so I will consider just this option; before making repairs on a budget, you will have to work hard to remove the remnants of the old coatings.
The following works are to be done:
- Most often on the ceiling old whitewash or paint that has turned black over time. Sometimes there are many layers on the surface, and it takes a lot of time to remove them. I use a scraper, but you can use a spatula, knife and any other device convenient for you, the main thing is that you can remove the old coating;
Old whitewash and water-based paint will come off much easier if the surface is thoroughly moistened and left for 20-30 minutes.

- As for the walls, they can either have many layers of paint and whitewash, or old tiles. The compounds are cleaned off as described above, but you will have to tinker with the tiles; for this work it is best to use a hammer drill with a special spatula. If there are no power tools, then you will have to work the old fashioned way - with a hammer and chisel, the work is tedious, but one way or another it needs to be done;

- Lastly, the floor surface is prepared; in my case, there was linoleum there, so the work was simple: I removed the old coating and got a flat surface, completely ready for work. If you have old tiles lying around, you will have to tinker with removing them from the surface; the same tools are used for the job as in the point above.

Naturally, you need to remove everything unnecessary from the room; you should only have prepared walls left.
Stage No. 4 – finishing the ceiling
It is from this part of the bathroom that I recommend starting work for the simple reason that a lot of dust will be generated in the process, and the putty may fall down. The finishing option I am considering is the most budget-friendly - you can achieve it yourself excellent result for the simple reason that the ceiling area is small and perfectly leveling it will not be difficult even with a lack of experience.
The instructions for carrying out the work look like this:
- First you need to check the plane with a level or a level bar to see what irregularities need to be eliminated;
- The surface must be treated with a primer to strengthen it and remove dust; the composition is applied with a brush and dries for about an hour;
- Then the composition is prepared, it retains plasticity for a couple of hours, so I advise you to do no more than 5 liters at a time, your work speed will be low, so you are unlikely to use more. All the features of mixing the composition are indicated on the packaging, so there should be no problems with this part of the work;

- With the first layer you need to eliminate all significant unevenness; if there are none, then simply putty over the entire surface, creating a kind of base; don’t worry about stains, they will be eliminated. After the surface has dried, the sagging can be easily cut off with a spatula, after which you need to check it with a level again;
- The second layer should level the ceiling, try to do the work carefully, there may be sagging on the surface, but there should be no holes left, since they cannot be eliminated. As a last resort, you can walk a third time if the ceiling was uneven and you have to create a plane with large differences;

- After drying, the dirtiest part lies ahead - grouting the surface; bring a respirator and goggles, as when sanding, dust will fly into the eyes and enter the respiratory tract. To control the plane, use simple trick: hold a light bulb near the surface, it perfectly shows all the unevenness and allows you to perfectly level the surface at one time;
- After finishing the work, the surface is cleaned with a brush or broom, after which it can be painted. The work is carried out in 2-3 layers, you can use either a brush or a roller, it all depends on your convenience. Each subsequent layer is applied after the previous one has completely dried.

Stage No. 5 - flooring
When considering the question of how to make a floor economically, linoleum will always be unrivaled not only due to its low price, but also to the reliability and durability of the coating. In the bathroom this coating is installed very simply:
- The surface is cleaned of dust and debris; it can be wiped with a damp cloth to clean it as best as possible;
- Next, the material is spread out; it will extend onto the walls, so you need to position it evenly, after which the excess is cut off with a construction knife or any other sharp knife. Do this carefully, since it is unlikely that you will be able to glue back something that has been cut off by mistake;

- We don’t have any joints, which simplifies the process, the only thing is that doorway You may need to fix the material; for this you can buy a metal threshold.

Due to the fact that the area of the room is small and there will be a bathtub on the surface, there is no need to glue the linoleum, but if you want to strengthen the coating, you can use double-sided tape. The plinth will be fixed subsequently, on this this stage can be considered completed.
Stage No. 6 – wall decoration
First, a process diagram is presented, and below each stage is described in detail:

- The frame is leveled; when attaching the elements, you can put wood chips and pieces of wood under them to derive an ideal plane. A hole is drilled in the block, then a hole in the wall is drilled directly through it and a quick-installation dowel is driven in. You can fill your hand in literally 10 minutes, so the process will go quickly;

- Then the corners are attached in the corners, and the starting profile is attached above and below, as well as around the perimeter of the opening.. The main thing is to accurately cut the strip at the joints so that everything looks neat. Fastening is done using a stapler, it is very fast and very reliable;
- A panel is inserted into the upper and lower guides and inserted into the corner, after which it is fixed with brackets to the bars. The work is carried out until the entire wall is finished, the last plank is cut so that it is 3-4 mm wider, the corner or starting profile is slightly bent and the element falls into place. The plastic bends well, but you still shouldn’t be too zealous, do everything carefully.

After finishing the walls you can glue plastic skirting board, do not forget to put corners and plugs so that all elements fit perfectly together.
This is a simple example of how to do a cheap bathroom renovation, even if you spend 1-2 thousand more, but still the costs are not comparable to those that you would incur using standard materials and hiring builders.
Conclusion
It is quite possible to transform a bathroom while spending a little more than 7 thousand, and I showed this with a specific example. I tried to talk about everything in detail so that you can understand the topic, and the video in this article will clearly show some important points, so that you can better understand some of the nuances. If you have any questions, write them in the comments below.
How to decorate a bathroom on the cheap - relative concept. Depends on your financial situation and your personal wishes.
If we focus on the majority of the population living in apartment buildings, then you can choose several, quite budget options.
But first we need to consider ways to save money when performing finishing work.
Carrying out work on your own or hiring third-party hired specialists. Naturally, carrying out a set of works yourself will save a significant amount of money.
It is quite difficult to find finances to pay hired workers; the only option is to choose a specialist who offers the lowest cost for their services.
Selecting the type of finish. Rational planning and the use of modern materials can provide an opportunity to reduce the budget by tens of percent.
Use of the same type of finishing materials, varying in price. This method will reduce costs by 10...20%, but there is a high probability of making a mistake with the choice of materials and running into a fake.
Conclusion: finishing the bathroom with minimal costs possible when performing the work on your own, from inexpensive materials, using a rational type of finishing.
Bathrooms located in brick or panel houses (“Khrushchev”, “Brezhnevka”), as well as more modern buildings, consisting of 9…14 floors with standard layout, which came from the Soviet era.
Painting with paints and varnishes
This method is the most budget-friendly, low-cost in terms of materials and amount of labor invested.
Preparation of the base, which includes repairing the surface of the walls by applying plaster and putty. Treatment with antiseptic compounds.
Surface priming acrylic primers from the “aqua – stop” series, – fasten the structure of the base and create a moisture-resistant film.
Application of paint and varnish coating - you can use conventional enamels based on pentaphthals (alkyd resins), the components of which create a smooth, moisture-resistant decorative coating on the base.
Disadvantage - a pungent odor when drying will hang in the air for about two days. Another option is to use acrylic enamels. They do not have a pungent odor and dry out within 1..3 hours. But the price is almost twice as high as compared to PF enamels.
The junction of the bathtub with the walls is sealed using plastic elements or ceramic borders.
The cost of finishing will be about 2000...3000 rubles.
Wallpapering
Used for wet rooms vinyl wallpaper with a moisture-resistant coating - “washable”. The surface of the walls, especially with uneven brick partitions, must be carefully leveled in order to make them flat.
The disadvantage of this type of finishing is that moisture getting into the seams between the wallpaper sooner or later leads to peeling of the coating.
The use of decorative finishing material based on fiberglass will help avoid such troubles and significantly extend the service life.
Estimated costs are 2000...6000 rubles.
Covering with sheet panels
The size of the PVC (polyvinyl chloride) panel sheet is 1 x 495 x 955 mm (thickness, width, length). Produced in a variety of colors and textures.
These products require a fairly flat surface, so leveling with plaster should be more thorough than when treating with paint. Instead of painting operations, the panels are glued on.
The decorative material is fixed to the wall using glue from the “liquid” nails series, used in wet rooms and containing antiseptic additives against mold and mildew. Possible use of polyurethane polyurethane foam. The panel is processed using scissors or a stationery knife.
The cost of finishing work will be 4000...6000 rubles.
Another budget option from the “how to decorate a bathroom on the cheap” series is the use of traditional plastic panels, which are board-shaped products.
Application of plastic panels
The plastic panel is made from PVC and structurally looks like a board with a width of 100...500 mm and a length of 2600...3000 mm. The section shows that between the two sheets there are stiffening ribs, giving the product strength and lightness.
The panels are fixed in several ways:
- Fastening to a wooden, metal or plastic sheathing using clamps, self-tapping screws or staples from a furniture gun,
- Gluing on adhesive compositions from the “liquid” nails series
Installation on polyurethane foam.
In the latter case, you can omit the procedure for leveling the walls - this is explained by the properties of the foam, which, expanding, fills the void between the wall and the panel.
The joint between the panels and the bathroom itself is sealed using silicone sanitary sealant or using a flexible plastic skirting board.
The approximate amount of expenses is in the range of 5000...7000 rubles.
The above finishing options were considered for cases of independent implementation of work. With hired labor, the cost of expenses approximately doubles.
Finishing a bathroom in inexpensive and cheap solutions depends entirely on what materials will be used, who will use it, and how the finishing work will be carried out.
Share this article with your friends on social media. networks!
How to decorate a bathroom on the cheap: choosing affordable materials
The article will tell you how you can decorate a bathroom relatively inexpensively.
Even with a small budget, you can make a beautiful and practical bathroom. When purchasing a new home or living in an old one for a long time, the need arises to renovate it. Any updates are associated with costs that even the most economical person cannot always afford. If you don’t have a significant amount of money, it’s not at all necessary to put off replacing the damaged finish for a long time. It would be wiser to plan a budget renovation using inexpensive but high-quality materials. And you should start with the bathroom, which is one of the most important rooms in the house.
Where to start inexpensive bathroom renovations
Repair, like any change, begins with getting rid of the old and unnecessary. And this process can be called the most pleasant and easiest part of the work: coatings that have outlived their usefulness can be safely removed from the walls and ceiling without worrying about their safety.
Cleaning the premises is carried out in several stages:
- Disconnecting plumbing,
- Removing old coating from walls, floors and ceilings,
- Removing previous layers of plaster, screed and waterproofing residues,
- Cleaning the room from dirt and dust.
When planning to renovate a bathroom, the first thing you should do is choose a finishing material for the floor and walls.
After getting rid of debris, all surfaces must be leveled. cement mortar. The cracks must be treated with sealant.
A mandatory step is waterproofing the room. For the floor, you can use a coating composition that is applied to the screed in one or two layers.
Cheap DIY bathroom renovations: material requirements
The bathroom is characterized by a special microclimate, which leads to rapid wear of materials. Therefore, when doing even low-budget repairs, it is worth choosing a finish whose performance indicators meet the requirements.
The materials used must have the following properties:
- Resistance to high humidity,
- The presence of antiseptic additives that prevent the appearance of fungus and mold,
- Resistance to aggressive compounds used for bathroom cleaning,
- Easy to care for.
When purchasing bathroom materials, you should ask the seller for a certificate confirming their quality.
The best option for a bathroom is smooth surfaces. Due to the absence of irregularities and various three-dimensional patterns, the material does not accumulate dirt, maintaining its original appearance for many years.
When choosing a finish, you should also pay attention to the possibility self-installation. Simple repairs done by yourself will require less cost (about half).
How to wallpaper a bathroom cheaply: decorate the walls
A significant part of the costs falls on the design of walls, which have the largest area when compared with other surfaces to be finished. One of the economy class options is wallpaper, but you should think carefully before covering your bathroom with it. This type finishing is very unstable to high humidity indoors.
Painting with a water-repellent emulsion is the cheapest way to decorate walls. Used for finishing special composition on a polyester or acrylic base, which is applied to the surface after it has been leveled. The paint lasts for 5 – 8 years.
For the bathroom you need to choose tiles of a color and texture so that they blend harmoniously with other finishing materials and pieces of furniture
Among the budget options, the following types of finishes also have the necessary properties:
- Plastic panels,
- Ceramic tiles.
PVC panels – inexpensive material, allowing you to save not only money, but also time. Strips of plastic, fastened together, do not require preliminary leveling of the walls and removal of old finishing. Installation of the panels is quick and even a non-professional can do it.
If you want to decorate a small bath inexpensively, you can consider laying wall tiles. This material is resistant to moisture and mechanical damage, and has a huge number of colors. A tiled bathroom looks beautiful and neat. A small budget in this case will not be a problem: you can purchase domestic products, which have more affordable prices.
Bathroom renovation options: how to finish the ceiling and floor
The ceiling can be decorated in the same way as the walls. For example, paint it white or install plastic panels. This option is the most economical and practical.
For a small bathroom ideal solution may become installation tension fabric. The cost of such finishing depends on the area of the room, so installing a suspended ceiling in a small restroom will cost less than other options. Especially if you abandon the idea of a designer canvas and make it matte white.
PVC panels are well suited as a finishing material for the ceiling.
Finishing the floor is the most important task on which the safety of using all plumbing depends. That is why experts recommend first updating the waterproofing in the room, and only then repairing the coating itself.
Two materials that have high durability and varied designs are suitable for finishing the floor in the bathroom:
Linoleum will cost less than tiles, but if we are talking about a small bathroom or toilet, there will not be much difference in their cost. Therefore, the choice of coverage in this case depends on personal preferences. However, it is worth considering that installing linoleum is quite simple and is done by hand, which also significantly reduces costs. Having given preference to tiles, you will have to work hard with its installation. Or finish the floor with the help of a specialist.
Repairing a small bath: updating the plumbing
Buying a bathtub and sink is the biggest expense when renovating. However, you can save money in this case too. The solution to the problem will not be the purchase of new equipment, but the restoration of the old one.
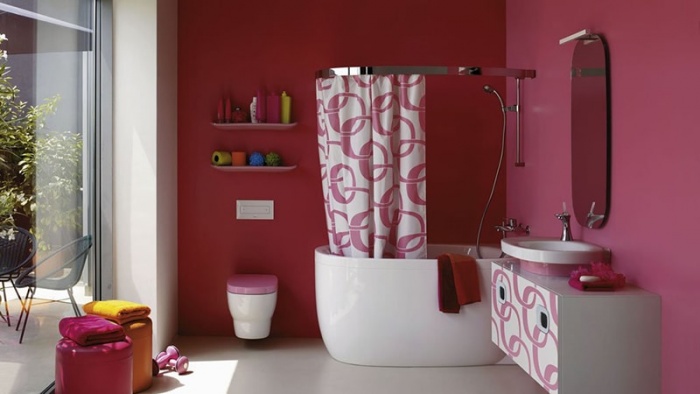
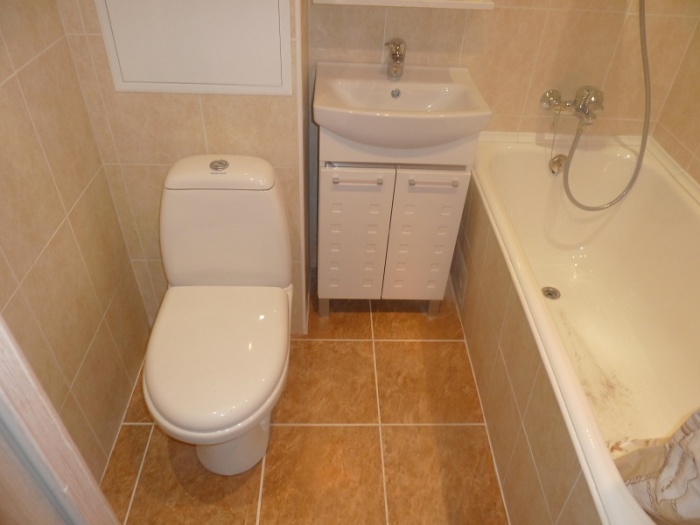
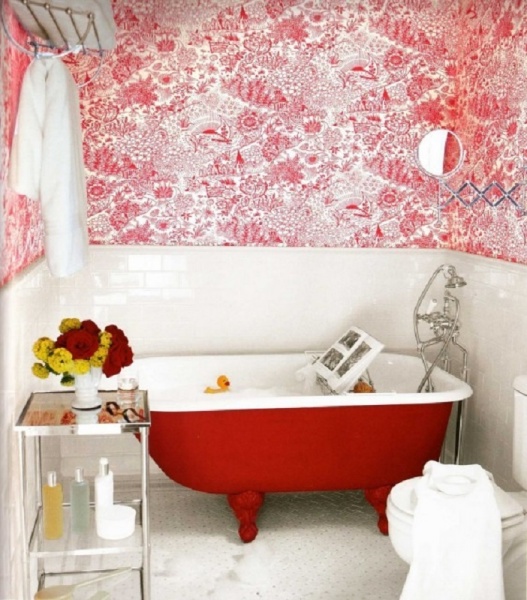
If the bathroom is small, then when decorating it you should use materials and furniture in light colors
The update is carried out in two ways:
- Application of two-component polyester enamel to the inner surface of the bathtub (the most cheap option),
- Restoration with liquid acrylic (will cost more, but the result will be more durable and beautiful).
If the bathtub is in a very poor condition, you can purchase an acrylic liner. This is a special insert that is attached inside the bowl using sealant.
The listed methods may not seem budget-friendly, because... are not very cheap. However, in any case it will be beneficial to restore old bath than to buy a new one.
Do-it-yourself bathroom renovations can be done with almost any income. It is only important to carefully plan the entire process and purchase necessary materials. Modern market offers a variety of finishes, so choose high-quality coating low cost will not be difficult. The main thing is not to get carried away, trying to save as much as possible: you need to pay attention not only to the price of the material, but also to its properties.
We do budget renovations in the bathroom: inexpensive options for finishing the room
Budget renovation in the bathroom requires careful preparation and selection of materials that meet all requirements. Read on to learn about types of inexpensive finishes and ways to save money when renovating bathrooms.
The question of how to cheaply decorate a bathroom worries many people in our country. Average salaries do not allow for expensive renovations in the apartment and force one to look for a budget option. Some of them for some reason believe that their dream cannot be translated into reality, but in fact this is not the case. You can achieve aesthetics, comfort, durability and safety of the planned repair, using even relatively inexpensive materials. How to do this?
How to save on materials without losing quality?
It should be understood that what is expensive is not always of high quality, and vice versa. The high price may be due to, say, the ability to be used in special situations, while your conditions do not require such dedication. The cost can be increased by the store's significant distance from the production facilities of the manufacturing company. Sometimes you have to overpay for a well-promoted brand. One should not exclude differences in living standards in different countries– if a product is produced in a state with high average incomes and high salaries for all employees, then residents of all other countries are forced to pay this very exorbitant salary if they want to buy a specific product. In general, in order to decorate a bathroom cheaply, you should approach the task wisely.
The high price of finishing materials does not always indicate their quality, so if you don’t want to overpay, you need to choose wisely
Economical glue
Let's start with something simple - with tiles, or rather, with glue for them. Tiles are one of the main materials for finishing walls and floors in the bathroom, and while it’s often not worth saving on the tile itself, they often overpay for the adhesive. Consumers often give preference to the famous Ceresit glue, refusing the cheaper Moment, not even suspecting that both trademarks belong to the same company. Of course, the two options differ in the range of hardness, but for ordinary home repairs, as a rule, there is no difference. If there is still some sense in purchasing more expensive consumables for the walls, then the tiles will not disappear from the floor in a moment, unless you set up a dance floor in the bathroom.
Wall decoration
At first glance, it is obvious that the most expensive tile options may look more prestigious, but those who want to save money are often interested in another question - is there a difference in strength and durability? It should be noted that usually there is none - you can decorate the walls with cheap tiles for decades to come.
The difference in price is usually due to appearance - if expensive models represent a real masterpiece, then budget options often seem to be made somehow, but most often this is just a visual deception.
The manufacturer can also save on non-slip coating, but if the finish is chosen for the walls, then this is not very important. Another thing is that laying tiles usually requires the involvement of professionals, so, in any case, this is not the cheapest option.
You can save significantly, getting approximately the same result, if you decorate the bathroom walls with plastic panels. In terms of variety of colors, they are not inferior to tiles, but they are much cheaper and much easier to install. Unlike tiles, damaged fragments are much easier to replace, and communications can be hidden under the panels. Installation of the panels does not require leveling the wall, however, due to additional fastening profiles, the area of the bathroom may be slightly reduced.
Plastic panels - an economical option for finishing a bathroom
Of course, the most budget-friendly renovation option is painting the walls. Even the most expensive paint will cost the owner less than the same plastic panels, especially since even a child can do the job, because the only thing that is really needed for this is accuracy. However, this option is very limited in application - if the walls are crooked, then it will have to be abandoned. Of course, the wall can be leveled, but it’s not easy to bring it to perfection on your own, and calling a specialist forces you to cross this design method off the list of inexpensive ones.
Floor decoration
For floor ideal option There is also tile - although it is expensive, it is still optimal in terms of practicality and durability.
Most practical option flooring For the bathroom, tiles are considered, the cost of which varies over a wide range
Classic competitors usually use linoleum, but it should be borne in mind that an attempt to purchase a cheaper variety is fraught with rapid destruction of the repair - the material does not tolerate constant humidity well.
Actually, the most budget-friendly solution for updating the flooring in the bathroom is to simply lay a new rug, if possible matching it to the tone of the walls and the rest of the decoration. At the same time, to avoid the appearance of mold, the rug should be regularly lifted and the floor underneath it wiped.
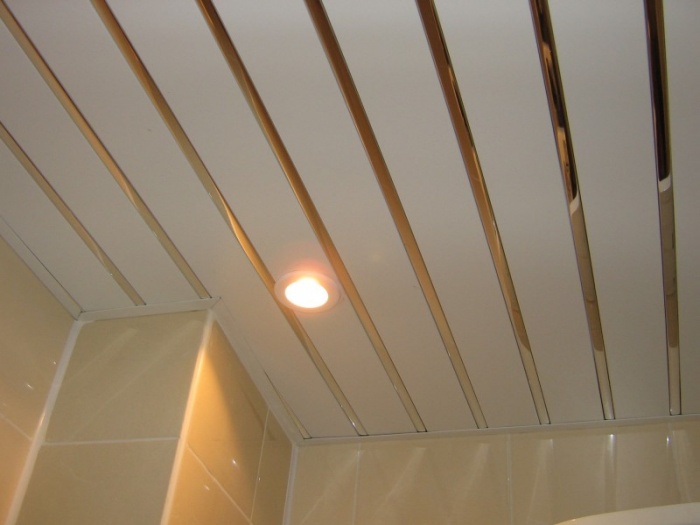
Ceiling and lighting
Repairing the ceiling surface in the bathroom limited budget involves the use of plastic panels that allow spotlights to be built into the ceiling.
Plastic panels on the ceiling in the bathroom
However lighting fixtures You can leave them on the wall, the main thing is to place them correctly.
A competent approach to the layout of the room, as well as cleanliness and order, will make it visually attractive and worthy of dear guests.
Plumbing
It is not advisable to save on plumbing and pipes, because any accident will force the owner to start renovating the bathroom from scratch. The quality should be maximum; sometimes it just makes sense not to purchase new plumbing fixtures, but to restore the old ones. If the bathtub has not lost its integrity, but has problems with the enamel coating, then it is better to renew it - modern materials allow for various types of enamel restoration, and it costs much less than buying a new bathtub bowl.
When renovating a bathroom, it is not necessary to purchase new plumbing fixtures; you can simply restore the old one
The option of purchasing used equipment on the market cannot be ruled out - construction companies that carry out regular repairs in public institutions (for example, hotels) can hand over removed plumbing fixtures for resale. Moreover, before implementation, it usually undergoes restoration to a normal functional level and costs significantly less.
The last details in the bathroom design
When the interior is almost ready, all that remains is to add the finishing touches that will make the room ready for its intended use - we are talking about curtains, shelves and hangers.
You can purchase the simplest and most inexpensive accessories for a bathroom, which will not make the interior any worse.
The curtain can be found at all low prices, if it is made of film or inexpensive fabric. If you have the opportunity to invest a little more money now in order to invest less later, it is worth paying a little more for a curtain made of waterproof fabric - it will protect more reliably from splashing water and will last longer. It is important to choose beautiful design accessory, and then it is not high cost won't seem obvious.
As for the shelves and hangers, you just need to place them correctly, falling into the general color scheme. If neatness and order reign on the shelves, the guest will not notice much of a difference between expensive and cheap accessories, and vice versa - there is no point in overpaying for a shelf if the appearance of the jars on it raises vague doubts about the owner’s solvency.
How to cheaply decorate a bathroom: what can you save on?
How to decorate a bathroom cheaper. What is worth saving on and what not. How not to overpay for plumbing. Budget option repair of walls, floors and ceilings.
If you want to do a cheap bathroom renovation with your own hands, then we will give you some tips, following which, an economical bathroom renovation will become a very realistic undertaking.
Let's figure out what you can save on when renovating a bathroom, without a significant loss in the quality of the renovation.
If you've calculated your budget for a bathroom renovation and it turns out you can't afford it, don't despair. After all, even an economical option for renovating a bathroom can be very attractive in appearance. In addition, it will not be difficult to do it yourself, which will further reduce the cost of your repair.
Options for budget bathroom renovations
So, we decided on the budget. Let's figure out which jobs require the highest costs.
Replacement of plumbing fixtures and faucets.
If your plumbing is in good condition, great, this will significantly save you on bathroom renovation costs. If not, consider restoration. For example, a bathtub can be restored with acrylic. And you can simply disassemble the faucets and replace outdated gaskets and clean them from limescale ordinary vinegar. What we don’t recommend saving on is hoses for faucets. A flood from a burst hose will wipe out all savings on repairs.

Replacing communications.
Water and sewer pipes, fittings, heated towel rails, etc., are in themselves an expensive pleasure. But the work of laying them also involves cutting walls or unsightly external laying of communications. It’s hard to get away with cheap bathroom renovations here. Therefore, we recommend considering the following options:
- If the pipes are not rotten and you are satisfied with their location, paint them with good enamel.
- You can also “sew up” communications in a plastic box, or in one made of moisture-resistant plasterboard. How to make a frame from metal profile read our article ““.

Ceiling repair.
A budget option for repairing the ceiling in the bathroom would be to simply paint it with latex water-based paint. But this is only if you have a flat ceiling. If you need to level it, then an inexpensive repair option would be:
- Plastering the ceiling followed by puttying and painting
- Ceiling finishing plastic PVC panels
To plaster the ceiling, clean it of old paint or whitewash. Prime it well with primer deep penetration. Apply plaster mortar onto the ceiling and level it with a plaster float. Let the solution dry a little and smooth it with a grater again. After the plaster has dried, apply the primer again. After a few hours you can start puttingtying. Apply putty thin layer starting from the edges or from a place free from putty. This way you will not leave dents in the fresh putty that has already been applied. Let it dry and smooth it out with sandpaper or sandpaper. Apply primer and repeat the cycle again. Then the ceiling can be painted.
To decorate the bathroom ceiling with plastic panels, you must use a galvanized metal profile to create load-bearing frame. Do not use for these purposes wooden slats. In conditions of high humidity in the bathroom, they will rot very quickly.
Mark a horizontal line along the perimeter with a level or level. Attach the guide profile to it. Make the lathing using a wide profile 60x27 mm. Attach the panels to it and.

Wall repair
The most budgetary and economical wall repair will be simple painting. Paint should be applied to the prepared wall surface. To do this, the wall must be smooth, clean and primed. Don't forget to apply penetrating waterproofing before painting. Choose moisture-resistant paint. It is best to use latex or acrylic water-based emulsion.
Another one of inexpensive options finishing and repairing walls in the bathroom - finishing with PVC panels. Here the sequence of actions is almost the same as in the case of the ceiling.
If you have a good but old one on your walls ceramic tiles, it can not be changed, but restored. Today there are a lot of “chemicals” for restoring the surface of tiles and tile joints. The same option can be used for floor tiles.

Floor repair
If restoring floor tiles is not your choice, then there are other ways to make economical bathroom floor renovations.
For example, you can put linoleum on the floor. This is an inexpensive material, moisture resistant, and can be quickly installed.
You can also make a self-leveling floor. For more information about floor repair options, see our topic ““.

Results
Organizing a budget bathroom renovation with your own hands is a doable task. The right strategy when choosing finishing materials and a clear idea of the progress of work will allow you to transform your bathroom space even with a modest budget without compromising quality.
Process organization
Proper planning is the first step towards successful completion. Most of the work in the bathroom during a budget renovation can be done with your own hands. Removing old coatings, dismantling plumbing fixtures or painting can be done even by a novice craftsman.

But if there is not enough experience in tiling walls, you should think about inviting specialists to separate areas bathroom renovation. Don't overestimate your strengths and capabilities. Sometimes redoing your own mistakes will cost more than inviting a specialist in the first place.

When the bathroom renovation work has been distributed, we move on to the selection of finishing materials. It is better to avoid well-known imported brands. A significant part of the cost is the brand fee, which seems impractical for a budget repair option. Cheapness Chinese goods also not the best option.
Advice! Choose a domestic manufacturer or an assortment from Poland, Slovenia and Bulgaria.
This applies to both finishing materials for the bathroom and plumbing fixtures. The combination of reasonable cost and good quality – distinguishing feature offered products.
An important condition for a high-quality result when carrying out budget repairs yourself is compliance with the technological process. If any stage of the work is in doubt, listen to the recommendations of specialists; improvisation may be inappropriate.
Remodeling a bathroom automatically increases the repair estimate significantly, so there is no need to talk about a budget option. Leave your ideas for moving walls or plumbing to another place until better times, when there are no financial restrictions.

Volume preparatory work removal of old cladding depends on the choice of new materials. Sometimes this stage can be avoided. Mandatory dismantling of plumbing fixtures is required if plans are to replace them.
Wall decoration
Economical bathroom renovation includes several wall finishing options:
- coloring;
- installation of PVC panels;
- wallpapering, including self-adhesive film;
- tiling from the budget segment.
Each method has undoubted advantages and some negative points.
Coloring
Coating walls with paint is a leader among economical finishing options due to its ease of execution and low costs. A competent approach when choosing paint and high-quality preparation of walls is the beginning of the path to success.
Advice! It is not recommended to completely cover the walls of the room with paint.
A project where areas near the sink and bathtub are lined with inexpensive tiles or moisture-resistant panels PVC.
Moisture resistance and antibacterial properties – prerequisites when buying paint, otherwise it will not be possible to avoid the development of fungus and peeling of the coating in the bathroom. High performance characteristics against the backdrop of budget cost, the following are inherent in paints:
- latex;
- acrylic;
- silicone.
The absence of a pungent odor is a definite plus water-based compositions, and silicone paints perfectly serve as a water barrier. It is better to avoid using oil mixtures. Within a short time after the renovation, the bathroom walls will become covered with cracks.
 4
4
When carrying out an economical bathroom renovation, you should remember that paints with an attractive glossy effect highlight any unevenness in the walls and make all defects more visible. Therefore, careful alignment of the walls is mandatory. The advantage of gloss is the ability to visually increase the space of a small bathroom.

Often, during renovations, it is necessary to remove the old paint coating from the walls of the bathroom. You can do this in several ways:
- use a drill with a special grinding attachment;
- purchase paint removal liquid; during the work process you will also need a spatula and a scraper;
- take advantage thermal methods, when the old coating is heated with a hair dryer or burner, and the swollen paint is cleaned off with a spatula.
Naturally, after the removal process is completed and before painting begins, the whole range of measures is carried out: sealing cracks, eliminating protrusions, priming.
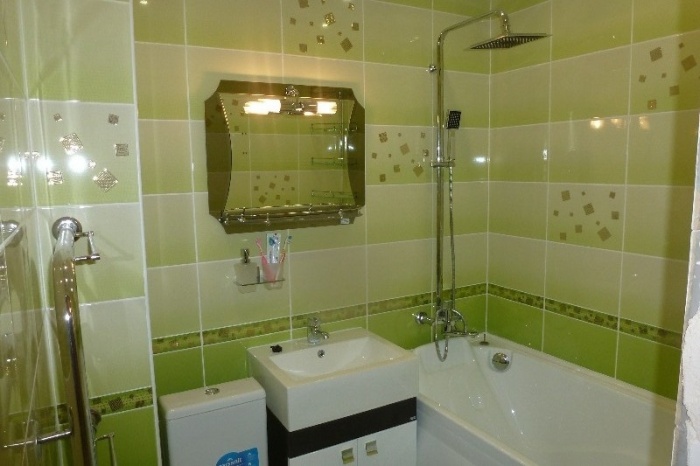
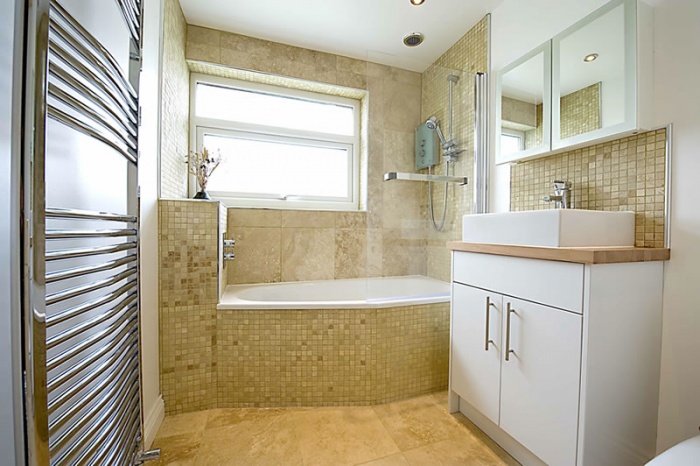
The photo shows a bathroom with a DIY budget renovation:
PVC panels
You can repair bathroom walls with PVC panels. In terms of cost, this will cost slightly more than purchasing paint, but the method has two clear advantages:
- The appearance of the bathroom after a budget renovation using PVC panels, from a design point of view, is incomparably better.
- No thorough preparation of the wall surface is required.
The panel installation process does not contain complex steps and can be done with your own hands. After calculating the need for material, the lathing is formed. For these purposes they are used plastic profiles with clips. Wooden slats are also suitable for economical bathroom renovations. Pre-impregnation of the material with antiseptics will protect the slats from increased moisture.
Wallpapering
The option of renovating a bathroom using wallpaper also has the right to exist; the main thing is to choose moisture-resistant products. The work is carried out at a fast pace; removal of the old coating is not required in all cases. There are 3 main types of wallpaper intended for use in the bathroom:
- Vinyl with non-woven base. The price is quite high; repairs will require the purchase of special glue, which is not always advisable in an economy project. But high performance characteristics serve as the basis for popularity among consumers.
- Washable. Compared to vinyl copies, they are less practical and the cost of the product is correspondingly lower.
Note! When renovating with your own hands, it is advisable to avoid covering areas of the bathroom that may be exposed to water.
- Self-adhesive film. Incredible practical material, which is initially equipped with an adhesive layer. Wide range design solutions can create a wonderful transformation in a bathroom after renovation.

The high quality and attractive appearance of the self-adhesive is accompanied by 3 negative points:
- Quite a high cost of the product, which may not fit into the budget repair estimate.
- Bathroom walls require careful preparation, since any flaw under self-adhesive wallpaper will be extremely noticeable.
- Quite a complicated application process. The painstaking process takes much longer than standard pasting.

Tiling
Budget renovation also includes the use of wall cladding. tiles. The main thing is to choose an inexpensive product with decent quality. Advantages of the solution:
- the material is resistant to temperature changes;
- not afraid of high humidity, withstands prolonged contact with water;
- washes well;
- resistant to mechanical damage.
The following negative aspects may become an obstacle to use in the bathroom during budget renovation:
- Additionally, you need to purchase a mixture for fixing to the wall and a grout joint;
- walls with old paint need preparation, the coating must be removed;
- the process requires some experience and not everyone can do it themselves; inviting a specialist will increase the repair estimate;
- It takes more time to cover than when wallpapering or painting.
The best option when renovating a bathroom with budget project– combination of cladding. The area near the bathtub and sink is decorated with tiles, and for those less exposed to water, a simpler and more economical covering method is chosen.

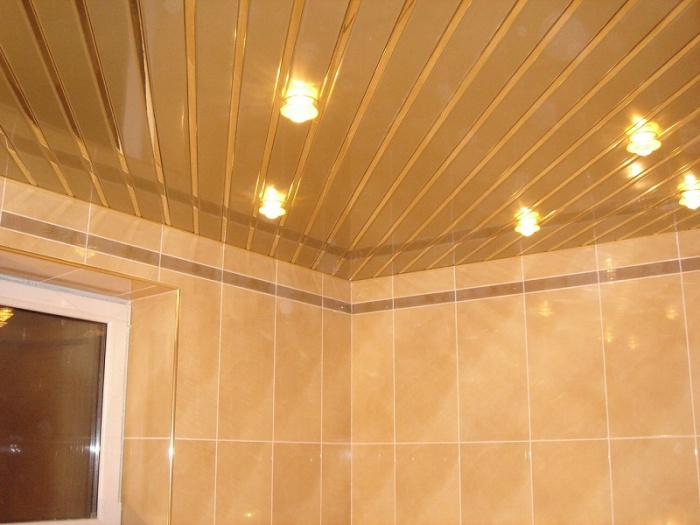
Ceiling finishing
The scope of work on budget finishing of the ceiling depends on its original condition. Smooth surface It is enough to cover it with water-based paint or whitewash it. It’s a simple and quick process that you can do yourself. It is recommended to remove significant curvature or disguise bathroom communications suspended structure. The material used is slatted elements or PVC panels.
Main advantages of choice:
- affordable price segment;
- simple lining procedure;
- does not require ideal preparation of the surface of the bathroom ceiling;
- successfully disguise wires and pipes;
- It is possible to install built-in lamps.
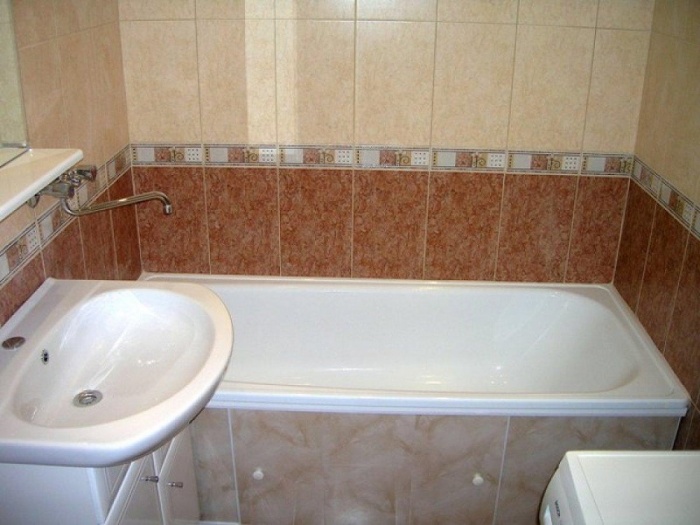
The result of the budget renovation is shown in the photo:
Floor covering
The finishing option depends on the repair estimate and the condition of the old bathroom flooring. Sometimes just refreshing the appearance of the tiles is enough. To do this, you will need to remove the grout and select a new one that matches the color of the tile.
It is quite simple and cheap to lay linoleum, but this measure will be temporary. An increased level of humidity in the bathroom provokes the development of mold on the linoleum.
Comment! Avoid negative consequences for budget repairs, purchasing PVC-based linoleum or without a base at all will allow you to purchase it.
When renovating a bathroom, tiles are more practical, even at a budget price. The cladding is carried out without dismantling the old tiles. The screed will require labor and time. To renovate a bathroom floor, choose tiles with a rough texture to avoid slipping and cause injury.
With an extremely limited budget, the most economical option would be to purchase a large rubber mat that will maximally cover the free space of the bathroom floor. It can be changed much more often than any stationary coating, and a fresh look for the interior will be ensured at minimal cost.
Nuances of choosing plumbing fixtures
Replacement of plumbing fixtures in the case of budget repairs is not always carried out. Sometimes they settle on the option of restoring the bathtub. There are several update methods:
- The inner surface is treated with two-component polyester enamel. The most budget-friendly method.
- Restoration with liquid acrylic is characterized by greater durability and cost.
- Sometimes both methods are unacceptable due to the deplorable condition of the bathtub. An acrylic tab, fixed with sealant, will save the situation.

Each of the methods still involves financial costs, although they will be incomparably lower than purchasing a new bowl.

If budget renovation involves purchasing a bathroom new plumbing, are considering the following options:
- Acrylic container. Located on the bottom step price segment. Easy installation and simple maintenance are the key advantages of this product for the bathroom. Short service life and instability to mechanical damage are the main negative features.
- Cast iron is characterized by greater practicality. The cost is higher than acrylic analogues.
- Steel bathtubs in their characteristics are between acrylic and cast iron products.
- If having a bathtub in the bathroom is not important, you can think about installing a shower stall. But the renovation will already go beyond the budget.
When replacing sinks in a bathroom, choose between hook-on or pedestal hardware. The first option is more budget-friendly, the second is more aesthetically pleasing, as it successfully masks communications. The nuances of choosing plumbing fixtures and the preference of domestic manufacturers were discussed in the first section.
Conclusion
Small little things can embellish the interior of a bathroom after a budget renovation. An original curtain, decorative stickers and new accessories will enliven the design of the room. Communications are not left open; they will ruin the result of even the most expensive bathroom renovation. A budget-friendly way to quickly hide functional elements of the furnishings is to form a plastic box. It will take little time and expense, but the result will be obvious.
When finishing a bathroom, tiles are most often used. It's not about tradition, it's really a comfortable material. Hygienic, not afraid of dampness, beautiful, durable. But this is not the only one suitable material, nowadays there is something to decorate a bathroom other than tiles.
Wallpaper
Paper ones are not suitable; they are short-lived in damp conditions. Acrylic and vinyl are better. When purchasing, choose one with the “three waves” symbol or a painted washing brush (moisture resistant), they are more stable. But still, water resistance is insufficient: moisture penetrates the joints and gradually renders them unusable. 
But these definitely fit. They are made like fabric, only the threads are made of glass. Special jacquard machines allow you to obtain a varied surface pattern. 
Very high-quality coating, durable (lasts up to 30 years), environmentally friendly, non-flammable, does not require ideal surface when applied. Not afraid of fungi and dampness. Moreover, this wallpaper itself protects the walls from damage, it is so strong. Unfortunately, the price is much higher regular wallpaper, but it's worth it.

Do not confuse when applying: the inner and outer sides are similar, but there are differences. In rolls, the front side is wound inward, some manufacturers mark with a colored stripe outside. Special glue is required. Fears of “harmfulness” transferred from glass wool are stupid and due to a lack of information: these are completely different materials. After finishing the walls, such wallpaper can be left as is, or painted, primed or decorated additionally - as desired. Such wallpaper will adequately decorate the bathroom.
Similar to wallpaper, but made of PVC film, glue is already applied. Cheap, but requires very careful preparation of the walls before finishing, which increases the cost of the result. Yes, and you need to apply it very carefully. And it’s still unstable, sometimes it swells or peels off, which doesn’t paint the bathroom...
On video: range of PVC panels
Simple finishing: 2 slats are strengthened, panels are attached to them one by one. Large selection, low cost, moisture resistance. In addition, they can cover pipes, cables, without complicating access to them, even minor construction defects in the walls. However, moisture condensation is possible between the walls and panels. In addition, the material is fragile, the impact leaves dents or tears (however, this damaged socket is easy to replace if you left spare ones). Over time they turn yellow. Another minus: the availability and simplicity of the material determines its prevalence in public places. And the bathroom (by analogy) does not look chic enough...

We can only talk about moisture resistant drywall, the other one is not suitable for finishing a bathtub. Cheap, easy to install, improves sound insulation. It is not particularly beautiful in itself, so subsequent painting is advisable. In addition, during installation the volume of the bathroom decreases, and if it is already small...

Mosaic
Labor-intensive finishing, and artistic taste is also needed. But there is a wide range of choices; in principle, any design is possible. But, as for maintenance, the tiles are simpler in this regard, they have fewer irregularities.

Stone, natural and artificial
Natural is so expensive that for some it may be a disadvantage rather than an advantage. The stone is heavy, which requires special care during installation. It's better to hire a specialist. Marble (often also referred to as breccias, dolomite, carbonate mixtures) requires care. Granite has a high strength. A high price alone does not guarantee amazing results. For example, by completely finishing a bathroom with granite slabs, you can turn it into a kind of cave, and not at all luxurious...

Reduces space, so a bad choice for small rooms. Artificial is in many ways similar to natural, but much cheaper.

Tree
Not a bad choice. The material requires special impregnation, but it can still be used in damp conditions. You can carefully burn the panels, soak them in stain to reveal the texture, and make them more beautiful. It lifts the mood somewhere on a subconscious level; perhaps we were all Druids in a past life. Expensive. Requires appropriate design in other elements of the bathroom (hangers, shelves, mirrors).

A bit similar to ordinary plaster in application - also a thick mass, smeared on the wall. But only in the eyes of a non-specialist, in reality it is a special material. Very beautiful if done correctly. Nowadays, various types of such plaster are produced, so it is not difficult to choose one that suits your concept of beauty. In addition, the “marbled” finish differs very significantly in cost from real marble. Clearly, in the direction of cheapness.

Painting
Perhaps one of the cheapest options for replacing tiles (although the price depends on the selection of paint), It is better to use latex paint - it is resistant to dampness. The result depends little on the method of application - any will do: brush, roller, spray. And strongly - from the artistic taste and skill of the performer. This does not mean monochromatic painting, although here you can choose any color. You can draw real pictures or use stencils. Alas, the gray soviet walls only evoke despondency...


